

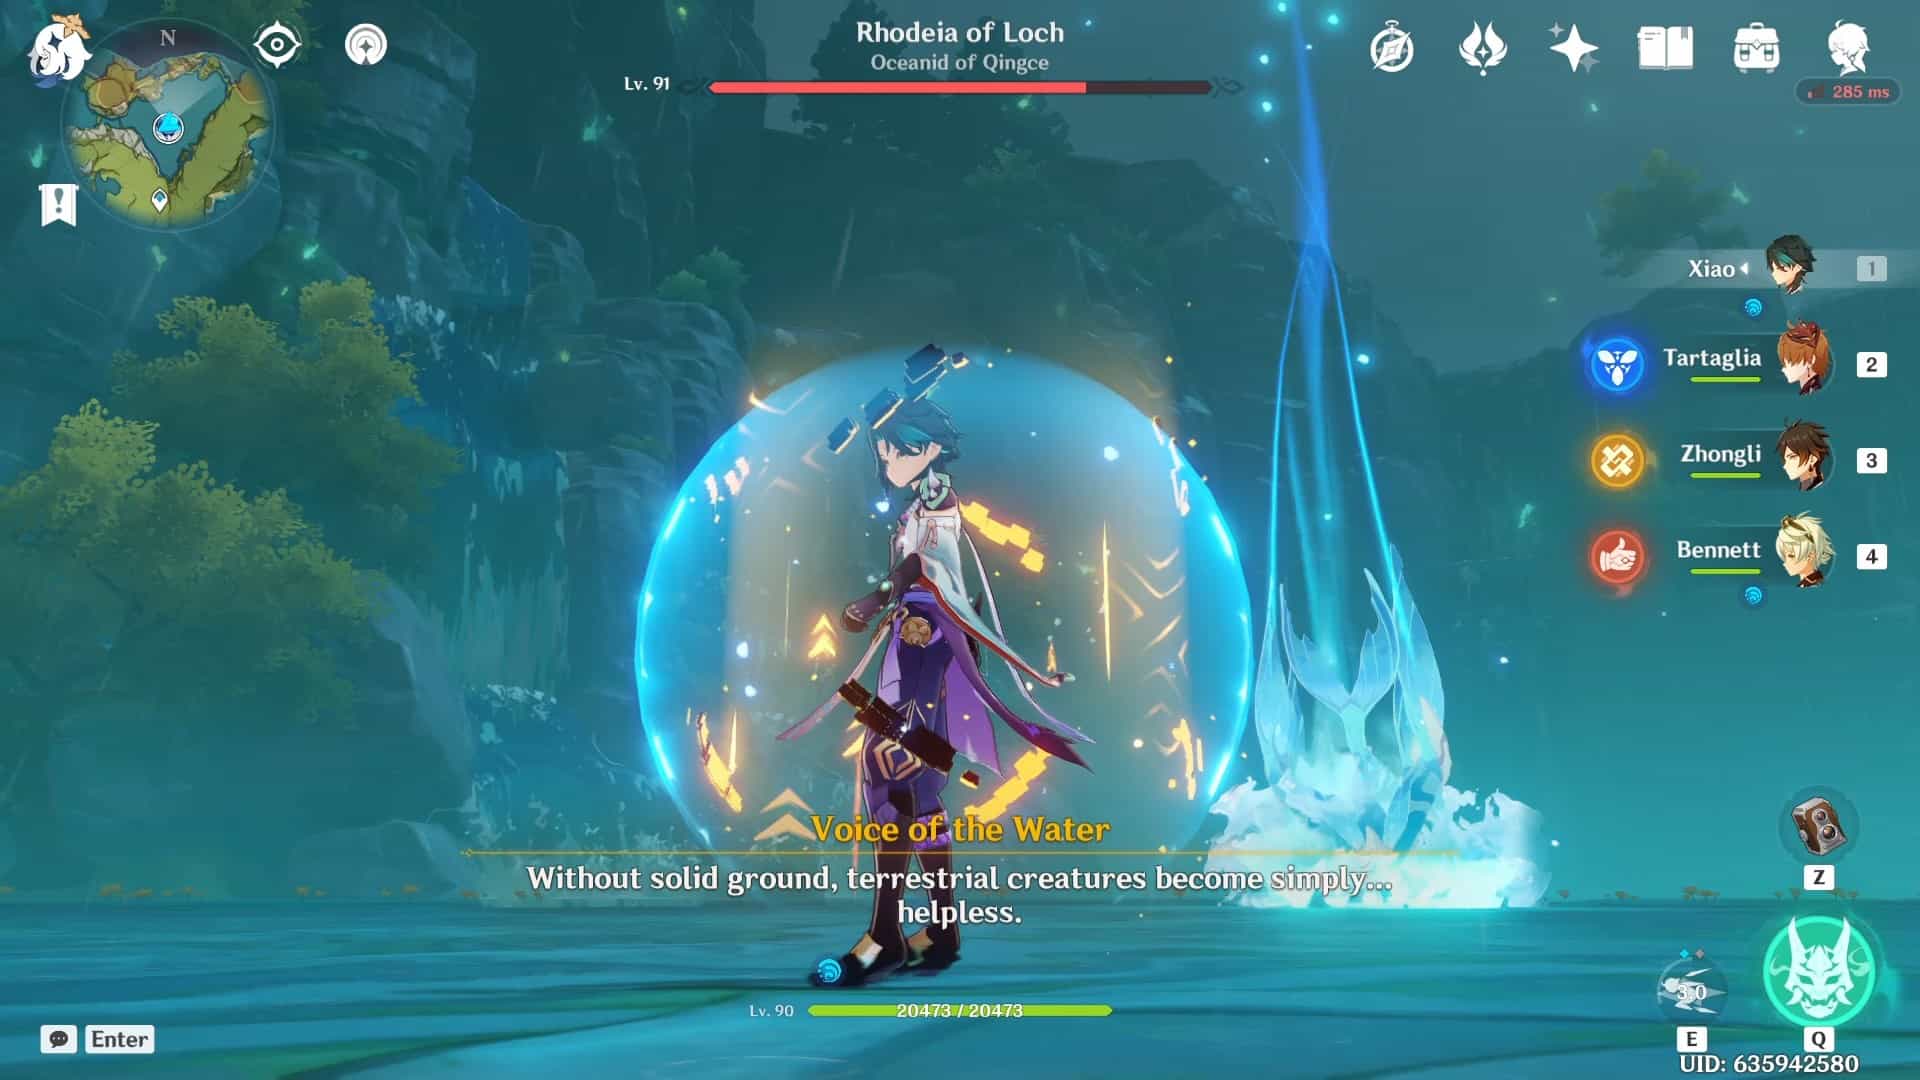
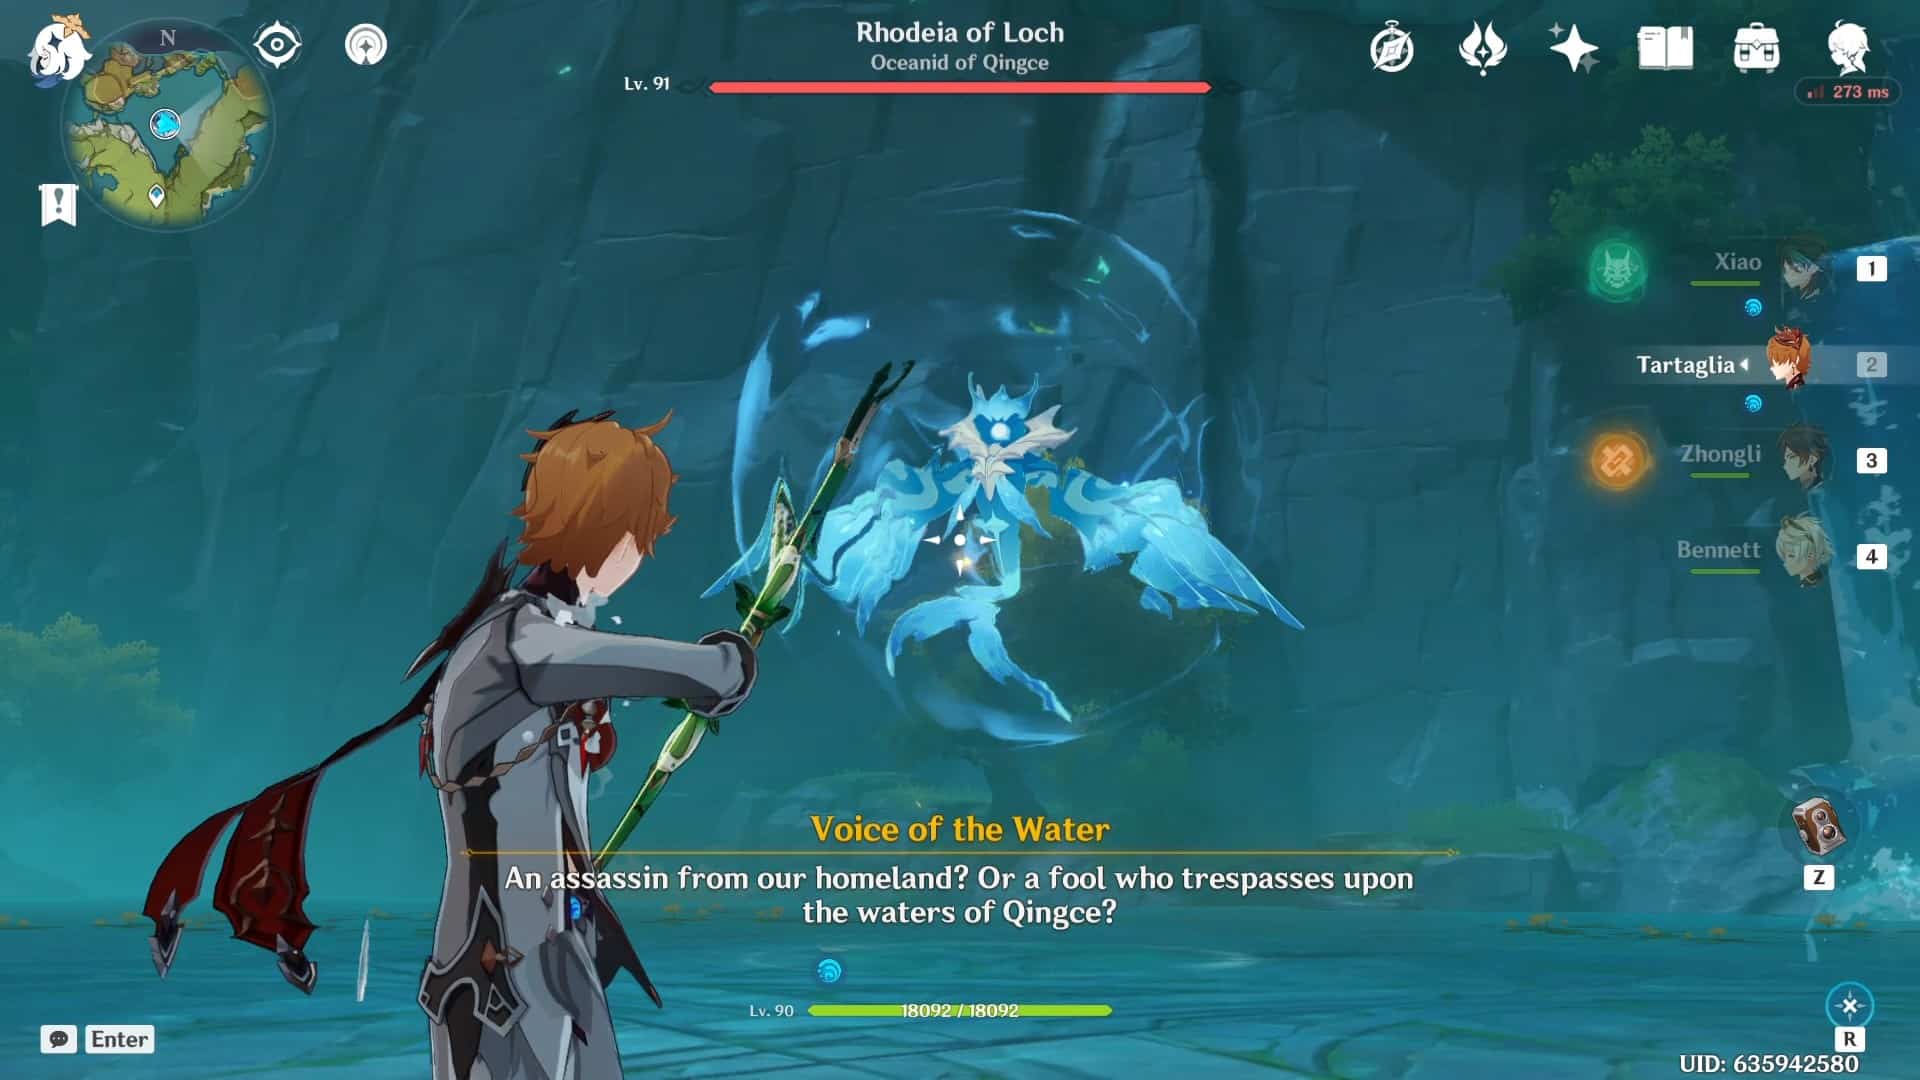
Keqing and the Oceanid look like they are about to drop one of the sickest albums in Teyvat. Once again, we are at yet another normal boss guide. The Oceanid is a relatively easy boss. However, it is only so for me because of my trial and error battles with it over time that I have spent playing Genshin Impact.
I have compiled all of my knowledge and information I gathered by researching online into this guide to help other members of the Genshin Impact community or new players to the game. I have played Genshin Impact for almost seven months, and I have got to adventure rank 56 quite recently.
When I had trouble with certain quests or bosses, I looked at guides to help me overcome the obstacles, so I hope that I can also extend the same hand to you, the reader.
This comprehensive Oceanid Genshin Impact guide is based on the attacks, team comps, recommendations, and advice listed below.
A quick summary of what to expect in this article would be:
- What the Oceanid is, and where to find it.
- The movesets recommended team comps and rewards.
- Mistakes to avoid, hidden achievements, a few final words, and a brief FAQ session.
What is the Oceanid?
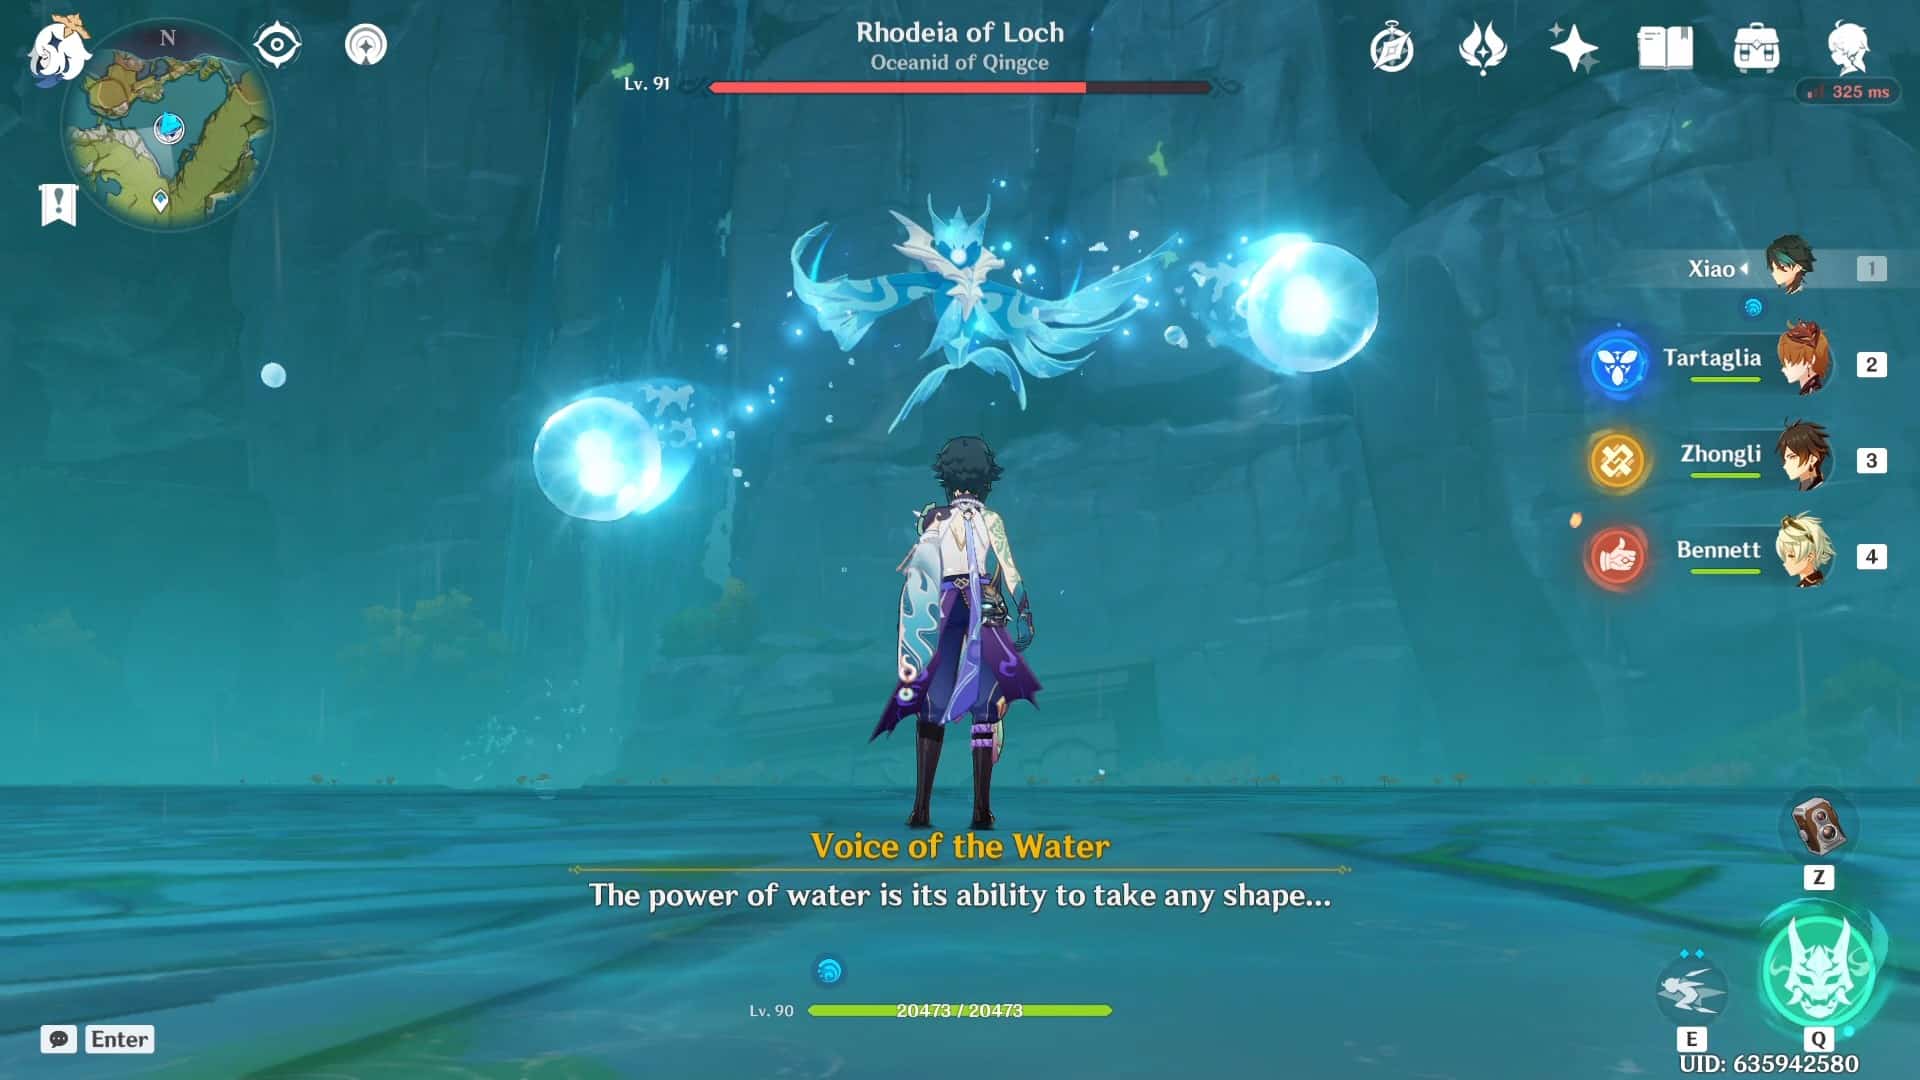
The Oceanid is one of the elemental lifeforms available in Teyvat. The Oceanid is made of “condensed Hydro elements of incredible purity,” making it another elemental being. The Oceanid was introduced to provide character ascension material for a selected group of Hydro characters in the game, such as Tartaglia, Mona, Xingqui, Barbara. The item it drops is called the Cleansing Heart.
Since Hydro is one of the reactionary elements in the game, most elemental reactions, such as Electro Charge, Vaporize, and Freeze, are possible when dealing with the Oceanid.
The key thing to remember is that the player cannot directly attack the Oceanid; instead, defeating the Hydro mimics that are summoned is the way to chip away at the health of the Oceanid.
The Oceanid is one of the first bosses that a player would encounter since they need character ascension material for Barbara, who is given for free (should the player choose to build here).
The Oceanid goes by a few names within the game, they are:
- Rhodeia of Loch
- Oceanid of Qingce
- Voice of the Water
Location
 |
 |
| Location on the map | Location in the game |
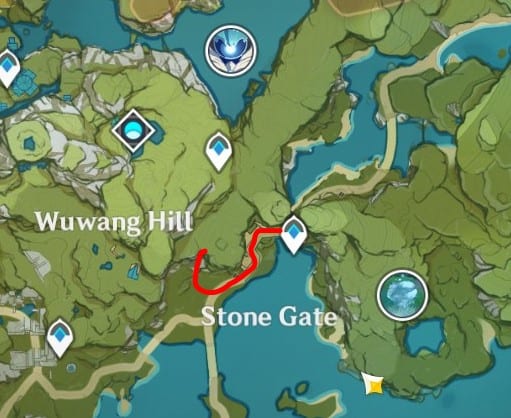
As shown above (outlined by the red circle), this waypoint would be the closest waypoint to the Oceanid. To unlock this waypoint, follow the path in the table below; along the way, players will run into an Electro Cicin Mage, two small Electro slimes, and one mutant Electro slime.
However, that particular battle would be a one-time thing after the waypoint is unlocked. Along with the waypoint, there is a small campfire in case players need to make some food, white iron chunks, noctilucous jade, and cor lapis as well.
*The ore spot and pathway to the waypoint will be shown below.*
 |
| The pathway to unlock the waypoints |
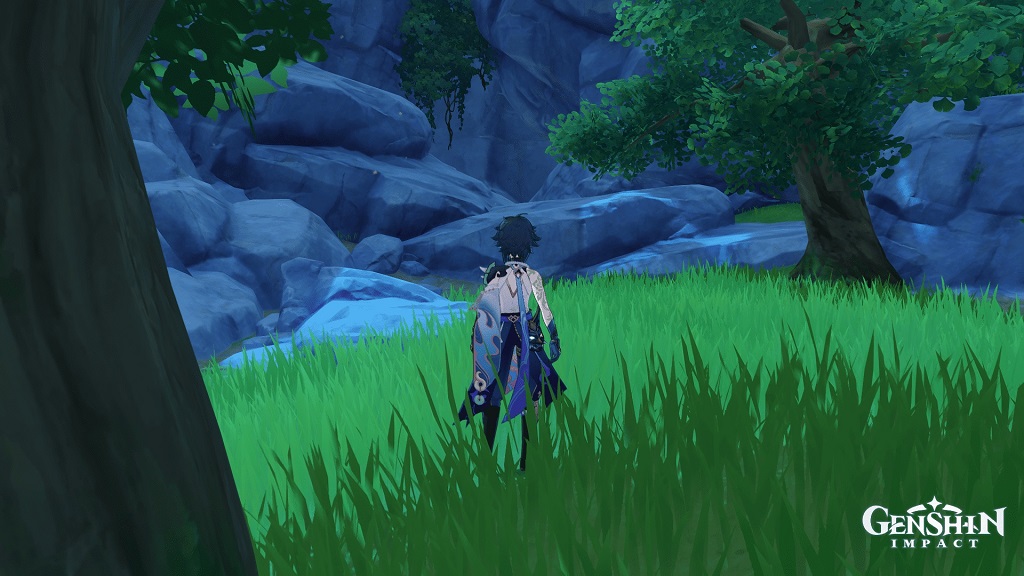 |
| The entrance to the cave |
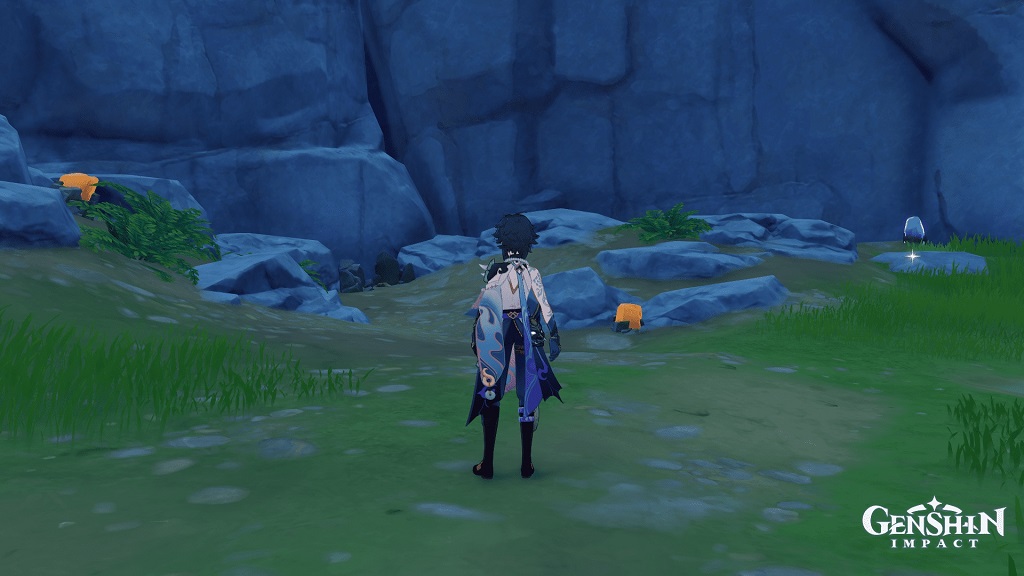 |
| The ore location |
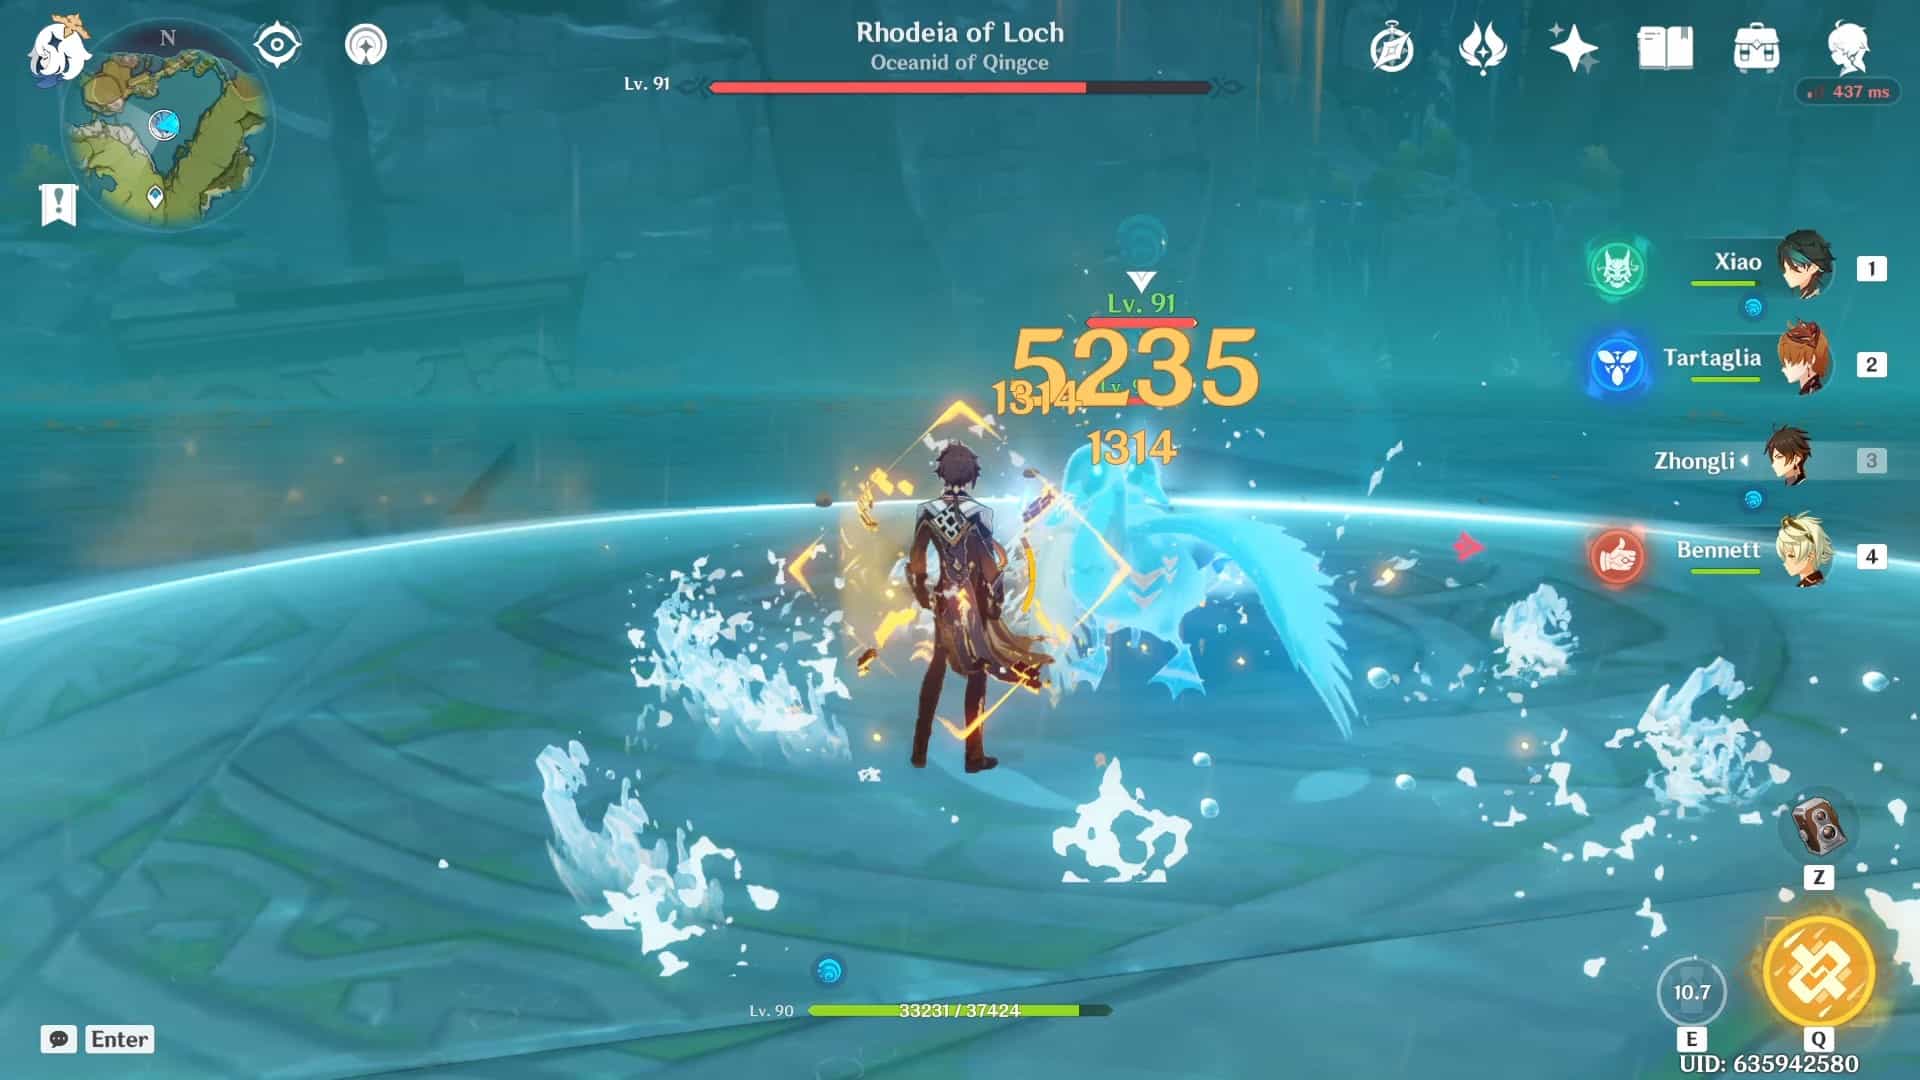
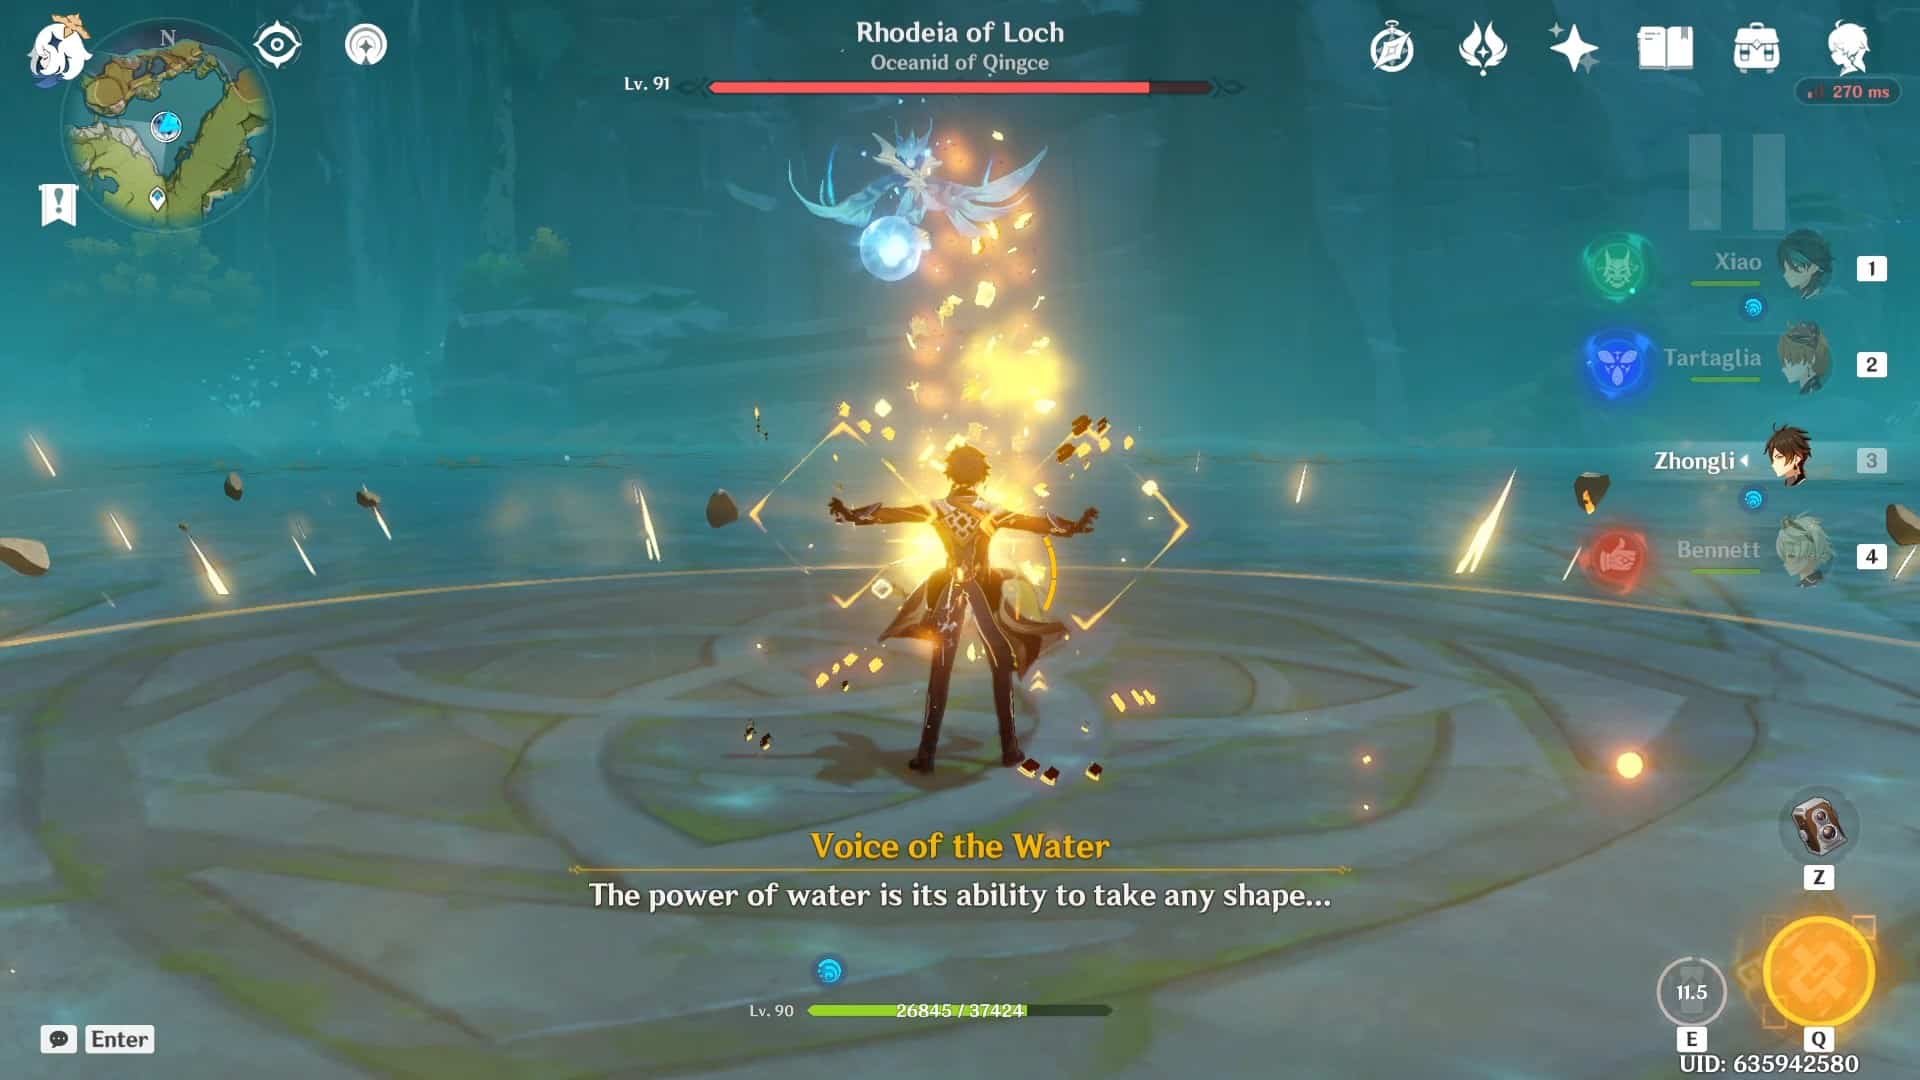
Attacks, Stages, and What to expect
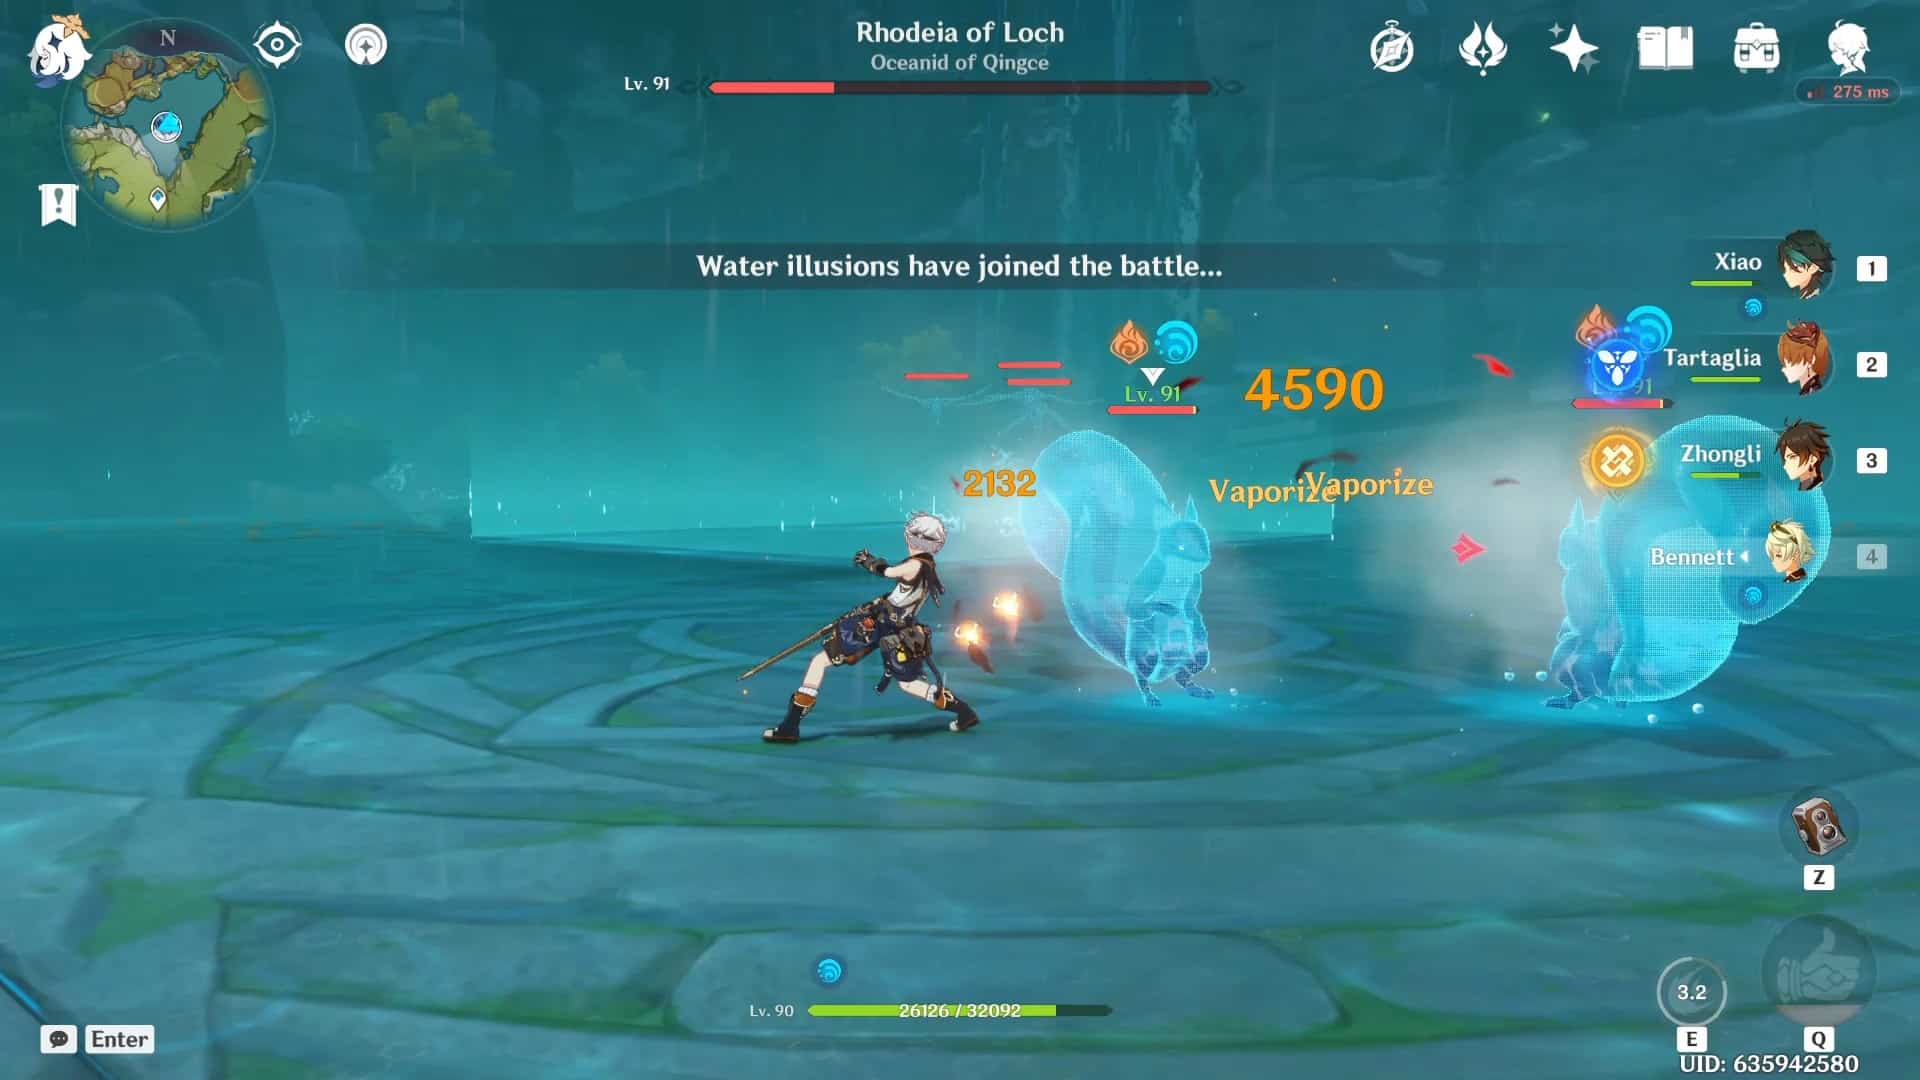
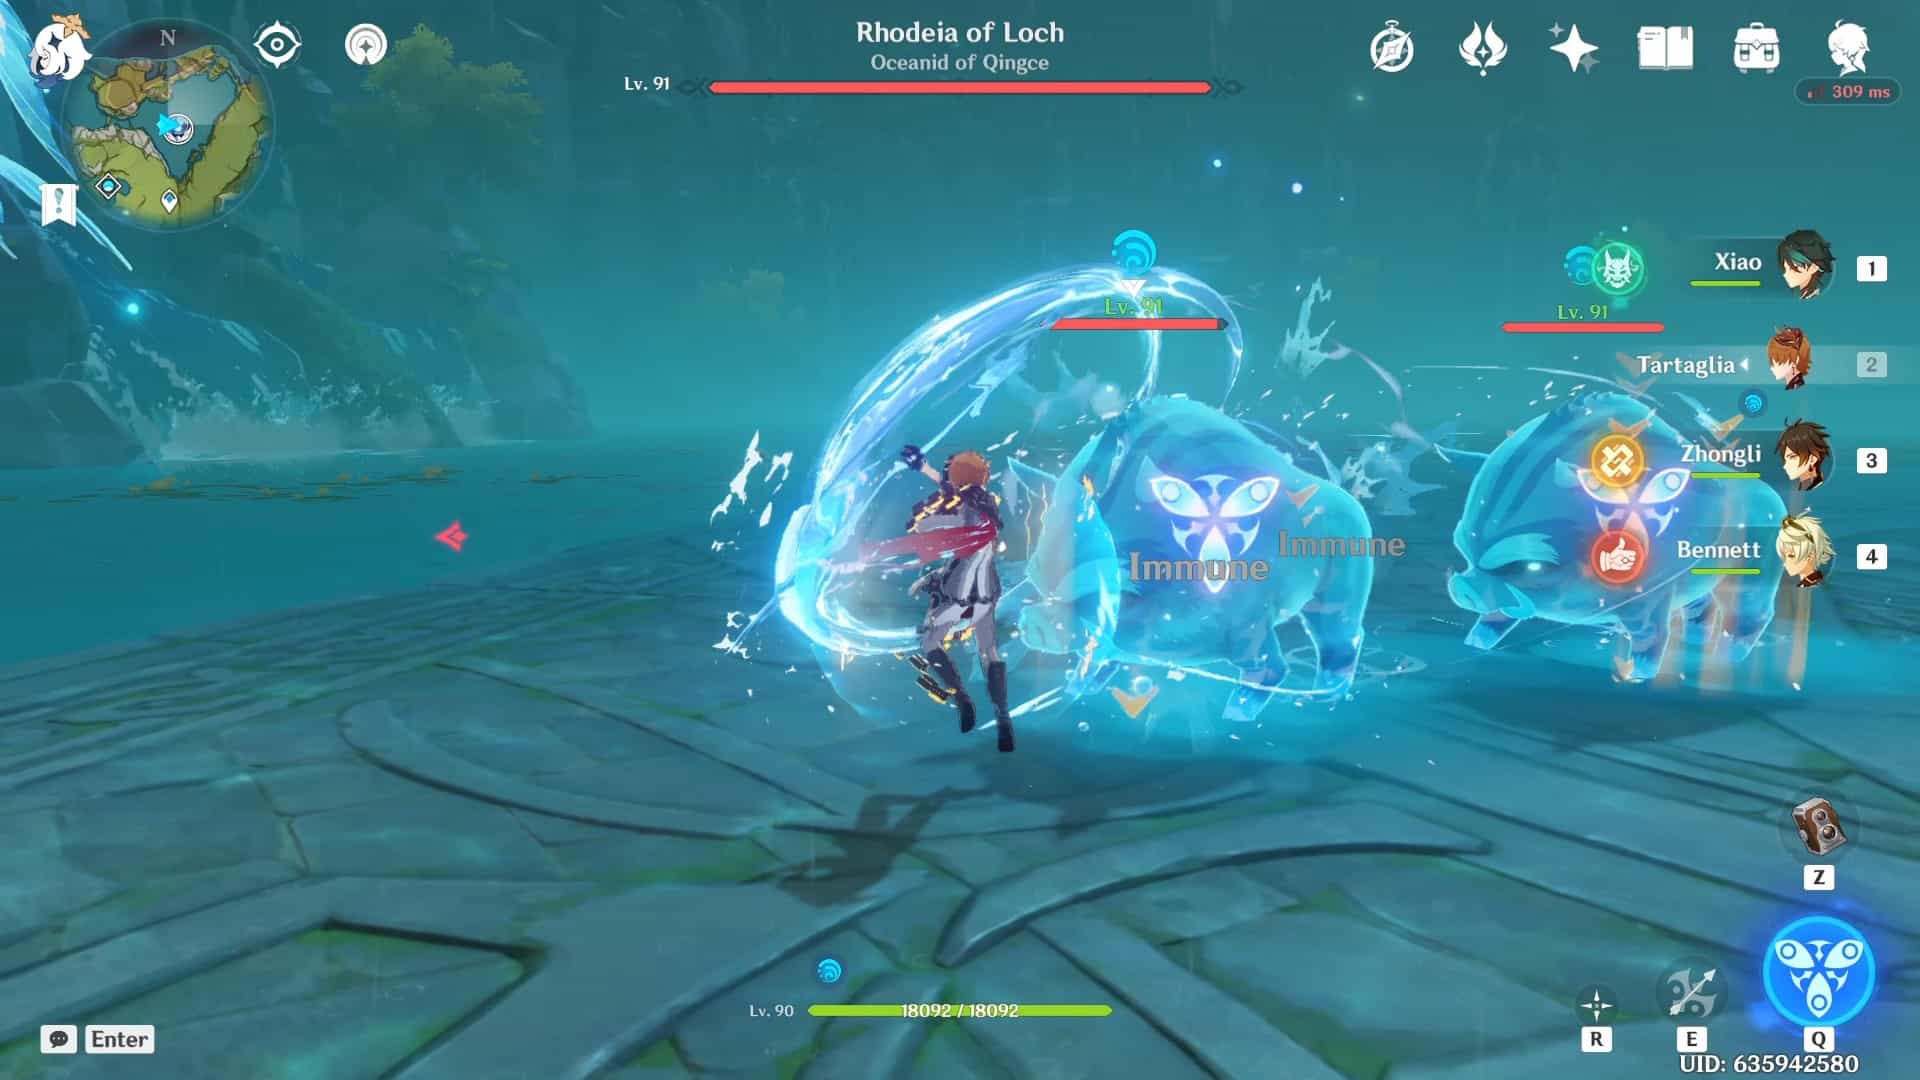
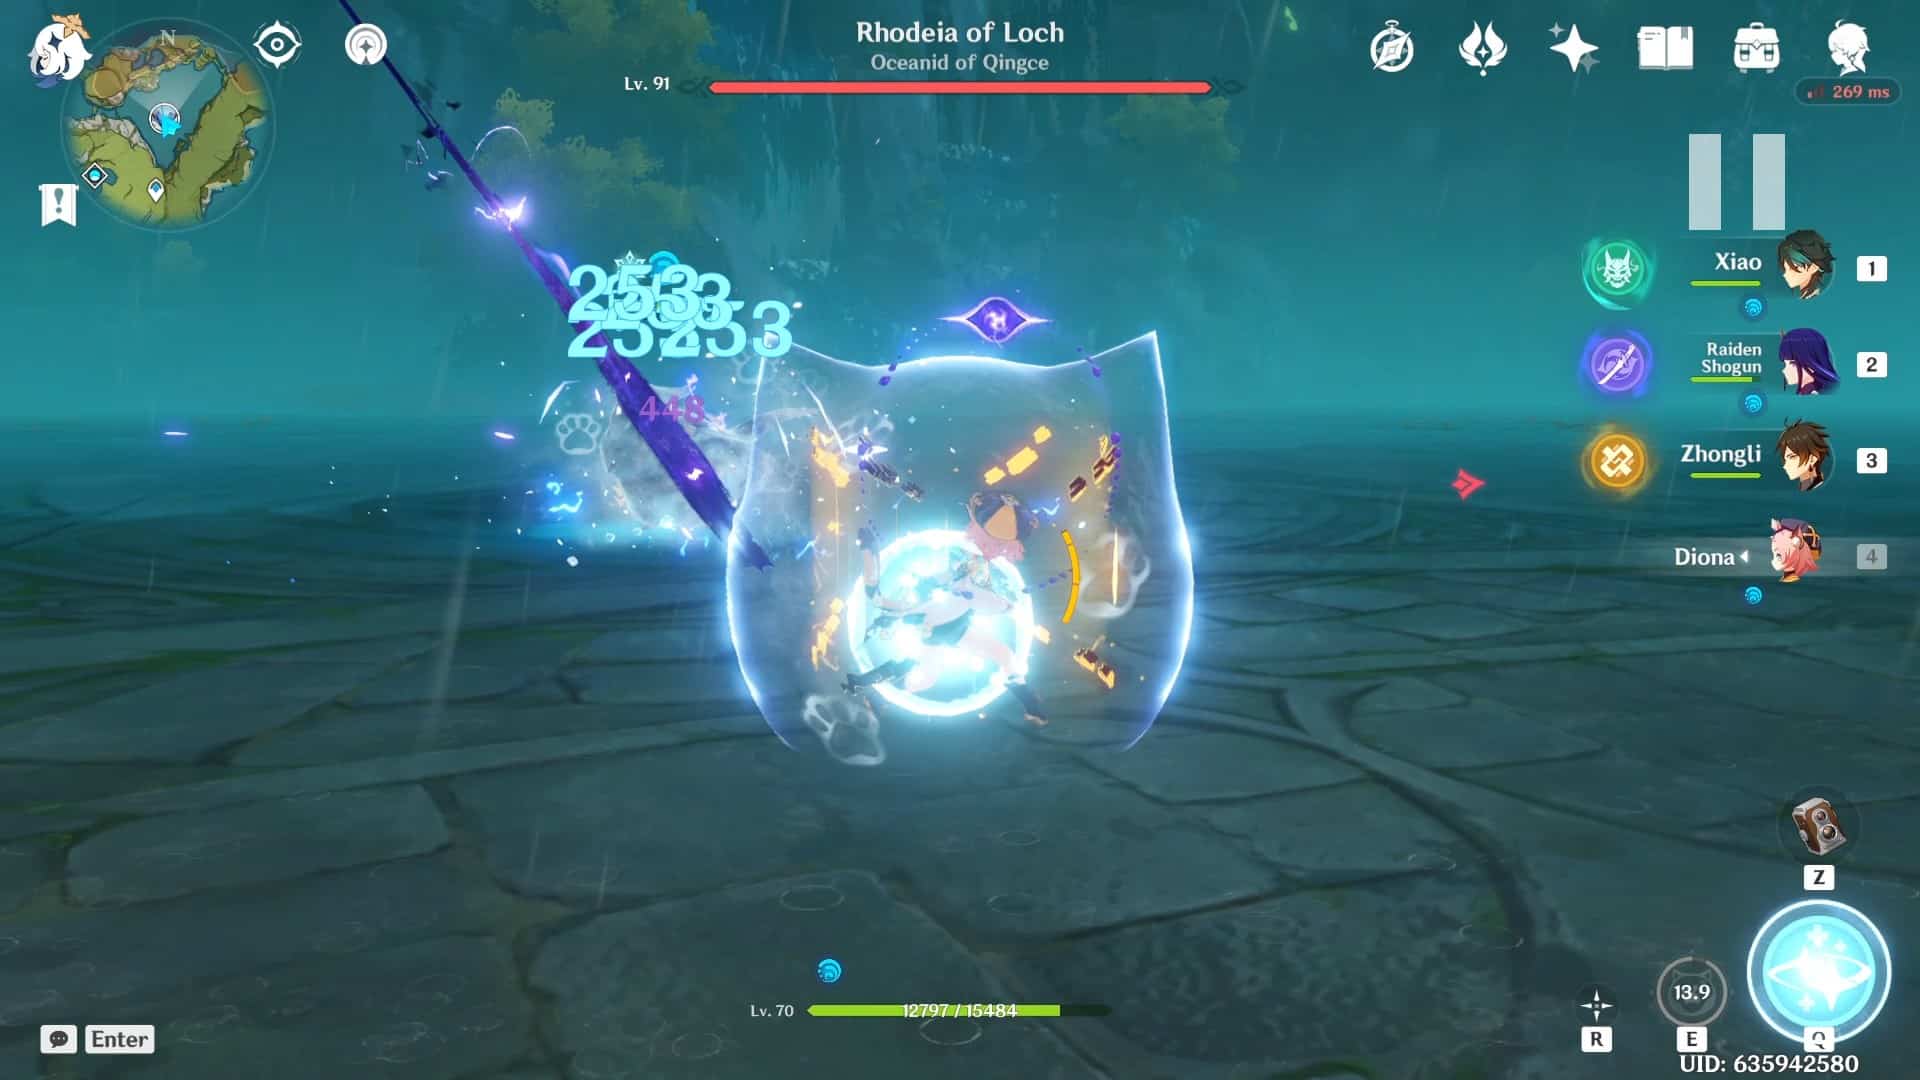
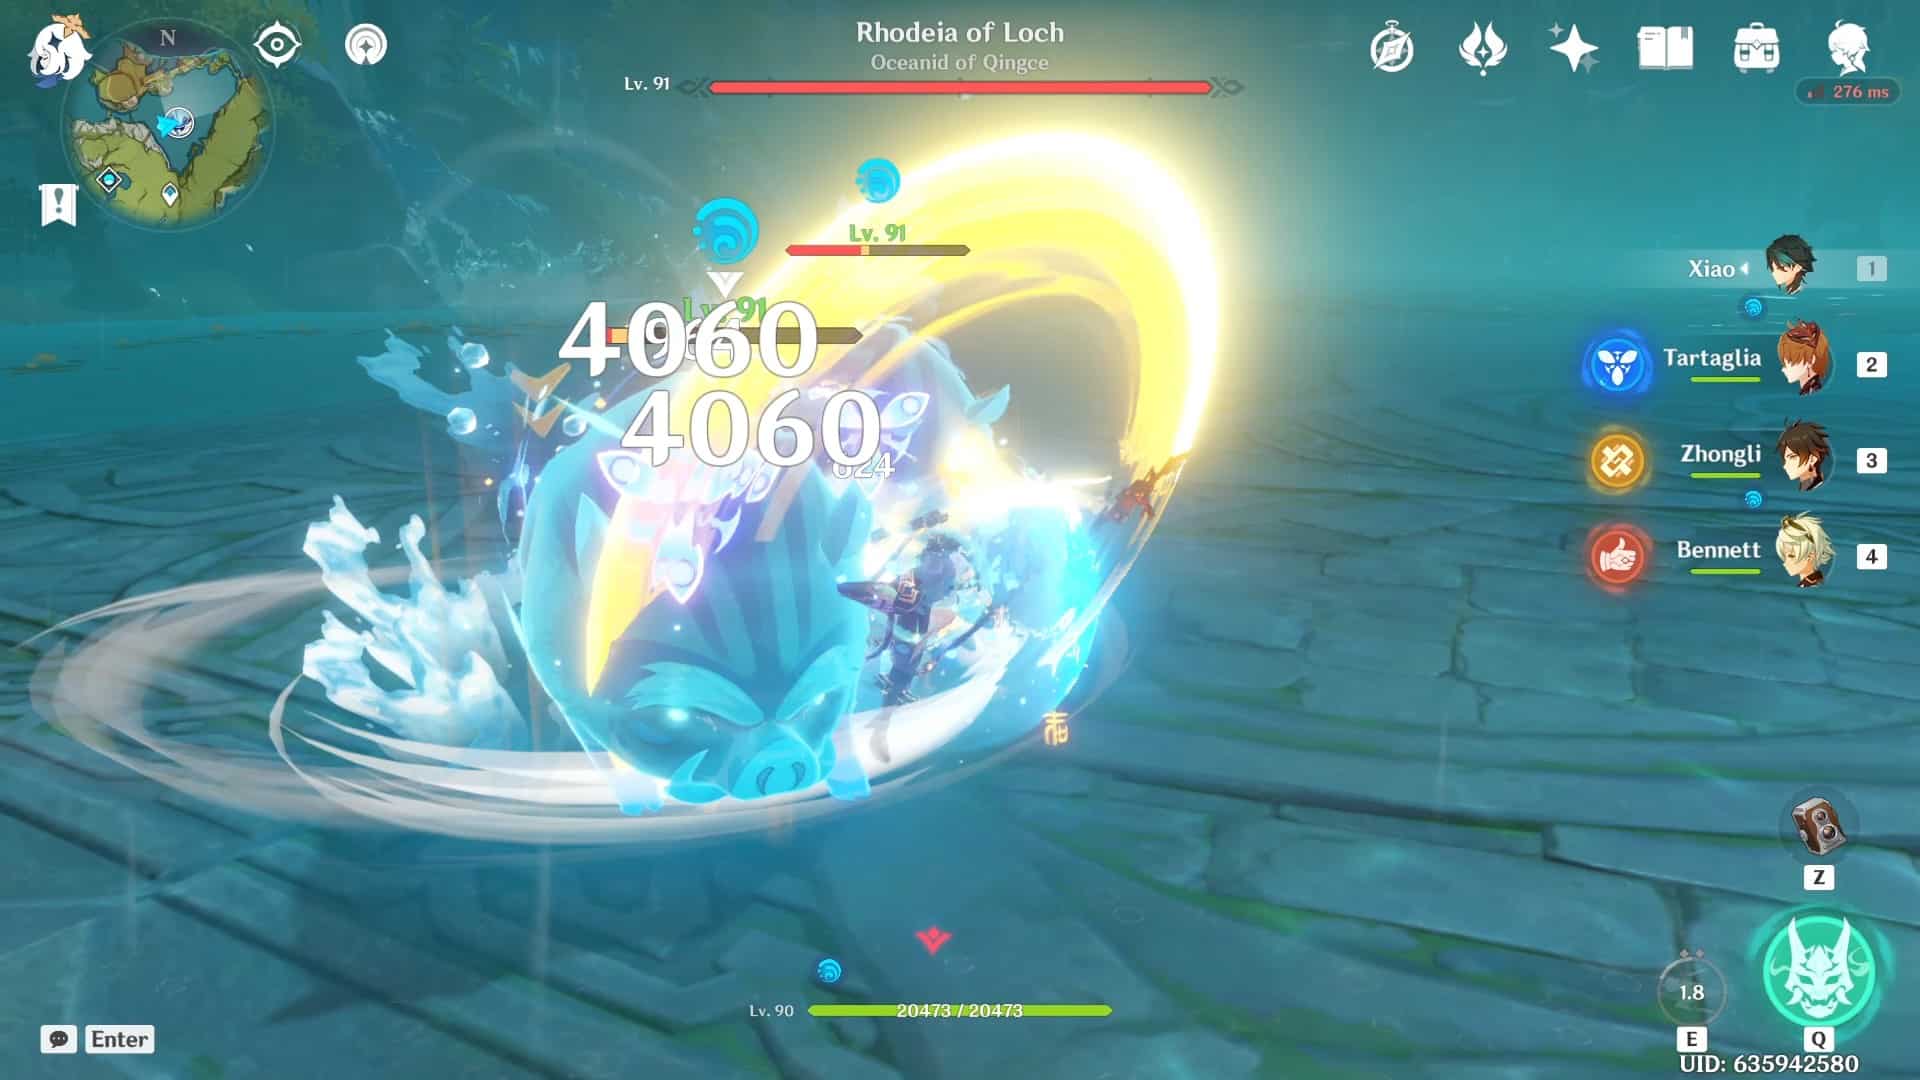
The Oceanid does not directly attack the player; instead, it summons Hydro mimics to deal damage to the player. Likewise, the Oceanid also cannot be directly attacked; only the Hydro mimics take on damage.
After every wave of Hydro mimics (pun unintended) has been defeated, the Oceanid loses a percentage of her health; once all three waves of Hydro mimics have been defeated, the Oceanid will fall into the water reward collection can be done.
Another key point that players must keep an eye on is that the platforms sink once the Oceanid plunges onto it; players must also keep in mind that the Oceanid is also able to deal damage through the plunges if the player happens to be standing on a platform that the Oceanid plunges onto.
 |
| Hydro mimic summon |
 |
| Oceanid plunging down onto the platform |
 |
| Platform sinking |
Each Hydro mimic is different; therefore, the attacks and the movement of the Hydro mimics also vary.
Below, I have compiled a list of the Hydro mimics and their corresponding attacks. The Hydro mimics also appear in the Spiral Abyss floors; however, the Oceanid does not appear.
The Hydro mimics have strength in numbers so that they can launch multiple attacks at the same time. However, this handicap can be overcome by using characters that can produce shields and characters that can heal.
 |
| Hydro mimic: Frog Personally, the Frog is one of the most annoying Hydro mimics available since it can jump up and perform plunge attacks, send waves from a distance, and leave a Hydro bomb after it has been defeated. An all-rounder and, without a doubt, the mimic that I despise the most. T_T |
 |
| Hydro mimic: Finch
Another annoying jump and plunge Hydro mimic, but unlike the Frog, the Finch has a limited move set. However, it also leaves a Hydro bomb behind once defeated, which is not the best news for close combat players. |
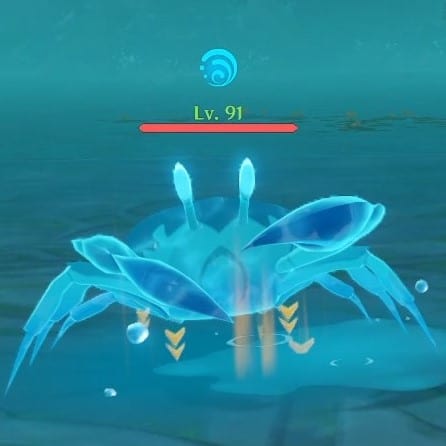 |
| Hydro mimic: Crab
These mimics appear in pairs, and they can cause trouble if left unchecked. The Crabs have excellent mobility and if the angle is wrong, unleashing a combo of normal attacks is not possible. The Crabs also launch bubbles which deal small amounts of Hydro damage when it comes into contact with the player. |
 |
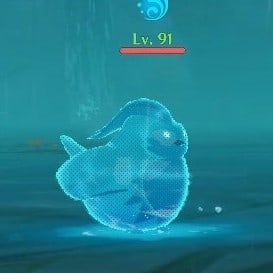
| Hydro mimic: Mallard
These mimics also appear in pairs; the Mallards are quite tricky since they can do a few attacks, and they also come with a Hydro Vortex, which does damage over time (DoT) to the character that gets caught in it. However, defeating them is possible without too much effort since it does not have tricky movements. |
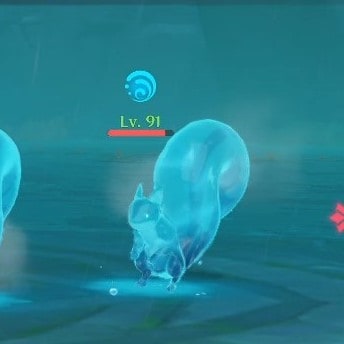 |
| Hydro mimic: Ferret
The third installation to the mimic pair group, the Ferrets (mimics that I initially believed to be squirrels T_T), can move and attack very rapidly. They rest for some time after performing an attack; therefore, there is a window of opportunity to launch the counterattack. |
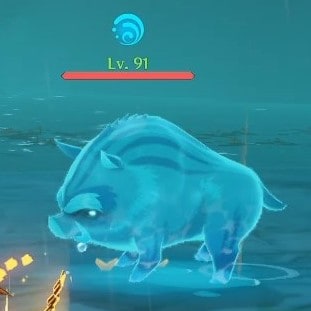 |
| Hydro mimic: Boar
The final mimic pair, the Boars, love to ram players from a relatively close range or charge at a player from a distance. Either way, these mimics are easier to dodge because they ready themselves before attacking, which gives us a slight indication of the oncoming attack. Much like the Boars that roam Teyvat, the Hydro mimic: Boars also act in the same way, BY ATTACKING UNSUSPECTING TRAVELERS. |
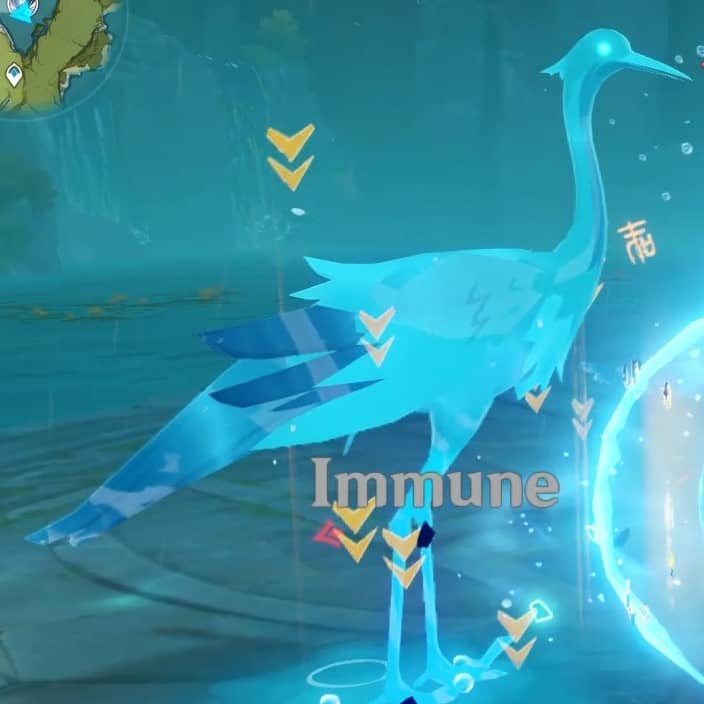 |
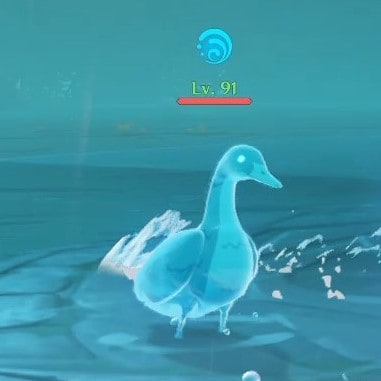
| Hydro mimic: Crane
The final Hydro mimic and also the final of the mimics that spawn in groups of three. The Cranes can flap their wings and release a Hydro wave which can travel across the platform similar to the waves sent by the Frog. The Cranes also maintain distance from the player and do not come into close combat; they simply deal damage from a distance. |
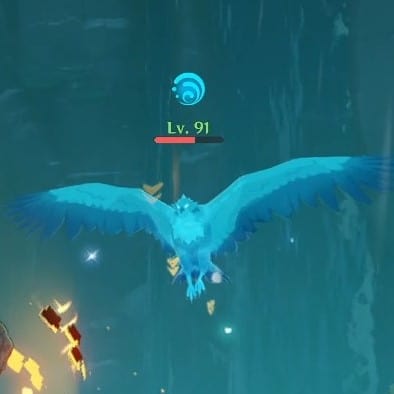 |
| Hydro mimic: Raptor
These mimics spawn in groups of three, and they are summoned to enact emotional damage. Since the Raptors are flying, only bow-wielding characters or catalyst users can harm them. This Hydro mimic might be the biggest problem for mobile players when facing the Oceanid due to their issues with aiming. However, they do not have a lot of health and can be taken down quite quickly. They attack by swooping down and slashing the player with their talons. I usually wait for them to line up, and then I jump and use Xiao’s skill move Lemniscatic Wind Cycling and dart through all three of them. As much as players find this particular mimic to be annoying, they are my favorite because not only does the design look great, but they genuinely pose a threat if players cannot find a way to deal damage while the Raptors are in the air. |
 |
| Rewards- The rewards include Character EXP, Adventure EXP, Companionship EXP, and Mora. Artifacts (either Gladiators Finale or Wanderers Troupe for four* and 5* artifacts and Berserker, Instructor or Lucky Dog for the 4* to 2* range), character level material (the Varunada Lazurite variant), and Cleansing Heart. |
*The attacks will not come in the order mentioned above since the attacks are randomized, but these are the only attacks that the Oceanid can do.*
 |
| Pyro damage |
 |
| Hydro damage |
 |
| Electro damage |
 |
| Cryo damage |
 |
| Geo damage |
 |
| Anemo damage |
 |
| Physical damage |
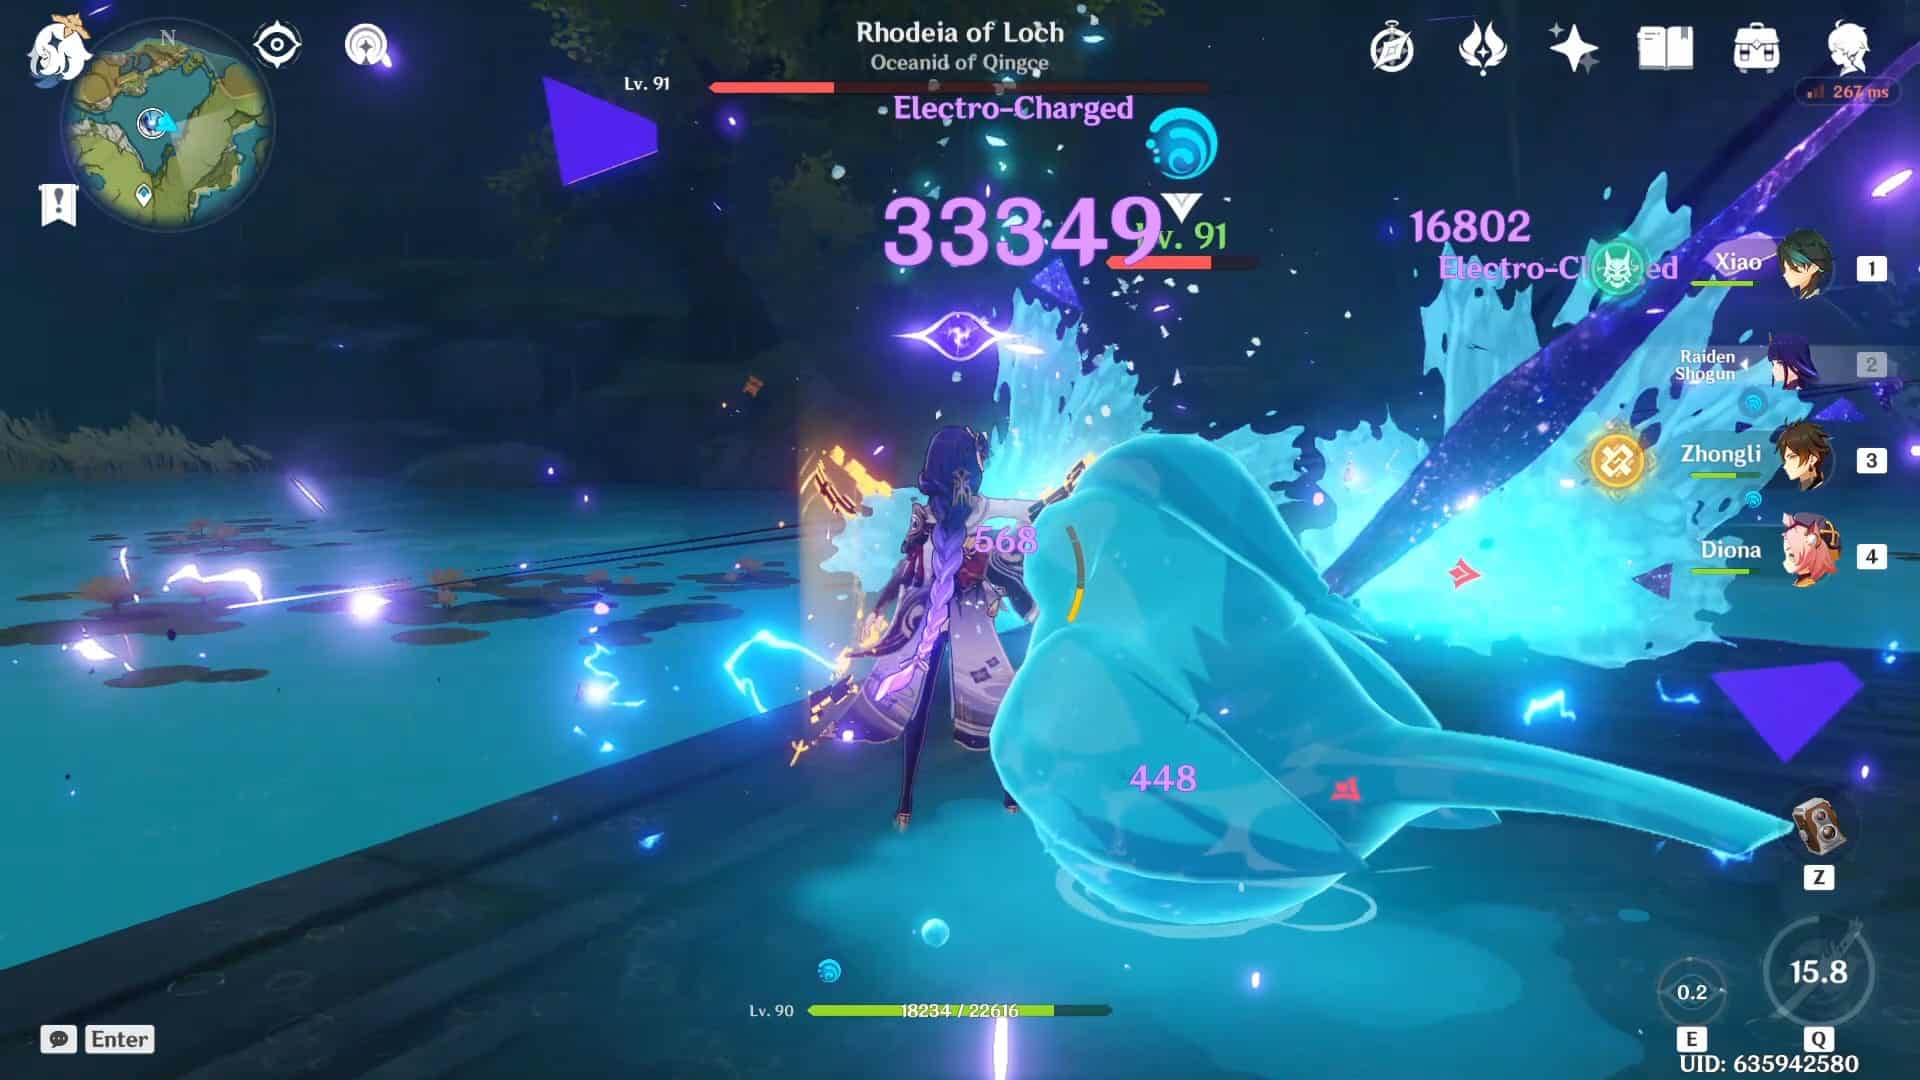
As for the elemental reactions, since the Hydro mimics are pure Hydro elemental lifeforms, they are entirely immune to any form of Hydro damage, but they do take on damage from all other elements, and some elements even contain certain buffs against particular enemies.
All enemy mobs that spawn in groups of three are more susceptible to Electro, where they take on 41.2% more damage from Electro characters. These mobs spawn on the corner tiles of the platform.
- Hydro mimic: Crane
- Hydro mimic: Raptor
- All enemy mobs that spawn in groups of two are more susceptible to either Pyro or Cryo, where they take on 41.2% more damage from Pyro or Cryo characters. These mobs spawn on the central tiles of the platform.
*Weak against Pyro characters*
- Hydro mimic: Boar
- Hydro mimic: Ferret
*Weak against Cryo characters*
- Hydro mimic: Mallard
- Hydro mimic: Crab
- All enemy mobs that spawn in alone are more susceptible to Geo, where they take on 41.2% more damage from Geo characters. These mobs spawn on the tiles at the edge of the platform.
- Hydro mimic: Frog
- Hydro mimic: Finch
How to beat the Oceanid?
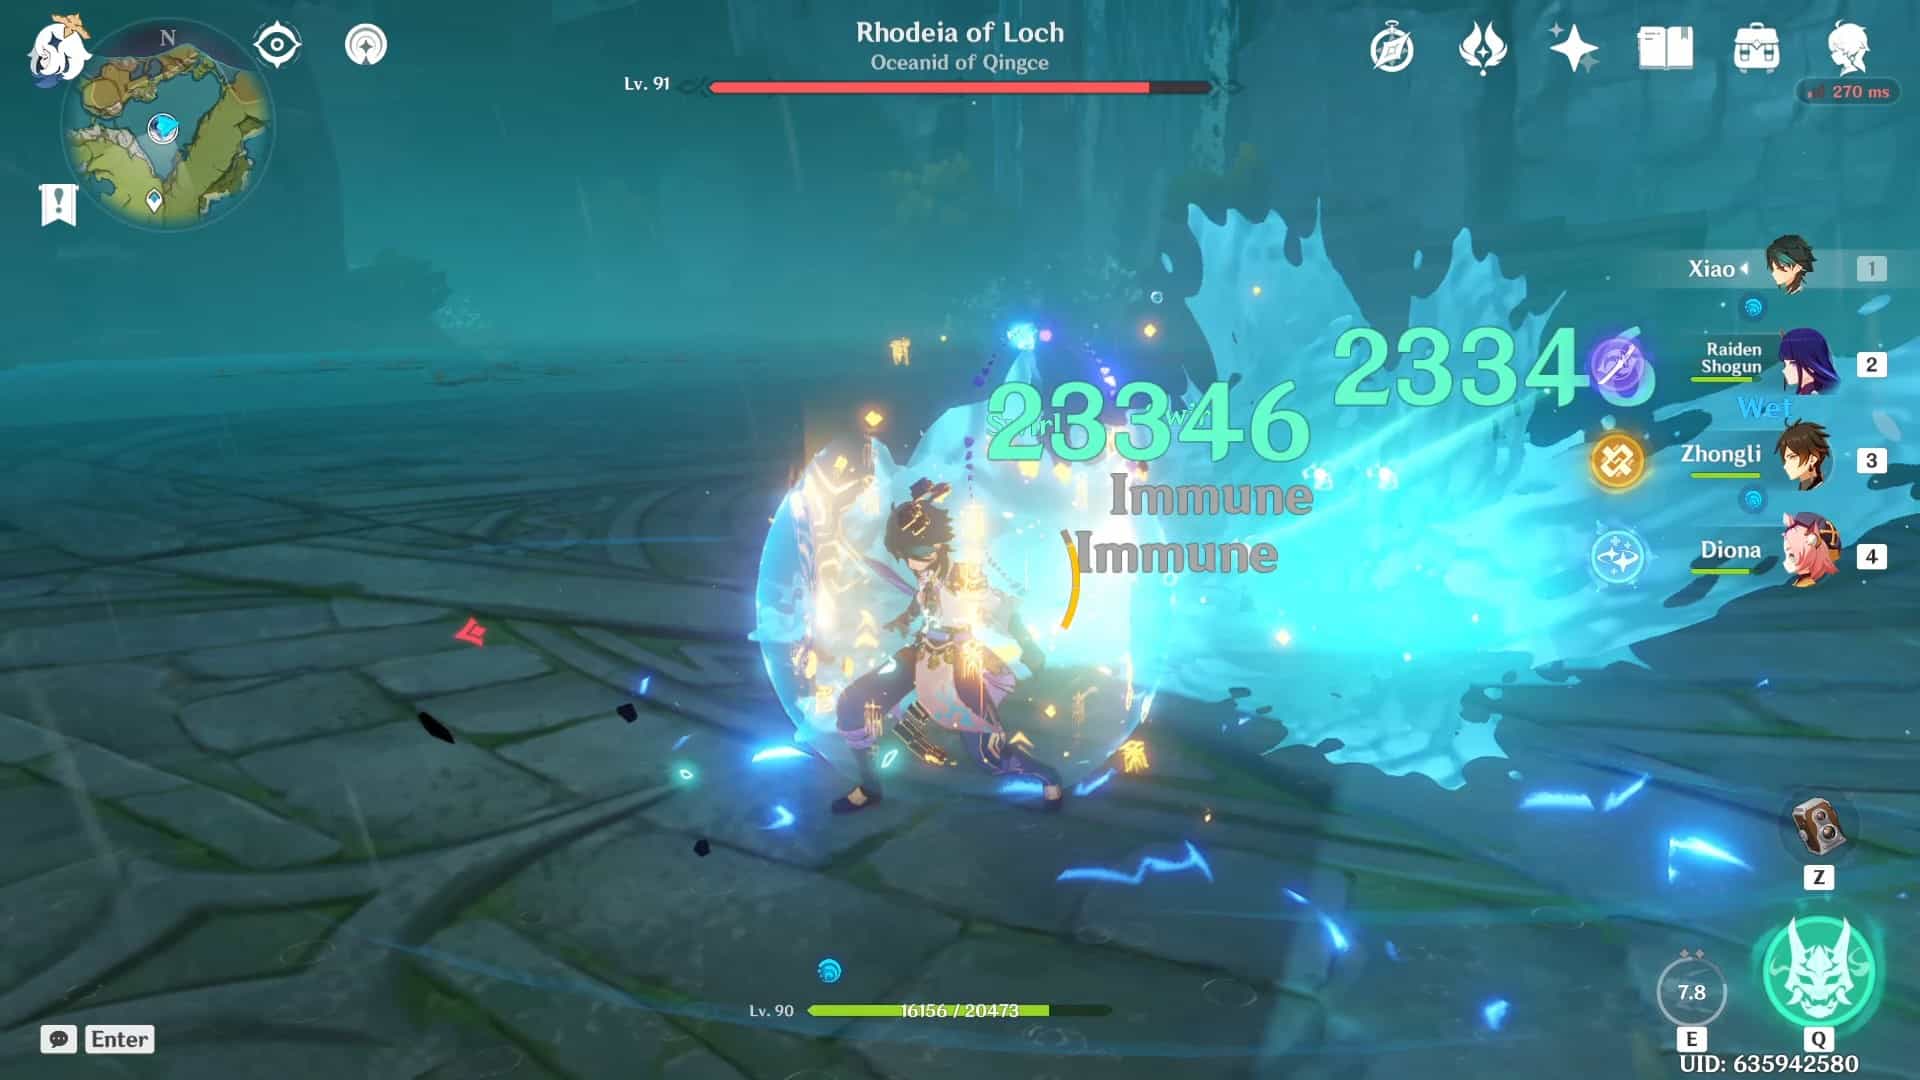
To beat the Oceanid, it is essential to remember that no damage can be done *DIRECTLY*, instead players must defeat waves of Hydro mimics to gradually reduce the Oceanid’s health.
This is a boss that forces the players to go through the motions since it cannot be one-shotted. The Oceanid is also not a flashy normal boss, so the concentration usually falls onto the Hydro mimics while the Oceanid just fades into the background for most players.
- Defeating the Hydro mimics while successfully evading the Oceanid’s plunges is the key to defeating the Oceanid.
- It is advised not to take any Hydro characters since the Oceanid is immune to all forms of Hydro damage.
- Since Hydro is a reactive element, almost all elemental reactions will deal damage to the Hydro mimics, except Hydro infused Swirl reactions.
- It is also advised to take characters who use bows and catalysts to deal with the Raptors and even the Cranes. The Frog and the Finch could also have their health lowered significantly to a near-death state and then taken out from a distance by a bow user to minimize the damage of the water bomb.
 |
| No damage was taken from direct attacks due to an invisible shield |
Team Comps
Since most players will run into the Oceanid in the middle part of the game (since the middle part of the current version is Liyue), the teams might not be fully complete or even polished up with the god-tier weapons and artifacts that we are all trying to get.
Since most players are still building their teams, below, I would set up a few suggestions for team comps, both free to play friendly and the best possible team comp for the current version as well. I will also give my reasonings for each character and so on as well to help players get a better understanding.
Free to play friendly
*These teams and weapons are strictly free to play only*
| Main DPS | Sub DPS | Support | Support | |
| Main Suggestion |  |
 |
 |
 |
| Substitutes | 
(Anemo) |
|
 |
 |
| Reasoning and Weapons | Kaeya – Kaeya Alberich is a Cryo character who is capable of dealing steady Cryo damage with minimum investment. He is an excellent character for any team comp. Still, he is exceptional at dealing constant Cryo damage over time through his elemental burst, which comes in handy because it can freeze the Hydro mimics as well.
Weapon – Harbinger of Dawn Traveler – The Anemo variant can deal a good amount of damage for early game players. The Anemo Traveler is one of my favorite characters in the game, even though most of the community feels that the Anemo Traveler is not too strong. Players can trigger the Swirl effect by infusing either Pyro, Cryo, or Electro to maximize the damage. Weapon – Prototype Rancour |
Xiangling – Xiangling is easily one of the best characters in the game; through her constant Pyro application through either Guoba or the Pyronado, she is a must-have for most Vaporize or Melt teams comps. When it comes to the Hydro mimics, Xiangling’s AoE Pyro damage would be extremely helpful because it can deal damage to multiple Hydro mimics at the same time. After Guoba despawns, he drops a Chili Pepper (after Ascension 4), which also provides a 10% attack buff for the characters.
Weapon – Crescent Pike |
Noelle – Noelle is another great character for any team since she can provide shields and heal as well, while steady Geo damage through her elemental burst. Since her elemental burst is pure Geo damage, she can do Crystallize reactions, and it can produce the Hydro shards, which provide an additional layer of shielding. The Hydro shard creates a shield that is 250% effective against Hydro.
Weapon – Whiteblind Barbara – Barbara will not do any damage at all; however, she can provide healing for the entire team, which would be extremely important for early game players who have not found other healers. Weapon – Prototype Amber |
Lisa – Lisa is an excellent Electro character for early game players since she leads the way for good Electro-based elemental reactions. With Noelle’s shield, pulling off Electro Charged reactions could be a very feasible option since the risk is minimal as long as the shield is up.
Weapon – Thrilling Tales of Dragon Slayers Amber – Amber could play the key role in creating diversions in this battle since her elemental skill Baron Bunny attracts enemies towards it. Which would prove to be highly beneficial since we do not have a character that provides shields in this team comp. Coupled with her long-ranged (because she is a bow user) charged attacks infused with Pyro, she could easily help take down the raptors as well. Weapon – Prototype Crescent |
The first team mentioned above is a generalized team that is balanced enough to help free-to-play players overcome certain obstacles. Kaeya can apply constant Cryo damage, which can freeze the Hydro mimics in place; this would be extremely helpful with the Hydro mimic: Frog and Hydro mimic: Finch since they do damage by plunging onto the player.
That being said, players should always start by using Noelle’s elemental skill move Breastplate, which would provide a shield, and also produce Hydro shards, which would give additional shielding.
After using Noelle and the Kaeya, players should use Xiangling’s Pyronado to deal AoE Pyro damage, which, when coupled with Lisa’s elemental skill or elemental burst, would easily help deal with large mobs of Hydro mimics.
The second team mentioned above are the most optimal substitutes since they can easily win the battle for the player if used correctly. Using Barbara in this team comp is purely for the healing and no other reason or elemental reaction. Using Amber’s Baron Bunny as the diversion, players can quickly launch counterattacks with minimal risks.
Since Baron bunny also explodes, it could help cut off more health from the Hydro mimics. Once again, Xiangling is the star of the since her Pyro application is what will help get the player through, coupled with the Travelers Anemo based attacks. Since this team has Pyro resonance, the attack is also increased by 25%.
Best Team Comp
| Main DPS | Sub DPS | Support | Support | |
| Main Suggestion |  |
 |
 |
 |
| Substitutes |  |
 |
 |
 |
| Reasoning and Weapons | Ganyu – Ganyu, with the correct build, would arguably be one of the best characters in the entire game so far. With her elemental skill Trail of the Qilin, the enemies will be attracted to the skill, while Ganyu can either deploy her elemental burst or use her Cryo-infused charged attacks.
Weapon – Amos Bow Keqing – Keqing is one of the most mobile characters in the game; she is also a character that I would recommend for most players (she was also my first 5* character). By holding Keqing’s skill move, Stellar Restoration, the player can aim towards the Raptors and then attack them in one go. Her elemental burst also has a large AoE. Weapon – Primordial Jade Cutter |
Raiden Shogun – Ei, Raiden Shogun, Electro Archon, Baal, Booba sword, her nicknames are endless, but she is not a character that should be taken lightly. Raiden is one of the best characters in the game because of her support nature coupled with her devastating elemental burst.
Weapon – Engulfing Lightning Kamisato Ayaka – Ayaka is one of the most beloved characters in the game since she excels at dealing Cryo damage. She is also able to freeze multiple enemies at once. This would be excellent when multiple mobs of Hydro mimics charge at the player; once frozen, it is easier to deal damage or tactically retreat to heal or get a food buff. Weapon – Mistsplitter Reforged |
Zhongli – Zhongli is one of the seven archons along with Raiden Shogun and Venti. Zhongli also has the strongest shield in the game, which, when built correctly, would allow close combat characters (such as Tartaglia and Xiao) to go berserk. Zhongli’s elemental burst Planet Befall would also leave a petrifying effect on the Hydro mimics, which would stop them from moving for a few seconds.
Weapon – Vortex Vanquisher Kazuha – Kazuha is everyone’s favorite soft Anemo boy, but his contribution to the team is incomparable. Through his elemental skill Chihayaburu, Kazuha can launch into the air, which would provide the team additional exceptional mobility. Weapon – Freedom Sworn |
Qiqi – Qiqi is a great healer, and she can also help freeze the Hydro mimics further. She has a wide AoE, and she can also provide healing for characters who are inside her elemental burst Preserver of Fortune. After using her elemental skill Herald of Frost, she can constantly apply Cryo onto the enemies, which would help this freeze comp even more.
Weapon – Summit Shaper Bennett – Bennett is one of the unofficial 5* characters in the community due to him being an all-rounder. His elemental burst Fantastic Voyage can heal and apply to Vaporize damage to the Hydro mimics, WHILE providing an attack buff scaled off his base attack to on-field characters if their health is above 70%. Weapon – Skyward Blade |
The first team mentioned above is a gorgeous Freeze comp that would ensure that players obtain minimal interruption while dishing out an unfair amount of damage. With Ganyu as the focal point, once again, it is important to start with Zhongli and apply the shield and then use Raiden’s elemental skill Baleful Omen to produce Electro slashes every time Ganyu uses her charged attacks.
Qiqi can swap in from time to time to apply Cryo and Freeze the Hydro mimics or to provide healing. Since this team also contains Cryo resonance, they can also benefit from an increased CRIT Rate against enemies that are Frozen or affected by Cryo by 15%.
The second team can be used to deal steady damage while maintaining high-quality mobility. Since this team does not have a shielder, the best option is to use the increased mobility to dodge and evade. By using Kazuha’s elemental burst Kazuha Slash, players can infuse either Electro from Keqing or Cryo from Ayaka.
Players can also select between Keqing and Ayaka to deal damage since both of them play a more Main DPS role in the team rather than a Sub DPS. Throwing Bennett in to heal or increase attack is also a good option, so if players feel like doing crazy damage numbers, then they can use Bennett’s elemental burst, then Kazuha’s elemental burst, and since this Swirl is infused with Pyro, players can easily pull off Overload or Melt reactions on the Hydro mimics.
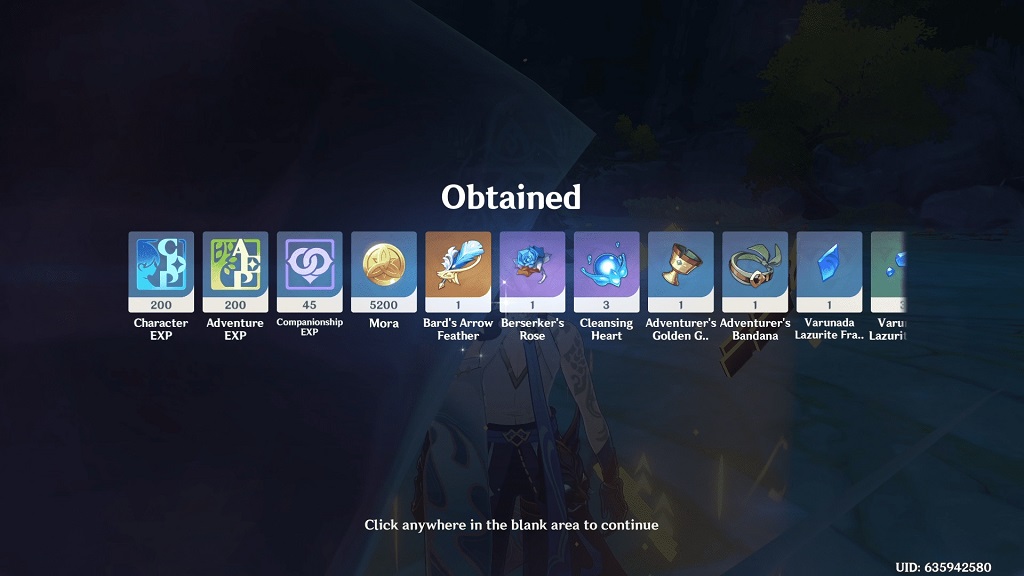
Rewards
| Name | In-game representation |
| Cleansing Heart |  |
| Adventure EXP |  |
| Companionship EXP |  |
| Mora |  |
| Varunada Lazurite Sliver |  |
| Varunada Lazurite Fragment |  |
| Varunada Lazurite Chunk |  |
| Varunada Lazurite Gemstone |  |
| Gladiators Finale(4* or 5*) |  |
| Wanderers Troupe(4* or 5*) |  |
| Instructor(3* or 4*) |  |
| Berserker(3* or 4*) |  |
| Lucky Dog(2* or 3*) |  |
| World Level | Boss Level | Expected Adventure Rank | Adventure EXP | Companionship EXP | Mora | Cleansing Heart | Artifacts 2* | Artifacts 3* | Artifacts 4* | Artifacts 5* |
| 0 | 36 | 0-19 | 200 | 30 | 3450 | 1-2 | 0-1 | 2-3 | 0 | 0 |
| 1 | 37 | 20 | 200 | 30 | 3450 | 1-2 | 0-1 | 2-3 | 0 | 0 |
| 2 | 41 | 25 | 200 | 30 | 3650 | 1-2 | 1-2 | 2-3 | 0 | 0 |
| 3 | 50 | 30 | 200 | 35 | 3850 | 1-2 | 0-1 | 3-4 | 0 | 0 |
| 4 | 62 | 35 | 200 | 35 | 4125 | 2-3 | 0-1 | 3-4 | 0-1 | 0 |
| 5 | 72 | 40 | 200 | 40 | 4450 | 2-3 | 0-1 | 2-3 | 1-2 | 0 |
| 6 | 83 | 45 | 200 | 40 | 4725 | 2-3 | 0-1 | 2-3 | 1-2 | 0-1 |
| 7 | 91 | 50 | 200 | 45 | 5200 | 2-3 | 0-1 | 2-3 | 1-2 | 1-2 |
| 8 | 93 | 55+ | 200 | 45 | 6000 | 2-3 | 0-1 | 2-3 | 1-2 | 1-2 |
| World Level | Varunada Lazurite Sliver | Varunada Lazurite Fragment | Varunada Lazurite Chunk | Varunada Lazurite Gemstone |
| 0 | 2-3 | 0 | 0 | 0 |
| 1 | 2-3 | 0 | 0 | 0 |
| 2 | 1-2 | 2-3 | 0 | 0 |
| 3 | 1-2 | 1-2 | 0 | 0 |
| 4 | 1-2 | 1-2 | 0-1 | 0 |
| 5 | 1-2 | 1-2 | 0-1 | 0 |
| 6 | 1-2 | 1-2 | 0-1 | 0-1 |
| 7 | 2-3 | 1-2 | 0-1 | 0-1 |
| 8 | 2-3 | 1-3 | 0-1 | 0-1 |
Once again, the rewards obtained are based on different reasons such as World level, and Boss level. The rewards obtained after defeating a boss (normal boss or trounce domain boss) are always the same. However, when it comes to character ascension, to level up a character to level 90, 46 of the boss drop material (Cleansing Heart in the case of the Oceanid) are required.
So this requires challenging bosses regularly and multiple times. To maximize the efficiency of this process, defeating the bosses after adventure rank, 40 or so would be advised since players can receive 2-3 of the boss material as opposed to 1-2 from adventure rank 35 and below.
I had to do this particular boss multiple times to obtain the character ascension material to ascend my Tartaglia, Mona, and Xingqui; it always made my head feel a little bit of a serotonin boost whenever the rewards page says “Cleansing Heart- 3.”
Mistakes to avoid
A few things to pay attention to would be
- That Geo constructs cannot be placed on the platform, due to this Zhongli’s steel Ningguang’s Jade screen and the Travelers Starfell Sword cannot be placed.
- Additionally, when using Electro characters, the player runs the risk of getting affected by Electro-charged since the platform is slightly submerged in water; players can avoid this by using a shield or by using the Hydro Crystallize shards that drop after using Geo attacks.
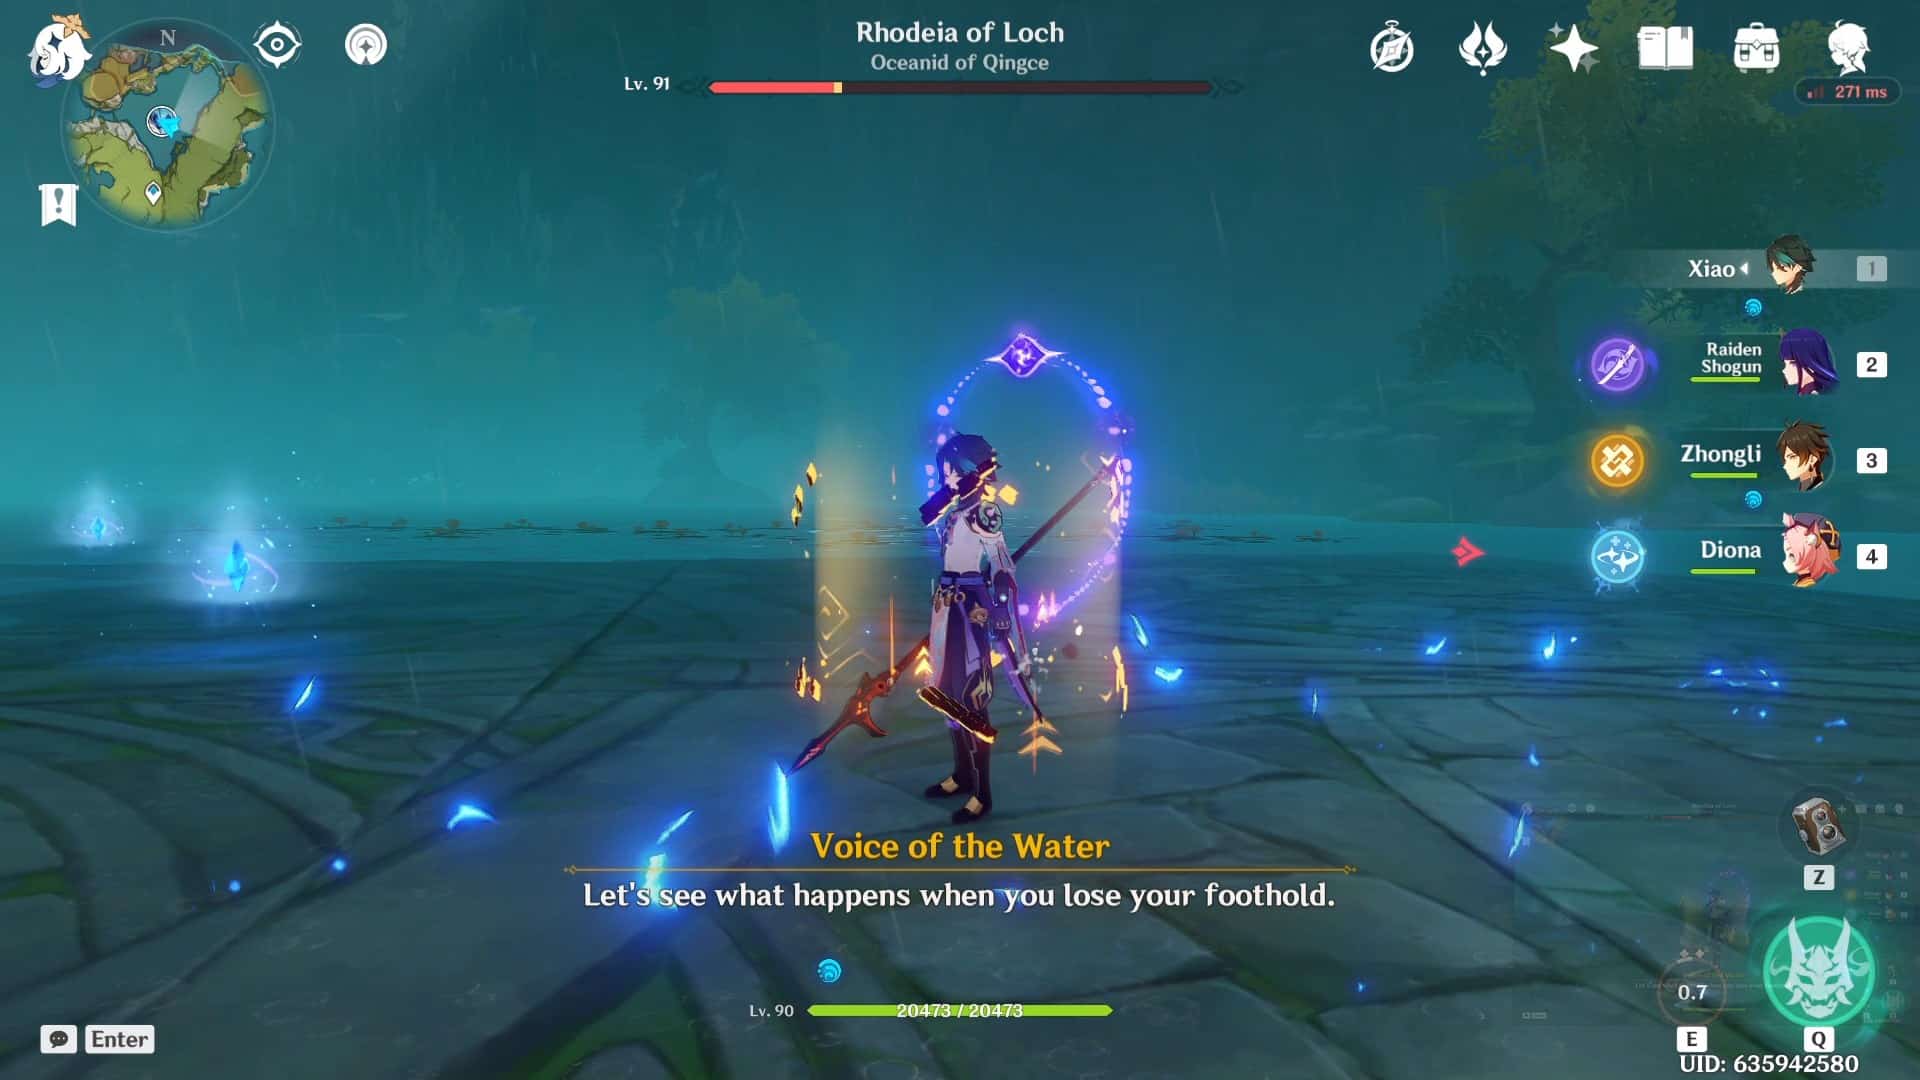
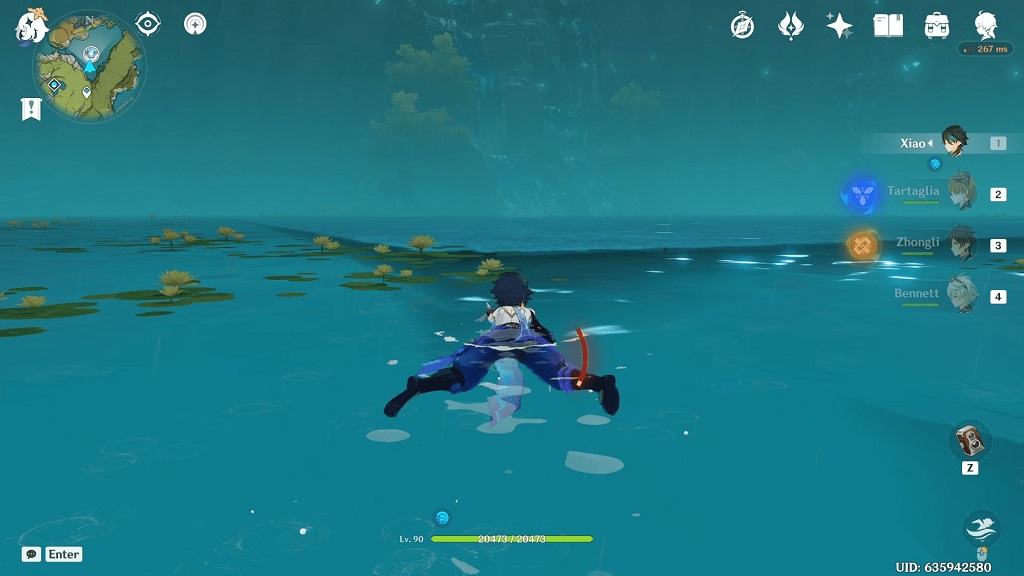
- Another thing to keep an eye on is the stamina bar; since characters cannot swim when stamina is depleted, they drown. Since there is a lot of water in the surrounding area outside the platform, players could potentially fall into the water while running around. This will pose an issue if the stamina bar is low; since the platforms continue to get submerged throughout the boss battle, this point would be the most important one
 |
| Geo constructs cannot be placed on the platform |
 |
| Electro-charge risk, due to surrounding water |
 |
| Stamina depletion: risk of drowning |
Achievements related to the Oceanid
Achievement name: Dip, Duck, Dive, Dodge, Defeat
To unlock this achievement, players must defeat an Oceanid without being hit by water bombs left behind by certain Hydro Mimics (Hydro mimic: Frog and Hydro mimic: Finch).
Since there are only two of the Hydro mimics that leave a water bomb, it becomes relatively easier to narrow them down; the best way to approach this would be to defeat the other Hydro mimics that spawn and leave the Hydro mimic that explodes for the end. The players have a few options where they can either:
- Reduce the health of the particular Hydro mimic and then move away from it. After a significant distance has been made, players can use a catalyst user or a bow user (non Hydro characters) and defeat the Hydro mimic safely. I would highly recommend characters such as Ganyu or Kujou Sara for this.
- For players that prefer close combat, they can always lure the Hydro mimic towards the edge of the platform and then jump into the surrounding water immediately to avoid the water bomb. The key focus in this method would be to keep an eye on the stamina bar because if a player jumps into the water when the bar is low, they run the risk of drowning. Which would be incredibly frustrating after working so hard to beat the Oceanid; I can vouch based on my own experiences with this. T_T
- Since the achievement is about evading the water bomb, I would not recommend using a shield to avoid taking damage. However, players could also use either Mona’s or Ayaka’s sprints to go below the explosion radius of the water bomb wave and avoid getting hit entirely.
FAQ
Question: How to dodge the Oceanid’s how to avoid water bombs?
Answer: As mentioned above, the best methods to avoid getting hit by the bomb left behind after defeating the Hydro mimic: Frog or the Hydro mimic: Finch is to use a shield or to jump off the platform and into the water. If the player jumps into the water, the shockwave should go over the character’s head, keeping them safe from the blast. For players lucky enough to obtain Kazuha and/ or Venti, using their skill move could help easily evade the bomb if timed correctly. Also, the further away the character is from the blast radius, the lesser the damage taken.
Question: How to beat the birds (Raptor) summoned by the Oceanid?
Answer: I would recommend using a character that can use bows; Ganyu would be the perfect candidate for this job due to her charged move. Alternatively, Keqing can be used since holding her skill move can be used to project her at the birds and then perform the Electro slash, Xiao can be used as well if the player jumps and then performs his skill move, and of course, Kazuha and Venti can be used here as well since their skill move has a lot of mobility.
Question: Where is the Oceanid located in Genshin Impact?
Answer: The Oceanid can be found in the middle of the furthest lake east to Qingce village; after meeting the Oceanid for the first time, the location will be registered on the map.
Question: How to beat the Oceanid without using a bow-wielding character?
Answer: If a bow user is not used, it does not mean that the player has no chance of success; due to difficulty with aiming for mobile users, I understand why most players would not want to use bow-wielding characters. This can easily be overcome by using characters with large AoE attacks. Since Genshin Impact is packed to the brim with characters with this trait, it would be easy to find solutions. Cryo characters are suggested since they can freeze the Hydro mimics in place.
Question: How to solo the Oceanid?
Answer: The Oceanid is another normal boss that becomes easier to beat once the player has experienced the battle a few times. It does not have overly complex movements or mechanisms, so it is easy for seasoned players. Characters such as Ganyu, Keqing, Venti, Kazuha, Xiao, and Yae Miko as well.
I prefer using a whole team since I do repeated runs one after another. Also, only Noelle can heal and provide shields at the same time, which is excellent for balanced solo gameplay.
Conclusion
The Oceanid is one of the easiest bosses since all of the attacks are pretty straightforward. Wave after wave of Hydro mimic, coupled with sinking platforms. Unfortunately, one-shotting this boss is impossible but dealing steady damage at minimum risk is an option for well-equipped teams.
I barely lose health with the team I usually take, but for newer players, rather than focusing on a perfect run, focus on clearing the boss with minimum casualties. The most important thing to remember is never to attack directly.
I enjoy defeating this boss, not only because it gives me the rewards I need for the character ascensions but also tests my patience with the swarm of Hydro mimics. T_T
- Genshin Impact Dragon of Vendure Guide - June 25, 2023
- Algorithm of Semi-Intransient Matrix Guide - June 13, 2023
- Genshin Impact Best Fan Theories - March 29, 2023