
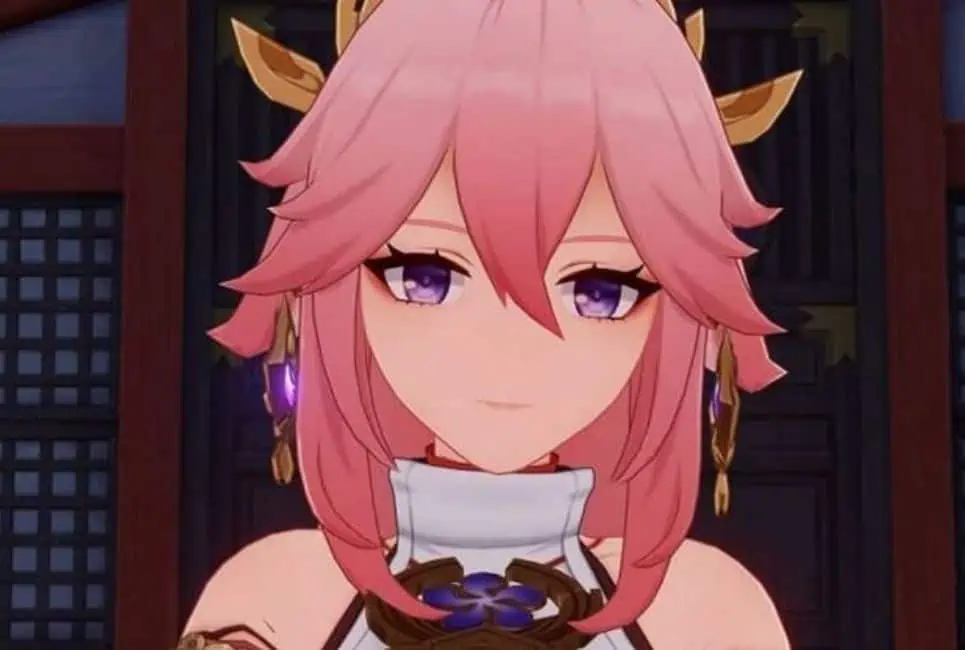
Yae Miko hails from Inazuma and is a cunning lady of many faces. Whether acting as head shrine maiden of the Grand Narukami Shrine, as editor-in-chief for Yae Publishing House’s many light novels, or as familiar to the enigmatic Raiden Shogun, her whims are a mystery to the many people that she meets. Yet despite her profound wisdom and intimidating beauty, her impulsive whims follow a much simpler goal than the public gives her credit for.
The Lady Guuji Yae, otherwise known as Yae Miko, is the third 5-Star Electro character to be introduced in Genshin Impact. Like many Genshin characters before her, she has an exceptionally unique playstyle that’s designed around her sly personality.
If you’re keen on investing in her, then you’ve come to the right place, as in this Yae Miko guide, I am going to show you the best way to optimize Yae Miko’s gameplay, as well as the various possible builds you can try for her.
Should You Roll for Yae Miko?

Yae Miko is a solid Electro unit that is designed as both a main and sub-DPS, meaning that she isn’t obligated to remain on the field for long to dish out damage. Her niche benefits include Elemental Mastery and Critical Rate, and as a catalyst user, she has easy access to the Electro element, similar to Lisa. 5-Star characters rarely end up being bad, and Yae Miko is no exception.
Some caveats to her include low defense as well as having among the costliest Elemental Bursts in the game. If you think that her attributes fit into a gap in your character roster and that you can make up for her downsides, then you won’t regret rolling for Yae Miko.
Materials Needed for Yae Miko
Below is a list of materials needed to completely max out Yae Miko’s stats and talents:
Materials to Reach Level 90

- Mora – 2092530
- Sea Ganoderma – 168
- Hero’s Wit – 419
- Vajrada Amethyst Sliver – 1
- Vajrada Amethyst Fragment – 9
- Vajrada Amethyst Chunk – 9
- Vajrada Amethyst Gemstone – 6
- Old Handguard – 18
- Kageuchi Handguard – 30
- Famed Handguard – 36
- Dragonheir’s False Fin – 46
Talent Level-Up
- Mora – 4957500
- Crown of Insight – 3
- Teachings of Light – 9
- Guide to Light – 63
- Philosophies of Light – 114
- Old Handguard – 18
- Kageuchi Handguard – 66
- Famed Handguard – 93
- The Meaning of Aeons -18
Among this list, there will be a few rare items you will need including:
Crown of Insight

A special resource that is only obtainable from premium events in Genshin Impact.
Dragonheir’s False Fin

This item is obtainable from the Bathysmal Vishap Herd boss. To unlock the boss fight, you’ll need to complete a lengthy questline, which also involves unlocking and completing the Enkanomiya region.
Enkanomiya can be reached by completing the following quests:
- Archon Quest Chapter 2: Act 3 – Omnipresence Over Mortals
- World Quest: The Moon-Bathed Deep
After this, a new quest called The Still Water’s Flow will become available, leading you to Enkanomiya.
The Meaning of Aeons

The Meaning of Aoens is a weekly resource that drops from Magatsu Mitake, Narukami no Mikoto (Raiden Shogun boss). To unlock this boss fight, you will have to complete the following quests:
- Archon Quest Chapter 2: Act 3 – Omnipresence Over Mortals.
- Imperatrix Umbrosa Chapter: Act 2 – Transient Dreams. (Raiden Shogun story)
Philosophies of Light

Yae Miko’s Character Talent material, Philosophies of Light, can be found from the Violet Court domain in Inazuma.
Keep in mind that this material will only drop on Wednesday, Saturday, and Sunday.
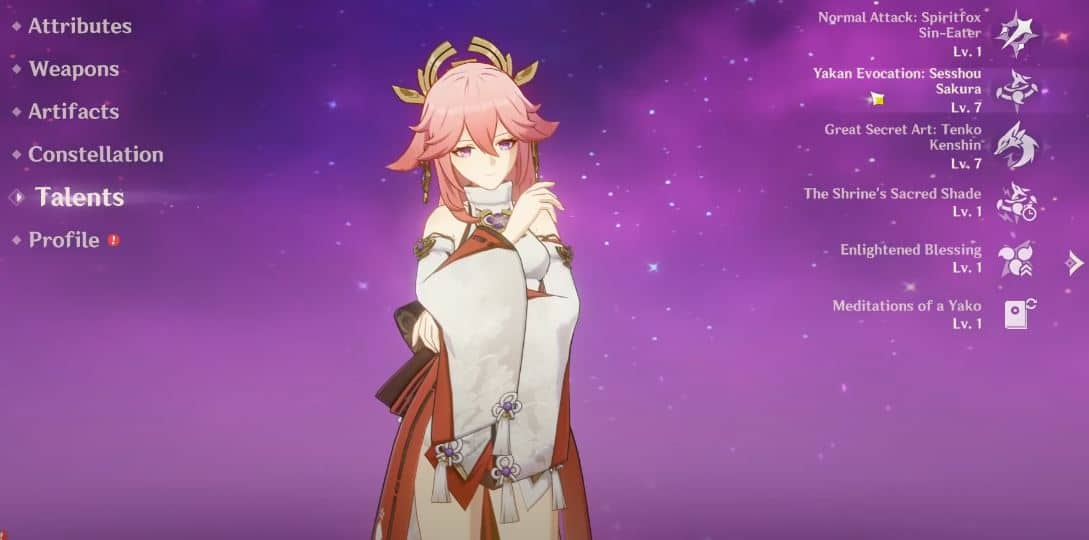
Overview of Yae Miko’s Elemental Skill and Elemental Burst
Yae Miko has quite an unconventional playstyle that may confuse you if you’re just jumping into her.
Her Elemental Skill, Sesshou Sakura, summons a fox-like totem that deals periodic Electro Damage to any enemies in its vicinity. Up to three totems can be summoned at any one time. To accommodate for this, Yae Miko can also hold up to three charges of her Skill. Furthermore, when other totems are nearby, these totems will also level up for a maximum of three times.
For her Elemental Burst, Tenko Keshin, Yae Miko will summon a lightning strike that deals AoE Electro damage. Any existing totems will be sacrificed by this Burst, adding an additional lightning strike per totem sacrificed.
Thanks to Yae Miko’s Passive Talent, The Shrine’s Sacred Shade, each totem sacrificed by Yae’s Burst will replenish one charge of her Skill. This means that should you sacrifice any of Yae’s totems with her Burst, you can easily set those totems up again.
Breaking Down Yae Miko’s Playstyle
With the previous information in mind, we can come to an idea of how Yae Miko is meant to be played.
First of all, her totems perform at their best when their level is maximized. Each summoned totem will deal up to five Electro hits, so you will want to get the most damage out of each totem. This can be done by using all three charges of Yae Miko’s Skill in one quick flow, all while ensuring that these totems stand closely together.
To maximize her Elemental Burst damage, you will want to make sure that all three totems are active on the field before letting it rip. This allows Yae Miko to rain down a total of four hits per Burst based on the totems sacrificed.
You may have noticed that there is a conflict in goals between her Skill and Burst. While Yae wants to maximize the damage and number of hits that her totems deal, her Burst also works to prematurely destroy them whenever it becomes available. So how do you match these two goals together? I had some trouble figuring this out, but after some testing around, the solution turned out to be pretty simple.
- For now, let’s assume you have an Elemental Burst at the ready. Have Yae Miko use her Skill three times to summon her totems into battle.
- Immediately execute her Elemental Burst, which destroys these totems and grants the maximum four hits of damage.
- With your Elemental Skill charges now replenished, summon the three totems again and have them run their total duration while your Burst is on cooldown. As this is happening, you can switch to other characters and play as you see fit.
- Repeat Step 1 once Yae Miko’s Elemental Burst cooldown ends.
As you can see, contrary to her unusual moveset, you can use Yae Miko in a very consistent manner by following this simple damage rotation. In essence, the sequence goes Skill (3x) > Burst > Skill (3x), and you won’t have to stray too far from this so long as you can fill her Burst gauge in time.
Best Weapons for Yae Miko
Yae Miko is one of the more flexible characters in Genshin when it comes to weapons. Whether she’s relying on Crit, Energy Recharge, or Elemental Mastery, most offensive stats or bonuses will work to her benefit in some form. That being said, there are still some weapons that are a cut above the rest.
Kagura’s Verity (5-Star)

- 608 ATK
- 66.2% Crit DMG
Passive – Gains the Kagura Dance effect when using an Elemental Skill, causing the Elemental Skill DMG of the character wielding this weapon to increase by 12% for 16s. Max 3 Stacks. This character will gain 12% All Elemental DMG Bonus when they possess 3 stacks.
This is Yae Miko’s signature weapon and also the best one for her. Designed specifically for her playstyle, Kagura’s Verity will easily reach its full buff potential whenever Yae places all three of her totems on the field.
These buffs can persist permanently if she is played right. Since all of Yae’s attacks use the Electro element, the 12% Elemental DMG bonus will also naturally apply to both her Skill and Burst.
The Widsith (4-Star)
- 510 ATK
- 55.1% Crit DMG
Passive – When a character takes the field, they will gain a random theme song for 10s. This can only occur once every 30s. Recitative: ATK is increased by 60%. Aria: Increases all Elemental DMG by 48%. Interlude: Elemental Mastery is increased by 240.
In terms of 4-Star choices, The Widsith provides Yae Miko with a randomized buff every 30 seconds. Thanks to her Elemental Mastery passive, she’ll benefit from all three possible buffs.
At first glance, The Widsith seems to have incredible utility, but keep in mind that she’ll have 20 seconds of downtime per use, so the weapon loses its luster when it comes to prolonged fights.
Hakushin Ring (Free-to-Play 4-Star)
- 565 ATK
- 30.6% Energy Recharge
Passive – After the character equipped with this weapon triggers an Electro elemental reaction, nearby party members of an Elemental Type involved in the elemental reaction receive a 10% Elemental DMG Bonus for their element, lasting 6s. Elemental Bonuses gained in this way cannot be stacked.
If you haven’t been lucky on the Wish banners, the Hakushin Ring can be a solid F2P option. It’s a craftable weapon with a recipe obtainable from the quest named ‘Yougou Cleansing’. This is part of a questline that begins with ‘A Strange Story in Konda’.
The Hakushin Ring’s main stat focuses on Energy Recharge, which is highly valuable considering Yae Miko’s obscene Burst cost of 90 Energy. As a character that consistently deals damage over time, she can also easily trigger Electro Elemental Reactions for a bonus to her Elemental DMG.
Best Artifacts for Yae Miko
2-Piece Thundering Fury and 2-Piece Gladiator’s Finale

The 2-Piece Thundering Fury grants Yae Miko a 15% Electro DMG bonus, while the 2-Piece Gladiator’s Finale adds 18% ATK.
This is a straightforward set that focuses on damage without any conditions for you to pay attention to. Thus, this is the recommended set if you aren’t sure about how you’d like to build Yae Miko.
4-Piece Thundersoother
The Thundersoother set has the highest potential damage on enemies affected by Electro, which is an easy condition to achieve with Yae Miko.
However, keep in mind that Elemental Reactions will remove the Electro status from enemies, so this is only a viable set for teams that don’t rely much on reactions.
4-Piece Emblem of Severed Fate
A set that focuses on Energy Recharge. As Yae Miko’s Burst cost is among the highest in the game, the 20% bonus to Energy Recharge here is no slouch at all.
The 4-Piece bonus of this set also increases Elemental Burst DMG by 25%, up to a maximum of 75% bonus DMG.
Before we move on, let’s also go through the ideal main stats and sub-stats that you’ll want in Yae Miko’s Artifacts.
Main Stats
- Flower of Life – HP
- Plume of Death – ATK
- Sands of Eon – Energy Recharge%
- Goblet of Eonothem – Electro DMG%
- Circlet of Logos – Crit DMG%
Sub-stats (in order of importance)
Crit DMG%, Crit Rate%, ATK%, Elemental Mastery, Energy Recharge %
Recommended Allies
As I’ve mentioned earlier, Yae Miko is a powerful DPS thanks to her ability to loop massive damage over time consistently and reliably. However, her damage output becomes tricky if she cannot get her Elemental Burst up in time.
To make her Burst more accessible, I recommend having an additional Electro character to take advantage of the Electro Resonance bonus. This bonus increases the rate of Energy obtained whenever you land an Electro Elemental Reaction.
I’ll also include some additional support characters with Yae in mind.
Raiden Shogun (5-Star Electro)

It should come as no surprise that the Electro Archon herself is a great fit for her closest familiar. Raiden Shogun’s Burst is unique in that she can replenish Yae Miko’s Energy as she attacks enemies.
Meanwhile, Yae Miko’s high Burst cost has the effect of improving the number of Resolve stacks the Raiden Shogun can earn – thus boosting Raiden’s Burst damage. The two are like peas in a pod and make an easy recommendation should you have both characters.
Fischl (4-Star Electro)

For those who don’t have Raiden Shogun, Fischl is a great free-to-play option (assuming you got her from the Unreconciled Stars event).
Besides having decent sub-DPS damage, she is one of the best four-stars when it comes to generating Energy.
Fischl’s Elemental Burst summons a crow named Oz that creates Elemental particles whenever he attacks. When paired with Electro Resonance.
Albedo (5-Star Geo)

Albedo has low cooldowns and costs across both his Elemental Skill and Burst. This makes him a highly effective Geo unit that’s capable of creating Crystallize reactions easily, thus providing shielded protection to Yae Miko.
Beyond that, however, his Burt also grants all nearby party members 125 Elemental Mastery for 10 seconds. This is an 18.25% increase to the damage dealt by Yae Miko’s totems.
Sucrose (4-Star Anemo)

As an Anemo character, Sucrose can inflict Elemental RES debuffs with the Viridescent Venerer set. She also synergizes well with Yae Miko thanks to having two ways to buff her Elemental Mastery.
Swirl reactions provide 50 Elemental Mastery while her Burst grants Elemental Mastery based on 20% of her own Elemental Mastery.
FAQs
Question: Do Yae Miko’s Sesshou Sakura totems snapshot?
Answer: No, they do not. Snapshotting in video games refers to when damage buffs are applied to a skill and linger as long as the skill remains active. However, the damage of Yae Miko’s totems shifts dynamically depending on Yae Miko’s current status. If Yae Miko is buffed, for example, existing totems will do more damage, and if these buffs expire on her, they will in turn do less damage.
Question: Can I make a Yae Miko Elemental Mastery build?
Answer: An Elemental Mastery build can work on Yae Miko but it is ultimately a DPS loss. Elemental Mastery will boost her totem damage in addition to offering powerful Elemental Reactions, but her Elemental Burst will lose out on a significant amount of damage that often isn’t worth it. I don’t recommend going all-in on Elemental Mastery. Only do so if you have a particular type of playstyle in mind.
Question: Does Yae Miko’s Elemental Skill have invincibility?
Answer: No, it does not. Although Yae Miko may seem to move as if she’s dodging whenever you use her Skill, it does not have any invincibility frames like a regular dodge. To ensure that she can safely place her totems down, consider using shield-type characters to protect her.
Conclusion
So Yae or nay? Amongst Electro characters, Yae Miko certainly stands at the near top, and it’s hard to say no to a Catalyst user that has easy access to the Electro element.
Like the crafty fox that she is, Yae Miko’s playstyle can be a handful at first. Her Elemental Mastery passive and high Burst cost also serve to throw people for a loop when it comes to potential builds. Despite this, Yae Miko has a flow that’s easy to follow once you smooth out the rough edges.
Compared to other characters, she also boasts plenty of viable avenues when it comes to weapon choices and Artifact builds, making her a flexible character that isn’t punished too hard if you don’t have the right equipment lying around.
- Aether Genshin Impact Guide - May 14, 2022
- Razor Genshin Impact Guide - May 13, 2022
- The Tree Who Stands Alone Guide: Genshin Impact - May 10, 2022