Genshin Impact started as a normal casual RPG game, and with every update, the game introduced the players to new features. While some were quality of life changes, others shifted the game’s flow.
In my experience, Gadgets were a really interesting addition to the game because they allowed players to optimize their gameplay. Simply put, Gadgets made many things easier for the players, whether to find an Anemoculi or shoot fireworks in the air. They are amazing on their own and bring a unique spice to the game that brightens up Genshin Impact’s wholesome experience.
As the game progressed with updates, Gadgets like the Kamera and Launch tube were introduced that players cherish to this day. I’ve created an amazing list to share more about the wonderful Gadgets we have in the game.
I’ve been using Gadgets daily and advising players to know their gist. Rather than grinding hard on the content, sometimes opting for a simple route is easy. In this Genshin Impact Gadgets guide, I will go through all the Gadgets you can obtain in the game and put my short remarks on them. Sit back and scroll down to learn more about amazing Gadgets.
Gadgets, What Are They?
In short, Gadgets are equipment you can use to activate a buff or improve your gameplay experience. You may find some Gadgets more valuable than others, whereas some may be for a niche role. There weren’t enough Gadgets in the beginning, but as the game progressed, we came across various Gadgets.
Initially, they were event-limited, but soon enough, they were introduced as permanent items to the players that they could benefit from. I love these little additions to the game because you can rejoice in the moments again with the Gadgets and reuse them while playing a co-op game with your friends.
Although Gadgets are wonderful items you can equip in the game, you need to know their precise function to use the most. No doubt, you can craft some Gadgets in any quantity, but you should be wary of the amount you need.
For now, I think it’s better to discuss the limitations of Gadgets once you know their types and the crux of their functions. I’ll return to this in the questions section, where you will better understand my viewpoint.
Gadgets
Let’s review the numerous Gadgets we have in the game and summarize their functions. I’ve listed the sources you can obtain and craft them at the Crafting table. A disclaimer that you can get some other Gadgets from quests and equip them whenever needed.
There are a variety of Gadgets that you will obtain throughout your journey. Sometimes there is a souvenir that you can only get from Genshin Impact events. But, a few updates back, the game offered some of the Gadgets in the shop for purchase, and players can obtain them now.
Don’t worry, they are not very expensive or require you to spend primogems. All you need is mora to purchase them from the merchants in the cities, and after that, you can enjoy the time with your new Gadgets.
Resonance Stones

Resonance Stones are consumable gadgets that you can obtain after reaching a certain reputation level in the city reputation systems. As you reach the required reputation level, you will get Instructions to craft them.
Now, as you will equip them and use them, you will notice a blue area highlighted on the map where you can find the required Oculi. The area’s color won’t change for whichever type of resonance stone you have equipped or are using.
After you are in the vicinity of the Oculi, a white marker will appear on your screen indicating the location of the Resonance stone. Once you come in further proximity, an icon will appear on the map that will show the location of the Oculi, and the highlighted area will disappear.
Once you have successfully used the Gadget, the item will be consumed. Here are the three types of Resonance stones that are available in the game, and I’ve mentioned the level you need in their reputation system to acquire them.
- Anemoculus Resonance Stone – 65 Anemoculi – Level 2 in Mondstadt
- Geoculus Resonance Stone – 131 Geoculi – Level 2 in Liyue
- Electroculus Resonance Stone – 181 Electroculi – Level 8 in Inazuma
Although, you can easily acquire the blueprints for Anemoclus and Geoculus resonance stone earlier in the game. Acquiring the Electroculus resonance stone may take you some time.
I remember I had collected most of them when I got to the reputation system and had only one Electroculus left to collect.
Treasure Compass

There are currently three types of Treasure compasses that you can obtain in the game. These compasses help you find nearby chests in a specific region, and every area has its own Treasure compass.
If there is a chest nearby, then you will see a golden wave-like animation going in a particular direction. It will mean that you can find a chest in that direction, and the Gadget will enter a cooldown of 30 seconds.
Otherwise, if no chests are detected nearby, then the cooldown will be five seconds only. Make sure to use your elemental sight to find chests that are hiding in the environment.
Wind Catcher
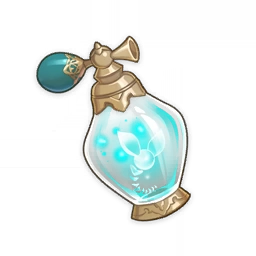
You can reuse this Gadget to create a wind current for 9 seconds and recharge it with the help of Anemograna with a cap of 5 charges at once. So far, I’ve not used this Gadget even once because I was lucky enough to get Venti and use his elemental skill for exploration.
A workaround for this Gadget is to pay attention to your surroundings and notice the things you can use to achieve the same goal. If you see a chest in a wind barrier, some wind spirits, totem, or a wall structure may be nearby to help you.
Portable Waypoint
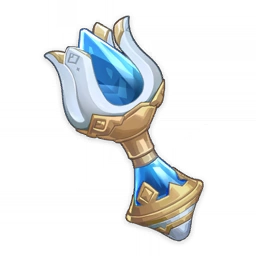
A craftable waypoint that you can place at a location for seven days. The previous one will disappear if you choose to deploy another at a different location. I prefer to use it near the wolf of the north challenge as I really don’t want to cover a distance towards the challenge.
Earlier, the game didn’t have a teleport system to the event places or some locations, but this rarely had a use after their introduction unless you wanted to farm unusual hilichurl and place a portable waypoint at a particular site.
Fishing Rods
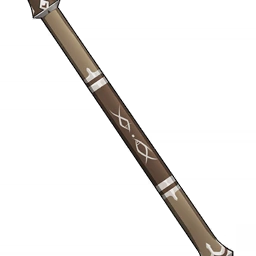
Fishing Rods help you catch a variety of fish from dedicated fishing spots. When you catch the fish, you will notice a tension zone that will form as a status bar, and you have to keep a pillar icon in that. I always recommend focusing on the status bar than the fishing wire, as that’s just for eye candy.
You need to be efficient in catching the fish, which can only be obtained after you maintain a perfect tension zone. Some fish are tricky to catch but not impossible if you focus a little.
Here are the types of fishing rods that you can obtain in the game, and I’ve mentioned the regions where you can get them.
- Narukawa Ukai: Inazuma Fishing Association
- Wishmaker: Liyue Fishing Association
- Wilderness Rod: You will obtain a basic type of fishing rod during the exploding population world quest.
- Windtangler: Mondstadt Fishing association
- Moonstinger: A unique kind of fishing rod that was available during the Over the moon event quest.
Adepti Seeker’s Stove
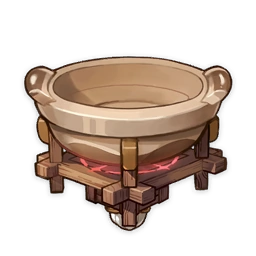
With a cooldown of 5 minutes, you can use this stove for cooking food out in the wild, thanks to its portable nature. The stove will disappear once the cooldown period has passed or if you initiate a fight near it.
Also, I rarely use this Gadget because whenever I have to cook some food, I visit a nearby food store and cook on a pot there.
NRE (Menu 30)

By far one of my most used Gadgets as it features two slots where you can put a recovery dish and a revival dish. Though you cannot use this in the spiral abyss, this Gadget is of immense help in the overworld.
From the diagram’s description, you get to know that NRE stands for Nutrition, Ready-to-eat, which is really what this Gadget does. My recommended dishes are Sweet Madame for recovery and Grilled Tiger Fish for revival.
It may seem like other dishes have better healing, but you have to keep the concept of fullness in mind and choose the dishes accordingly.
Warming Bottle

A warming bottle is a gadget that you can use that lasts 5 seconds and helps to remove sheer cold. This Gadget is more suitable for Dragonspine, where the character accumulates sheer cold after venturing out in the cold for long enough.
If you don’t want to use this Gadget often, then have a pyro character like Amber in your team to light up heat sources or find heat beacons.
Kamera
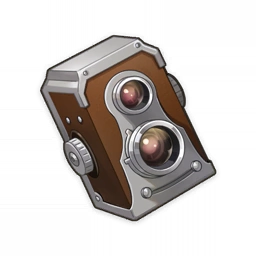
With some limitations in domains and other places like the spiral abyss, you can use this Gadget to capture images in the game. Once you capture the image, a save option will appear on the screen where you can choose to save this option in the in-game “Screenshot” folder.
By now, you must have noticed my UID or team members’ UID in some of our articles, and that’s how we take pictures! But remember that you cannot customize image settings with this Gadget as it’s more like a quick shot capture. You need to access the camera from the Paimon menu for the camera angle and other settings.
Special Kamera
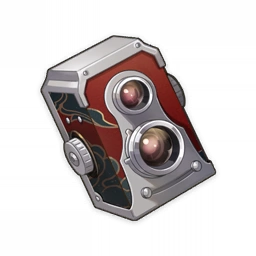
Like the Kamera, this device can also capture the images with a twist of a golden border added to them. I prefer not to use this one because it rarely happens that I need a border in my images and have it crystal clear. I’d rather advise you to avoid this Gadget and use the normal Kamera.
Serenitea Pot

Known by many names, the Serenitea pot is a housing system introduced in the game where players can create their own homes and put up structures they desire. Players will be greeted by the Teapot spirit Tubby and interact with it to access a variety of tasks or just know more about the system in general.
The best thing about the Serenitea pot is that you can obtain plenty of resources in a week with the realm currency. I usually collect them and exchange them for Mora, Hero’s wit, or artifacts’ EXP materials.
Parametric Transformer

A device that can transmute 150 materials fed to it into rewards of varying rarity. It has a cooldown of 7 days before you can reuse it. You can obtain a variety of rewards from this Gadget and invest them in your characters.
If you want to know more about it, we have an excellent guide on it on the site. I use this Gadget once a week and get something valuable in return for the mint plants I feed.
Memento Lens

You can obtain a gadget on the earth kitsune statue to reveal hidden chests and past events or get some clues related to the task at hand. The general notion is that it helps you to see what’s somewhat hidden in plain sight and go behind those places to discover or dispel items’ camouflage.
In the Inazuma region, you will often find yourself using this Gadget and solving mysteries surrounding the region in the quests over there.
Seed Dispensary

It’s a decent gadget that you can equip to collect seeds for the plants you need for your Serenitea pot, and the box can hold a maximum of 20 seeds of each plant at a time. You can use it to collect seeds and plants in your Serenitea pot garden. I’ve seen some beautiful designs on Genshin Impacts’s pages.
Peculiar Pinion

You will obtain this Gadget from a world quest, Octave of the Maushio. It can help you activate mysterious carvings with a cooldown of 3 seconds. Just go near the carvings, activate the Gadget, and you can go beside them or dispel the camouflage; not exactly like the Memento lens, but a similar way of working.
Trust me; there was a time when this Gadget was available on other servers, not in Asia, and I was waiting for its launch. I had completed a lot of things on the Tsurumi Island, and once I was able to get this Gadget, I was able to finalize my exploration.
Omni-Ubiquity Net
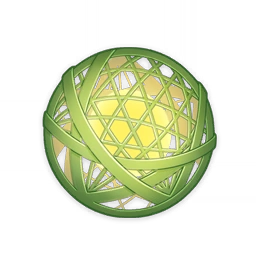
More like a Pokeball, I’d say. There are a lot of animals in the wild, and you can use this Gadget to catch them. With a cooldown of 10 seconds, you can use this Gadget to capture the animals where the Gadget will replace your elemental skill. There are some details to this Gadget, and I think that’s better suited for another guide.
Lumenstone Adjuvant
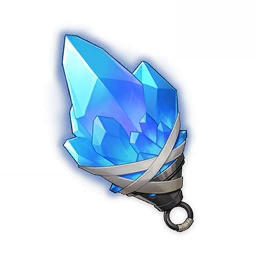
During the world quest, Chasm spelunkers, you will obtain this Gadget that can illuminate the area around you and help remove oozing concretions. While exploring the underground Chasm, you will use this Gadget to perform various tasks and switch to it every once in a while.
Until now, I found exploring the Chasm a bit difficult, and you must have this equipment with you most of the time. I’d highly recommend you to level up this equipment and improve its underlying effects to get additional buffs.
Red Feather Fan

A piece of equipment that can help to boost your gliding speed by 30 % for 30 seconds with a cooldown of 100-second. Once you use it, you will obtain the movement speed buff, suitable enough to glide through more considerable distances with some constraints on its use.
Souvenirs
You can call these Gadgets mementos or souvenirs. The key difference between these and normal ones is that these are events obtained. After participating in an event, these Gadgets are obtainable after completing some requirements and will be permanent Gadgets in your inventory.
A major pro of these Gadgets is that you can relive the moments or show your friends the items you received from the events. In other words, you can say they are like a trophy for your dedication to the game and show how long you’ve been playing it.
That’s my personal opinion, and I think it really holds its value when you show a friend that you’ve collected a lot of things in the game and have quite an experience with the same.
Launch Tube

An event gadget was launched during the Fleeting colors in Flight event to help complete smelting challenges in the game to create and modify the fireworks. It can be used to launch fireworks in the air with beautiful and vibrant effects.
Floral Zither
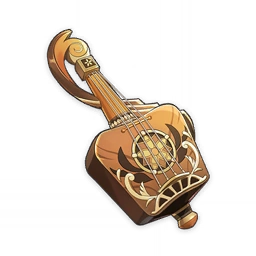
A gadget that was introduced in the Tuned to the World’s Sounds event and is currently available for purchase from Granny Shan in Liyue harbor. This equipment lets you play numerous music tones on your touch display or keyboard, where notes are mapped to the keys.
Shiki Koshou

You can say it’s not a pure Gadget but like a souvenir that will hover along with you and disappear in the combat. It was obtainable from the Labyrinth warriors event and acted as a temporary partner in your journey.
Windsong Lyre

A musical instrument that was obtainable through the Invitation of the Windblume event and is currently available for purchase from Marjorie for 150K mora in the City of Mondstadt. The keys will be mapped to music notes, and you can produce beautiful tones with the help of this Gadget.
Windblume Festival Commemorative Balloon

A balloon obtained during the Invitation of the Windblume event is currently available for purchase from Marjorie for 150K mora in Mondstadt. You can release a balloon with a cooldown of 5 seconds, but it cannot be used in some specific places like the domain or indoors.
Wind-Blessed Harpastum
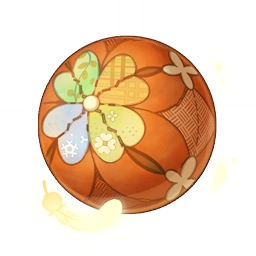
It literally is a volleyball that was obtainable during the Midsummer island adventure event and is currently available for purchase from Marjorie in Mondstadt for 150K mora. It will replace the player’s elemental skill and be able to throw it in a direction by aiming it either via tap or hold.
Mini Seelies

Players were able to obtain one of the listed seelies to accompany them during the lost riches event. In the lost riches event, you had to find Iron coins that could be exchanged for rewards, and there were plenty of rewards for completing the challenges. I remember it was a time-bounded event that ran for a few days and was fun to complete.
- Mini Seelie: Viola – Light violet color
- Mini Seelie: Rose – Pinkish red color
- Mini Seelie: Dayflower – Sky blue color
- Mini Seelie: Curcuma – Golden yellow color
Endora

Another showcase gadget you can equip yourself with during your journey was obtainable at the Wishful drops event. Similar to Shiki Koshou, you can equip Endora to accompany you while using your gadget slot in the game.
Waverider Repair Toolbox
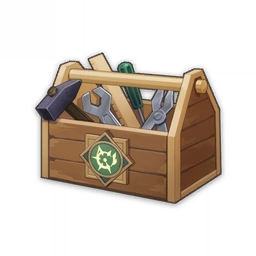
The players used a toolbox obtained during the Midsummer island adventure event to repair the wave rider. With a cooldown of 90 seconds, it can restore 50 % of a waverider’s structural wholeness.
Limited-Time Event
These Gadgets are also event-exclusive and you may not be able to retain most of them after the event. These Gadgets can be crafted or obtained from world quests and may expire after the event’s duration.
Although the events have passed already, we may likely see their re-runs in the future, as the same happened with Theatre Mechanics. But, it’s a speculation from my end, and I hope we get to rejoice in the events once again.
Bokuso Box

Bokuso box was obtainable during the Three realms gateway offering event in the Enkanomiya region. It helped remove the darkness around specific items. It acted more like a protective gadget that resisted the corrosion engulfing the area.
Bokuso box had a crucial role in exploring parts of Enkanomiya again with various uses in numerous tasks. Bokuso box was the key part of an event in Enkanomiya exploration and offered multiple rewards for leveling it up. You can say that the players had to re-explore the region again to get some rewards and solve a few mysteries surrounding the same.
Midsummer Island Adventure Event Items

In this event, balloon-type items dealt with pyro damage explosion and were used in various tasks. The players were able to interact with these items to complete the challenges and obtain rewards in return.
I’ve listed the items and mentioned the type of items you were able to interact with in the event. Personally, I loved the event because it featured a separate island, and players were able to meet with characters from Mondstadt.
- Hot Pod – small area
- Floaty Splody – wide area
- Straight Shooter – potent pyro damage
Ubiquity Net

A special type of Ubiquity net used during the Bantan sango case files: the warrior dog event and has a cooldown of 5 seconds where it replaced elemental skill to capture. Gadgets like this one replace the players’ elemental skills with other functions and use them instead.
Kurious Kamera
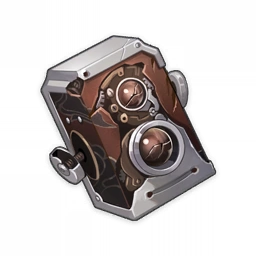
The players used a special type of Kurious Kamera during the Five flushes of fortune event, where players had to capture photos. It had no cooldown, and players could capture the images related to the event and even exchange them during the event.
Treasure-Seeking Seelie

A type of seelie that was available during the lost riches event could be used to find the presence of Iron coins in the area. With a cooldown of 30 seconds, players could locate the iron coins in dedicated areas, producing sound effects when they came into proximity to the coins.
Inquisitive Endora

A Gadget that was available during the Wishful drops event and helped capture hydro mimics or Oceanid creatures where equipping this Gadget replaced the player’s elemental skill.
Ayesha’s Chaos Prospector
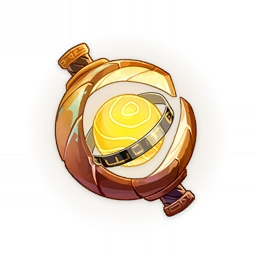
A gadget obtained from the Shadow of the ancients event was given by an Non-playable character named Ayesha, who belonged to the Sumeru region. It was used to search for monsters in the area and help complete event-specific tasks.
Gadget Questions
Now you know what kind of Gadgets are in the game and have gone through them briefly. To complement your knowledge a bit more, let’s go through some questions that may help you to understand the core concept in a better way.
Question: What are some precautions I should take while crafting Gadgets?
Answer: I suggest you avoid creating a bunch of them in excess because they will take unnecessary space in your inventory and won’t be used again. Let’s understand this with an example of the Anemo resonance stone. Suppose you are left to collect the last Anemoculi and have created five Anemo resonance stones.
Sure, you will be able to utilize one of them in collecting the remaining Anemoculus. Still, the rest of them will take space in your inventory, and you won’t be able to destroy them either. It happened to me when I created a bunch of Anemo resonance stones and Geo resonance stones, and now I cannot destroy them. So, I’d advise you to avoid a naive mistake and save your precious resources.
Question: Which Gadgets do you use the most daily?
Answer: These days, I’ve been using Kamera and NRE menu to capture a few pictures and replenish my characters’ health. Generally, whenever I’m in a middle of a fight and have a gut feeling that some awesome shot will come, then I instantly capture it with the help of Kamera. I have used Kamera a lot of time while playing Childe because of how beautiful his riptide animations are in the game. As for the NRE menu, I’ve cooked hundreds of sweet madame to use them whenever my characters’ health goes to severe levels.
Question: Which feature do you think we need in the game regarding the Gadgets?
Answer: I would love to have a Gadget wheel from where the player can switch to another type of Gadget. It wasn’t much of a problem until Chasm launched because there were many things to do in that region. While one side, we had to use Lumenstone Adjuvant. On another side, you would need the NRE menu in combat. It would be highly beneficial for the players if they could get a Gadget wheel because it will simplify the exploration and use multiple gadgets frequently.
Another instance where I found the need for a Gadget wheel was when I was hunting for chests in the regions. I had to switch back and forth between Treasure compass and the NRE menu and felt the need for a feature where we could instantly change gadgets. I hope the developers will introduce a feature like this in the game, and I hope that it’s not another gadget.
Gadgets, Closing Remarks
I’m sure as we progress through the game, Hoyoverse will introduce a variety of Gadgets in the game, and who knows, they may implement a Gadget wheel function. Am I eagerly waiting for the launch of a new region Sumeru and possibly another resonance stone? I must say, yes!
With new regions, we have to collect Oculi related to the same, and the game has resonance stones to make the process easier. If in the future, we come across Dendroculi, then we will likely have a Dendroculus resonance stone. But for now, it’s all a speculation that I can think of and hope so we get a Gadget wheel in the future.
Wrapping up the Gadgets guide, I hope you learned about the various Gadgets we have in the game and now better understand their functionalities. To know more about Genshin Impact, I highly recommend you to check out other guides, and I’m sure you’d love the detail we’ve put in them.
Feel free to experiment with Gadgets like Kamera to click cool pictures or unique animation effects. If you manage to get one, post it on your social media and share it with your friends. That’s all for now!
- Genshin Impact Fontaine Region Guide - January 5, 2024
- Genshin Impact Wild Fairies of Erinnyes Guide - December 17, 2023
- Genshin Impact All Dendroculus Locations - December 12, 2023
