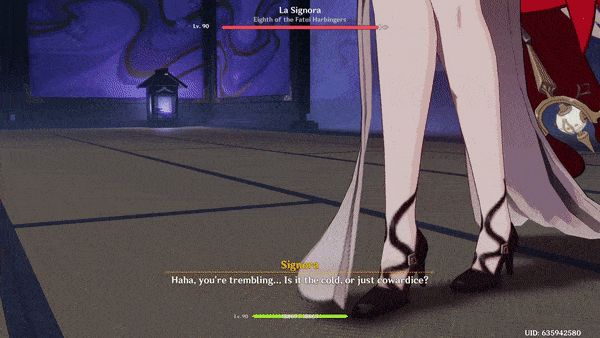
Signora is the 8th of the eleven Fatui Harbingers, her loyalty has been pledged to the Tsaritsa, and her enemies are shown little to no mercy. Signora carries herself in a very well respected (by lower-ranking Fatui members) sense; however, as a diplomat, she has done nothing but spark tension and unrest wherever she has gone in the world of Genshin Impact.
However, this is not a deal-breaker since this is the wish of the Tsaritsa. As she walks the lands of Teyvat, an air of sophistication follows her along with a trail of ice from her cruel nature, but when pushed to her limits, she reminds the world of Teyvat of her true self, The Crimson Witch of Flames.
A quick summary of what to expect in this Signora Genshin Impact Guide would be:
Who Signora is, and where to find her.
The movesets recommended team comps and rewards.
Lore and History, a few final words, and a brief FAQ session.
Who is Signora, her Lore, and History?
Before she became a Harbinger, Signora was just a regular girl living in the City of Mondstadt; she went by the name Rosalyne-Kruzchka Lohefalter. Although her origins and place of upbringing are unknown, we can confirm that she has been living in Teyvat for roughly 500 years. As a young maiden living in Mondstadt, she loved to sing; she eventually met a gallant young Knight of Favonius, Rostam.
Rostam and Signora spent their time together until Signora was accepted into the Sumeru Academia. As exciting as this endeavor was, I believe that it may have been a little sad since Rostam and Signora were in love. However, before Signora left to pursue her studies, Rostam gave her a Hydro timepiece to keep track of the time they spent apart.
This was one of the last interactions they had because although the timepiece marked the time they spent away from each other, due to the events of the Cataclysm, she would have no one to come back to.
As the events of the Cataclysm unfolded, the Knights of Favonius were called upon to protect Mondstadt; among their ranks was Rostam. As the Knights fought valiantly against the hordes of monsters and demons that ravaged Teyavt, the casualties accumulated rose, and eventually, Rostam lost his life as well. Upon returning from Sumeru (after the Cataclysm), Signora learns about the death of her beloved Rostam.
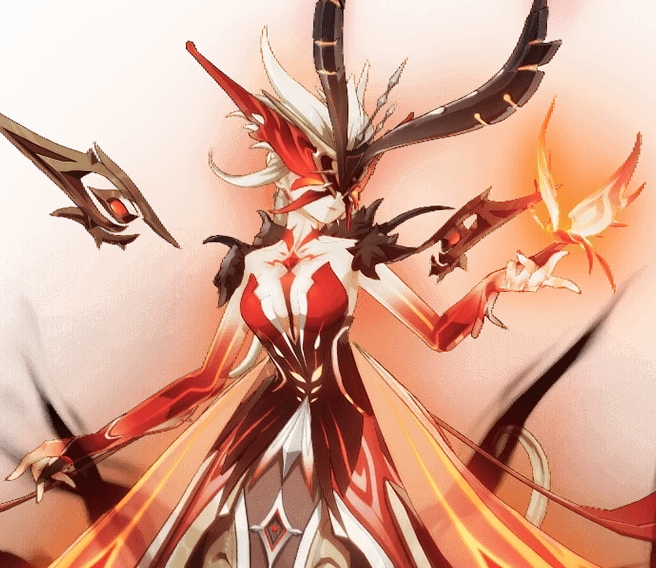
Drowning in grief, rage, and agony, Signora used an ancient art called “Liquid Fire” to transform her body into a Pyro entity. As she harnessed this new power, her body disfigured, she lost her beautiful features and became known as the Crimson With of Embers.
She used this raw Pyro power to enact justice and carry out vengeance against the monsters and demons that still roamed free. As she incinerated these monsters, leaving no room for remorse, the civilians that witnessed her actions grew fearful, and she was eventually an outcast.
Although her flames seared her enemies, they also inflicted damage on her. Before her flames can consume her, Pierro “The Jester,” number one of the Fatui Harbingers, saved Signora’s life and brought her before the Tsaritsa. The Tsaritsa bestowed a Cryo delusion upon Signora, not to amplify her abilities the way delusions usually work, but to suppress Signora’s Pyro.
She became number eight of the Fatui Harbingers, known as La Signora. As a Fatui Harbinger, she became a diplomat who traveled to other nations on behalf of the Tsaritsa. The Tsaritsa’s views on the events of the Cataclysm line up with that of Signora.
This common link and undeniable respect towards the Tsaritsa made Signora the fearful diplomat that she is today. However, she was not well-liked by the other Harbingers because her attitude and personality drew negative attention from her colleagues and enemies alike.
This bitter, cruel, and vindictive nature might have been a repercussion of losing her love, Rostam.
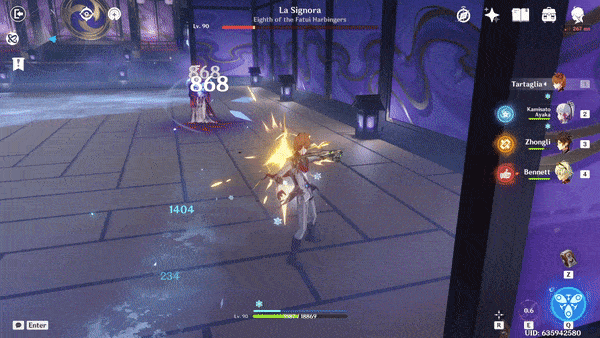
The Traveler first meets Signora during the final events of the final Archon Quest in Mondstadt. Signora confronts Venti before assaulting him and stealing his gnosis. Then the Traveler meets her again in the City of Liyue, where it is revealed that she used Tartaglia as a pawn to orchestrate an attack on Liyue before reaching a contract with Zhongli for his gnosis. However, the third and final time they met was at the Tenshukaku, in front of the Raiden Shogun.
The Traveler
In her quest for the Raiden Shoguns’ gnosis, Signora ended up before the Shogun, using her diplomatic stance and appearing ignorant of the actions carried out by the Fatui in the Inazuma region. She dismissed knowledge of the production and distribution of the delusions, causing strife between nations while taunting the Traveler.
The Traveler challenges Signora to a duel before the throne, where the Raiden Shogun approves. In an attempt to save her image, Signora accepts the duel, although she is reluctant. As the events of the battle unfold, players are first met with La Signora.
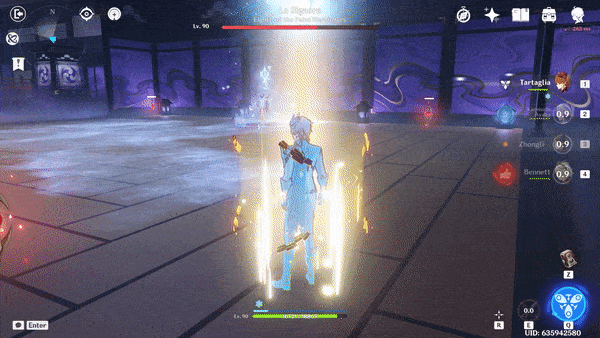
She uses Cryokinesis to deal damage to the player. As the battle progresses, she finds the delusion is holding her back. After deactivating the Cryo delusion, players encounter Signora’s proper form, The Crimson Witch of Embers.
She uses Pyrokinesis to give players a tough time and is eventually overpowered by the Traveler. Upon her defeat, Signora returns to her delusion form, and the Raiden Shogun approaches the now weak and hysteric Signora to carry out the stipulation of the duel.
Signora loses her calm persona as she knows that she is staring death in the face. Signora lunges forward in one final desperate attack to subdue the Raiden Shogun, but it is useless. As she is a woman of her word, Raiden Shogun executes Signora using the Musuo No Hitatachi. Signora’s body turned to ash as the Traveler and Paimon watched this event unfold in horror.
Signora begged for mercy during her final moments, and when her plea did not work, she resorted to threatening the Raiden Shogun. Signora vowed that her Fatui underlings would destroy Inazuma before turning her attention to the Traveler and Paimon to call them “Filthy Rats.” Upon hearing the news of her death, most of the lower-ranking Fatui were stunned and in grief, but a few remained in Inazuma to avenge her and cause turmoil.
However, some of the lower-ranking Harbingers wanted to take this opportunity to take her rank. Signora died while failing in her mission to take the gnosis from the Electro Archon. However, her efforts were in vain because the gnosis was already in the hands of her colleague Scaramouche.
Location
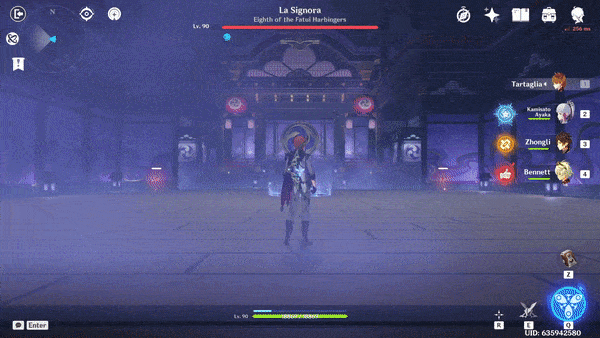
Signora can be found in the domain shown below; to unlock this domain, players must complete the final Archon Quest in Inazuma, “Omnipresence Over Mortals: Duel Before the Throne.”
Location on the map
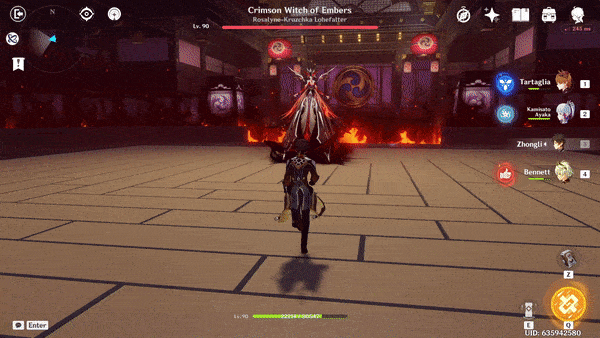
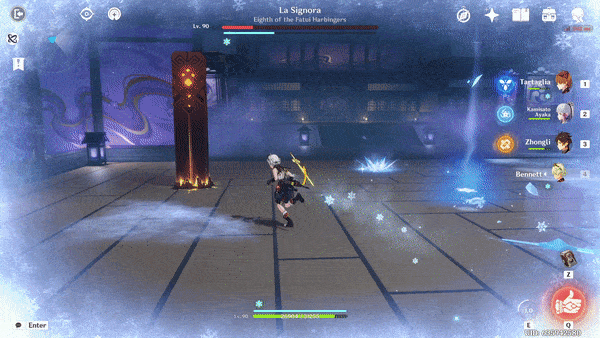
Signora in the game
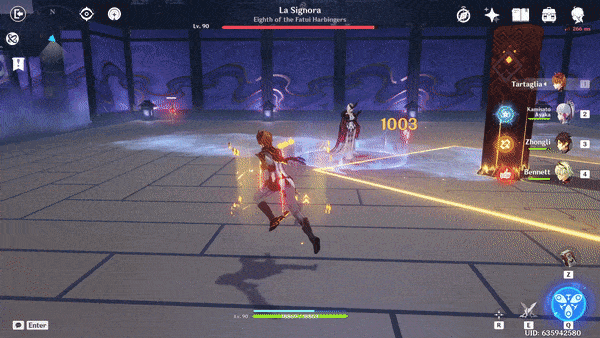
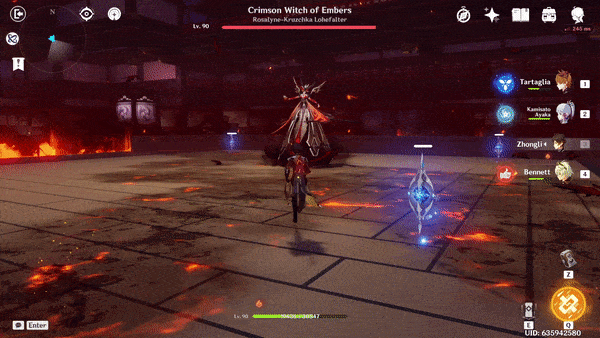
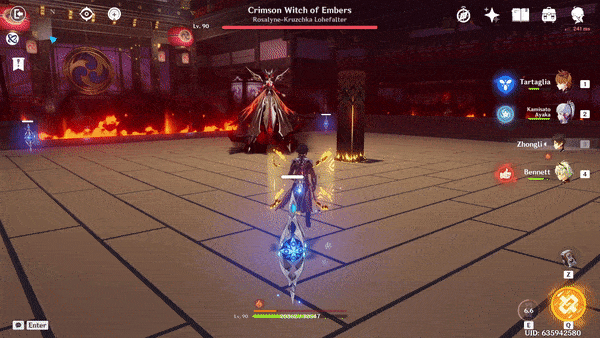
Attacks, Stages, and What to expect
Attacks
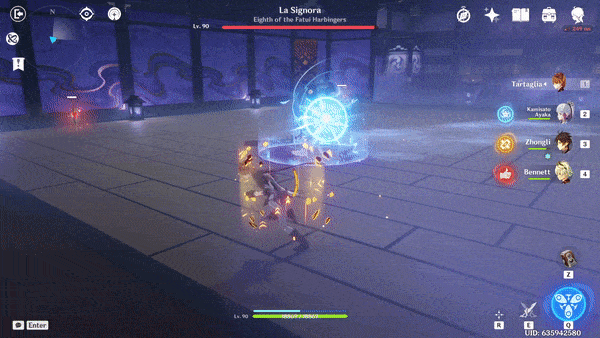
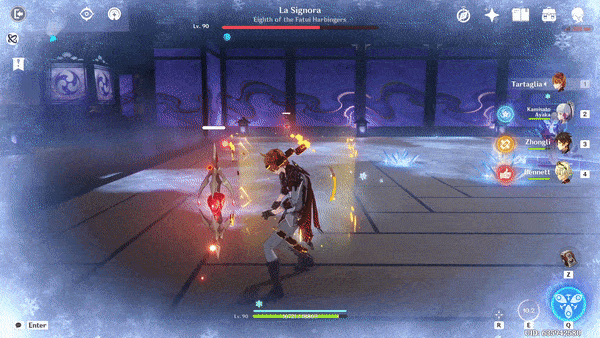
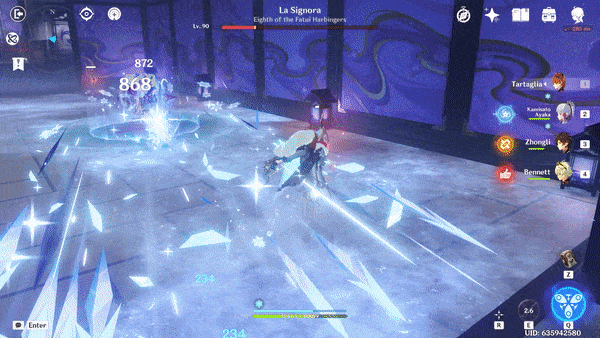
La Signora (Cryo Delusion), Ice Shards, and Frozen Wheel
Signora launches a few shards of ice, and immediately following this; she releases a wheel of ice. The best way to avoid this attack is by maintaining a large distance and then dodging. Using a shield can help minimize the damage if this attack is done when a player is engaged in close combat.
Hailstorm
Signora marks the ground and then releases a flurry of icicles that deal Cryo damage with a small AoE. The area affected by this attack takes on the Frosted Floor effect, dealing Cryo damage over time (DoT) if players cannot melt the ice or apply a shield.
Ice Flower
Signora releases three Cryo flowers that explode after a few seconds, dealing Cryo AoE damage. This move is relatively easy to dodge; the only issue is if players accidentally run into these flowers while evading a different attack because it can have a Cryo landmine effect.
Glacial Missiles
Signora launches a barrage of Cryo missiles, these missiles are not shot straight at the player, but they curve towards the player. Dodging these missiles is tricky, but players can always use a shield to protect themselves.
I would recommend constantly dashing if a shielding Genshin character is not in the current party to minimize damage.
Snowfall Strike
Signora teleports herself close to the player and unleashes a small AoE Cryo blast; this blast can be tricky if players are not equipped with a shield because this move is fast.
Tsaritsa’s Benevolence
Signora summons six Cryo spears above the on-field characters’ head and then converges them, dealing AoE Cryo damage while applying the Frosted Floor effect on the immediate vicinity. This attack follows the player, therefore, I recommend using a shield.
The Frozen Void
Signora launches a Cryo spear dealing AoE Cryo damage; the spear will explode in a few seconds, dealing additional AoE Cryo damage. This attack also applies the Frosted Floor effect to the immediate surroundings.
Frozen Cocoon – Intermediary Cryo Stage
Ice Flower
Signora will become cacooned in ice, gaining a Cryo shield. You must destory this by using either Pyro attacks or by picking up and hitting the shield with the Crimson Lotus Moth’s that will peridocially spawn in this phase. When the shield is fully depleated, you will progress to the next phase of the fight.
Glacial Missiles
Signora will launch glacial missiles towards you. I would reccomend either using a shield or dashing to avoid these attacks.
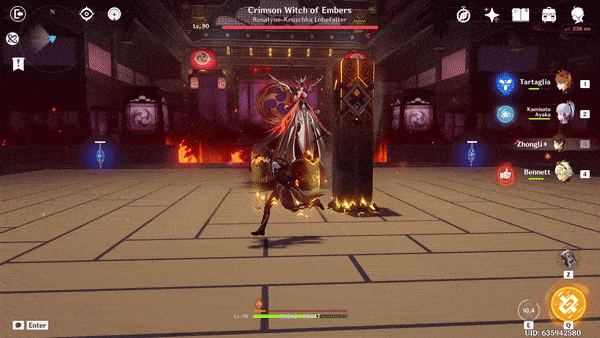
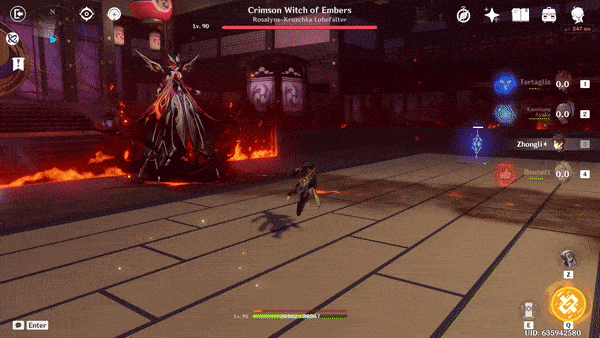
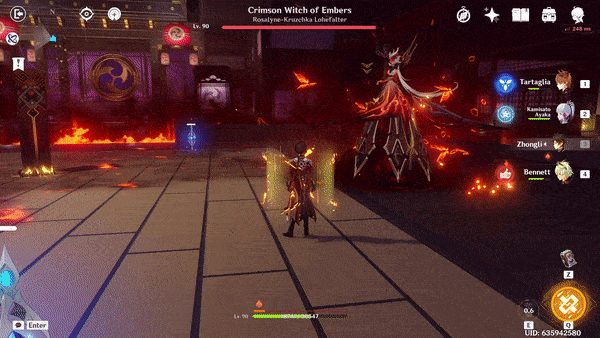
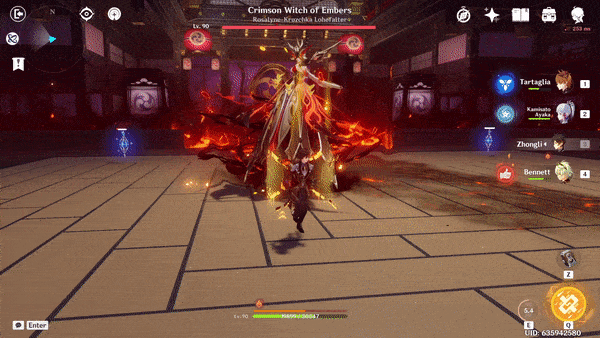
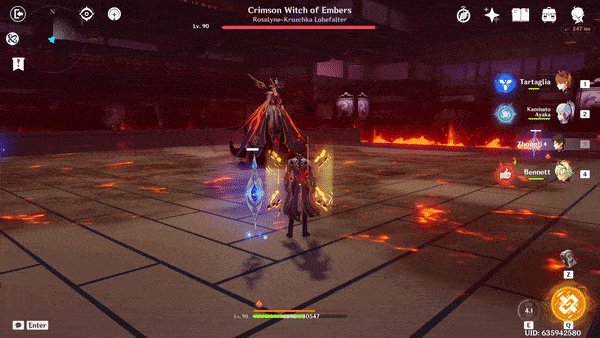
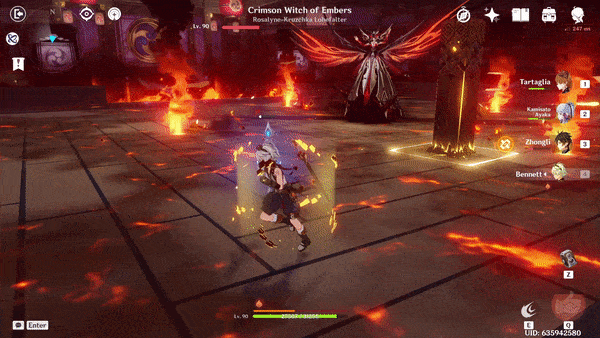
The Crimson Witch of Flames (Pyro form)
Flaming Whip (Single Melee)
The Crimson Witch uses a Pyro whip to deal Pyro damage; through one slash, not only does she deal damage, but she interrupts the player’s movements making it difficult to carry out attacks or evade.
Flaming Whip (Double Melee)
The Crimson Witch uses her Pyro whip to deal two consecutive lashes, with the impact from the second lash being a little further away from the first lash. Once again, players need to have a shield equipped because this attack also has a knockback effect.
Flaming Whip (Single Ranged)
The Crimson Witch uses her Pyro whip to reach out and attack the player with a single strike. Yes, there is no escape from her.
Flaming Whip (Triple Ranged)
The Crimson Witch uses her Pyro whip to deal three simultaneous lashes. Upon retracting the lashes, fiery explosions occur. This attack is a personal favorite because of the animation and because not only does she whip the player, but she also explodes the player, dealing AoE Pyro damage in the process.
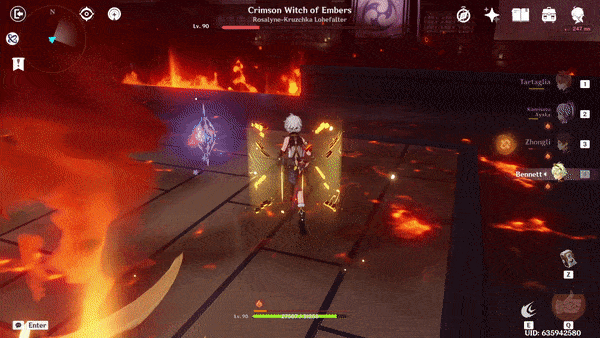
Fireball
The Crimson Witch hurls a giant ball of Pyro at the character dealing AoE Pyro damage and applying the Embered Earth status on the surroundings along its path. This attack is easy to dodge since it moves in a straight line instead of some of the other attacks we have seen.
Warp
The Crimson Witch uses Pyro to relocate and reposition herself, leaving the Embered Earth status on the surroundings in her path. In my own experience, every time I get ready to use Tartaglias Havoc Obliteration Slash, she uses Warp to dodge the Elemental Burst. The timing is very suspicious; coincidence? I THINK NOT!
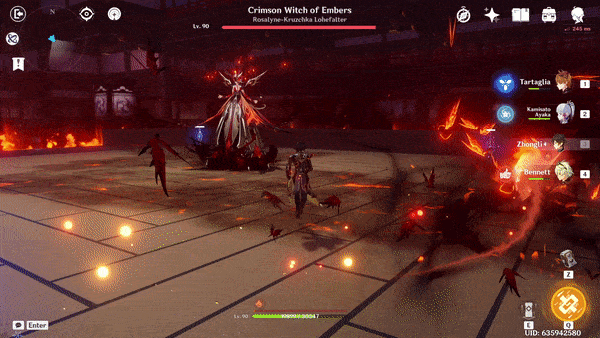
The Witch’s Wrath
The Crimson Witch summons meteors causing them to rain down on the battlefield dealing large AoE Pyro damage, and Embered Earth status is applied at each area of impact.
This is a large AoE attack, and players have no chance of successfully dodging this attack unless they have maintained sufficient distance before The Crimson Witch initiates the attack.
Hellfire Onslaught
The Crimson Witch summons a Hellfire Butterfly swarm that deals very small AoE Pyro damage. However, they apply the Embered Earth status to the areas of impact.
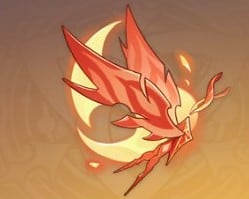
Hellfire Butterfly
The Crimson Witch summons a large Hellfire Butterfly that follows the player until it makes contact, and then it explodes, dealing large AoE Pyro damage. If players can keep dashing, the Hellfire Butterfly dies out. Think of this attack as a heat-seeking missile and the player as the target.
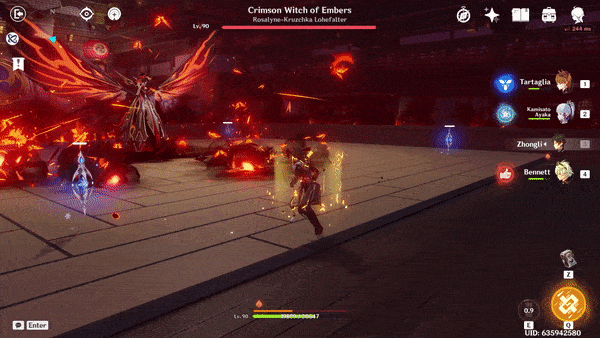
Searing Reckoning (Tornados)
The Crimson Witch engulfs herself in flames and becomes a Pyro tornado; she moves across the domain, applying the Embered Earth status everywhere. During this move, The Crimson Witch does not take on any damage.
The only thing that players can do is stand next to an Eye of Frost and stay cool since the effects of Blazing Heat are intensified. The Crimson Witch also sends four smaller Pyro tornados that deal Pyro damage if it comes into contact with a character.
This attack indicates that the battle has been prolonged or that The Crimson Witch is at 20% of her total HP.
Searing Reckoning (Blazing Heat Application)
At the end of her Pyro tornado rampage, The Crimson Witch unleashes this move along with four small tornados to apply the Embered Earth status and deal Pyro damage. Players can easily avoid this attack with a shield; however, the effects of Blazing Heat require immediate cooling down from an Eye of Frost.
Stages
Signora has two stages; players need to prepare ahead because the two elements she uses are contrasting. Her stages are:
La Signora (Cryo)
The Crimson Witch of Embers (Pyro)
La Signora (Cryo)
As a Cryo character, Signora deals Cryo damage both directly and indirectly. She can always Freeze players if they have the Hydro status applied on them; this can happen through a character’s Elemental Skill or Elemental Burst.
However, players need to maintain close proximity to deal the maximum amount of damage. I would recommend using a character that can provide shields because players can minimize the damage taken. However, the shield will not protect characters from the effects of Sheer Cold.
Once Signora’s health drops below a critical level, she will place herself in the middle of the domain, where she encases herself in ice and then enters the Frozen Cacoon stage. During this stage, she can only do two attacks (as mentioned above).
However, she increases the speed at which Sheer Cold accumulates, making things difficult for players if they cannot warm up on time. Players can only deal damage to this chrysalis through Pyro attacks or Elemental Skills imbued with the Pyro energy from the “Crimson Lotus Moth.”
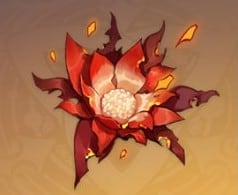
Crimson Lotus Moth
The Crimson Witch of Flames (Pyro)
During this stage, Signora transforms herself into the Crimson Witch of Flames/ Embers; she deals Pyro damage directly and indirectly. This stage is difficult, mainly because she does not give players much time to catch their breath.
Her attacks are rapid and can cover a large AoE; she uses both melee and ranged attacks. Players have to maintain close proximity while keeping themselves cool because Blazing Heat accumulates quite fast. Once again, shields will not protect players from the effects of Blazing heat.
What to expect
Since players unlock this domain through the Archon quest, there is no need to do any extra work. Since most meta-relevant characters use her talent level-up material, players need to make this domain a must-do during their weekly Trounce domain boss runs.
We are looking at high DPS Hydro characters and the appropriate support characters for this domain. We need very strong shields along with consistent healing.
Since Signora has two stages, players could even benefit from elemental shield potions as well. However, players can easily take her down and emerge victoriously with some prep time.
Free to play friendly
Although most players might have got themselves a 5* character or two by this stage of the game, along with an army of 4* characters and constellations, some still wish to remain strictly free to play.
The below team comps are for the newer players who just got to Inazuma and strictly free to play players who are about to face off with La Signora.
Kaeya – Xiangling – Anemo Traveler – Barbara
Xiangling – Lisa – Noelle – Barbara
Main DPS
When tackling Signora, players need to deal the maximum damage before retreating to either cool down or warm up (depending on the stage). As a Main DPS, your character should be doing the maximum damage while the rest of the team provides a boost.
Although La Signora has a Cryo Res and The Crimson Witch of Embers has a Pyro Res, Kaeya and Xiangling still remain our best Main DPS options.
Kaeya
Kaeya can help players ease through the second stage of the battle. Although he can deal damage during the first stage, I recommend Xiangling to make things a little smoother.
Players can use Barbara’s Elemental Skill, then switch to Xiangling and use her Elemental Skill and Elemental Burst, then switch to Kaeya and use his Elemental Skill and Elemental Burst, and finally switch to the Anemo Traveler and use the Elemental Skill.
This rotation requires a lot of energy, but it can help deal a significant amount of damage.
Weapon – Dawn Harbinger (Obtained through Gacha)
Xiangling
Xiangling can help melt through the first stage; as for the second stage, I would recommend getting Noelle and Lisa to take turns dealing damage.
Once again, players can use Barbara’s Elemental Skill, then switch to Lisa and use her Elemental Skill and Elemental Burst, and then finally switch to Noelle and use her Elemental Skill and Elemental Burst. Players can keep dropping Guoba to aid in elemental reactions and provide the additional 10% ATK buff.
Weapon – Dragonsbane (Obtained through Gacha)
Sub DPS
In this domain, our Sub DPS characters will be on-field for almost as long as our Main DPS characters to evenly distribute the workload and provide the Main DPS a chance to recharge their Elemental Bursts or run down CDs.
Xiangling would help Kaeya pull off Melt reactions, and Lisa would help Xiangling pull off Overload reactions.
Xiangling
Xiangling’s primary role is to pave the way for Kaeya’s elemental reactions while being able to swap places and hold the fort until Kaeya recovers. However, Xiangling is more than capable of clearing the first stage of the battle by herself.
Weapon – Crescent Pike (Obtained through Forging)/ Dragonsbane (Obtained through Gacha)
Lisa
Weapon – Thrilling Tales of Dragon Slayers (Obtained through Gacha)
Once again, Lisa takes on the role of providing elemental reactions, but she can also swap places with Xiangling to deal damage whenever she needs to swap out. Lisa can easily attack during both stages with no backlash as an Electro character.
Support
The support characters play a critical role in helping the Main DPS and Sub DPS deal more damage than usual. Since both support character recommendations come from inert elements, players can benefit from both Swirl and Crystallize reactions.
Anemo Traveler
The Anemo Traveler provides a breather for the team while also being able to boost elemental reactions through his Swirl reactions. I would highly recommend using a high Elemental Mastery Anemo Traveler.
Weapon – Prototype Rancour (Obtained through Forging)
Noelle
Noelle is our savior once again since she can provide a shield and heal through her Elemental Skill “Breastplate.” Players can benefit greatly from her Crystallize reactions as well, which will provide additional shields.
Weapon – Whiteblind (Obtained through Forging)
Healer
As always, our final team slot is reserved for a healer. Barbara is the only free healer that players receive; this means that she would be included in every free-to-play team comp. Being a Hydro catalyst user has its privileges in this domain, especially against the Crimson Witch.
Barbara
As always, Barbara is our designated free-to-play healer. She can help the team by providing Hydro for elemental reactions while gaining a healing passive through the Prototype Amber.
Weapon – Prototype Amber (Obtained through Forging)
Best Team Comp
We are looking at the more veteran/ not so free to play team comps for this section. Most players repeatedly do Signora’s domain to get the talent level-up material. We are looking at two Hydro teams, a Vape comp and an Electro Charged comp.
Tartaglia – Kazuha – Zhongli – Bennett
Kamisato Ayato – Raiden Shogun – Beidou – Kokomi
Main DPS
Our Main DPS character will carry the weight of dealing the maximum amount of damage, and that is why both Tartaglia and Kamisato Ayato fall into this role perfectly. With their high-tier Hydro damage, The Crimson Witch stage would be a breeze.
Tartaglia
Tartaglia is capable of taking on both stages of the battle since he is a Hydro character. To gain his best, players can use Zhongli’s Elemental Skill, then switch to Kazuha and then use his Elemental Skill and Elemental Burst, then switch to Bennett and use his Elemental Burst, and finally switch to Tartaglia and use his Elemental Skill and then Elemental Burst. This rotation would help destroy Signora, perhaps vengeance for using him as a pawn back in Liyue.
Weapon – Polar Star (Obtained through Gacha).
Kamisato Ayato
Kamisato Ayato is an excellent character for Electro Charged reactions; this is why he is partnered with Raiden Shogun since her Elemental Skill is still applicable when off-field.
The best rotation for this team would be to start with the Raiden Shogun’s Elemental Skill, then Swap to Beidou and use her Elemental Skill and Elemental Burst, then switch to Kokomi and use her Elemental Skill, and finally switch to Kamisato Ayato and use his Elemental Burst and then his Elemental Skill (the Elemental Skill must be used as close to Signora as possible).
Weapon – Haran Geppaku Futsu (Obtained through Gacha)
Sub DPS
The Sub DPS roles for Kazuha and Raiden Shogun are quite similar since their job is to enable elemental reactions in order to maximize the Main DPS character’s total damage output.
Kazuha
Kazuha is there to help evade attacks through his Elemental Skill and then help boost Tartaglia’s overall damage output. Kazuha can help the player gain a few seconds of peace from the damaged floors.
Weapon – Freedom Sworn (Obtained through Gacha)
Raiden Shogun
Signora’s executioner, Raiden Shogun, can help the entire team with their Energy Recharge needs and help Kamisato Ayato’s elemental reactions through her Elemental Skill.
Weapon – Engulfing Lightning (Obtained through Gacha)
Support
Both of these support characters have been selected for their high-tier shield-making capabilities. With Zhongli having the strongest team in the game, players have very little to worry about. With Beidou having her shields and providing additional Electro to pave the way for more elemental reactions, she is an excellent addition to the team.
Zhongli
Zhongli is primarily used to provide shields, both the Jade Shield and the Crystallize shields as well. If players use a four-piece Tenacity of the Milileth artifact set, they can benefit from a really ATK boost.
Weapon – Vortex Vanquisher (Obtained through Gacha)
Beidou
Beidou joins this team to help with elemental reactions while providing a sturdy shield because that is a must-have in this domain. Players could even use her in a Sub DPS capacity if both Kamisato Ayato and Raiden Shogun are recovering from their CDs.
Healers are critical in this domain; Kokomi would be perfect for both team comps due to her reliable rate of healing through her Elemental Skill. However, for the first team comp, I introduced Bennett in order to gain his Pyro applicator abilities, healing, and ATK buff through the Elemental Burst.
Bennett
My favorite healer makes the cut once again; he is the only source of Pyro for this team in order to pull off the Vape comp for Tartaglia. Bennett provides an additional ATK buff through his Elemental Burst, which will help players defeat Signora much faster.
Weapon – Mistsplitter Reforged (Obtained through Gacha)
Kokomi
As the best and most meta-relevant healer in the game, Kokomi takes this healer slot. The duration between her healing intervals is optimal for this domain, making her a must-have character. She can provide additional Hydro to help aid elemental reactions.
Weapon – Everlasting Moonglow (Obtained through Gacha)
How to beat Signora
When players take Signora on in battle, a few key points need to be kept in mind in order to avoid obstacles because she is a challenging boss. Since she has two stages with two contrasting elements, players need to build a team that can handle both aspects without falling behind.
I would recommend using long-ranged characters, such as Tartaglia and Ganyu. Tartaglia is my first choice because he can be used for both stages without a problem, whereas Ganyu would only be helpful in the second stage of the battle.
A character that can provide shields is critical against Signora since she can affect the floor through “Frosted Floor” and “Embered Earth,” dealing elemental energy damage.
Players need to keep at least one “Hearts of Flame” or “Eyes of Frost” active on-field at all times. Players might be tempted to break the final one to save themselves from the damaged floors, but this will backfire since the respawn rate for the “Hearts of Flame” and “Eyes of Frost” are randomized.
I would recommend preparing for the second stage over the first stage. The second stage would have a much more prolonged battle, and the damage inflicted by movesets and attack frequency all increase. In her “The Crimson Witch of Embers” form, her HP is nearly twice as high in comparison to her “La Signora” stage.
Players need to be constantly moving; if you remain stationary, you could get caught in a flurry of attacks. This would be troublesome when affected by Cryo, but players can find a mobility rotation that works for them by timing the sprints and dashes correctly.
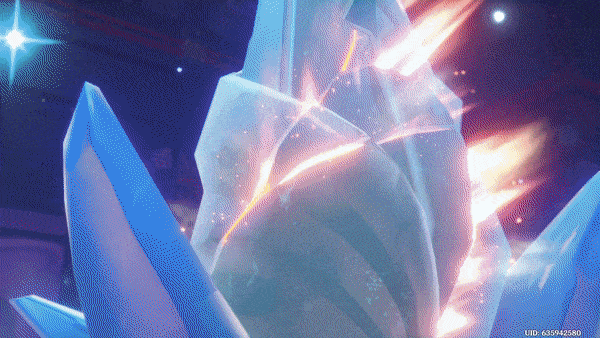
How to counter the environmental damage of “Frosted Floor” using a Heart of Flame.
How to counter the environmental damage of “Embered Earth” using an Eye of Frost.
Rewards
Players can expect to receive the same loot as other normal bosses and trounce domain bosses, with Signora’s talent level-up material being the only difference. In Signora’s case, she drops:
Molten Moment
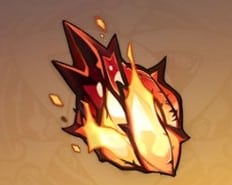
Hellfire Butterfly
Ashen Heart
Achievements related to Signora
Icy Rivers, Crimson Witch
Defeat Signora without destroying either her Hearts of Flame or Eyes of Frost.
Players must defeat Signora without breaking the “Hearts of Flame” or “Eyes of Frost” (the gadgets in the four corners of the domain room).
In order to do this, I would recommend using characters with small AoE’s and conducting the battle away from the corners of the domain.
This is a difficult achievement because most players rely on the “Hearts of Flame” or “Eyes of Frost” to combat the effects of Sheer Cold and Blazing Heat.
How much HP does La Signora have?
Answer: As with all bosses, Signora’s HP scales with her level; in the table below, we can see the specific amount of HP against the particular level. Since she has two stages with two full HP bars, she has to be defeated twice. Players can look at the table below to know the HP levels for La Signora (Cryo delusion) and Crimson Witch of Flames (innate Pyro energy).
Signora (Cryo Delusion)
Crimson Witch of Flames
Level
HP
Level
HP
1
514
1
1028
5
1158
5
2315
10
2024
10
4048
15
3649
15
7298
20
5958
20
11916
25
8339
25
16679
30
11095
30
22190
35
14894
35
29788
40
19921
40
39842
45
26762
45
53525
50
36705
50
73409
55
47627
55
95254
60
62013
60
124025
65
81528
65
163056
70
102565
70
205129
75
128338
75
256676
80
165456
80
330913
85
211387
85
422774
90
259702
90
519404
95
318001
95
636001
100
388220
100
776440
FAQ
Question: What element does La Signora use?
Answer: Signora primarily uses a Cryo delusion to produce attacks and in the storyline as well. We see her using her Cryo abilities against Venti and then later the Traveler during the battle at the Tenshukaku. Although her true element is Pyro, her delusion was given to repress the Pyro aspect of her abilities. Also, no, her Pyro abilities do not originate from a Pyro vision.
Instead, the Pyro abilities originate from her own body. After the death of her lover Rostam, Signora used her life’s “flame” to purge the world of all entities responsible for his death. Her rage and hatred manifested themselves in the form of Pyro after she used the art of liquid flame to turn herself into a Pyro entity, earning her the title “The Crimson Witch of Flames.”
Question: Why was La Signora harsh towards Venti during their encounter?
Answer: As a Fatui Diplomat, Signora takes her job very seriously. Not only is she allowed to plant discourse and chaos amongst the nations, but she is also working directly under the Tsaritsa, as number eight of the eleven Fatui Harbingers. For Signora, this job comes with loyalty and admiration towards the Tsaritsa, primarily because they share the same ideals. Therefore, when Venti mocked the Tsaritsa, it added to Signora’s annoyance.
She considers Venti to be a weak and useless God because he could not defend his people during the events of the Cataclysm. The victims include Rostam, a Knight of Favonius, the person that Signora fell in love with. The harshness was both personal and professional. As a former citizen of Mondstadt, she might have felt vengeful, and as a Harbinger, she might have felt disrespected.
Question: Is the “The Crimson Witch of Flames” artifact set named after Signora?
Answer: Yes, this artifact set holds different valuables that once belonged to the Crimson Witch of Flames. These artifacts hold her unparalleled Pyro powers and abilities that will help bolster the Pyro output of any Pyro character in Genshin Impact.
Question: Will La Signora be playable in Genshin Impact?
Answer: As of version 2.6, we have not found any indicators on when exactly Signora will be made available as a playable character. However, players can expect to have her unlocked as a playable character either towards the end of the game when we approach Snezhnaya or a timeline where she may come up again during a story quest. Although she is dead, we might see glimpses of her during cut scenes and flashbacks. We do not have a definite answer yet.
Conclusion
Signora is a demanding boss for new players and veteran players alike. When she first came out, my friends and I struggled just during the Archon quest. She was challenging to defeat even during co-op until players figured out the specific team comps and rotations.
Personally, I loved the challenge that she brought and the difference since she produced two very contrasting elements that influenced environmental damage components, Sheer Cold and Blazing Heat.
As infuriating as it was to make a dent in her health bar without dying, she provided players a genuine hurdle to jump over. I love playing against her because not only does she give me a headache, but she also satisfies the role of an antagonist. Villains are how I gauge games, anime, and stories, and Signora ticks all of the necessary boxes to be one of the most satisfying villains in Genshin Impact.
In a game that provides its fan base with beautiful sceneries and wholesome characters, to have an antagonist like Signora is quite refreshing. She bursts into the picture and immediately becomes the center of attention and the center of chaos as well.
Having a painful past that pushes her on a vengeful path makes players sympathize with her character, then she goes ahead and either beats up Venti or aids in destroying Liyue, only for us to snap back to reality and see her for who she really is, The Crimson Witch of Flames.
Rashen is a dedicated and passionate Genshin player turned writer who has used his love for this brilliant live service game as a means of turning his passion into a career. While not outspoken in nature, when let loose on a page, Rashen let's his work speak for itself and when it comes to the world of Genshin, there are few players out there that can offer more detailed and informative articles than him. He's poured literally thousands of hours into Genshin and explored every nook and cranny of Mondstadt, and he's more than willing to pass this knowledge on to you, our faithful readers!