

Sometimes, when you are following the archon quests, you end up in new regions and meet new characters. I remember completing the Inazuma archon quest, taking a boat to Watatsumi Island, and eventually meeting the divine priestess of the island.
I won’t lie; the journey was a bit spooky because the whole area was surrounded by darkness, and it gave me an ominous vibe. I vividly remember the environment full of enemies and thunder striking the ground at random places.
There was an eerie atmosphere all around the island, and for the first time, I was a bit hesitant to explore a place in Genshin Impact.
I thought this might be a point where the Traveler would start to face hardships and come across formidable opponents. However, to my surprise, the ambiance changed once I reached the island’s heart.
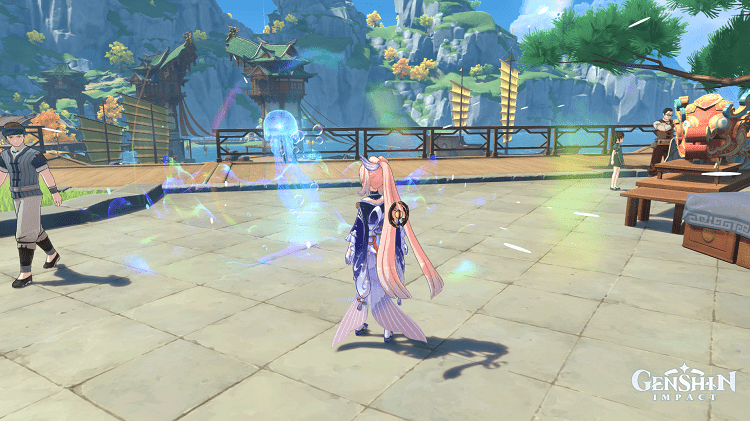
Watatsumi Island might be one of the most beautiful places in Genshin, and their divine priestess, Kokomi, welcomed the Traveler with a warm heart.
I was in awe of the floating jelly fishes around me and listened to soothing background music throughout my time exploring Watatsumi island.
Soon enough, I learned more about the island’s matters with the Tenryou commission and how Kokomi handles all the military affairs. She’s a well-versed strategist in the art of war and always keeps herself a few steps ahead of her enemies.
In this Kokomi Genshin Impact guide, let’s go over Kokomi’s extraordinary abilities that can turn the tide of war and learn about her best builds. I will go over her best artifacts, weapons, and team compositions that can help you to defeat enemies.
Sangonomiya Kokomi
Kokomi serves as the supreme leader of Watatsumi island and is a divine priestess in the Sangonomiya shrine. Well-versed in handling domestic and diplomatic affairs, Kokomi always keeps her enemies on their toes. The Traveler meets her on various occasions where they see her working tirelessly to devise policies for their citizens.
In a way, Kokomi is like Jean, who always wishes for the well-being of people. Kokomi tries her best to oversee everything that happens on Watatsumi island. While she prefers to work by herself, she does take out some time to go on a walk and admire the island’s beauty.

Kokomi is well-respected among the citizens because of her ability to deliver fair judgment and always do what’s best for people’s interest. She’s someone who analyzes each and every detail of a scenario and carefully considers the outcome.
I love the fact that despite being in a position of authority, Kokomi doesn’t have a shred of ego. She’s a humble person who works towards the well-being of her people and always works towards the betterment of society.
Shouldering the military leadership with Gorou, Kokomi holds a generous camaraderie towards her soldiers and mitigates any incoming threat to Watatsumi island.
Having defended the island against Raiden Shogun’s army in the past, Kokomi never gives up on devising new strategies to counter her enemies. People do feel safe in her presence, and her excellency leaves no stone unturned to show her benevolence.
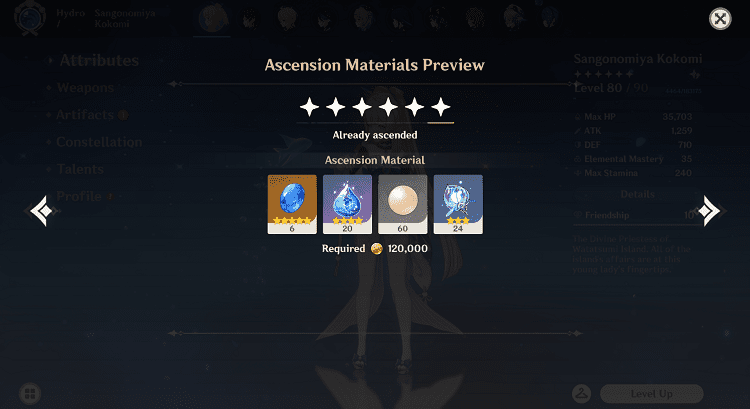
Ascension & Talent Materials
Kokomi’s ascension stat Hydro damage bonus contributes to her overall damage output. Most of her kit is focused on utilizing skills to apply Hydro on enemies and deal Hydro damage. Though it may feel a bit underwhelming with her inability to perform critical hits, it still contributes to the overall team damage.
Here are Kokomi’s talent materials:
- Mora x 420,000
- Sango pearl x 168
- Dew of repudiation x 46
- Varunada lazurite sliver x 1
- Varunada lazurite fragment x 9
- Varunada lazurite chunk x 9
- Varunada lazurite gemstone x 6
- Spectral husk x 18
- Spectral heart x 30
- Spectral nucleus x 36
Talent materials you need to level up a single talent:
- Mora x 1,652,500
- Crown of insight x 1
- Hellfire butterfly x 6
- Spectral husk x 6
- Spectral heart x 22
- Spectral nucleus x 31
- Teachings of transience x 3
- Guide to transience x 21
- Philosophies of transience x 38
I suggest investing in all of her talents at an equal pace because of their synergy with each other. Kokomi’s elemental burst and skill go hand-in-hand with her normal attacks and are worth leveling up in the longer run.
Combat Talents
Normal Attack: The Shape of Water
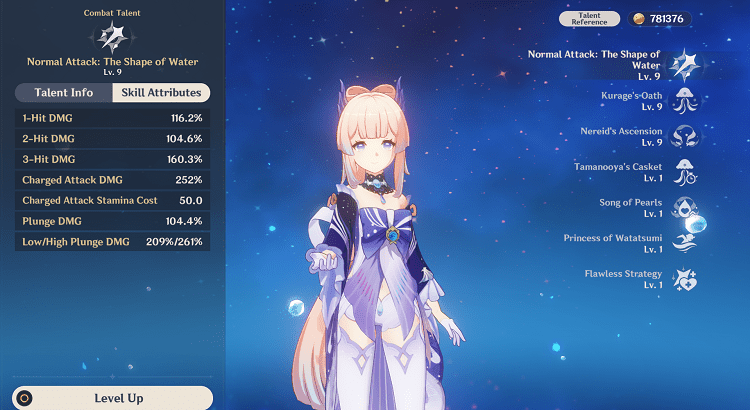
- Normal attack: Kokomi performs up to 3 attacks in a row that deals Hydro damage to enemies
- Charged attack: After consuming a certain amount of stamina, Kokomi deals AoE Hydro damage to opponents
- Plunging attack: Kokomi plunges from mid-air to the ground to deal AoE Hydro damage on impact
You can use a combination of normal and charged attacks to remove a Pyro shield from an abyss mage. Unlike Raiden Shogun, who cannot benefit from Beidou’s burst, Kokomi can proc Beidou’s Stormbreaker and bounce off lightning discharges over enemies.
That makes her a viable candidate for electro-charged teams, where you can use characters like Fischl, Beidou, and Sucrose to provide off-field abilities.
Elemental Skill: Kurage’s Oath
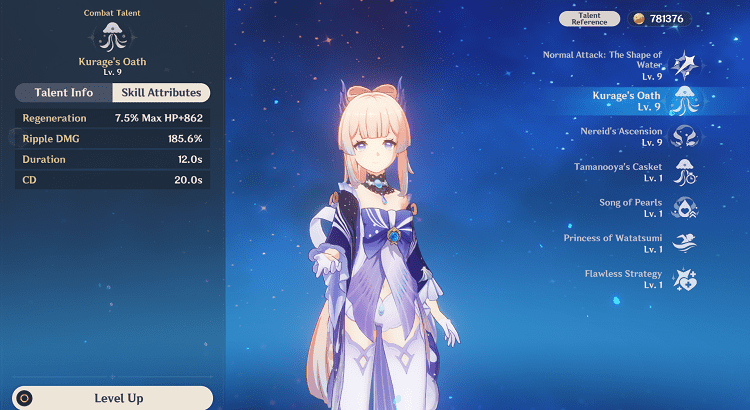
Kokomi summons a water-based “Bake-Kurage” that heals nearby characters and applies the Wet status on Kokomi herself. The healing scales off Kokomi’s maximum health.
You can deploy a jelly-like creature on the field that can heal your active character and apply Hydro to nearby enemies. It can be helpful in freeze teams. However, the deployment is stationary and doesn’t follow you, so before using the skill, ensure you have a strategic advantage.
You also run into an issue of applying Hydro to your character, so if enemies hit you with an Electro attack, you risk getting stun-locked or freezing if it’s a Cryo attack.
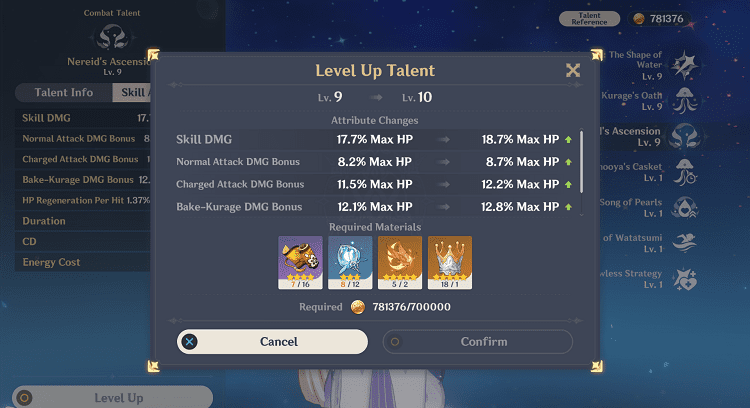
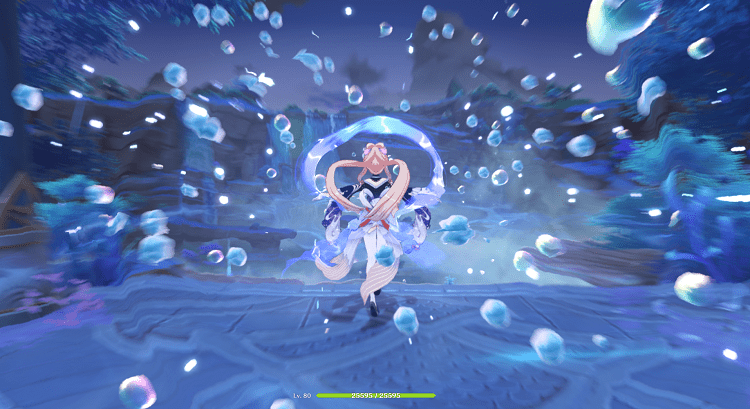
Elemental Burst: Nereid’s Ascension

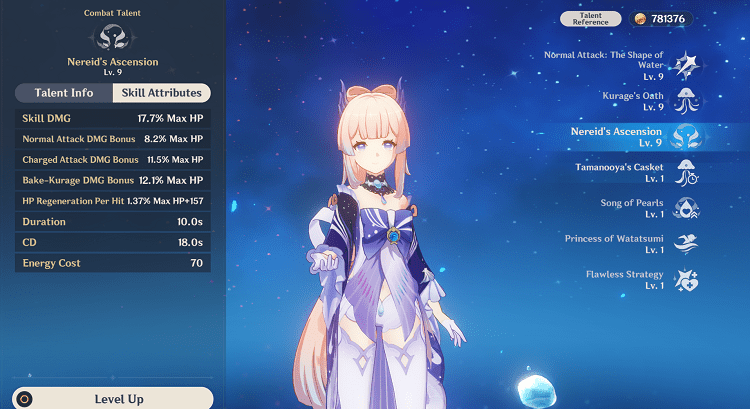
Kokomi deals Hydro damage to enemies nearby, and she gets a Ceremonial Garment that has the following properties:
- Kokomi’s normal attack charged attack and Bake-Kurage’s damage increases according to the maximum health.
- Kokomi restores the health of team members with her normal and charged attacks. The amount of healing depends on her maximum health.
- Kokomi can walk on the water’s surface, and resistance to interruption increases.
These effects are removed once Kokomi leaves the field.
Kokomi’s elemental burst is unique in nature. It allows the players to walk on Hydro surfaces, which is beneficial in overworld exploration.
While her burst is active, Kokomi gets a buff in all her abilities and increases healing efficiency. I would suggest investing in her energy recharge to occasionally use her burst and benefit from extra buffs that increase her abilities’ potential.
Passive: Tamanooya’s Casket
If Bake-Kurage is on the field and Kokomi uses her elemental burst, Baku-Kurage’s duration refreshes.
If you look closely, you will realize that the elemental skill cooldown remains the same. The duration of Bake-Kurage is refreshed. So, you need to keep in mind the duration of the elemental skill to benefit from this passive. Once you feel that the duration of Bake-Kurage is about to expire, you can use Kokomi’s burst to reset the timer.
Passive: Song of Pearls
While Kokomi’s elemental burst is active, the normal and charged attack damage bonus will further increase by 15 % of her healing bonus.
You can equip a healing bonus on Kokomi to benefit from extra damage on her attacks. Though she cannot perform mind-boggling attacks, she still can contribute something to the team’s overall damage.
Passive: Princess of Watatsumi
The swimming stamina consumption rate for the team decreased by 20 %. The passive doesn’t stack with abilities that provide the same effect. Quite helpful if you want to swim for a long or explore underground domains filled with water.
Passive: Flawless Strategy
Kokomi gets a 25 % healing bonus, but the CRIT rate decreases by 100 %.
The passive means the CRIT rate is decreased by 100 %, so you can still stack the CRIT rate on her. It doesn’t mean that her CRIT rate is fixed to zero or multiplied by zero.
With insane artifact rolls, CRIT weapons, food buff, and Rosaria’s passive to share CRIT rate, you can get a positive CRIT rate value on Kokomi. However, it’s best to avoid that approach because, eventually, that will be anti-synergetic to the team.
Constellations
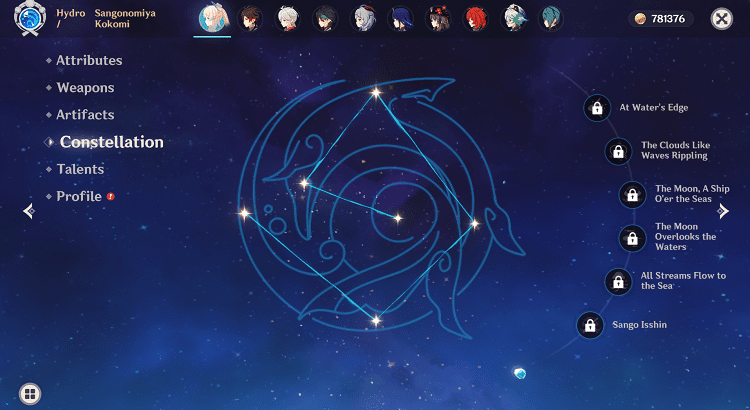
C1: At Water’s Edge
The final normal attack in Kokomi’s attack combination will deal 30 % of her maximum health as Hydro damage as a swimming fish. The damage isn’t considered normal attack damage, and this effect persists in her elemental burst, Nereid’s ascension.
You can have an extra Hydro application with the final attack and consistently follow the normal attack combination. If you plan to use Kokomi to proc reactions on the field, then this constellation is a really nice addition.
C2: The Clouds Like Waves Rippling
Kokomo obtains the following healing bonuses regarding characters with 50 % or less health:
- Kurage’s Oath Bake-Kurage: 4.5 % of Kokomi’s maximum health
- Nereid’s Ascension: Normal and Charged attacks: 0.6% of Kokomi’s maximum health
Kokomi’s healing is pretty awesome. Even in a very tense combat situation, she can heal your characters in seconds and enable you to face-tank enemies. It’s hard to see this constellation in effect because once you level up Kokomi’s talents, the healing potential grows exponentially.
C3: The Moon, A Ship O’er the Seas
The level of Nereid’s ascension increases by 3 with a limit of 15
C4: The Moon Overlooks the Waters
Kokomi’s normal attack speed increases by 10 %, and normal attacks restore 0.8 energy for her per hit while wearing the Ceremonial Garment during her elemental burst. This effect’s cooldown is 0.2 seconds.
A decent constellation for an on-field Kokomi who wants to enable reactions in a team. You can easily swap out an energy recharge artifact sand to a health percentage one and focus on continuing a normal attack chain.
Remember to funnel energy particles to Kokomi so that she can use her elemental burst and remain under the effect of the Ceremonial Garment.
C5: All Streams Flow to the Sea
The level of Kurage’s oath increases by 3 with a cap of 15.
C6: Sango Isshin
While wearing the Ceremonial Garment during her elemental burst, Kokomi obtains a 40 % Hydro damage bonus for 4 seconds when her Normal and Charged attacks heal any team member with 80 % or more health.
Her final constellation focuses on an on-field role where you can use her to trigger numerous reactions. This is a massive upgrade to her previous constellations in terms of damage because of the Hydro damage bonus.
You can deploy her Bake-Kurage to heal your characters and essentially have them above 80 % health all the time. Once you use your burst, the duration of Bake-Kurage refreshes, and you can keep the rotation in a loop.
Artifacts

Tenacity of Millelith
The artifact set provides a 20 % health bonus to Kokomi with a 2-piece set. The 4-piece set helps to increase nearby characters’ attack and shield strength once her skill damages an opponent.
The best thing about this artifact set is that you can trigger the 4-piece effect even if your character is not on the field. The artifact set is a really good option if you want to go with characters who can benefit from Kokomi’s elemental skill.
Deepwood Memories
The artifact set provides a Dendro damage bonus with a 2-piece set which doesn’t grant any buff to Kokomi’s damage output. However, the complete set reduces enemies’ Dendro resistance by 30 % for 8 seconds after a skill or burst hits them. On top of that, the effect can persist even if the character is off the field.
I suggest equipping this artifact set in teams where Dendro reactions will be predominant. Bloom and Hyperbloom teams can benefit from a Kokomi equipped with Deepwood memories to deal better Dendro damage. A tip would be to pay attention to artifact bonuses so that you can come up with unique team-building ideas.
Ocean-Hued Clam
Amazing artifact set for healers in the game that provides good passive damage. The 2-piece set grants your character a 15 % healing bonus, and the complete summons a Sea-Dyed Foam that damages nearby enemies.
The damage scales off the amount of healing your character does, and the effect can be triggered even if the character is off the field. I highly recommend using this artifact set as it perfectly synergizes with Kokomi’s playstyle.
Artifacts Summary
Building Kokomi is quite straightforward as you don’t have to build offensive attributes like CRIT rate, CRIT damage, or attack percentage. Kokomi’s CRIT rate decreased by 100 %, so you can completely avoid building any sort of CRIT on her. Though it’s possible in the game to build a positive CRIT rate on her, I won’t advise going that route.
If you don’t have enough energy recharge on her, then go with an energy recharge sands or equip an HP % attribute. As for the Goblet, you can go with a Hydro damage bonus or HP %.
Finally, the circlet can either be HP or a healing bonus. A rule of thumb is to have Kokomi’s HP around 30K and swap out to other attributes like a Hydro damage bonus and healing bonus on her.
Weapons
Everlasting Moonglow ( 5-star )
Kokomi’s signature weapon features an HP% substat that helps to make her tankier against enemies. Additionally, the passive increases the healing bonus and normal attack damage and enables Kokomi to restore energy via normal attacks. I suggest you equip this weapon on Kokomi because of its synergy with her abilities.
However, remember that this weapon isn’t flexible with other Catalyst characters besides Barbara. So, if you are a free-to-play player, you are better off with 4-star weapons and avoid using precious primogems on the weapons banner.
Favonius Codex ( 4-star )
Favonius Codex can be useful if you are playing Kokomi as an on-field character to trigger reactions. The weapon provides enough energy recharge to give better uptime on your elemental burst with a passive that generates energy particles for characters.
You can opt for an HP/Hydro Damage Bonus/ Healing Bonus artifact attribute setup and achieve good synergy with Kokomi’s abilities. Energy recharge is an end-game substat that enables players to consistently utilize their bursts to achieve the best results.
Hakushin Ring ( 4-star )
The weapon features an energy recharge substat and a passive that’s suited for Catalyst characters focusing on Electro-related reactions.
You can easily equip this weapon on Kokomi and provide an elemental damage bonus to nearby team members of an elemental type involved in the reaction. This weapon will benefit you if you want to play Kokomi in a support role.
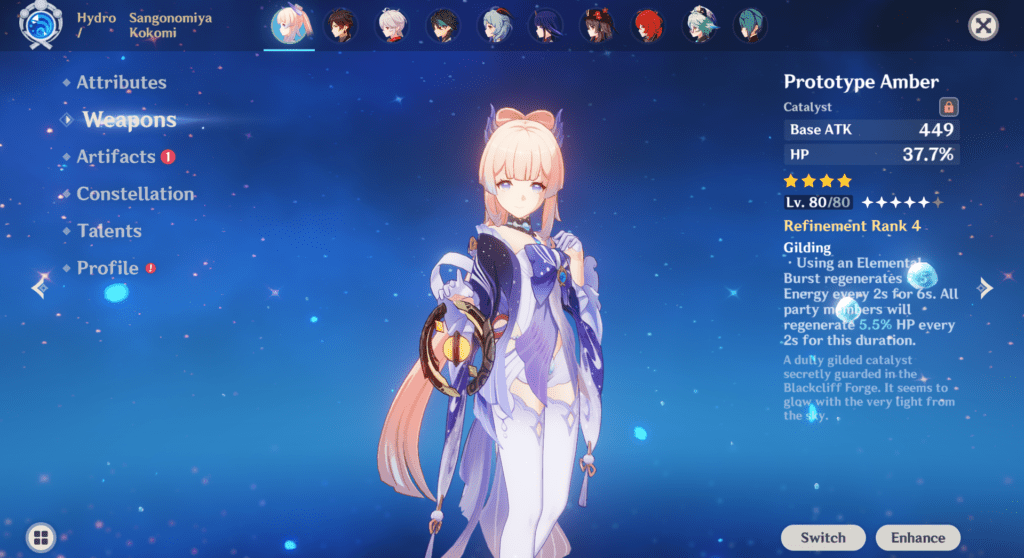
Prototype Amber ( 4-star )
The weapon features an HP % substat that helps to stack more health on Kokomi and make her tankier in front of formidable enemies. Your character regenerates energy after using the elemental burst. Another aspect of passive is generating health for team members that can provide passive healing to your off-field characters.
Thrilling Tales of Dragon Slayers ( 3-star )
This weapon is an underrated weapon and can be a game-changer in some team compositions. The weapon features a good HP % substat that can help buff Kokomi’s health.
Additionally, the passive massively increases switched character’s attack by a certain percentage. You can have Kokomi in a support role and easily equip this weapon on her to pump an attack buff to your main DPS or a hypercarry character.
Team Compositions
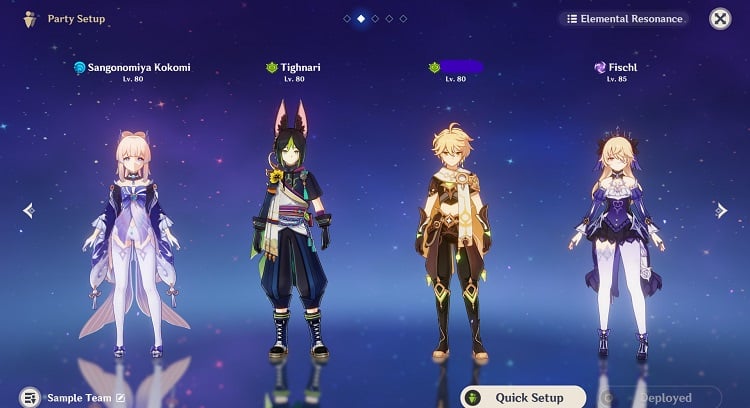
Mono Hydro: Kokomi Anemo Hydro Hydro
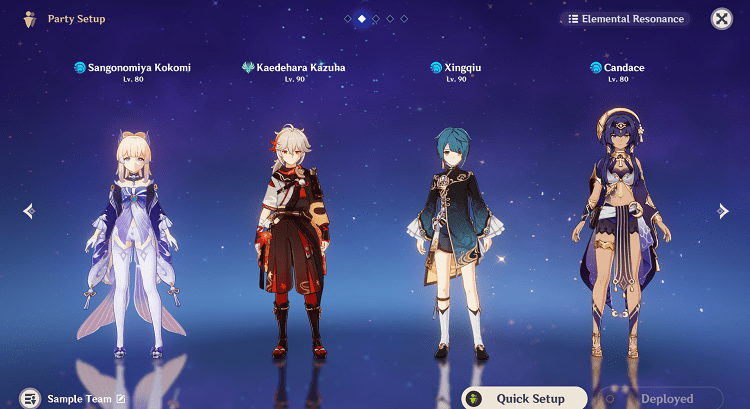
With a few good Hydro characters on the roster now, you can easily build a mono Hydro team that focuses on dealing Hydro damage. An Anemo character like Kazuha can provide elemental shred and elemental damage bonuses simultaneously with his abilities to buff the overall Hydro damage.
You can either play Kokomi as an on-field damage dealer or support this team. Characters like Xingqiu, Yelan, or Ayato can provide you with enough off-field damage for Kokomi. One use case to play a team like this would be facing a Pyro hypostasis who has a lot of Pyro aura, and you need to apply Hydro to bring him into a cooldown phase.
You can trigger vaporize reactions on it to benefit from massive damage numbers. Depending on your requirements, you can use a double resonance setup with two Hydro characters and two Anemo characters.
Support: Kokomi Flex Flex Flex

Kokomi can be used as general support in teams to heal and Hydro applications to characters. You can equip the Thrilling tales of Dragon slayers on her to buff the main damage dealer and give them a massive attack bonus.
The key here is to use Kokomi only for healing and supporting the team. You won’t be swapping to her on the battlefield to face enemies.
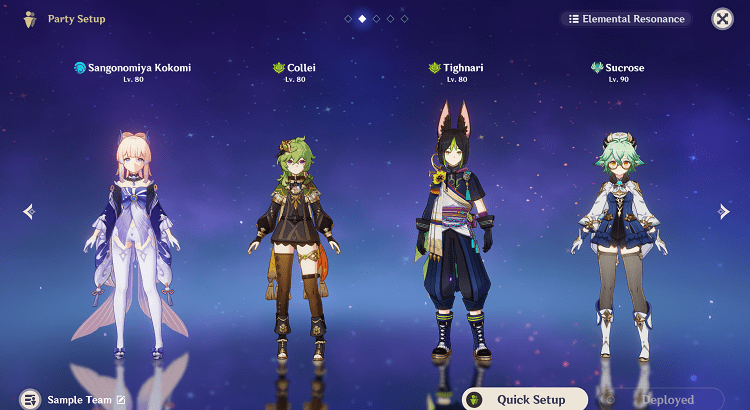
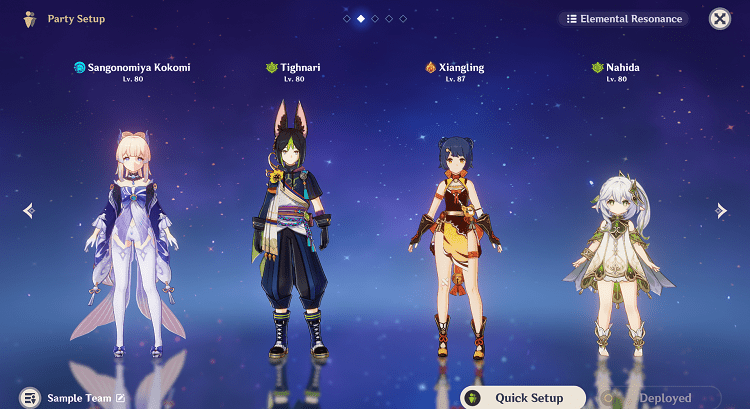
Dendro Reactions
With the introduction of the Dendro reactions in the game, many new team compositions became available to players. If you are new to the game, I highly suggest looking at our Dendro reactions guide, where we do an in-depth analysis.
You can use Dendro characters like Collei, Dendro Traveler, Nahida, or Tighnari to apply the Dendro element and switch to Kokomi to summon Bloom seeds. If you want to go with a double resonance setup, then Hydro characters like Xingqiu, Yelan, and Ayato can also provide good off-field Hydro application.
Alternatively, you can use the Traveler in any team composition with Kokomi because of their ability to change elements. The Traveler can switch to another element and benefit from all constellations.
Depending on your requirements, you can switch to Electro, Anemo, or Dendro Traveler. Feel free to check our Dendro Traveler guide to know more about their new abilities.
Bloom: Kokomi Dendro Flex Flex
Hyperbloom: Kokomi Hydro Electro Flex
Burgeon: Kokomi Hydro Pyro Flex
Electro-Charged: Kokomi Electro Flex Flex
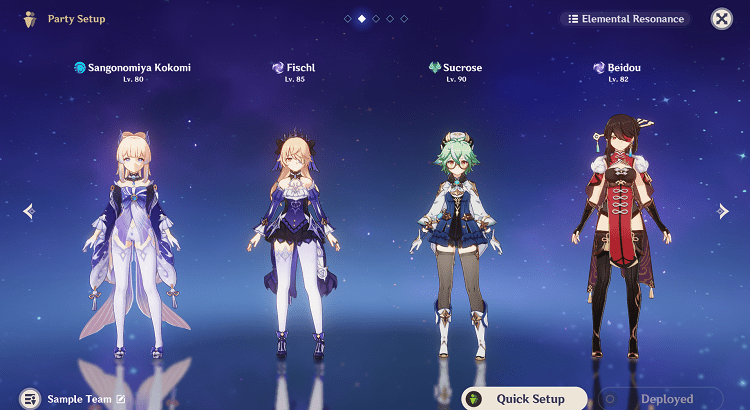
You can easily use Kokomi in Electro-charged teams to benefit from the healing and Hydro application at the same time. With off-field damage dealers like Fischl and Beidou, you can trigger Electro-charged reactions and have an Anemo character to shred elemental resistance from enemies.
Sucrose or Kazuha would be amazing choices in this team setup. Sucrose can share elemental mastery with her team members, whereas Kazuha can provide an elemental damage bonus. If you want more Hydro damage, you can easily swap out Beidou for Xingqiu and switch to Kokomi as the main damage dealer.
Vaporize: Kokomi Pyro Flex Flex
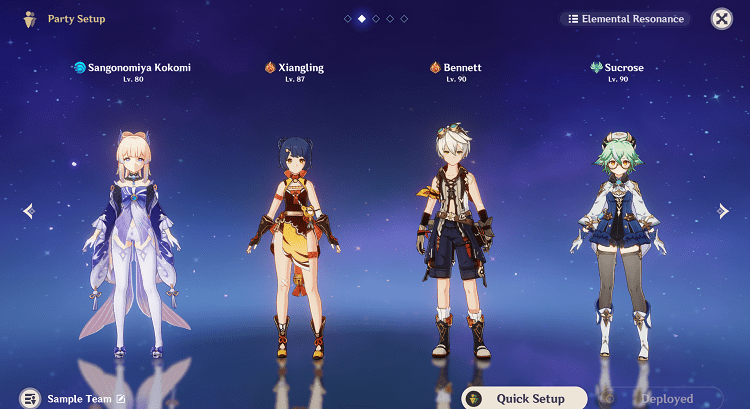
It’s hard to miss a character like Xiangling when it comes to vaporize team compositions. Almost every team composition features Xiangling for the Pyro application.
You can easily combine Xiangling, Diluc, or Yoimiya with Kokomi to trigger vaporize reactions to ramp up damage numbers. I would suggest using Sucrose in this team composition because she can share elemental mastery with other team members and boost the reaction damage.
Freeze: Kokomi Cryo Flex Flex
Kokomi is really good in Freeze team compositions where you can have an off-field Hydro application with the Bake-Kurage on the field. Cryo characters like Ganyu, Ayaka, Kaeya, and Rosaria can easily freeze the enemies in place and shred the Cryo resistance with the help of Anemo characters like Kazuha, Sayu, or Sucrose.
Venti is another Anemo character you can use in Freeze team compositions to couple enemies at a single point on the field. I don’t think you need to have another Hydro character on the team because Kokomi herself can apply Hydro and heal other team members.
The best thing is that you can go with a hypercarry like Ayaka in one slot and a Cryo battery in another to benefit from the Cryo resonance. The last team slot can be reserved for an Anemo character to benefit from the Viridescent venerer artifact set.
Sample teams:
- Ayaka, Kokomi, Rosaria, Kazuha
- Ayaka, Kokomi, Shenhe, Kazuha
- Ganyu, Kokomi, Kazuha, Kaeya
Frequently Asked Questions
Question: Should I Build Kokomi as a DPS or Support?
Answer: I suggest building Kokomi as support. Her abilities can heal other characters, provide Hydro application, and equip a weapon like the Thrilling tales of Dragon slayers to buff the main damage dealer.
You can also play Kokomi as an on-field character in certain team compositions with off-field characters like Fischl, Beidou, and Sucrose. Still, playing her in a support role is better in the longer run.
Question: Should I Use CRIT Damage or CRIT Rate on Kokomi?
Answer: Technically, it’s possible to build a CRIT rate on her, but that’s purely for meme purposes. There is no use in building CRIT rate or CRIT damage on her because she can’t effectively use them. You are better off using HP or Healing bonus attributes on your artifacts to maximize her healing potential and Hydro damage.
You don’t need a CRIT rate to deal damage. At the end of the day, Kokomi can still damage enemies. CRIT rate or damage just amplifies the amount of damage.
Question: I am a Free-to-play Player. Should I Get Constellations on Kokomi?
Answer: Kokomi is perfectly fine without any constellations. Most of her constellations focus on an on-field role and increase her personal damage capability. Even without extra constellations, you can build amazing team compositions on your account and not worry about spending money on her.
Even her weapon, Everlasting Moonglow, can be traded for 4-star alternatives or support weapons like the Thrilling tales of Dragon slayers.
The Art of War
I remember Kokomi getting featured on a wish banner and the community creating a lot of memes about her. I love the part of the community that never shies away from coming up with creative ideas and sharing those with others.
Many times, I found myself revisiting those memes. Eventually, I got Kokomi and started playing her in the abyss. I love the fact that you can heal your character and trigger reactions at the same time. Sure, there are healers like Jean and Bennett, but when it comes to elemental application, Kokomi is in a league of her own.
I’m waiting for her banner to be re-run again in the future so I can roll on her on my other account. I have two Everlasting Moonglow weapons sitting in my inventory that I can equip on her.
It’ll be dream come true to use a team with Ayaka, Ganyu, Kokomi, and Kazuha for me. All I need to do is manage some energy recharge and watch hilichurls vanish into oblivion.
Jokes apart, Kokomi is a really good character, and you should definitely pull for her. If you want to know more about characters in detail, then I highly suggest you check our character guides, where we discuss every detail. That was it from my side, and I’ll see you soon in another guide!
Besides writing about his favourite games, Himanshu prefers to keep himself up-to-date with the latest happenings in the financial world, watching anime, cooking and listening to music from all around the world.
- Genshin Impact Fontaine Region Guide - January 5, 2024
- Genshin Impact Wild Fairies of Erinnyes Guide - December 17, 2023
- Genshin Impact All Dendroculus Locations - December 12, 2023