Scaramouche is one of the most anticipated characters in Genshin Impact, both as a playable character and as a character appearing in the story quests and so on. He has held a death grip over a large number of Genshin Impact players via his pure evil aura and smug one-liners since the “Unreconciled Stars” event in version 1.1.
This edgelord can compete with Xiao in terms of how edgy they are, but their core values are entirely different. Scaramouche is estimated to be as strong as Raiden Shogun in a canonical sense. However, in the Sumeru Archon Quest, we see Scaramouche pull off moves that we have never seen before, thereby raising the standard for any other upcoming Trounce Domain Bosses.
A quick summary of what to expect in this Genshin Impact Scaramouche guide would be:
Who Scaramouche is, and where to find him.
The movesets, recommended team comps, and rewards.
Lore and History, a few final words, and a brief FAQ session.
Who is Scaramouche, his Lore, and History?
Scaramouche is a puppet body made by Ei, and in fact, he was the first functional puppet made by Ei. However, he was discarded since he was seen as a prototype and not one made to inherit Ei’s will and abilities.
This was because Ei saw him as a gentle and kind individual who was not fit to carry out the hard work (merciless killing and sacrifices needed to protect Inazuma, as every Archon would naturally do) necessary as the Electro Archon. Therefore, in an attempt to preserve his gentle nature, she released him and allowed him to live his life instead of killing him.
However, Scaramouche saw this as abandonment and negligence, which upset him and made him grow bitter. He looks at this incident as the first betrayal since he was let down by his creator, but more sadly, the one person he looked at as his mother.
He then proceeded to roam the lands of Inazuma, trying to find a meaning for his life and to find the path that he was destined for. He settled in Tatarasuna, and this is the place where he would encounter his second betrayal in the form of a sequence of events that would displace him from the company of Katsuragi, one of Nagamasa’s men.
The third and final betrayal, which would lead Scaramouche to lose all hope, came when a young boy he befriended passed away. They shared a strong connection; perhaps, he saw a brother or family figure that he deeply lacked, and losing this figure would become the tipping point for him.
Unfortunately, life was cruel towards him and made him lose hope in humanity, which ultimately made him grow even more bitter and filled him with rage.
His path eventually crossed with that of the Fatui, who took him in, made adjustments, and unleashed the full creation power instilled in him as a creation of an Archon. He rose through the ranks of the Fatui and took on the 6th position, where he was given the codename “Balladeer.”
After the events of the Inazuma Archon Quest, Scaramouche cut ties with the Fatui and ran off on his own with the Electro gnosis. Tartaglia was sent to Inazuma to search for him, but his efforts did not bear fruit.
However, Scaramouche resurfaced once more in Sumeru, and he was in the process of becoming an entity that rivaled the power of Greater Lord Rukkhadevata by becoming the new God of Wisdom.
Here, with the help of the Sumeru Akademiya and Dottore, Scaramouche would create a vessel for himself that can harness the power within the Electro gnosis and provide a path to make him the new Archon of Sumeru. This would mean that he will replace Lesser Lord Kusanali and become Shouki No Kami: The Prodigal.
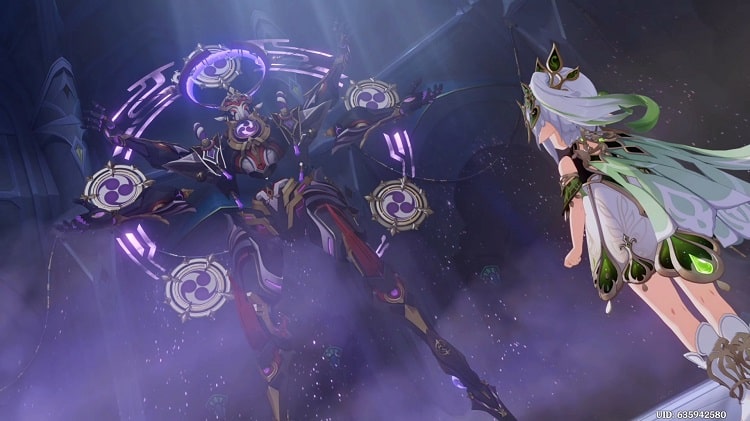
As usual, the Traveler stepped up to fight and eliminate yet another threat, but this time in the shape of a familiar opponent. With the help of Nahida (Lesser Lord Kusanali), the Traveler manages to defeat Scaramouche. In the final moments of the cut scene, we see Nahida take the Electro gnosis; this makes Scaramouche desperate and leads to him reaching out too far beyond the frame of his puppet.
This action causes the tubing attached to him to detach, resulting in Scaramouche falling out of the puppet and onto the floor, headfirst. This leaves him in a coma, and under the care of Nahida, she has him under her custody. Still, I believe that she will counsel him and eventually be the catalyst (pun unintended) that will help him set out on his upcoming redemption arc.
In the upcoming version (version 3.4), we are expected to see the playable version of Scaramouche as “The Wanderer,” this will, of course, drive the fanbase crazy and pave the way for the second character that is both a Trounce Domain Boss and a playable character, the first being Tartaglia of course.
Location
Scaramouche can be found in the domain shown below; in order to unlock this domain, players must complete the final Archon Quest in Sumeru, “Akasha Pulses, the Kalpa Flame Rises.”
Location on the map
Scaramouche in the game
Attacks, Stages, and What to Expect: Attacks – Phase 1 Attacks:
Arm Slam
Scaramouche slams one arm onto the arena, and after a few seconds, he moves the same arm across the field, dealing AoE elemental damage. This attack will leave either Cryo or Pyro on the floor of the field, and if any character walks onto the affected areas, they will take Cryo or Pyro damage.
In order to remove these effects, the opposite matrices must be activated; for example, if Pyro is applied to the floor, the Cryo matrix must be activated. Depending on which arm he uses, he can manipulate either Cryo or Pyro, as shown below.
Right Arm
Left Arm
Arm Combo
Scaramouche moves one arm across the arena, dealing elemental damage, and this is followed up by slamming the second arm dealing elemental damage once again. Once again, depending on the arm used, the attacks could be Cryo first, then Pyro, or Pyro first, then Cryo. This attack covers the two sides of the arena, leaving the middle area relatively unaffected.
However, once again, players will be able to remove the on-field effects by activating the Cryo and Pyro matrices. However, it will cost two fully charged Neo Akasha Terminals, which could be used to activate two Electro matrices instead.
Right Arm
Left Arm
Waterspout
Scaramouche summons three Anemo vortexes, which pull the active on-field character in and deal Anemo damage if they get too close. To the same attack, he infuses Hydro making three waterspouts that move around the arena dealing high volumes of Hydro damage. This move will also block the view of the matrices; however, when the waterspouts despawn, they will leave behind energy blocks.
Laser Array
Scaramouche summons a group of lasers that continuously deal Electro elemental damage while rotating. This is not a stationary attack, it rotates while dealing high volumes of damage, and if players are not careful, it could deal enough damage to wipe out their shields.
I would recommend using mobility characters such as Kazuha, Venti, and Keqing or simply activate the Anemo matrix to keep the players airborne, and at the same time, the Laser Array is carried out below.
Shard Rain
Scaramouche summons many Electro-based shards that will be launched at the player; after that, two giant Electro prisms are thrown in the player’s direction. The first part of this attack is difficult to dodge since it is more or less a barrage of missiles; however, the two prisms are pretty easy to avoid.
Players can use a character with a solid shield to prevent taking on any damage since the matrices available will not be able to help with this attack.
Electrostreak
Scaramouche charges up before unleashing a huge Electro beam at the center of the arena, directly at the immediate area near the matrices. This attack does extensive AoE damage because, at the end of the Electro beam, a large Electro shockwave is emitted as well. Players could use the Anemo matrix to dodge this as well, or a strong shield would be able to take the damage too.
Phase 2 Attacks:
Triple Earthshock
Scaramouche slams one foot and two arms to the ground below him, dealing large AoE Electro damage, and at the end of the sequence, he unleashes a large Electro shockwave that deals additional Electro damage if it comes into contact with the on-field character.
Players can usually predict when this move is going to happen and when they realize they should put distance between themselves and Scaramouche in order to avoid taking damage.
Thunder Lance
Scaramouche stabs two massive Electro lances into the floor, and these lances deal damage on impact and continue to deal AoE Electro damage to the immediate area around it as well. This move can shred the player’s shield if they are not careful; once again, I would recommend keeping a fair amount of distance from Scaramouche.
Bomb Scatter
Scaramouche summons bombs made of Cryo, Hydro, and Pyro, which are then randomly scattered around the battlefield. Additionally, he summons numerous “sparks” that launch themselves randomly at the ground, covering a vast area and dealing a large amount of damage.
If the bombs, as mentioned above, are not disabled, they will explode after a certain period of time; the sequences discussed below will help disarm the bombs.
Cryo bomb – players must attack this with Pyro elemental attacks.
Hydro bomb – players must attack this with Cryo elemental attacks.
Pyro bomb – players must attack this with Hydro elemental attacks.
Cosmic Bombardment
Scaramouche summons a large number of orbs that deal continuous Electro damage within a highlighted area, and then once this is done, a large number of thunder beams hit the entire arena at random places. This attack is the most visually stunning attack in Genshin Impact so far.
To be honest, when I first saw this, I wondered how to deal with this, but I quickly realized that running out of the highlighted area and evading it is the best and only way to survive. Similar to the Homing Thunder Cage attack of the Thunder Manifestation, just run…
Double Charge
Scaramouche charges at the player twice across the arena; the first time, he deals Pyro damage, and the second time he deals Cryo damage. This move can be dodged quite quickly, although it leaves behind a large AoE of elemental damage for a few seconds after the attack is carried out.
Thunder Sphere
Scaramouche only does this attack if the player is behind him; he quickly turns around and launches five Electro spheres at the player. This attack carries out a large AoE of Electro damage, and it is also challenging to dodge if players cannot respond quickly enough; fortunately, a shield will help deal with this issue.
Eruption Trails
Scaramouche summons both Anemo and Hydro and sets off a trail of elemental explosions that form a cross shape. This attack is relatively easy to dodge as well unless the player is backed into a corner of the arena. I would not recommend trying to fly or jump over this; instead, I would recommend dashing away at the first indication of this attack.
Setsuna Shoumetsu
Scaramouche uses this move as a last resort when his shield is fully drained. He summons four “Nirvana Engines” at the center of the arena, and players must attack these to charge up the Neo Akasha Terminal. The Nirvana Engines will damage the player, so I recommend taking these out quickly with elemental attacks. Players are given 40 seconds to destroy the Nirvana engines and;
If the player succeeds in destroying the Nirvana Engines – then the Neo Akasha Terminal can be fully charged, allowing players to launch an aimed attack at Scaramouche. Further, all of the party members will have their energy replenished, and this attack will paralyze Scaramouche and result in him entering a weakened state where players can launch a full-scale attack.
If the player fails to destroy the Nirvana Engines, Scaramouche will bring the Setsuna Shoumetsu down, instantly killing the active on-field character. Further, it will drain the energy of all the party members, and even a shield will not be able to save the on-field character.
Stages
Phase 1
Only the upper half of the full boss is visible, and he deals his damage via the elemental forces summoned by his hands. There are different ways to avoid the attacks, but using a shield is the best method.
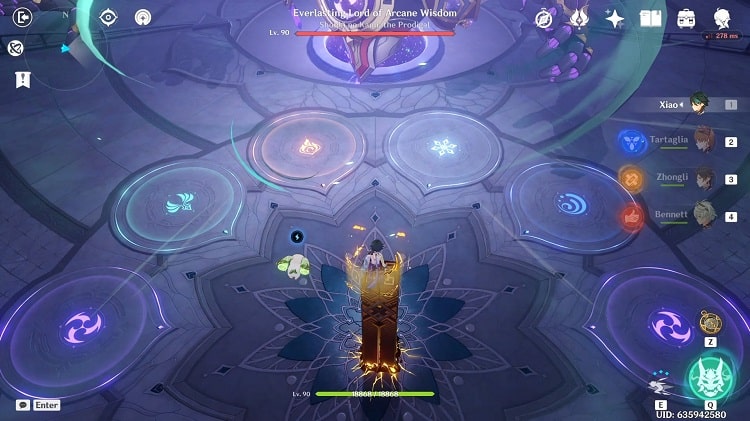
The attacks have a large AoE and often leave an effect on the field that needs to be removed via one of the elemental matrices on the floor. Players need to fully charge the Neo Akasha Terminal in order to activate the different matrices, each matrix has a different property, and they are;
*Each matrix produces five energy particles of the respective element when activated*
Anemo Matrix – Produces an upwards wind current, allowing players to easily dodge some of the large AoE attacks.
Cryo Matrix – This cools down the surrounding area; the recommendation is to use it after the Arm Slam (right hand) and Arm Combo.
Electro Matrix – This matrix stuns Scaramouche; when both Electro matrices (on the left and right side of the arena, the activation requires no particular order) are activated, it will temporarily immobilize him, allowing players a window of opportunity to launch a full-scale attack.
Hydro Matrix – This matrix heals the on-field character, but it does not remove the Pyro status applied on the field via the Arm Slam and Arm Combo attacks.
Pyro Matrix – This warms up the surrounding area; the recommendation is to use it after the Arm Slam (left hand) and Arm Combo.
Phase 2
The entire body of the boss is now visible, and we can see the completed form of Scaramouche’s “God” form, along with a wide array of attacks and significant AoE effects as well.
The Neo Akasha Terminal will play a vital role in this phase of the battle, especially when it comes to immobilizing Scaramouche and depleting his shields. After the shields have been worn down, he will lose health due to the continuous attacks of the Neo Akasha Terminal.
What to Expect
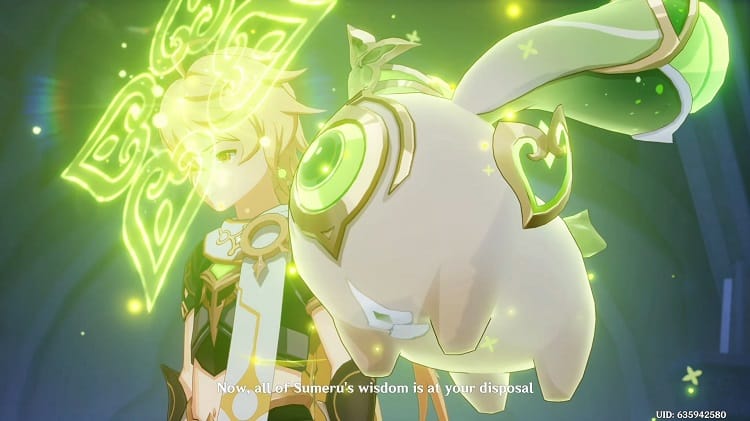
Neo Akasha Terminal
Nahida made this mechanism after she drew inspiration from non-other than our trusty Teyvat guide, Paimon. The Neo Akasha Terminal is the most useful mechanism for this battle due to the attacks carried out by it and the matrix activation effects as well.
I will list below the different uses of this mechanism and provide brief explanations on how to use it as well since it is a relatively brand-new introduction to Genshin Impact.
Phase 1 – The energy blocks that spawn after Scaramouche’s attacks must be collected to charge the Neo Akasha Terminal; once fully charged, players can stand over one of the six elemental matrices and activate the desired effect.
Phase 2 – The energy blocks that spawn after Scaramouche’s attacks must be collected to charge the Neo Akasha Terminal; however, in this phase, the recharge energy block cost is a little higher. Although the recharge cost is higher, the role played by the Neo Akasha Terminal is quite significant because, throughout this phase, the Neo Akasha Terminal continuously attacks Scaramouche. Once fully charged, players can switch the on-field character’s Elemental Skill for an aimed attack from the Neo Akasha Terminal that;
If his shield is still up – it will deal a very large volume of damage to the shield.
If his shield is down – it will deal 20% of Scaramouche’s total health as damage.
In terms of what to expect, do not expect a complicated and drawn-out battle similar to that of the Magatsu Mitake Narukami no Mikoto Trounce Domain Boss. Instead, prepare for a battle that can end instantly if players lose concentration.
Therefore, a shielding character is vital to the team’s success. One-shotting this boss is quite possible in either phase, but the shield must be taken down in the second phase before attempting high-damage volume bearing rotations.
Since this domain is automatically unlocked after completing the final Archon Quest in Sumeru, players can start farming the Trounce Domain boss drop materials quite early because it will be helpful in almost all upcoming Sumeru characters. As of version 3.3, the following characters require;
Puppet Strings- Nahida
Mirror of Mushin – No characters yet
Daka’s Bell – No characters yet
Team Comps
For this domain, we are looking at strong shielding characters and preferably off-field damage dealing characters as well. Since Scaramouche has a higher resistance to Electro than any other element, we will refrain from using Electro characters.
Free to Play Friendly
In this section, we will look at the team comps featuring freely available characters for all players. These teams usually include the starter characters and other guaranteed free characters and compatible weapon suggestions. However, most players would have a few five-star characters or weapons at this stage.
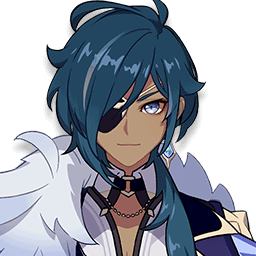
Kaeya – Xiangling – Noelle – Barbara
Main DPS: Kaeya
Kaeya is the only viable free to play Main DPS option against Scaramouche; due to him being a Cryo character, we can expect Kaeya to perform exceptionally well against the Nirvana Engines as well.
Weapon – Dawn Harbinger (Obtained through Gacha)
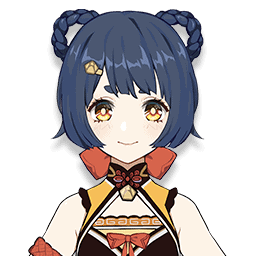
Sub DPS: Xiangling
Xiangling is excellent because she is a great Pyro applicator and off-field damage dealer. Since Scaramouche is relatively stationary in the first phase, players can get the maximum use of Guoba.
Weapon – Kitain Cross Spear (Obtained through forging)
Support: Noelle
Noelle is the best four-star shielding option because she has a Geo shield; as we all know, the best shields are Geo since they can absorb damage much better than elemental shields.
Weapon – Whiteblind (Obtained through forging)
Healer: Barbara
Barbara is the only four-star healing alternative, and she is excellent at it too, which makes her a must-have character in this team comp due to the high volumes of damage done by Scaramouche.
Weapon – Prototype Amber (Obtained through forging)
Best Team Comp
In this section, we are looking at the best possible characters and alternatives that will help take this boss down while suffering minimal difficulty.
Tartaglia – Nahida – Zhongli – Bennett
Ayaka – Ganyu – Zhongli – Bennett
Main DPS: Tartaglia
Tartaglia will be a great option due to his two playstyles, melee and long-range. The versatility that he brings will provide players with the creative freedom that they need to execute high volumes of damage.
Weapon – Polar Star (Obtained through Gacha)
Ayaka
As the focal point of this team, Ayaka will be able to deal high volumes of Cryo damage that will come in handy whenever Scaramouche is immobilized.
Weapon – Mistsplitter Reforged (Obtained through Gacha)
Sub DPS: Nahida
Nahida is a new character, but she breaks barriers and quickly becomes one of the most sought characters. Due to her large Elemental Burst range and constant Dendro application, she would complement Tartaglia perfectly to pull off continuous bloom reactions.
Weapon – A Thousand Floating Dreams (Obtained through Gacha)
Ganyu
Ganyu actually plays a more shared Main DPS role than a pure Sub DPS role due to the high volumes of damage that she can do via her Elemental Burst and aimed charge shots. Additionally, she can unlock Cryo resonance with Ayaka, further boosting the entire team.
Weapon – Amos Bow (Obtained through Gacha)
Support: Zhongli
Zhongli has the strongest shield in the game, which is why he is a must-have character for any team comp. If equipped with a four-piece Tenacity of the Milelith artifact set, the additional ATK% buff would go a long way for both team comps.
Weapon – Vortex Vanquisher (Obtained through Gacha)
Healer: Bennett
Bennett is another must-have; not only can he heal, but he also provides a powerful ATK buff. If equipped with a four-piece Nobelese Oblige artifact set, the additional ATK% buff from this, too, would make it even easier to take down Scaramouche.
Weapon – Mistsplitter Reforged (Obtained through Gacha)
How to Beat Scaramouche?
Players need to keep a few points in mind when taking on Scaramouche; since he is a new boss, more details can be added as we get to know and understand this boss on a better level. As for now, through multiple rounds of trial and error, I have been able to compile the following;
Use long-ranged characters, especially when the Nirvana Engines are summoned. This will help take the Nirvana Engines down faster by dealing pure elemental charged shots, players will be able to maintain a safe distance, and it will provide a recovery period for any other characters CD’s to come down.
Always charge the Neo Akasha Terminal and wait for the most opportune time to unleash the Aimed attack in the second phase.
Players need to act quickly as soon as the shield breaks in the second phase because if they cannot paralyze Scaramouche quickly, they run the risk of facing the Setsuna Shoumetsu.
Underestimating the AoE damage done to the floor via his attacks, players can always use the matrices in the first stage and get to safer areas of the arena in the second half.
When Scaramouche gets ready to do the Cosmic Bombardment attack, players should conserve their stamina until the highlighted area appears and then start dashing to outrun the highlighted area.
How much HP does Scaramouche have?
Answer: As with all bosses, Scaramouche’s HP scales with his level; in the table below, we can see the specific amount of HP against the particular level. However, he has two stages.
The second stage has a shield; this is not a big issue because the Neo Akasha Terminal will do a large volume of damage when players charge it by using the energy blocks that appear on the battleground.
Level
Health
1
734
5
1653
10
3432
15
5212
20
8511
25
11913
30
15849
35
21276
40
28458
45
38213
50
52435
55
68038
60
88589
65
116468
70
146520
75
183339
80
236366
85
301981
90
371002
95
454286
100
554600
Rewards
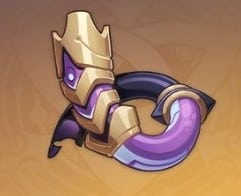
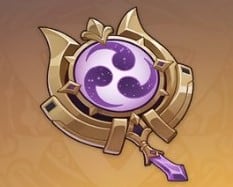
Players can expect to receive the same loot as other normal bosses and trounce domain bosses, with Scaramouche’s talent level-up material being the only difference. In Scaramouche’s case, he drops:
Puppet Strings
Mirror of Mushin
Daka’s Bell
Achievements Related to Scaramouche
It All Comes Tumbling Down
This is automatically unlocked when players activate both Electro matrices in the first phase and immobilize Scaramouche.
Causality of Birth and Extinction
This is automatically unlocked when a player gets hit by the Setsuna Shoumetsu attack, the only downside to unlocking this achievement is that the active on-field character has to be sacrificed.
FAQs
Question: Where did Scaramouche Get the Electro Gnosis from?
Answer: Scaramouche received the Electro gnosis from Yae Miko in exchange for sparing the life of the Traveler. During the Inazuma Archon Quest, the Traveler has to enter a factory that is producing Delusions and put a stop to this since it is harming the citizens of Inazuma. After clearing the factory full of Fatui soldiers, the Traveler falls victim to a gas emitted in the final chamber.
As the Traveler lies on the floor, on the brink of passing out or potential death, Scaramouche comes into the frame to mock and laugh at the Traveler. Then, Yae Miko appears, and she negotiates with Scaramouche and hands over the Electro gnosis that was entrusted to her by Ei before she entered the plane of Euthymia in exchange for sparing the Traveler’s life.
Question: How to Evade the Large AoE Attacks when Fighting Scaramouche?
Answer: The answer is quite simple, but the execution will be difficult. First and foremost, a shielding character is a must. I would recommend Zhongli as the best option. However, for free to play players, Noelle, Diona, Xinyan, and Thoma are all viable options. Beyond that, dodging and evading skills are required, but this process is a little easier because of the Four Leaf Sigils that appear from time to time.
With all of these factors in place, first, apply a shield, second keep an eye on Scaramouche’s movements and predict which move is coming next (this analytical skill improves after repeated encounters with this Trounce Domain Boss); and finally, keep an eye out for the appearance of the Four Leaf Sigil, since this will help with quick or sudden evasive maneuvers.
Question: When will we See Scaramouche Return as “Scaramouche” and not “The Wanderer”?
Answer: This is quite difficult to answer since there is no official answer yet; however, knowing his personality and the type of person he is, I feel we might not see Scaramouche again. Instead, we will have his new form, “The Wanderer,” which will have an Anemo vision, but he will remain the same old edgelord that we know and love.
This might be his redemption arc, and if so, this would also mean that his days as a Fatui Harbinger might come to an end. However, this will pave the way towards having more interactions between Scaramouche and the other characters (*cough* Mona) and also more chances of having his own event(s) as well.
Conclusion
In terms of the expectations I had going into this Trounce Domain, I can easily say that I am blown away. The challenge, graphics, attack choreography, and variations brought on by this Trounce Domain Boss are unlike anything we have seen before in Genshin Impact.
However, although Scaramouche may not be as bulky and strong as Azdaha or Raiden Shogun (the Magatsu Mitake Narukami no Mikoto Trounce Domain Boss, not the playable character), he makes up for it with his more comprehensive range of attacks.
All in all, I am a massive fan of the gameplay behind the Scaramouche Trounce Domain Boss and the riveting story behind his lore as well. It will be great to see more of his backstory and the journey that led him to becoming a Fatui Harbinger, along with his potentially upcoming redemption arc as well, but that part of the story is for another time.
Rashen is a dedicated and passionate Genshin player turned writer who has used his love for this brilliant live service game as a means of turning his passion into a career. While not outspoken in nature, when let loose on a page, Rashen let's his work speak for itself and when it comes to the world of Genshin, there are few players out there that can offer more detailed and informative articles than him. He's poured literally thousands of hours into Genshin and explored every nook and cranny of Mondstadt, and he's more than willing to pass this knowledge on to you, our faithful readers!