

- Locations
- Khaj-Nisut Sacred Seals
- Abdju Pit Sacred Seals
- Valley of Dahri Sacred Seals
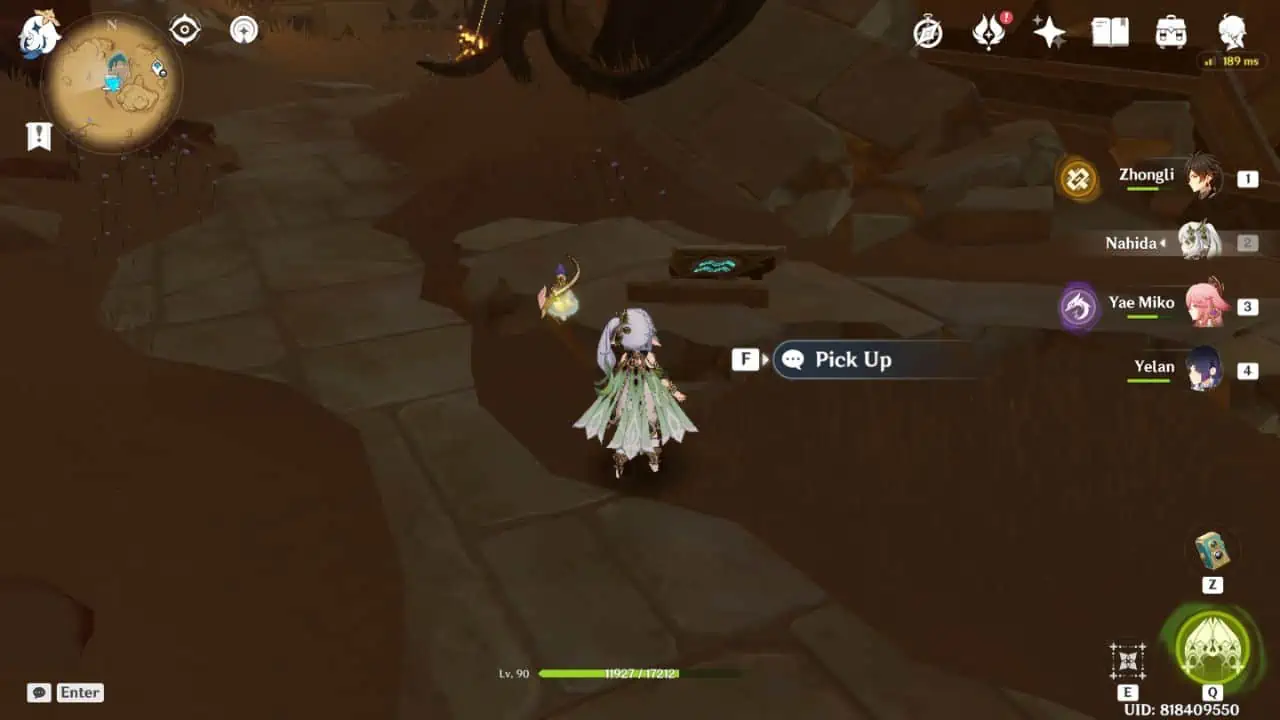
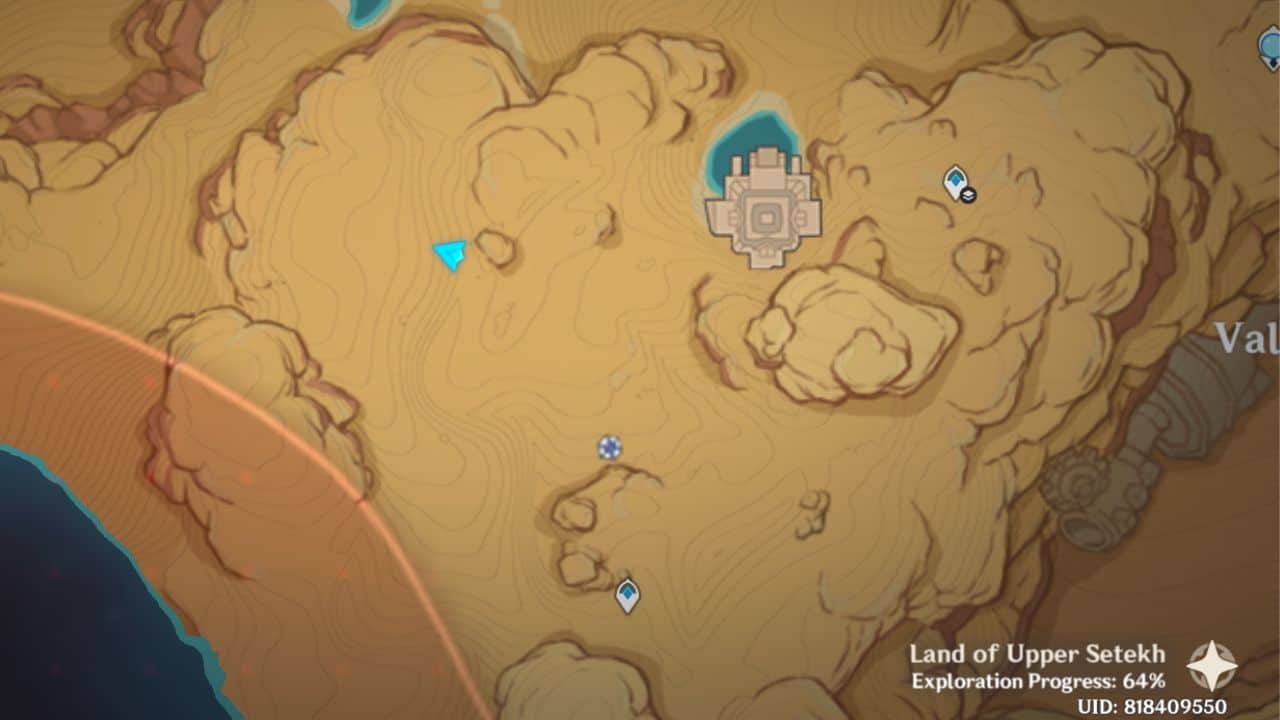
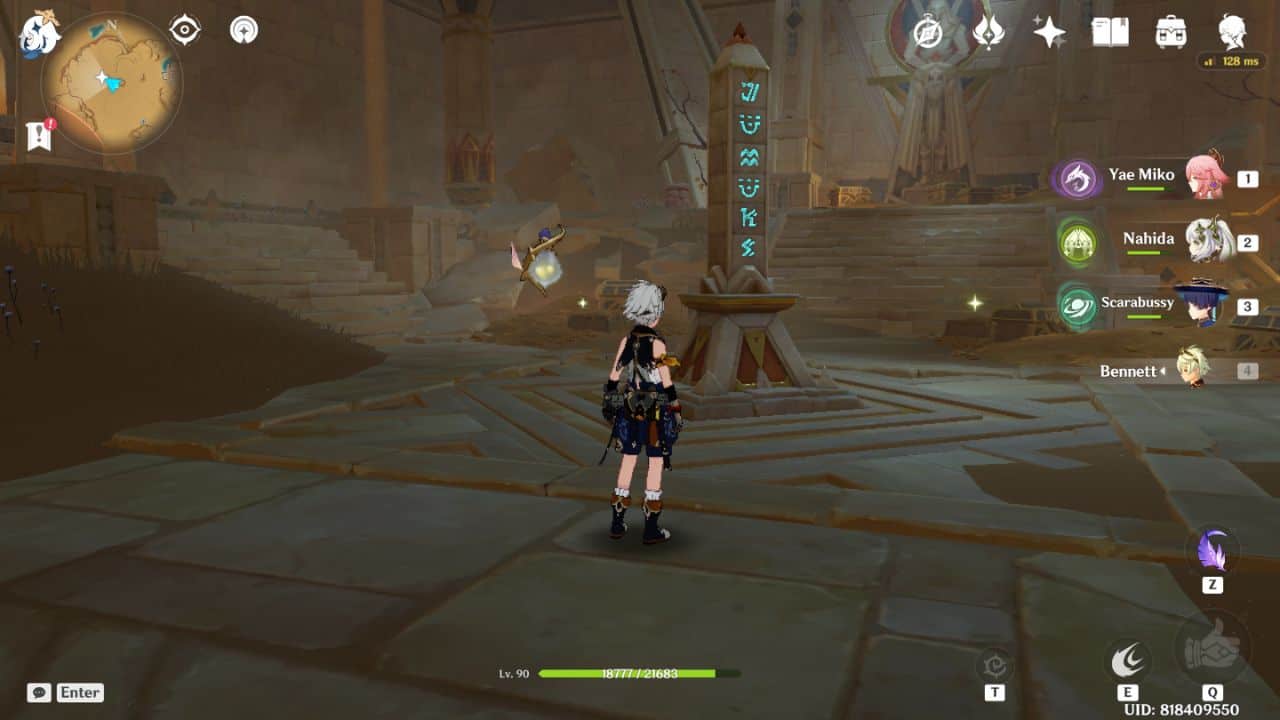
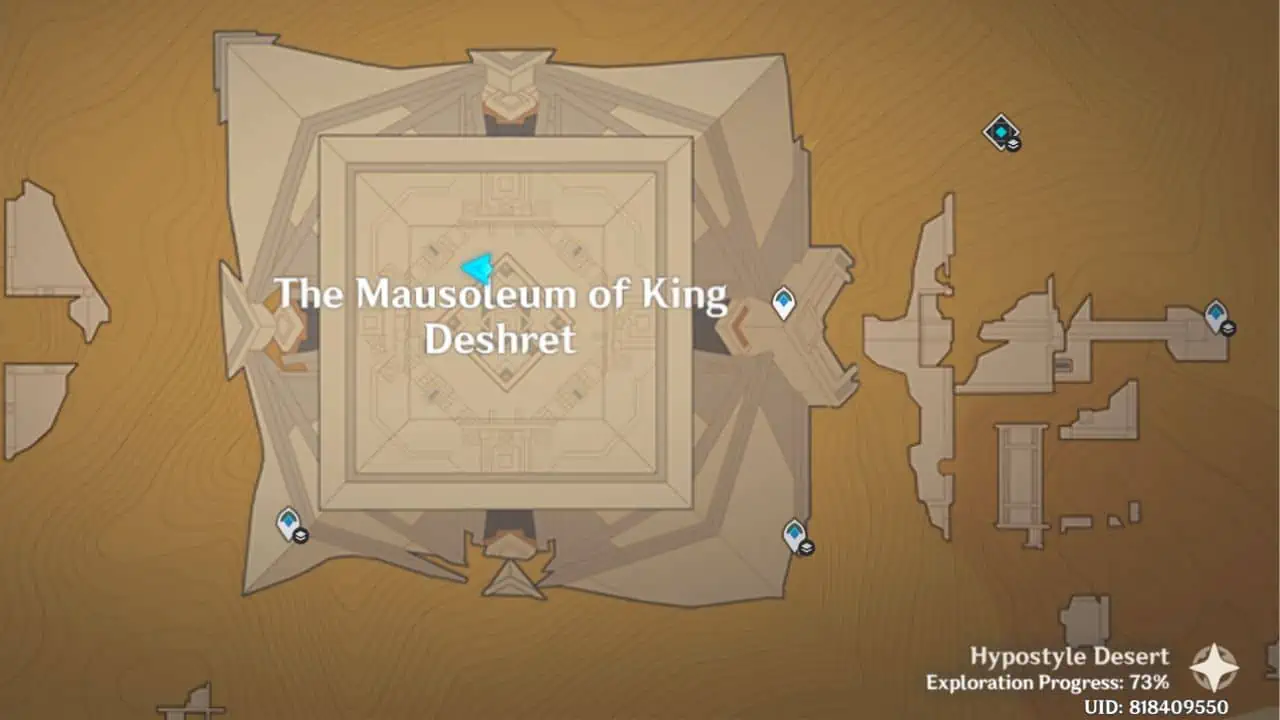
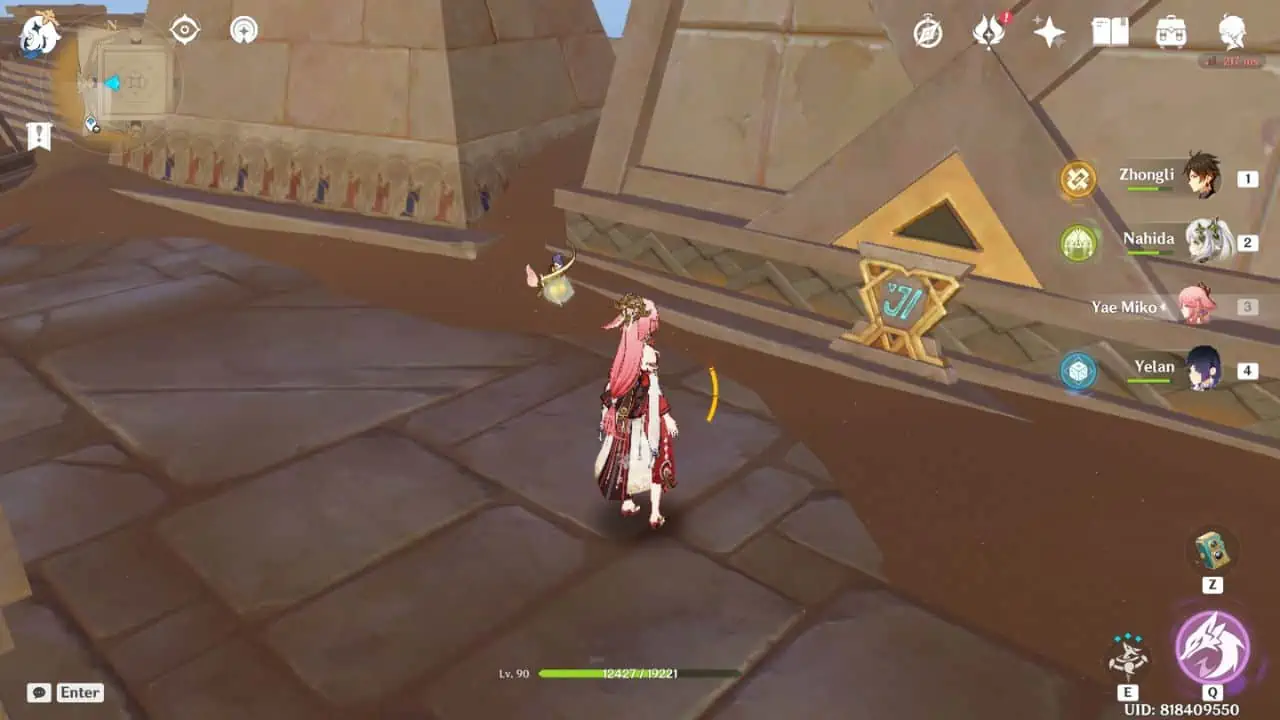
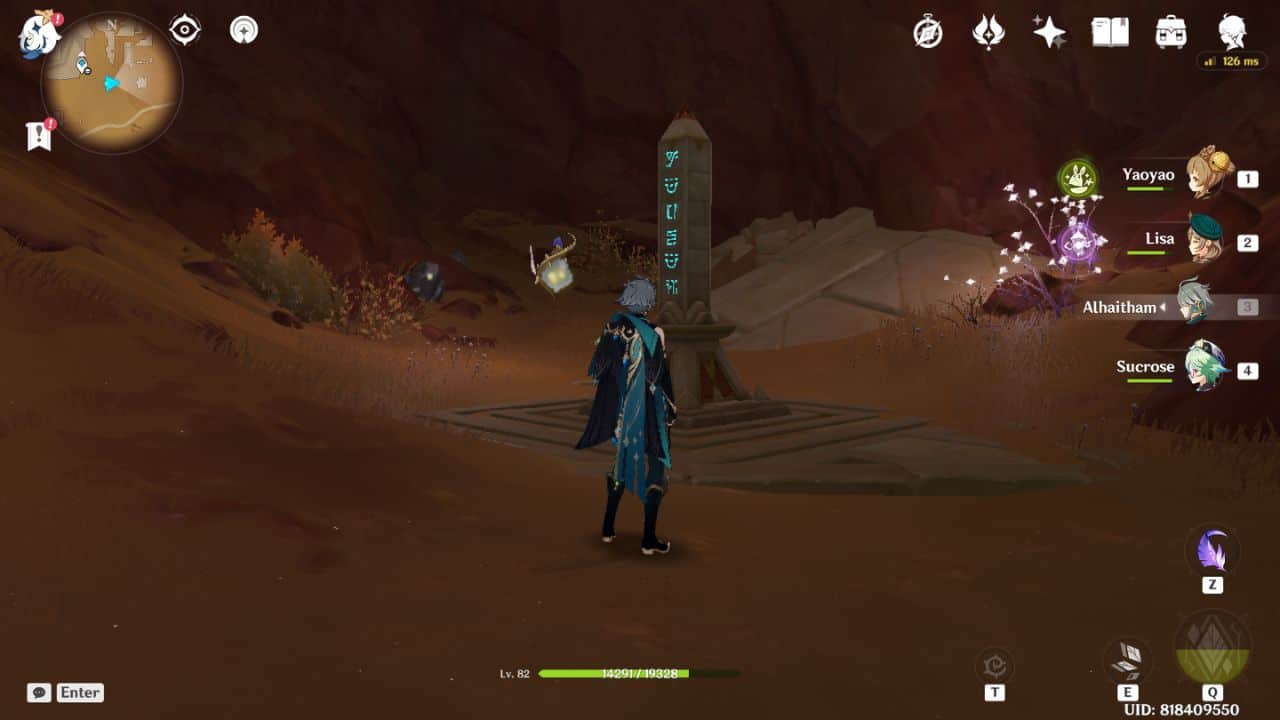
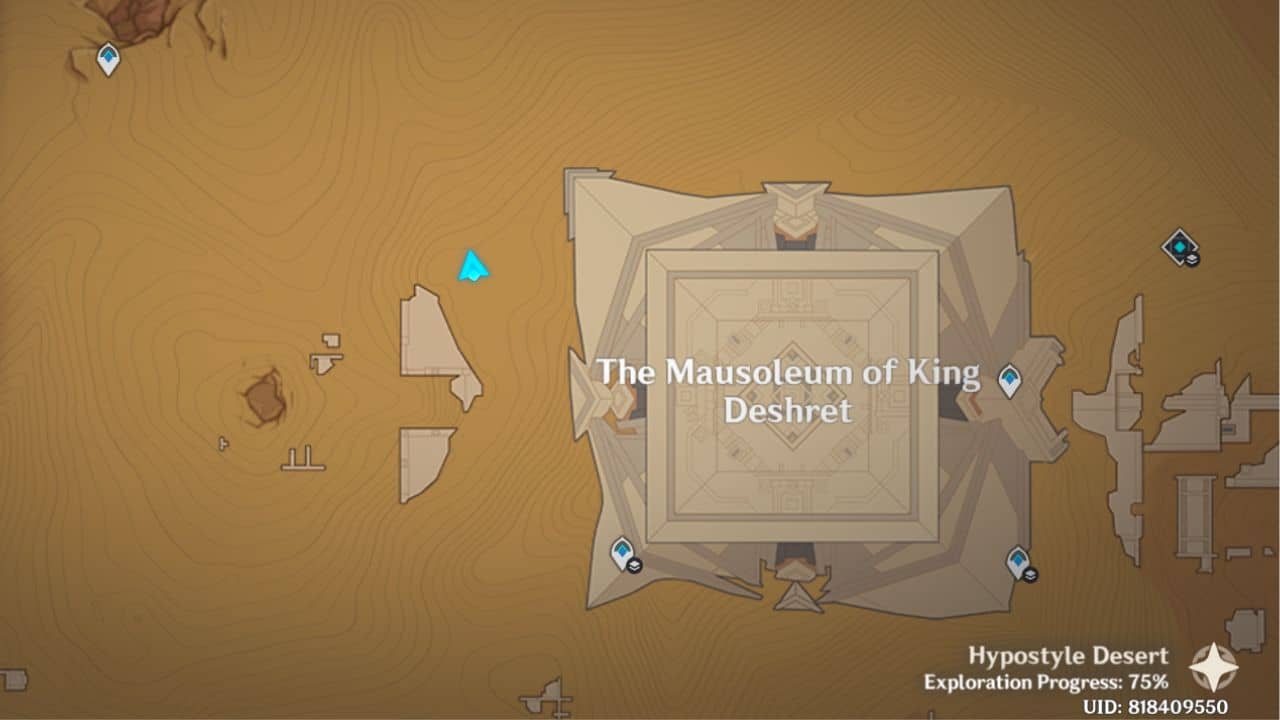
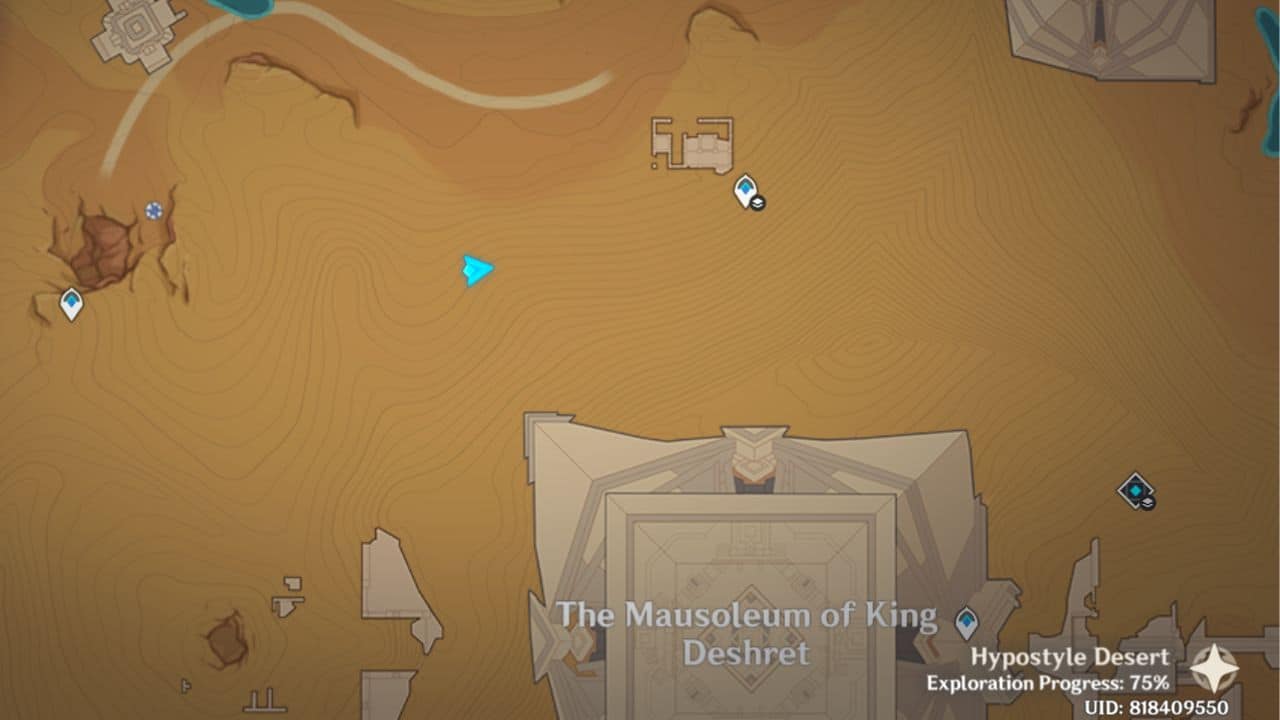
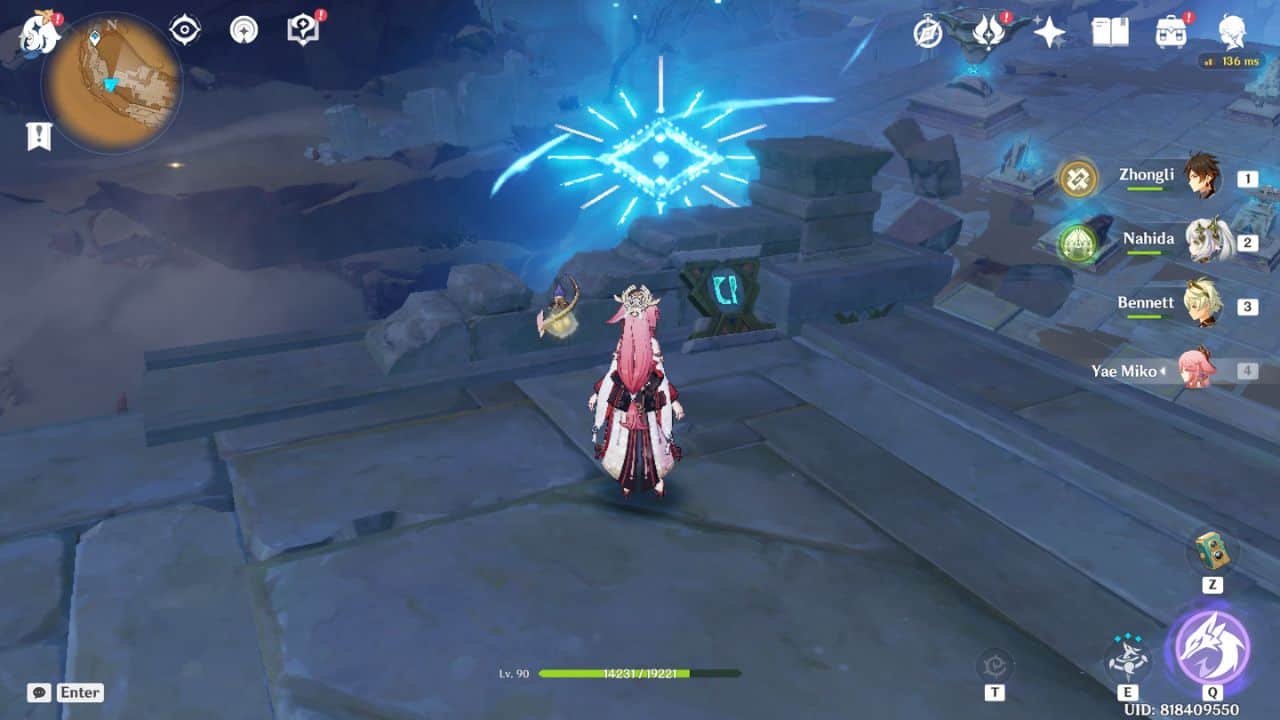
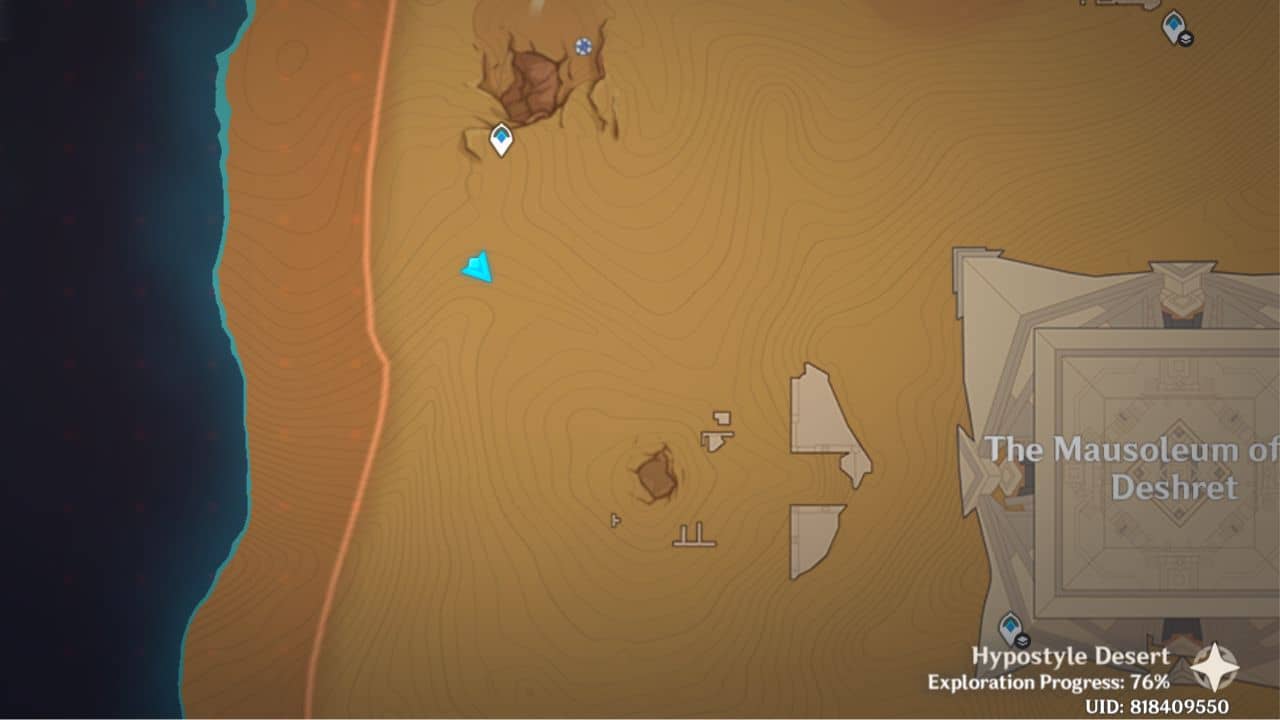
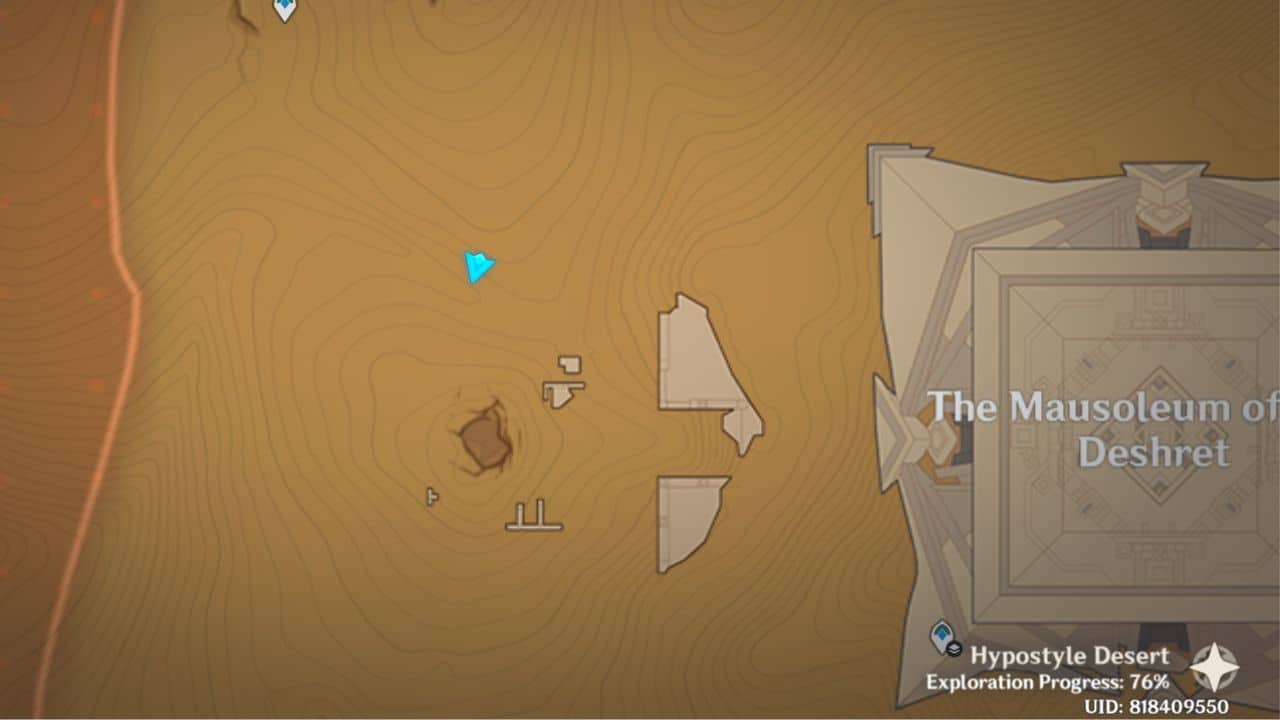
- The Mausoleum of King Deshret Sacred Seals
- North Underground Sacred Seals
- Dune of Magma Sacred Seals
- Khemenu Temple Sacred Seals
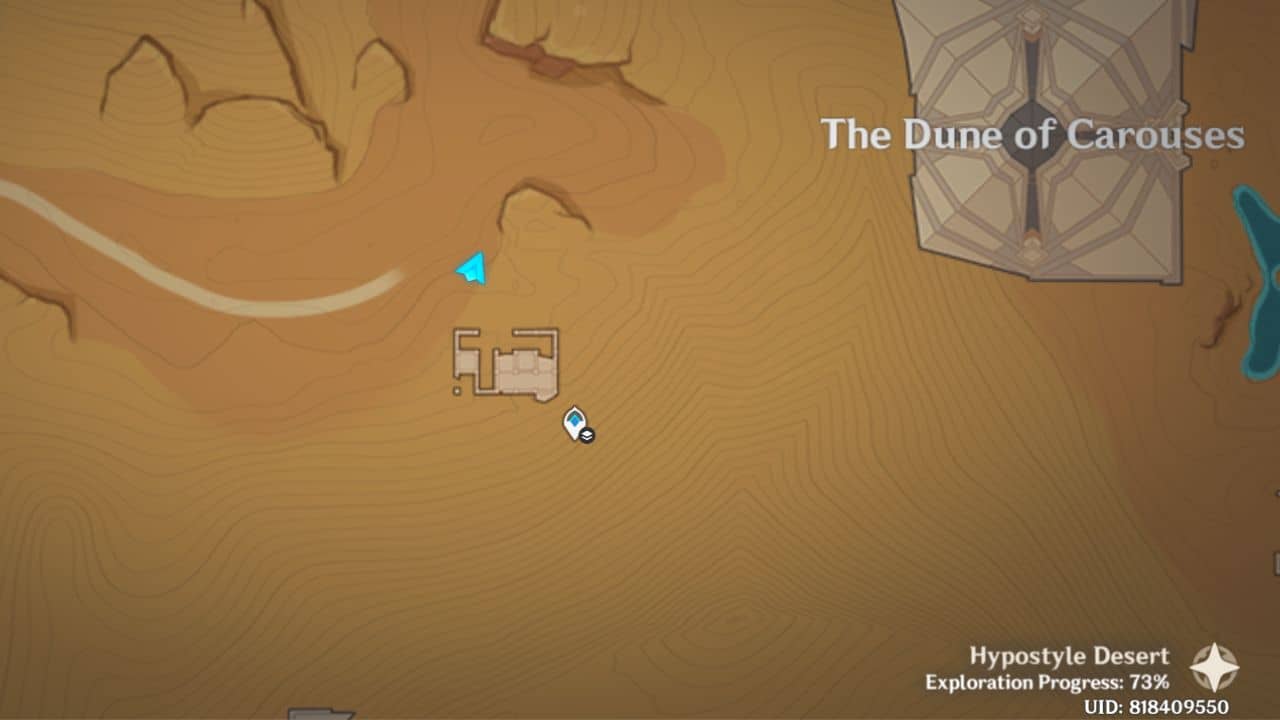
- Dune of Carouses Sacred Seals
- Dune of Elusion Sacred Seals
- West Underground Sacred Seals
- Safhe Shatranj Sacred Seals
- Wadi Al-Majuj Sacred Seals
- Passage of Ghouls (Overground) Sacred Seals
- Passage of Ghouls (Underground) Sacred Seals
- Sands of Al-Azif Sacred Seals
- Debris of Panjhave Sacred Seals
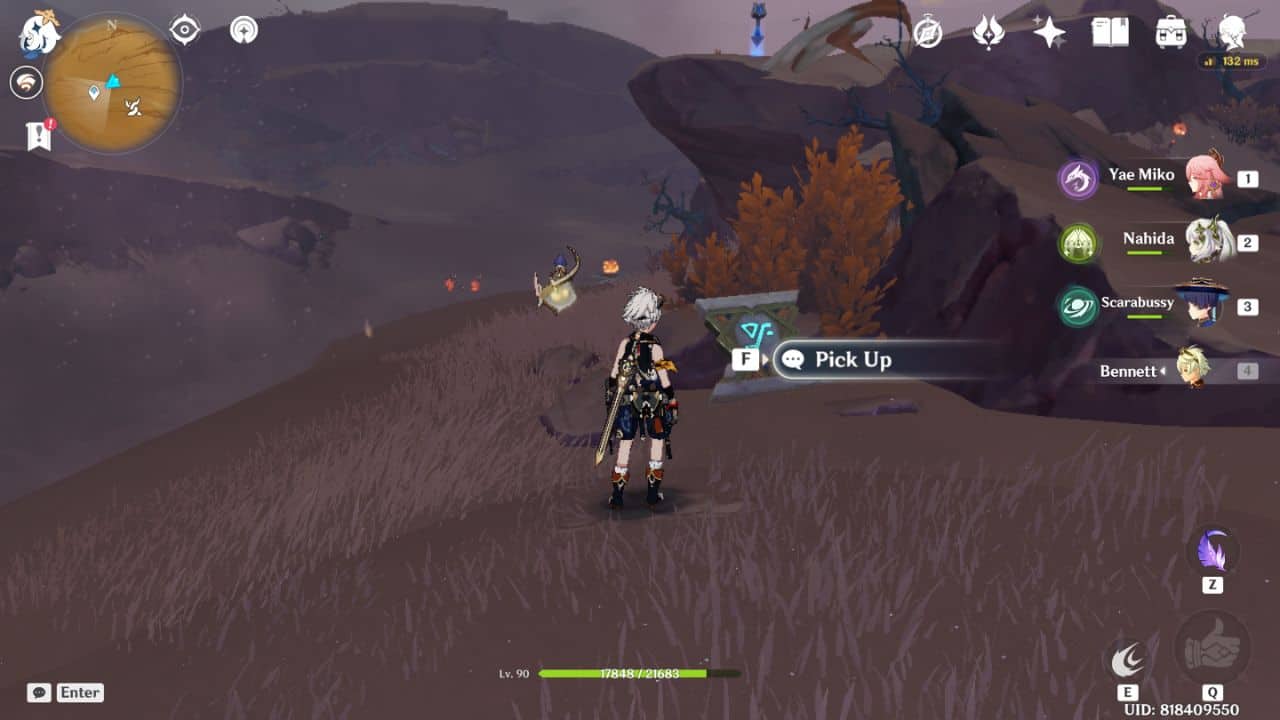
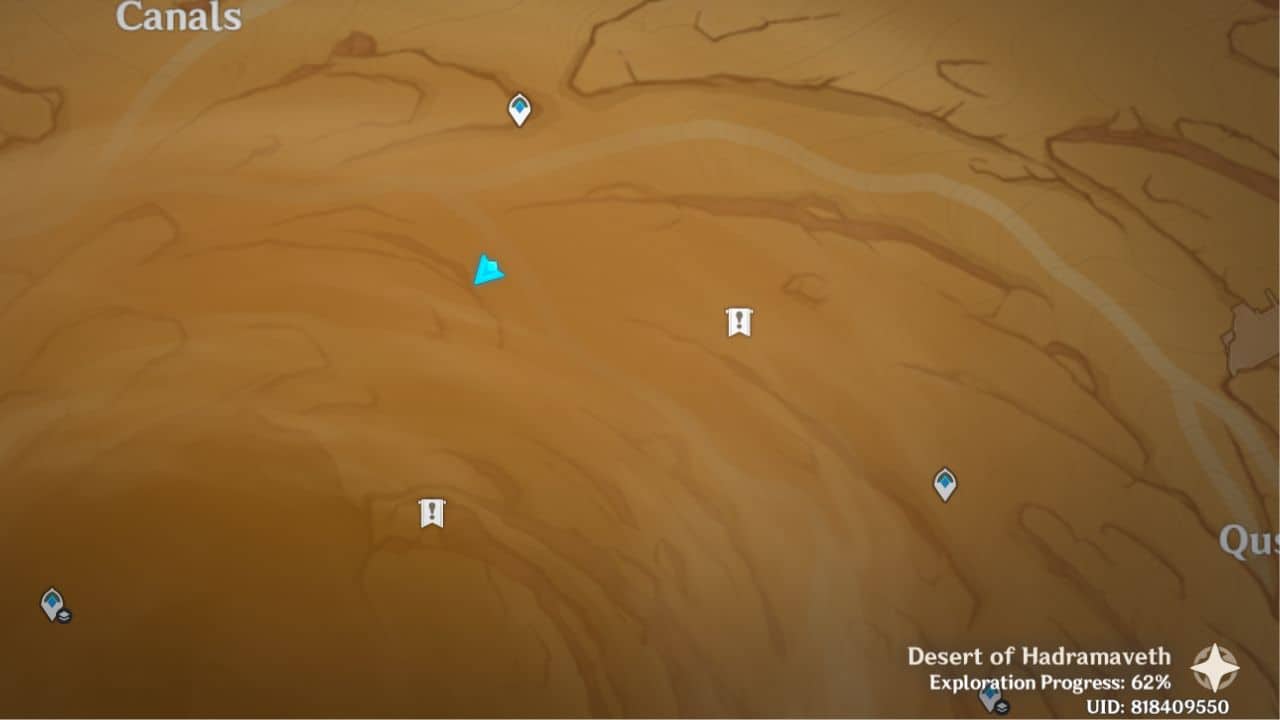
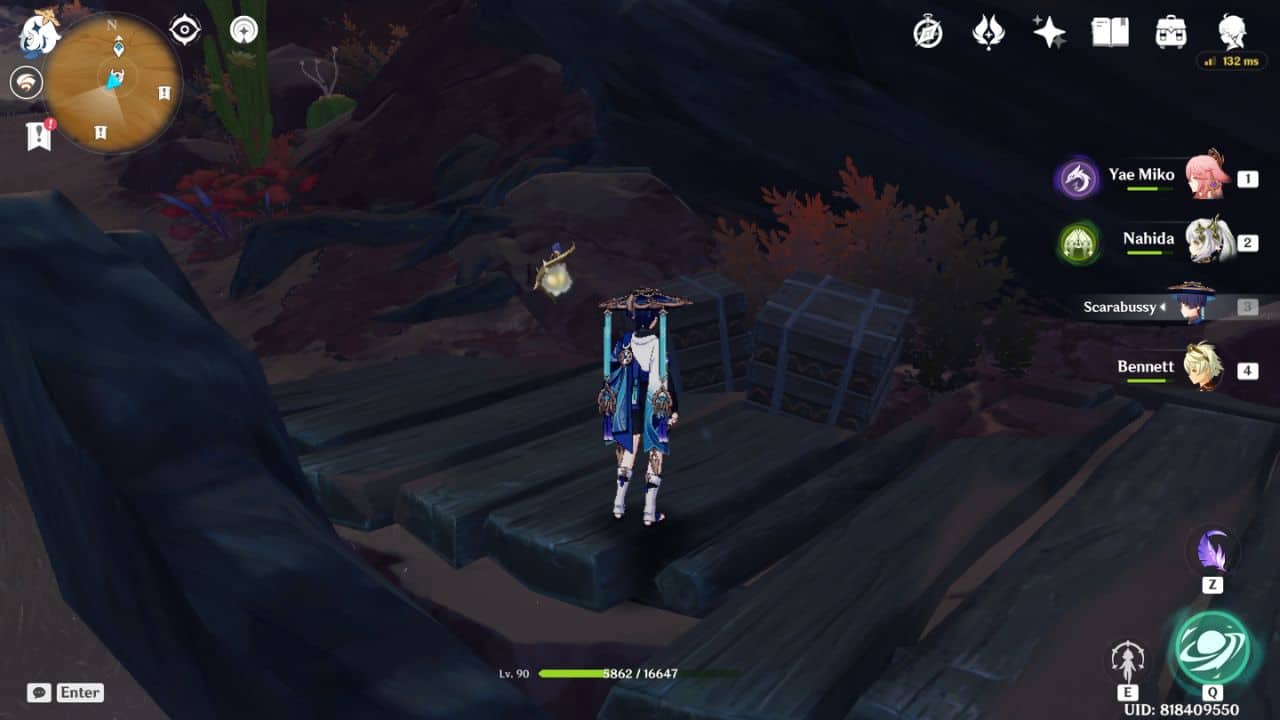
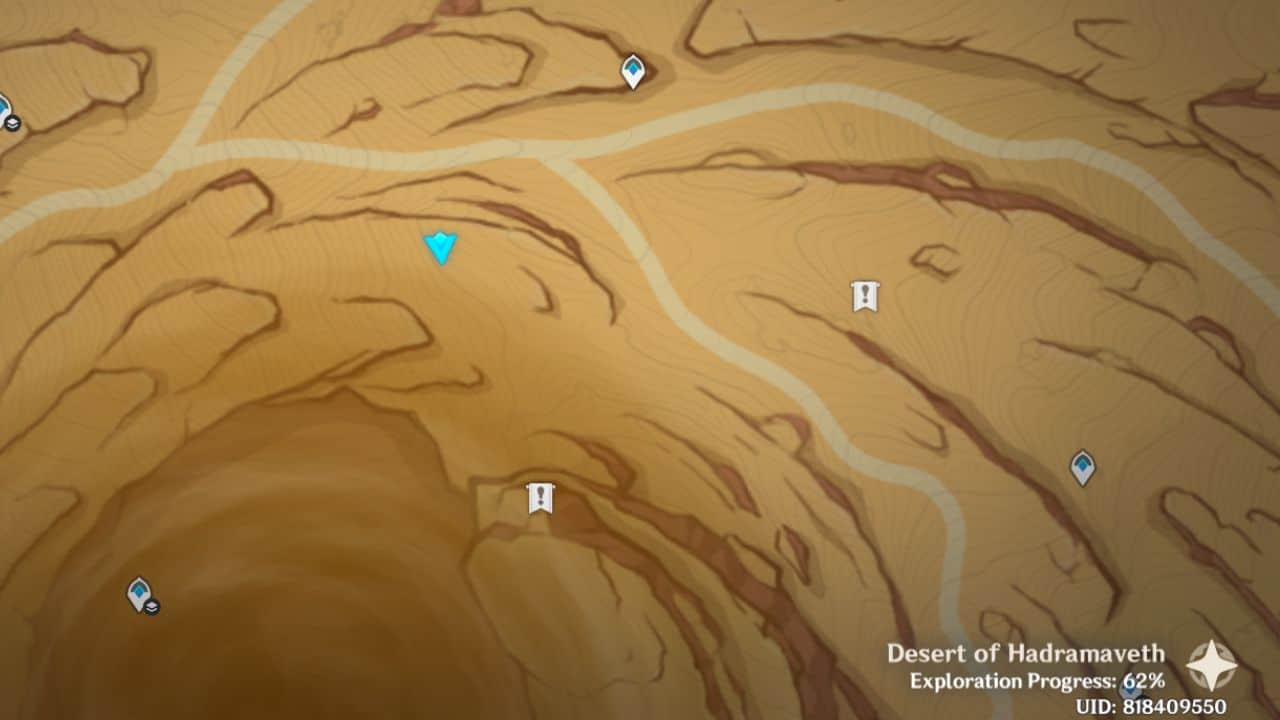
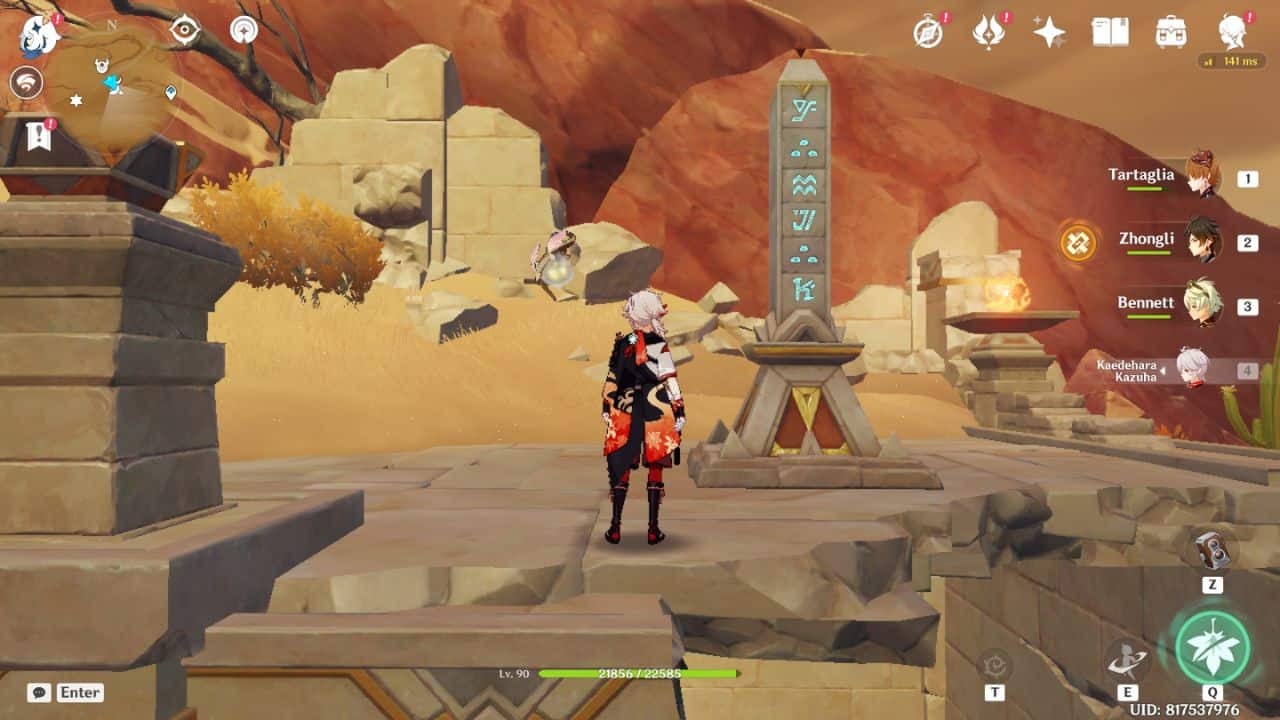
- The Sand of Three Canals Sacred Seals
- The Sand of Three Canals North Sacred Seals
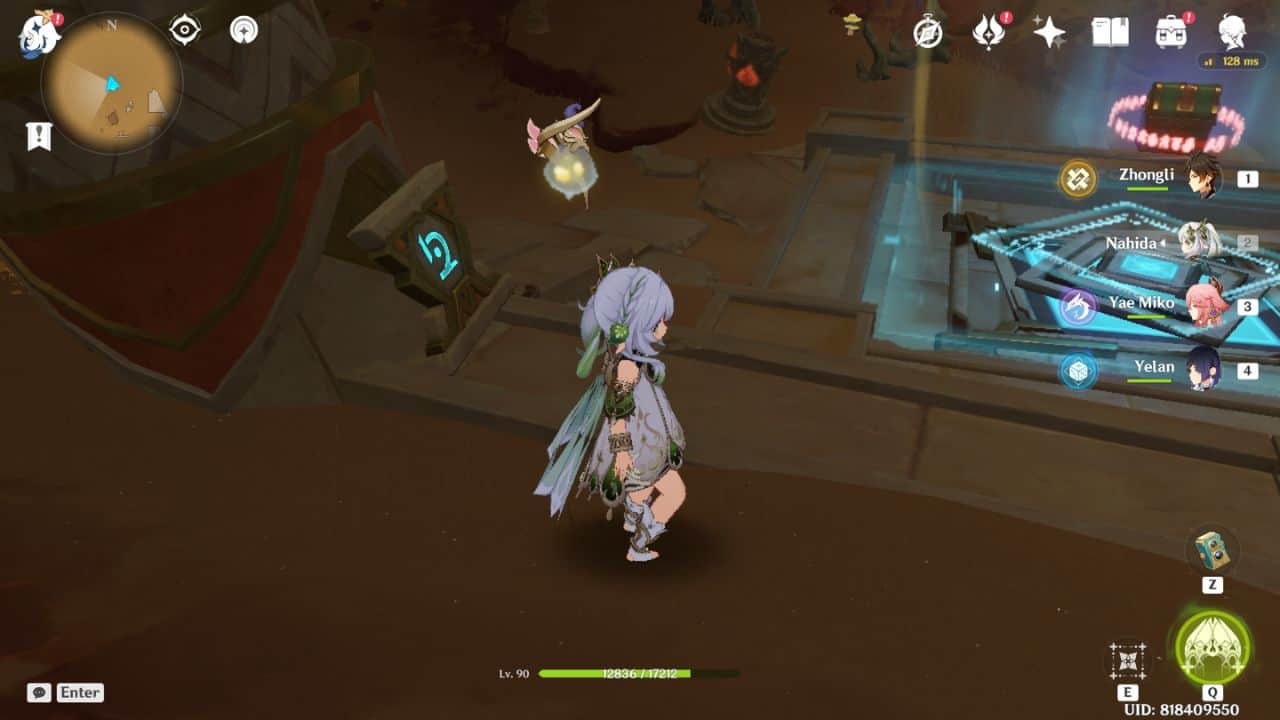
- Rewards
- Sacred Seals Locations Guide: FAQs
- Final Thoughts
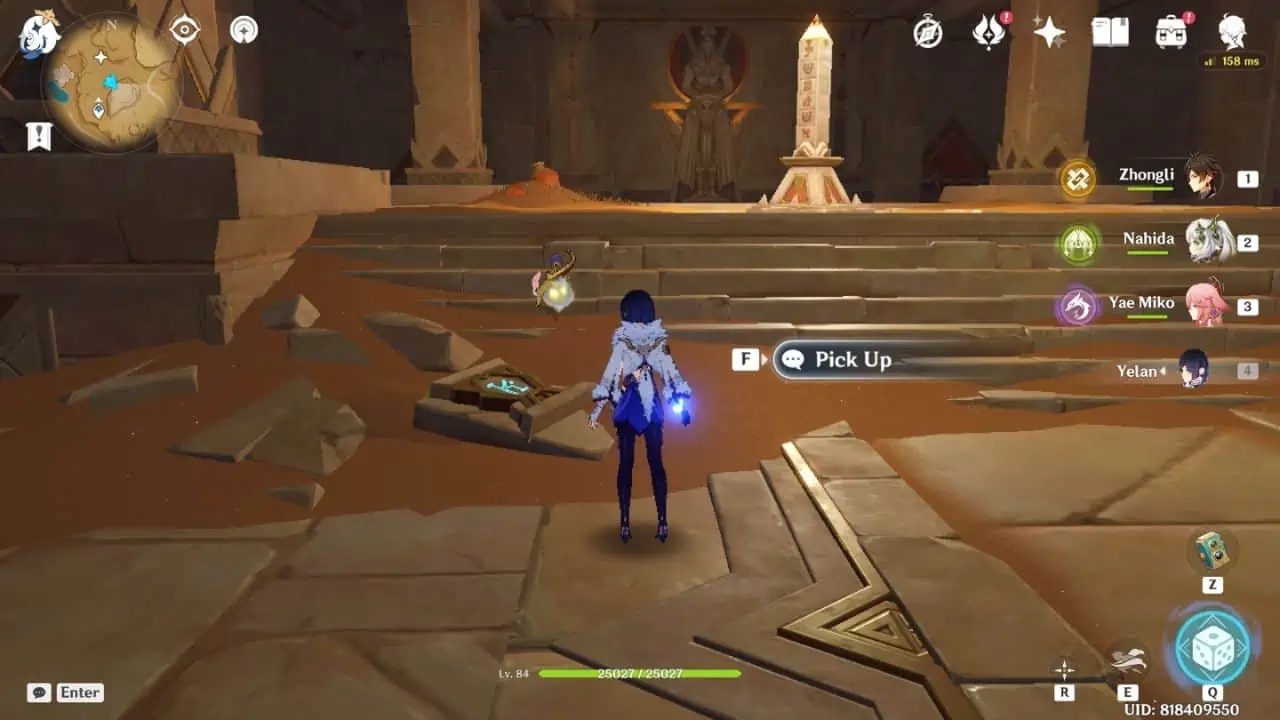
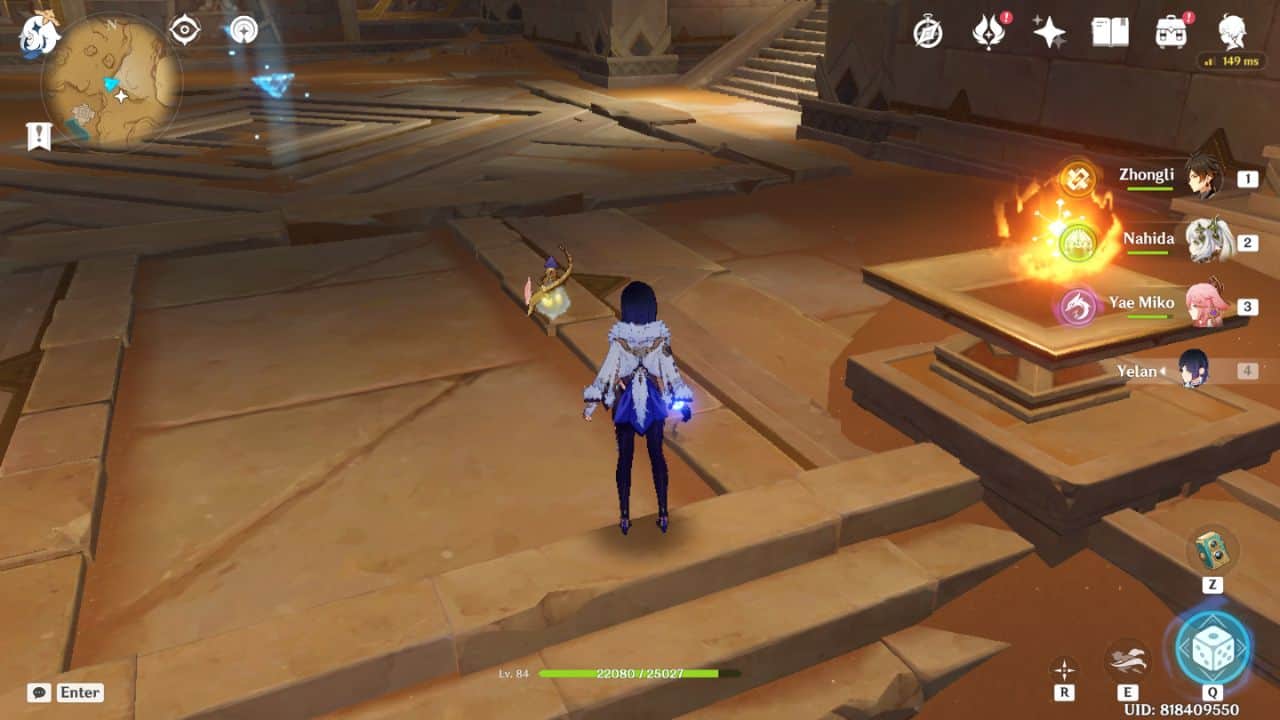
Sacred Seals are valuable relics of a civilization that existed during King Deshret’s rule. A set of six seals is required to restore every Primal Obelisk. To access some hidden seals, you need to complete the Golden Slumber, Dirge of Bilqis, and Old Notes and New Friends World Quests.
| Sacred Seal symbol | In-game representation |
| Sacred Seal: Auricle | 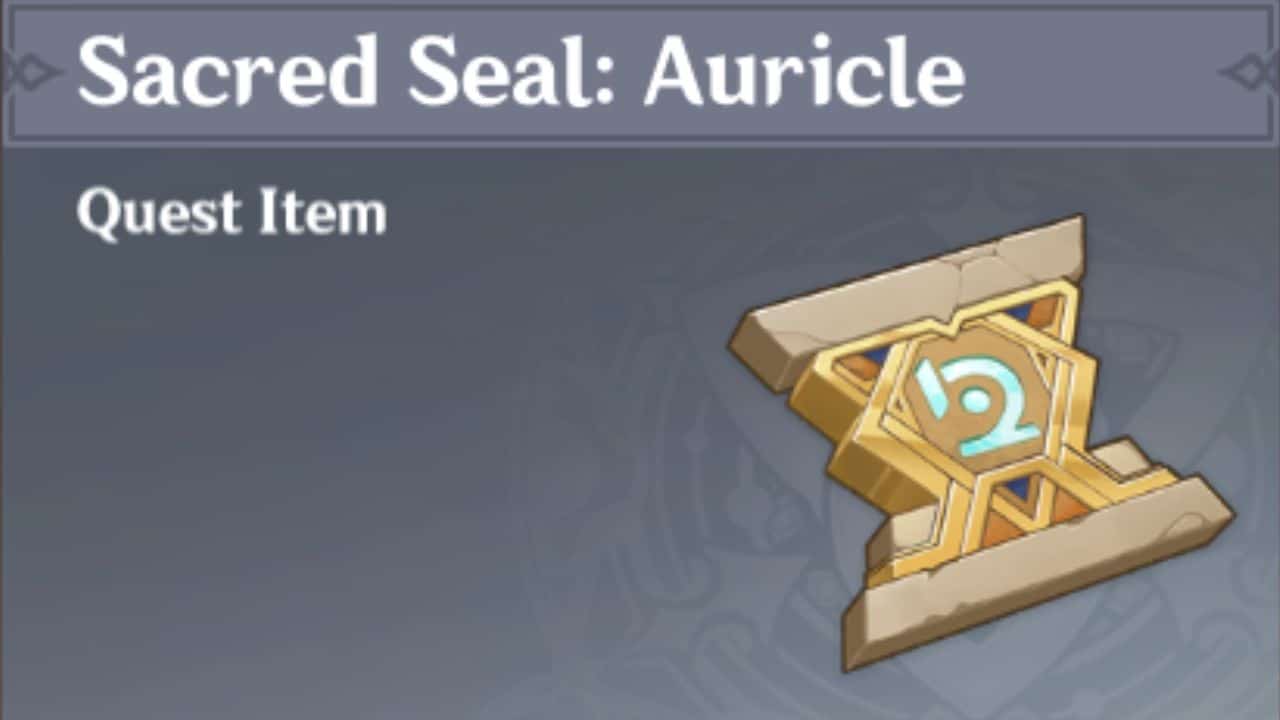 |
| Sacred Seal: Bird Head | 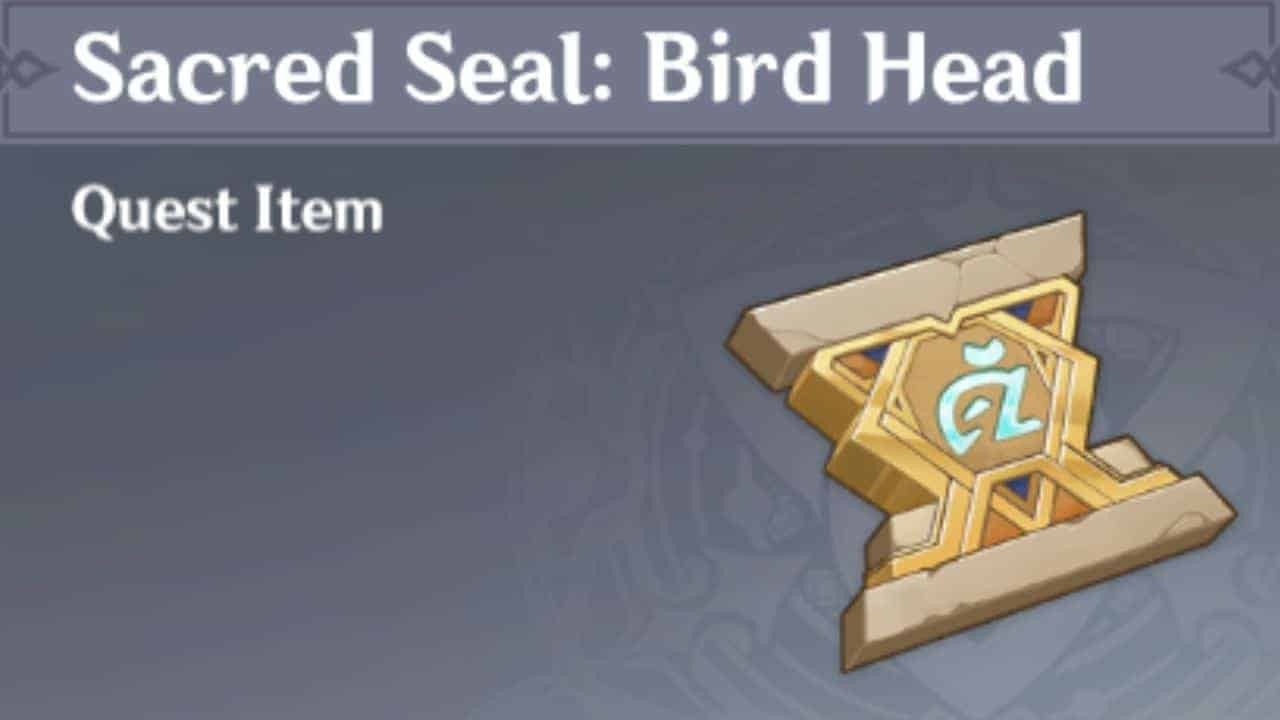 |
| Sacred Seal: Ceremony | 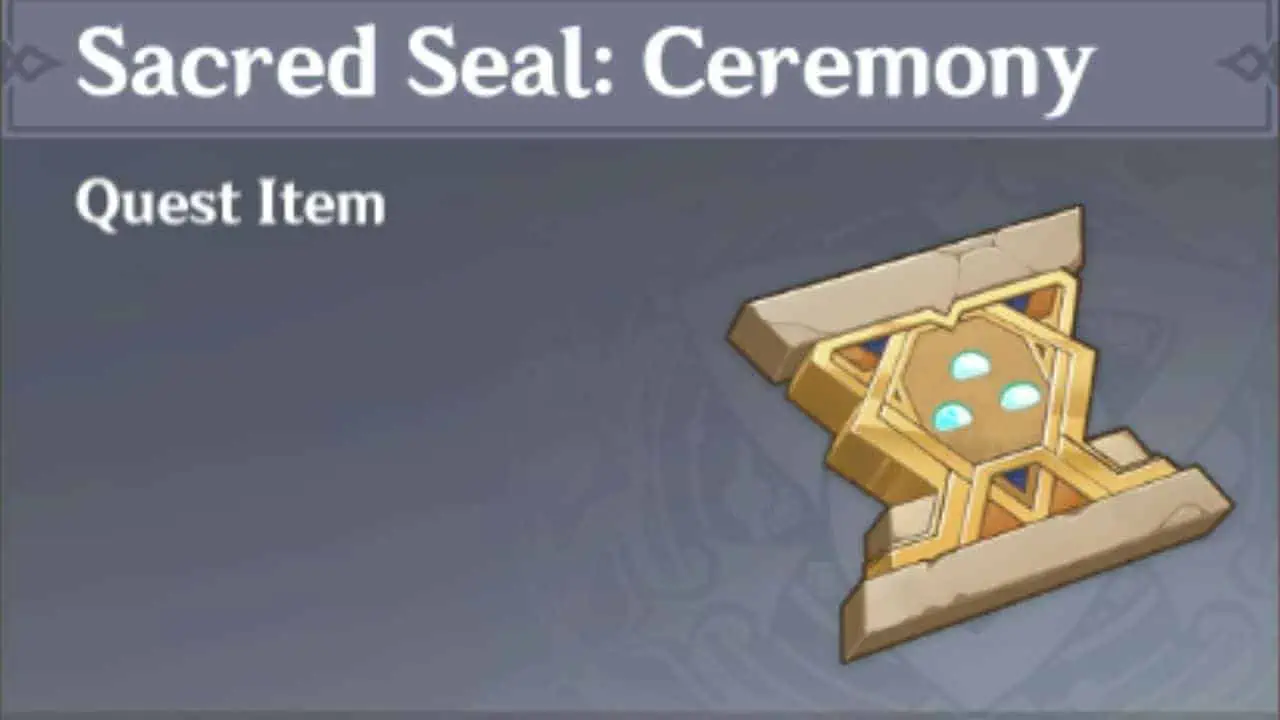 |
| Sacred Seal: Chisel Hammer | 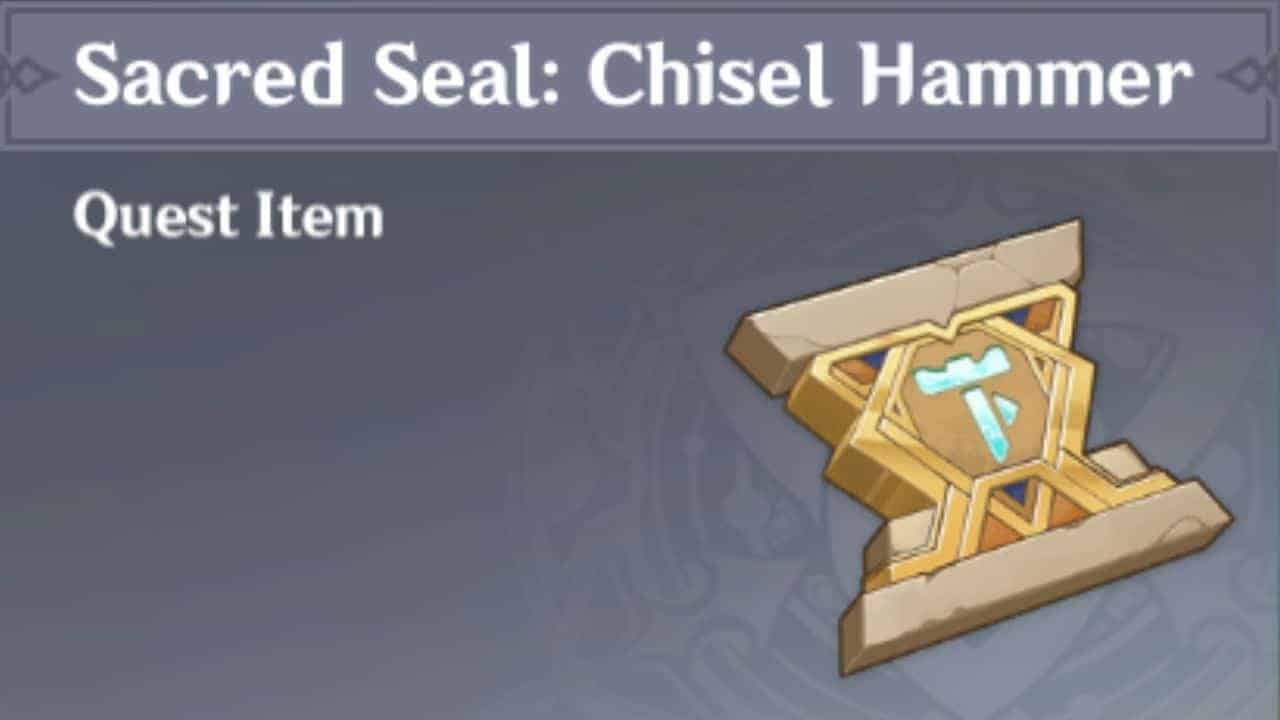 |
| Sacred Seal: Crocodile Head | 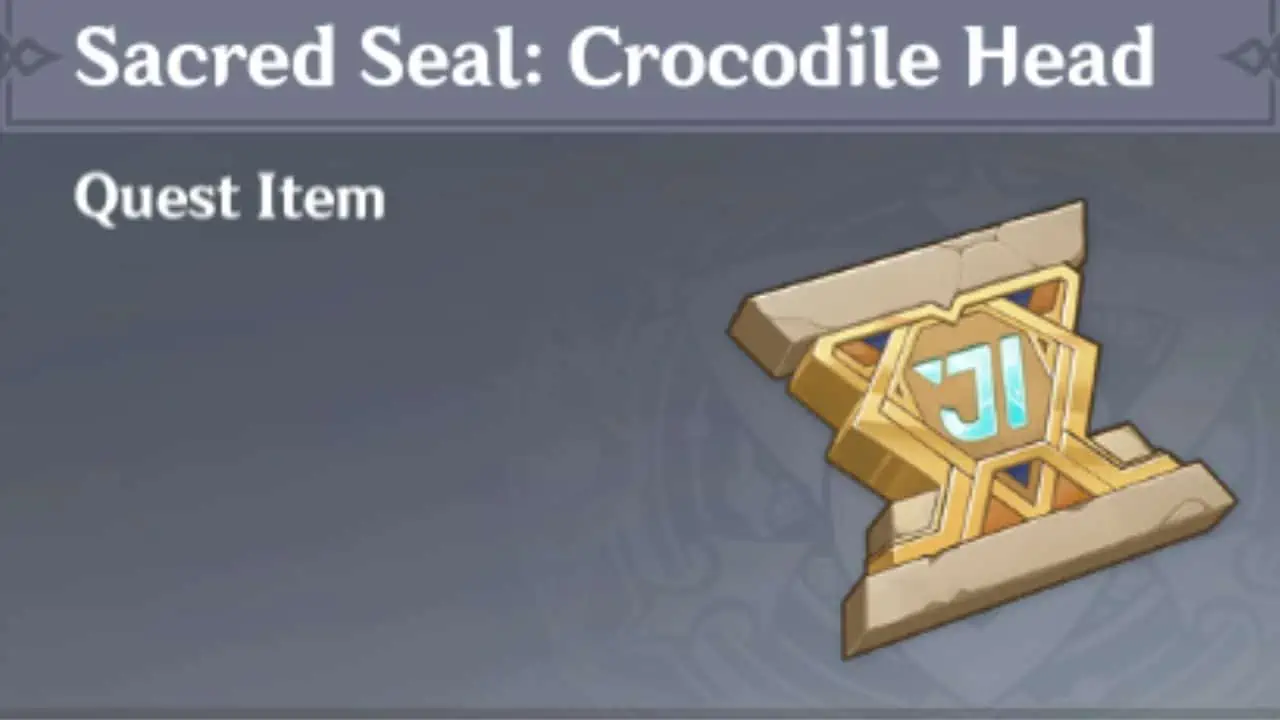 |
| Sacred Seal: Danger | 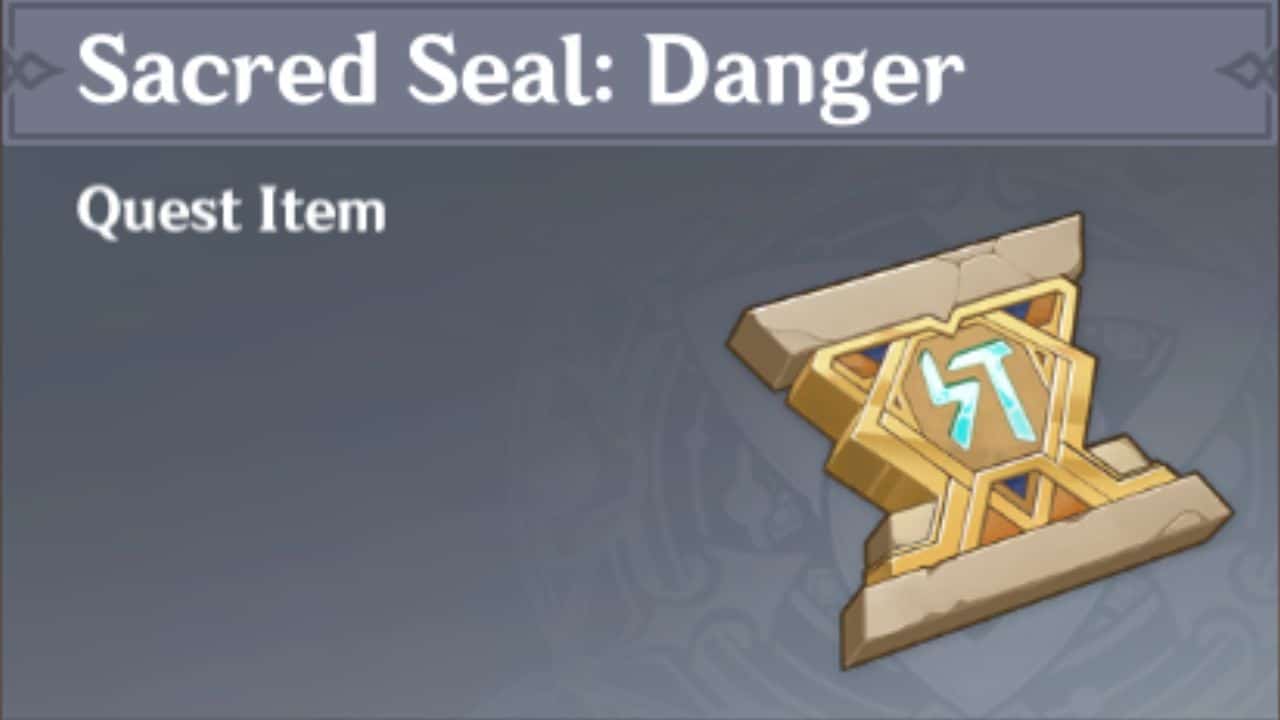 |
| Sacred Seal: Dune | 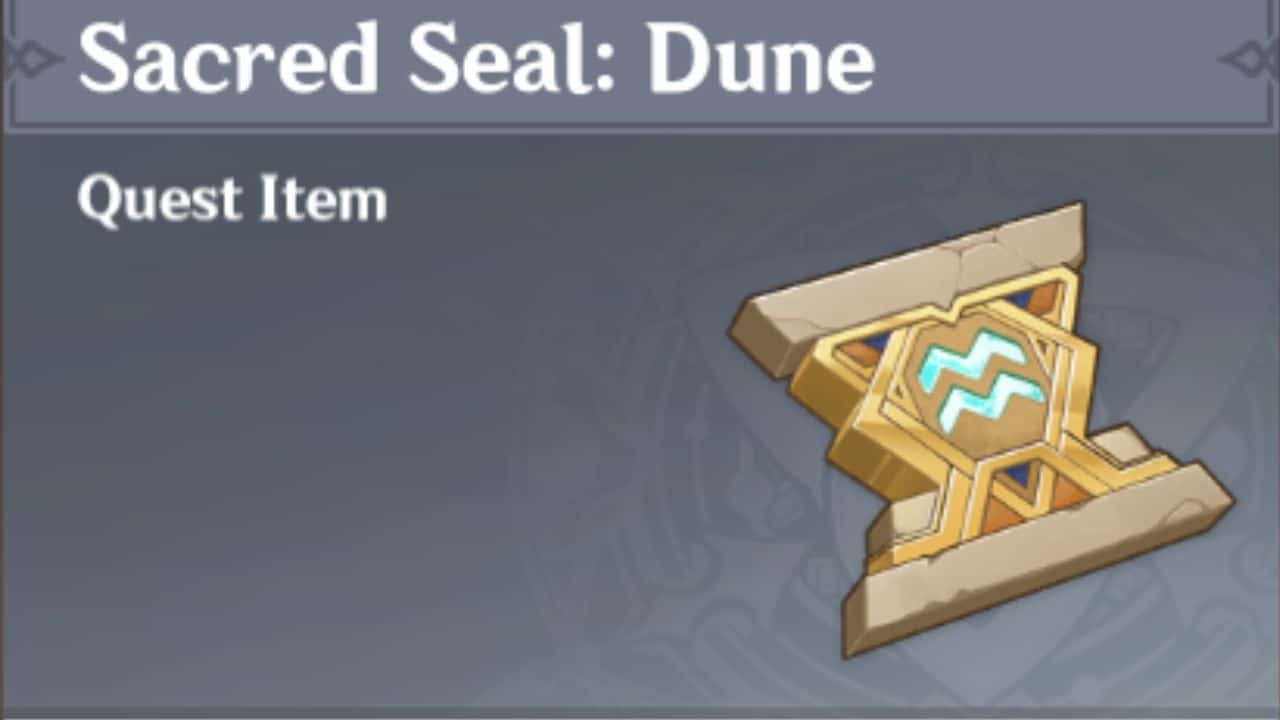 |
| Sacred Seal: Forest | 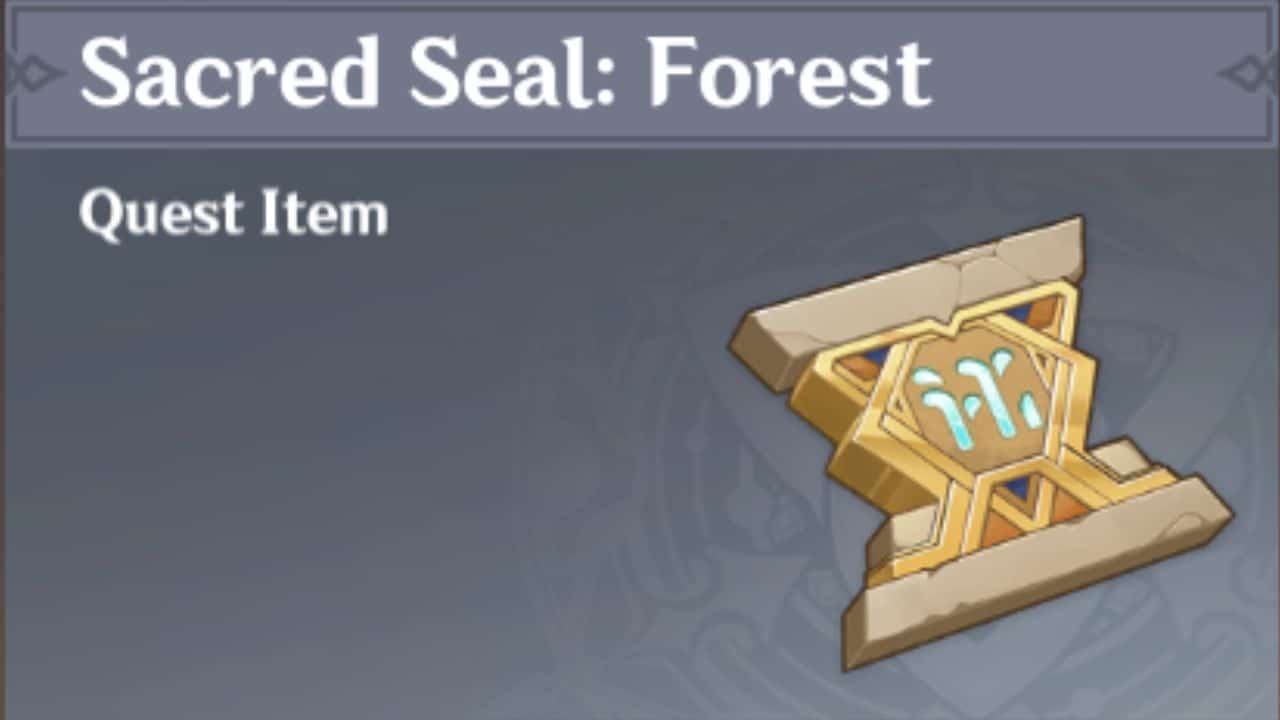 |
| Sacred Seal: Giant Serpent | 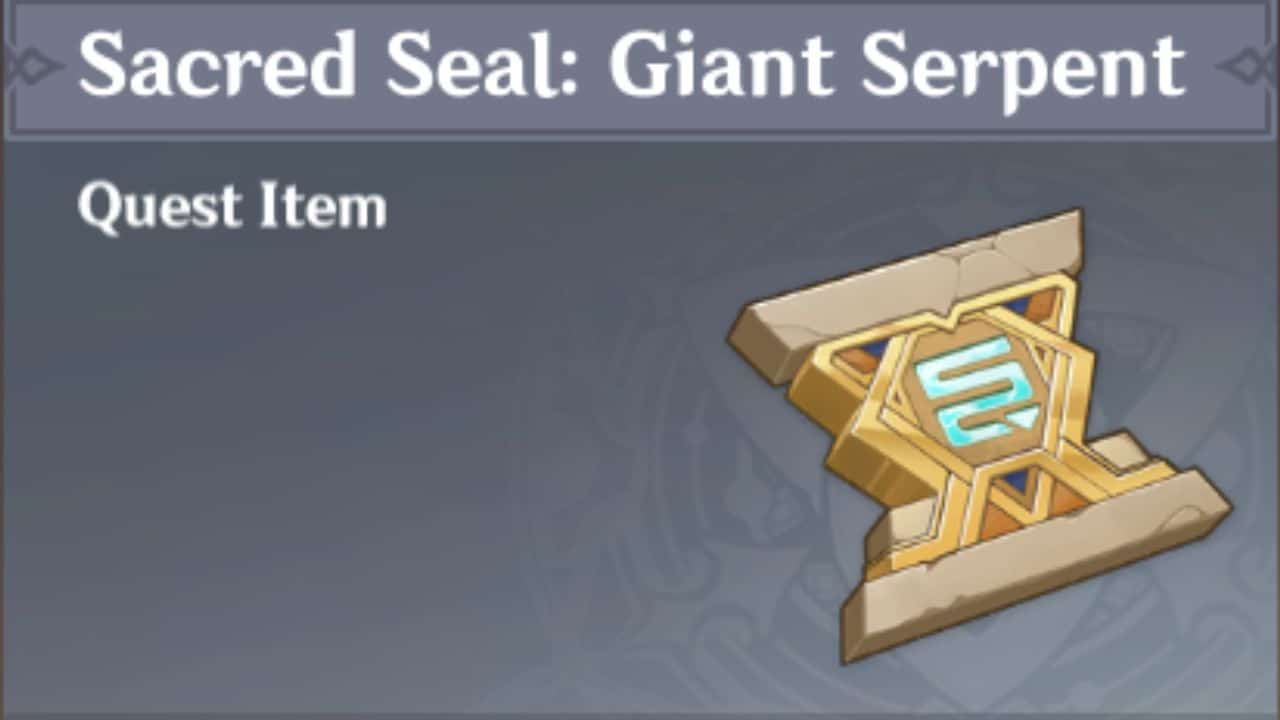 |
| Sacred Seal: Grand Door | 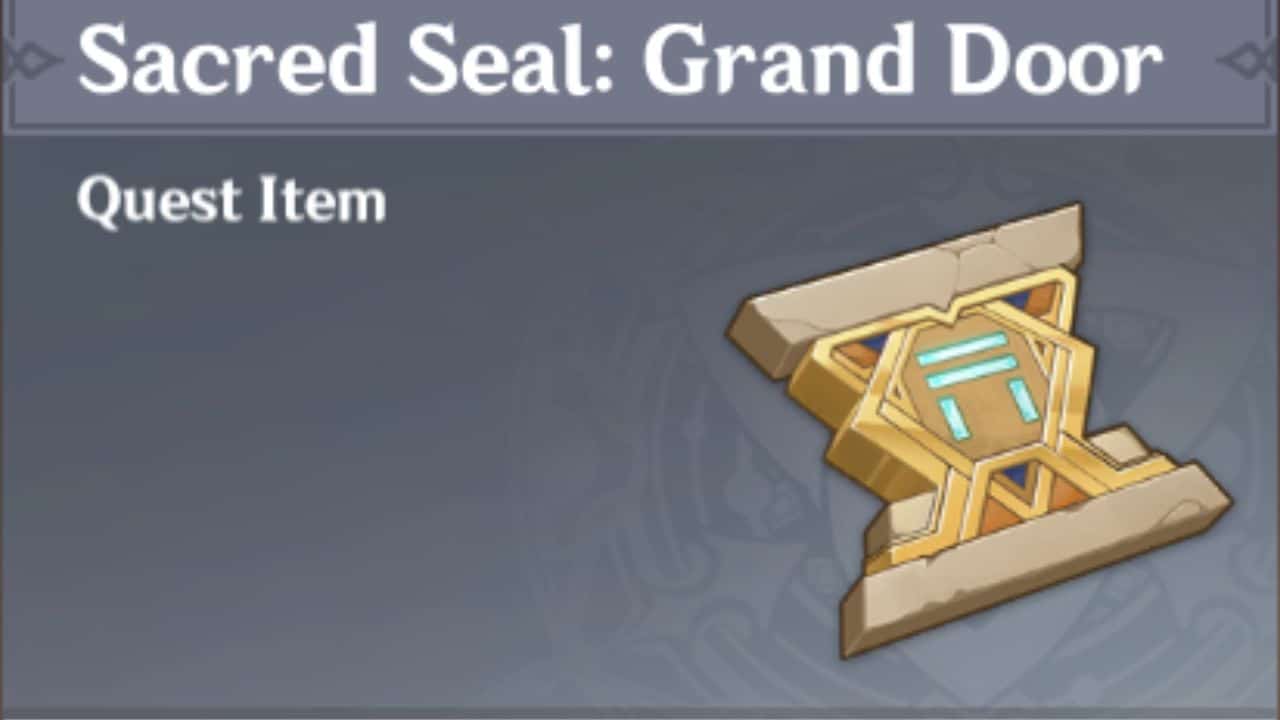 |
| Sacred Seal: Labor | 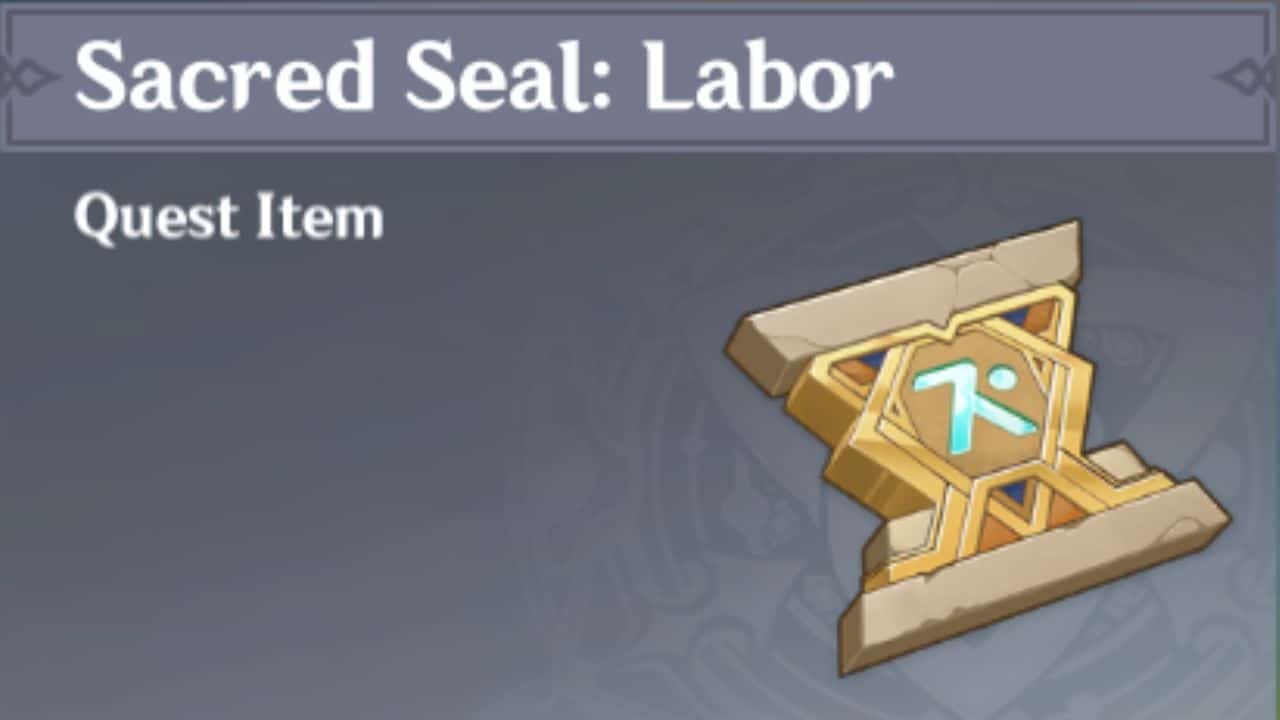 |
| Sacred Seal: Precipice |  |
| Sacred Seal: Raised Arm | 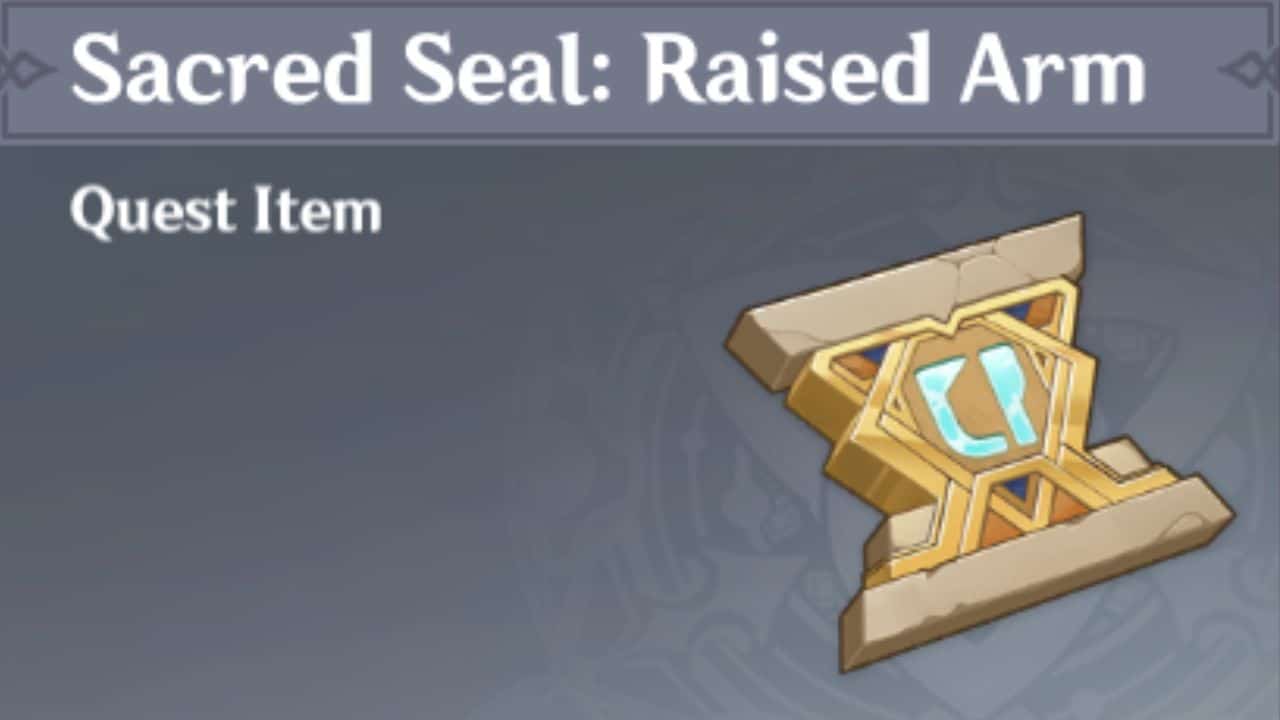 |
| Sacred Seal: Right to Rule | 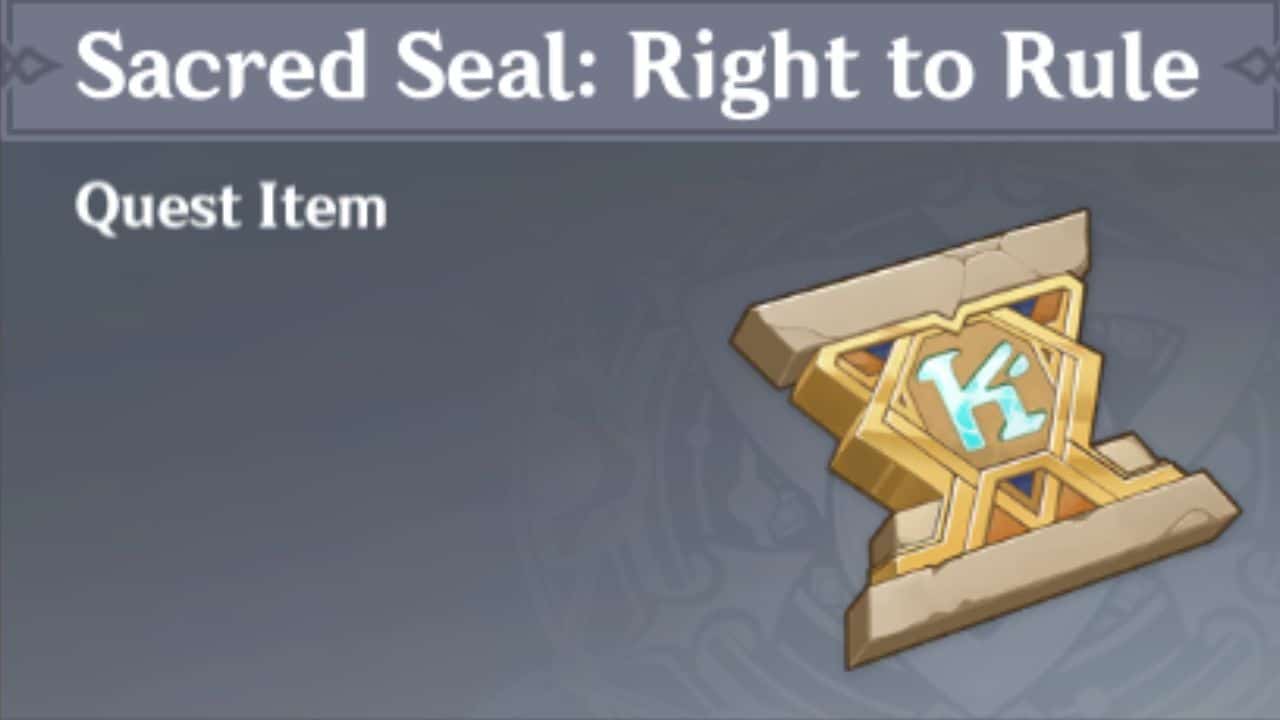 |
| Sacred Seal: Sandstorm |  |
| Sacred Seal: Sheep Head |  |
| Sacred Seal: Sunrise | 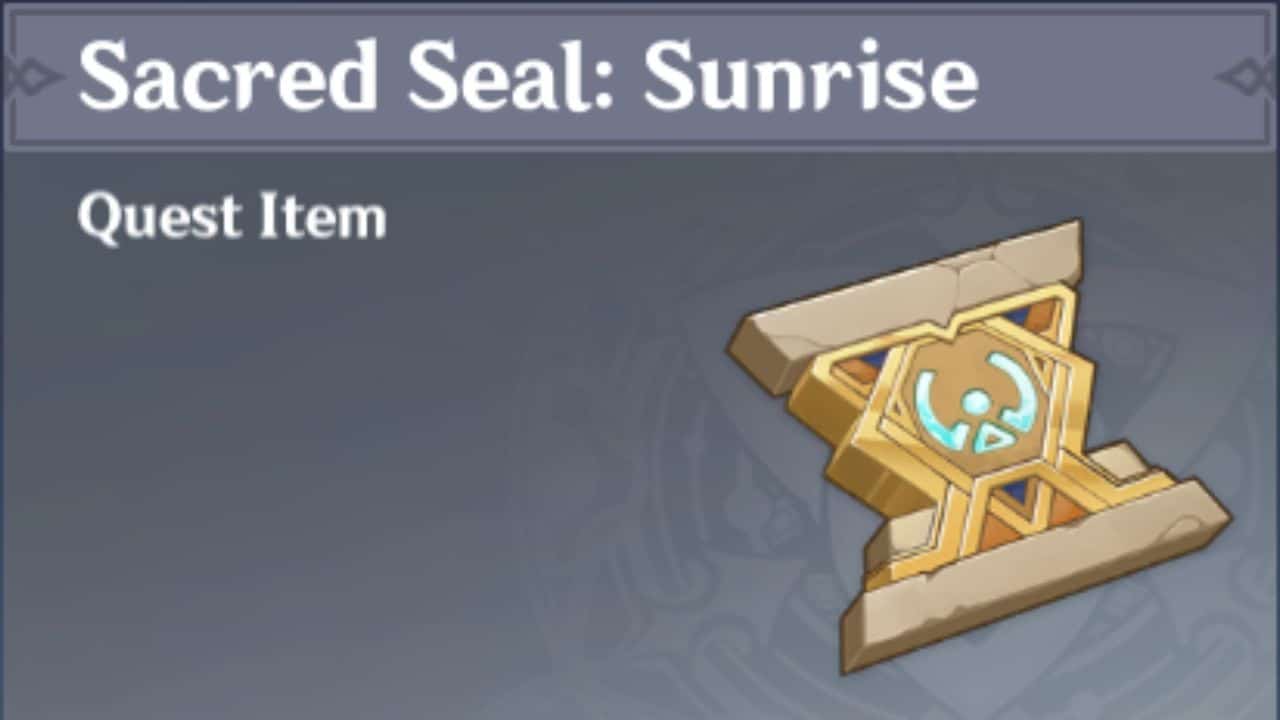 |
| Sacred Seal: Thunderstrike | 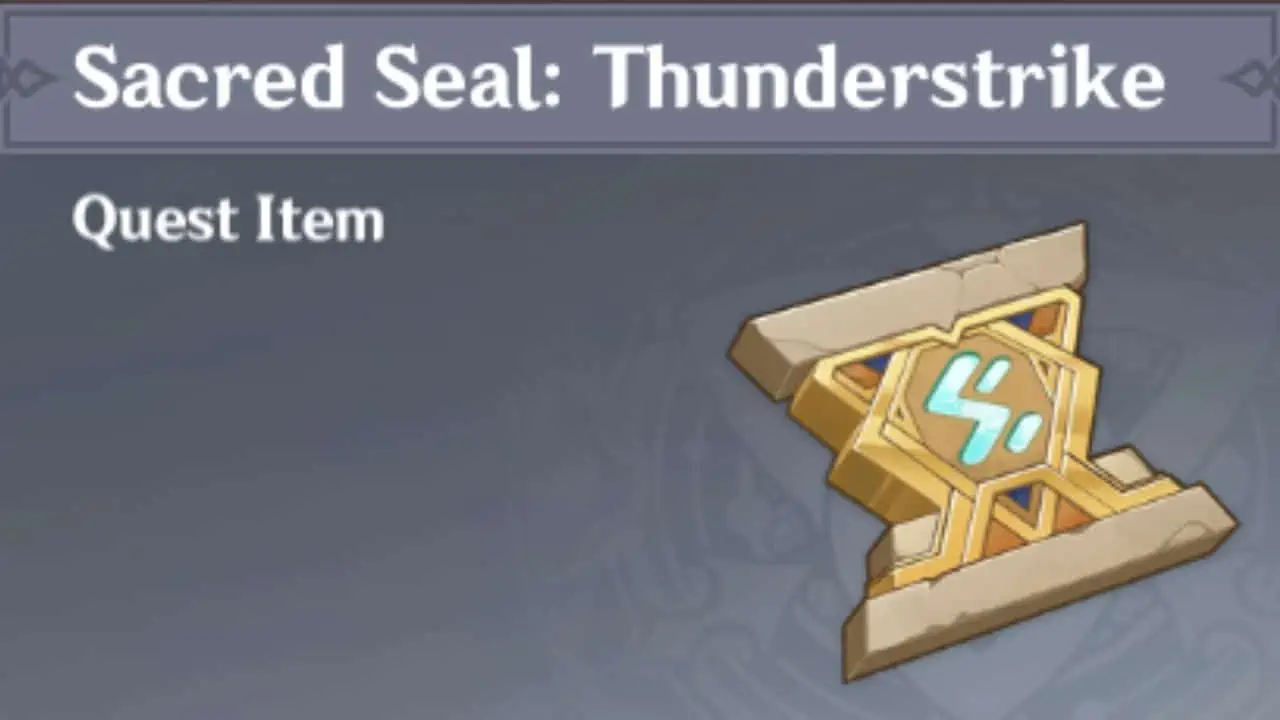 |
| Sacred Seal: Valley |  |
Locations
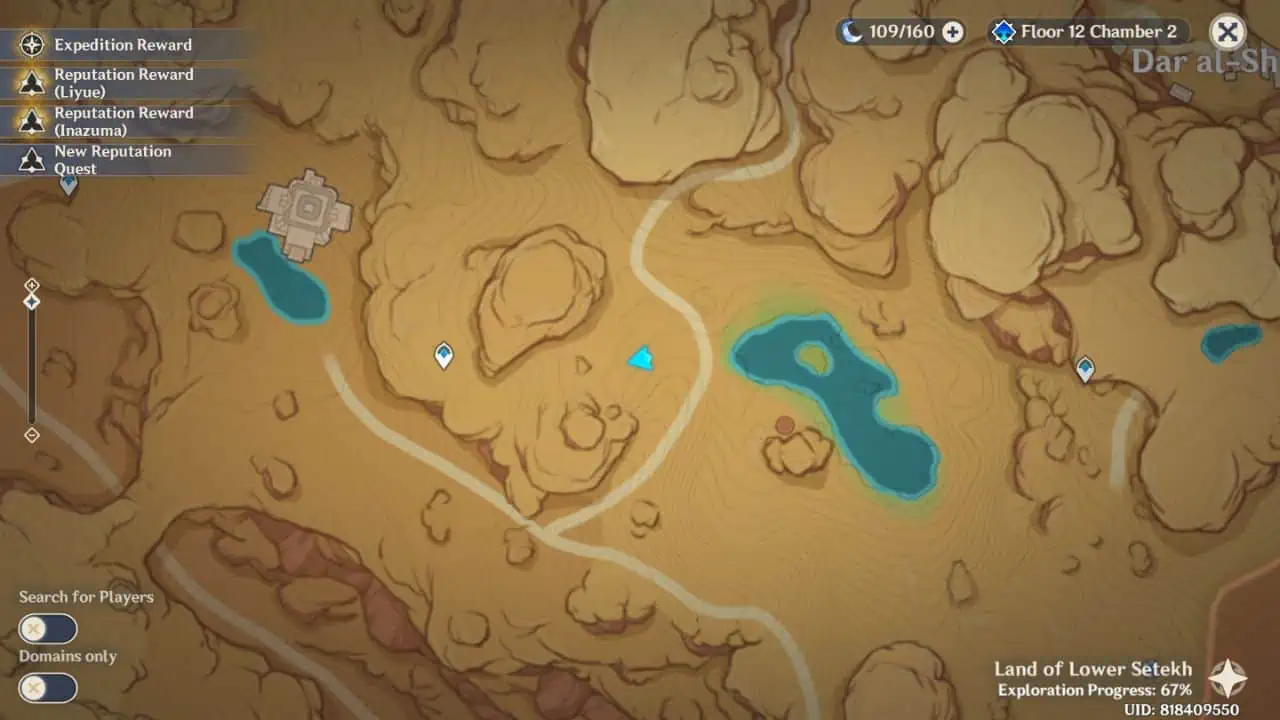
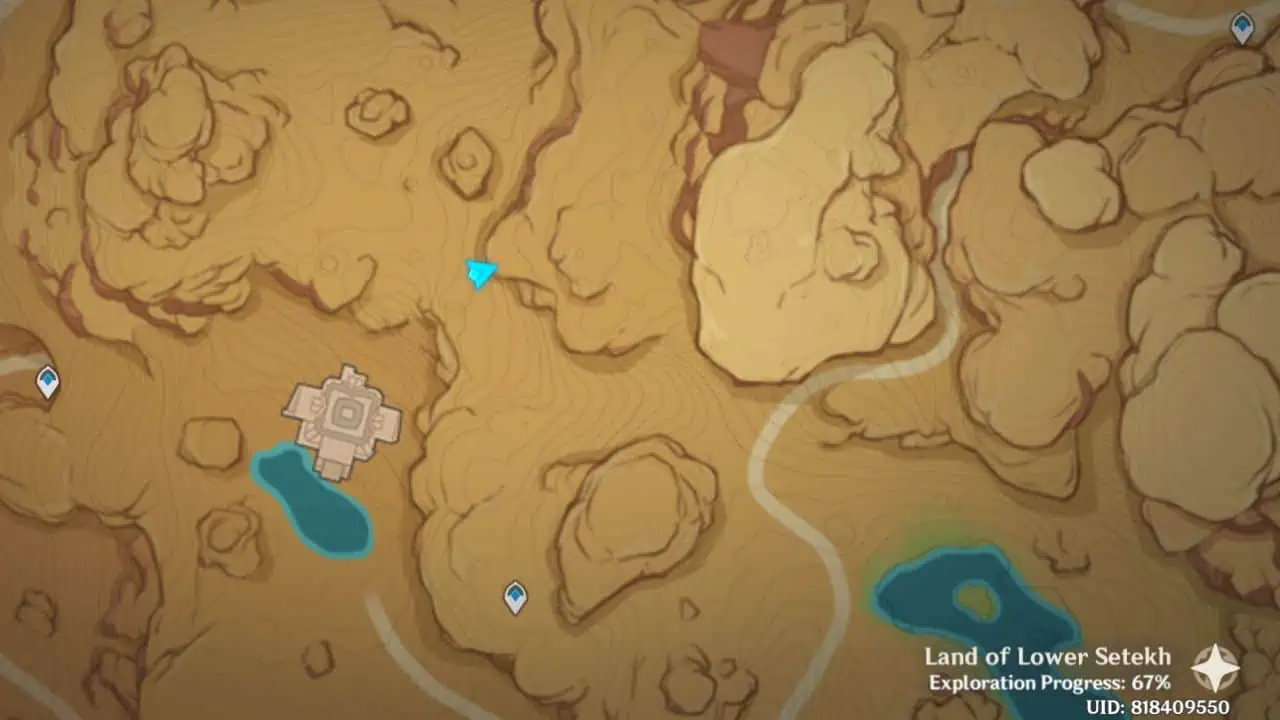
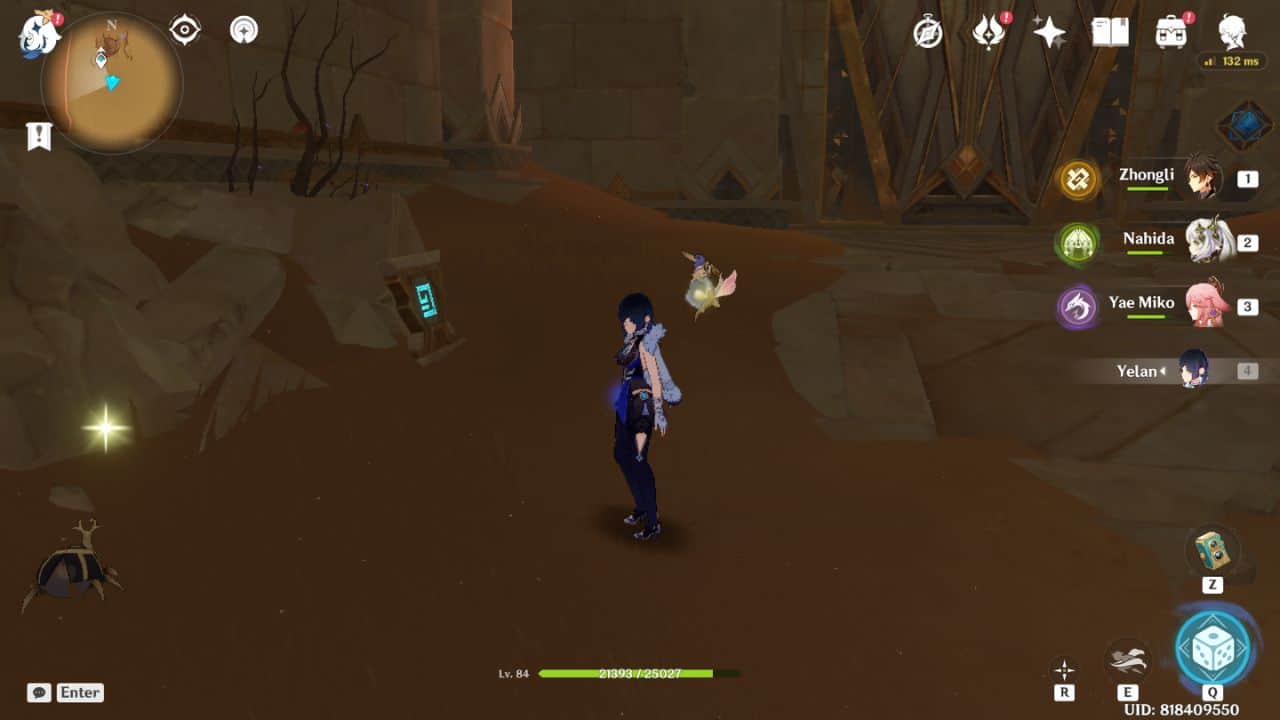
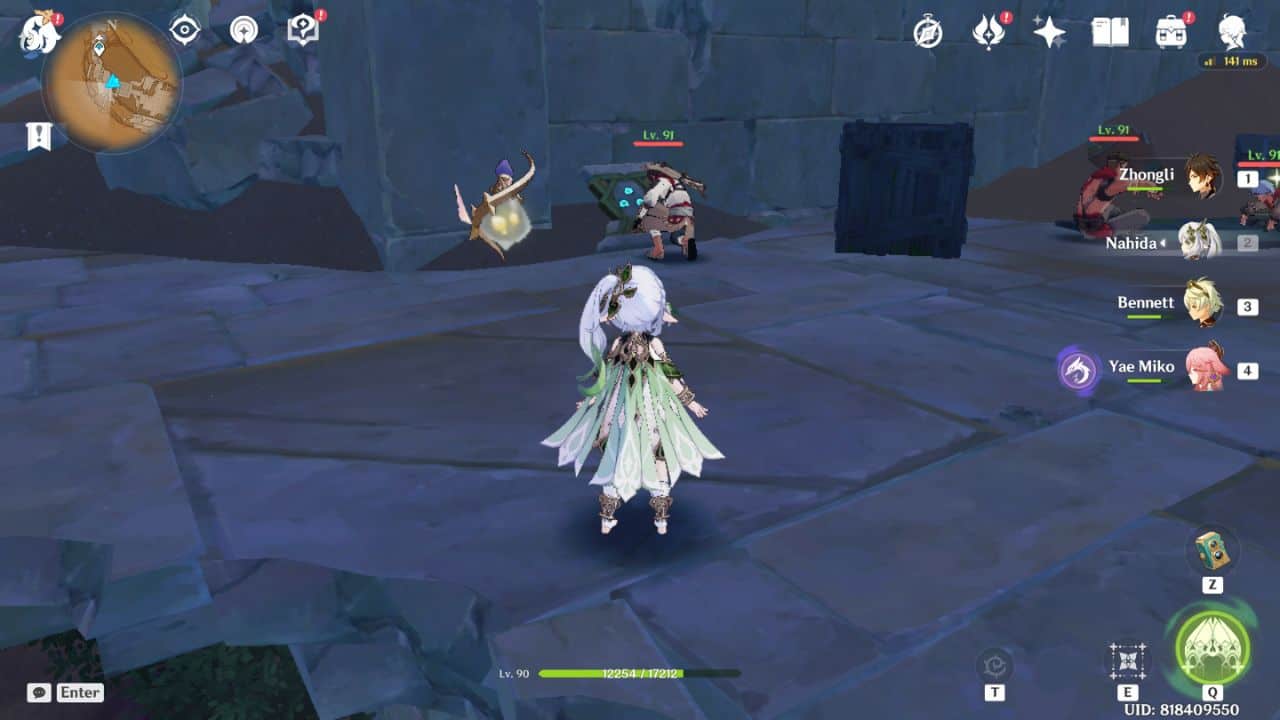
By selecting the ‘Mark Sacred Seals’ option, you can find the approximate location of every Sacred Seal of a Primal Obelisk. That’s why we will collect seals of one Primal Obelisk at a time.
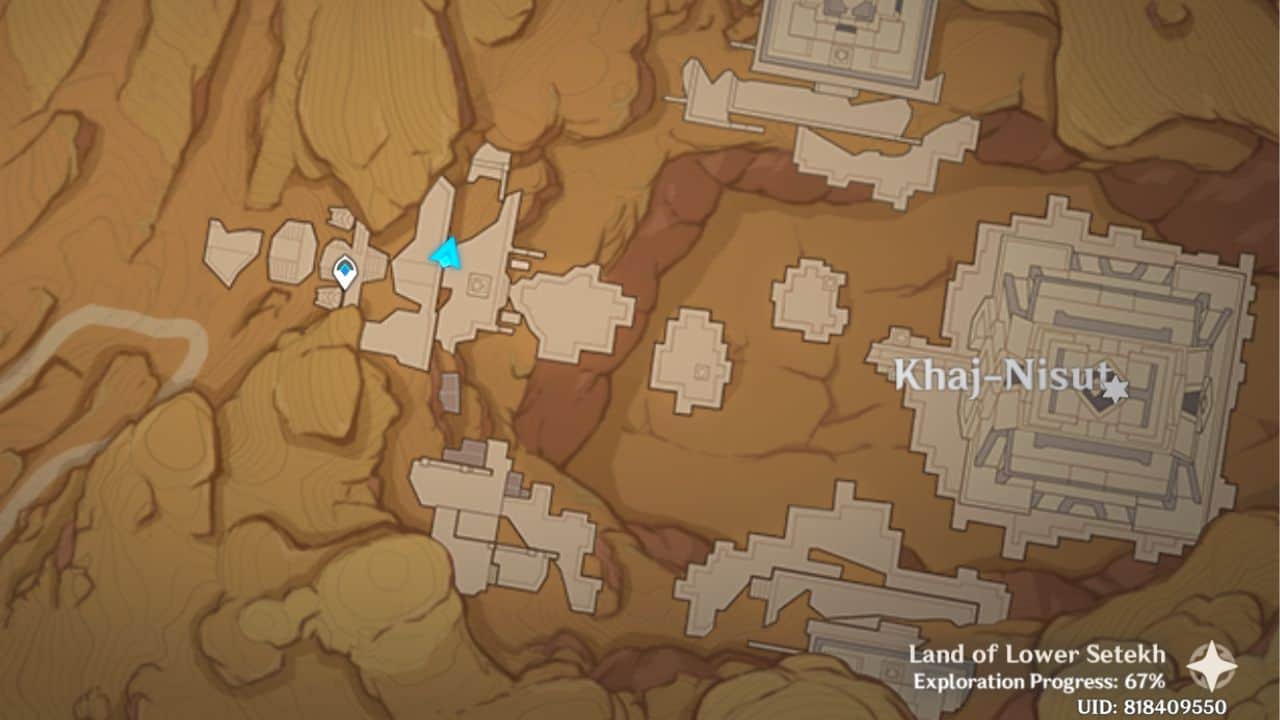
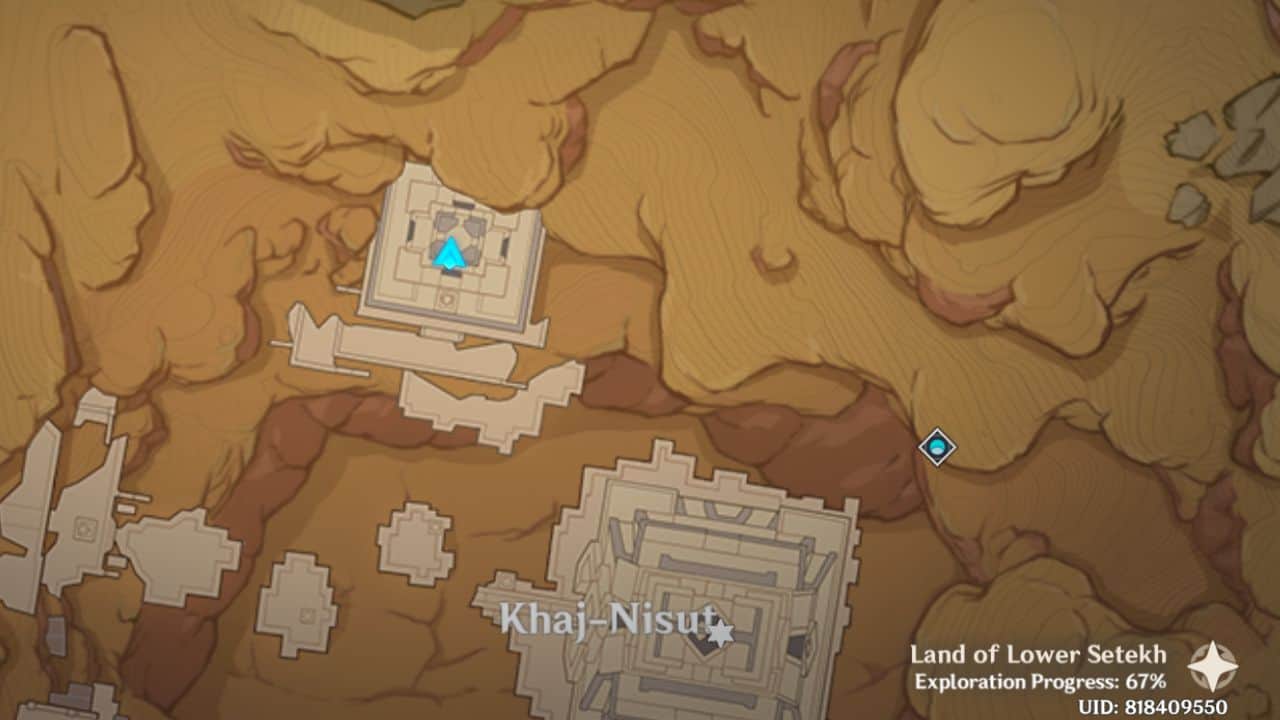
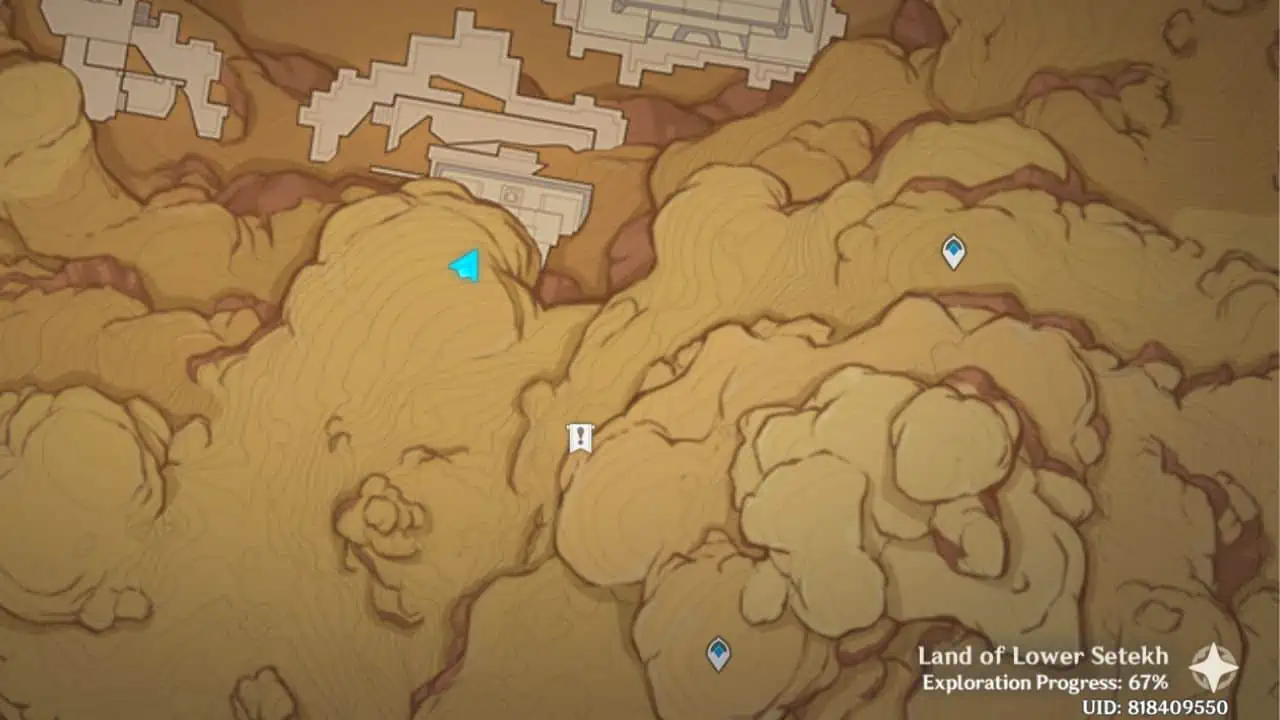
Khaj-Nisut Sacred Seals
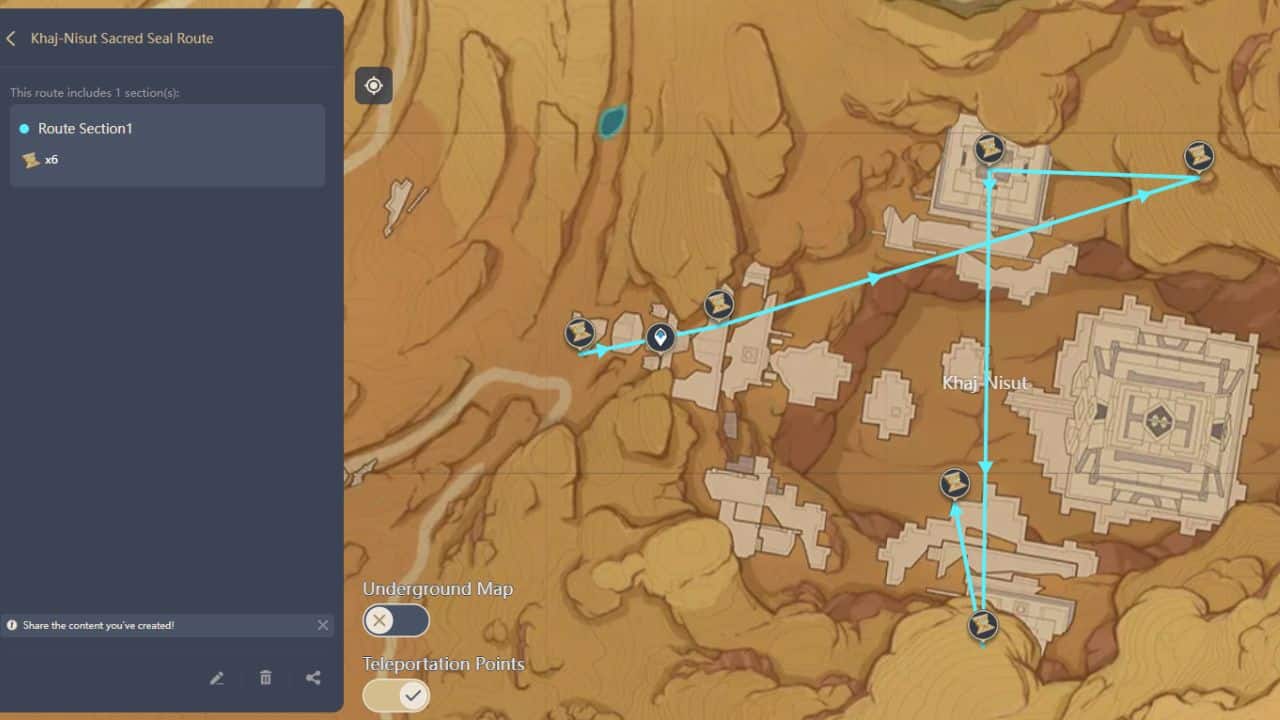
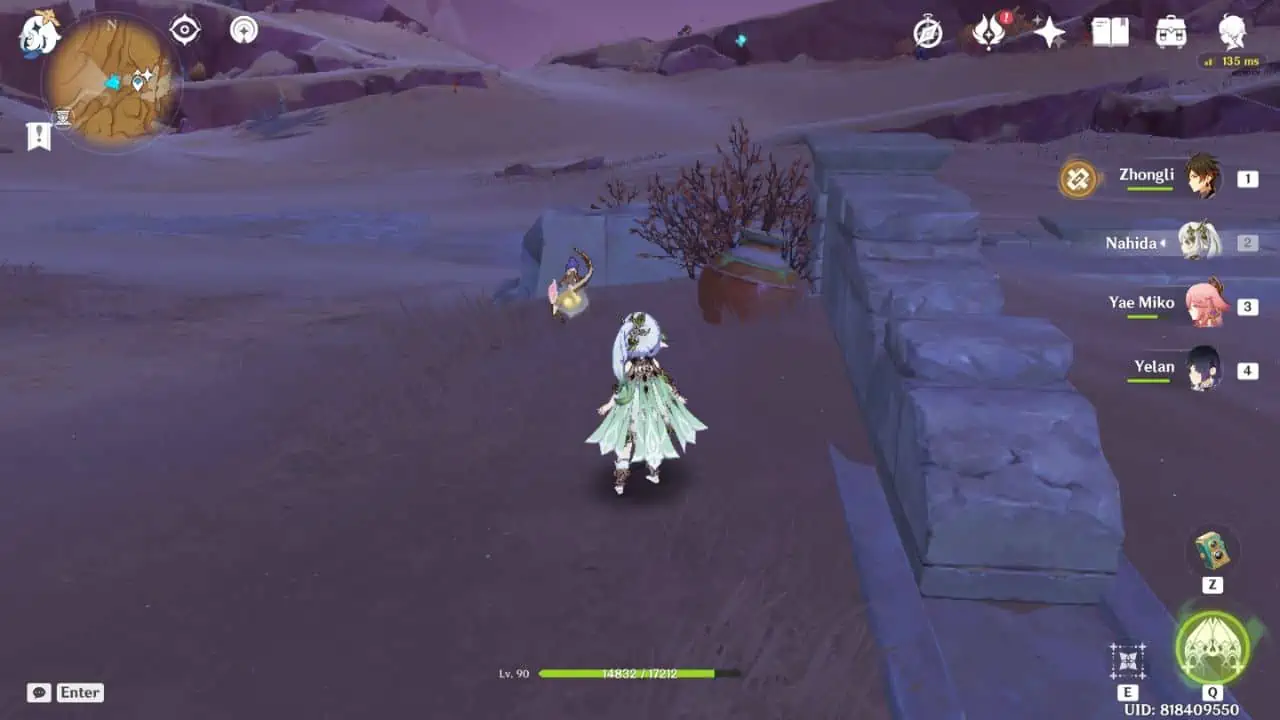
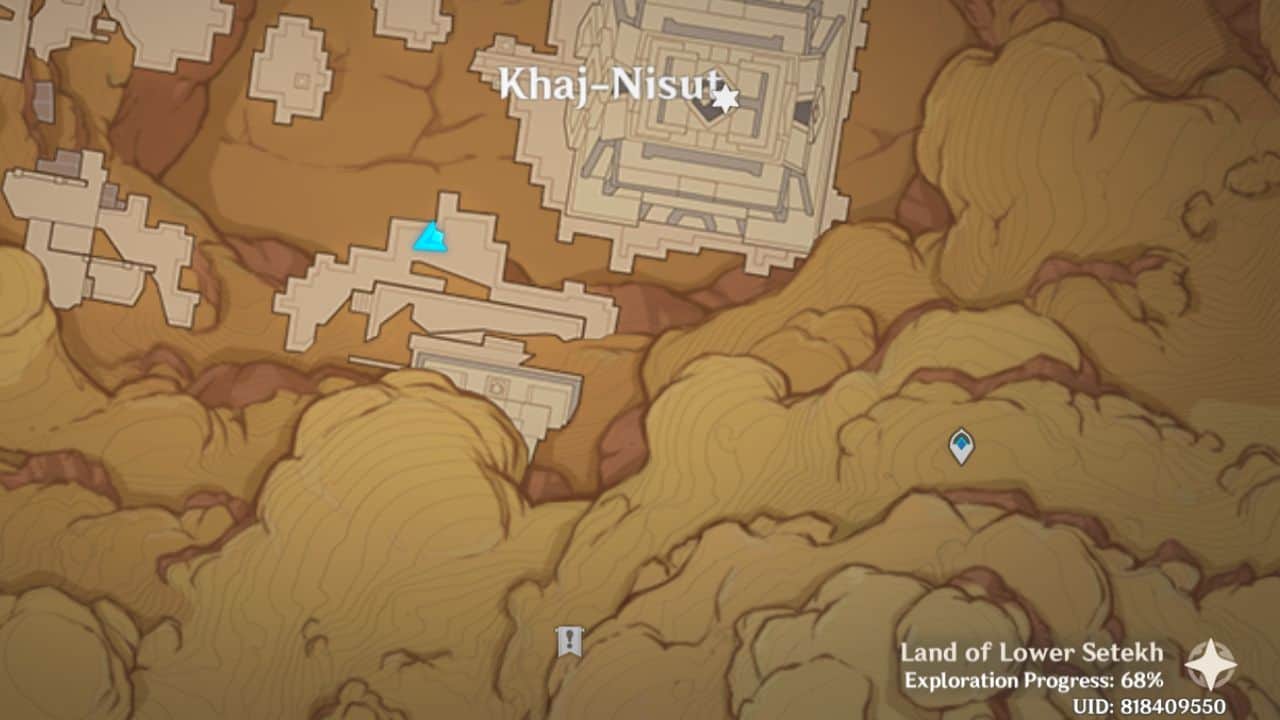
1. Right to Rule
 |  |
| Map Location | In-game Location |
Walk west of the west Khaj-Nisut waypoint until you encounter two Primal Constructs. The seal is located in the corner of a broken wall.
2. Valley
 |
| Map Location |
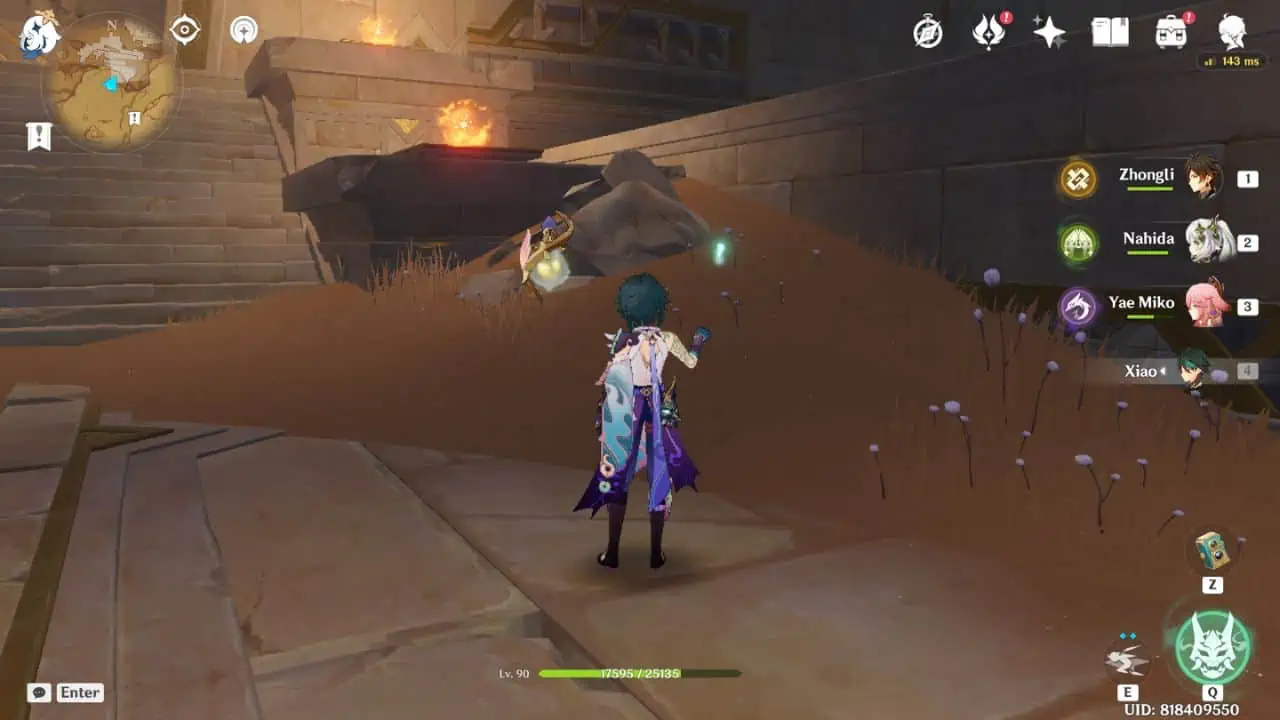
This seal is found during one of the trials from the ‘Dreams Beneath the Searing Sand’ quest. Head inside the temple and plunge through the subsequent two wind currents.
After you plunge through the second wind current, enter the room to your left. The seal is near a plinth mechanism.
3. Thunderstrike
 |  |
| Map Location | In-game Location |
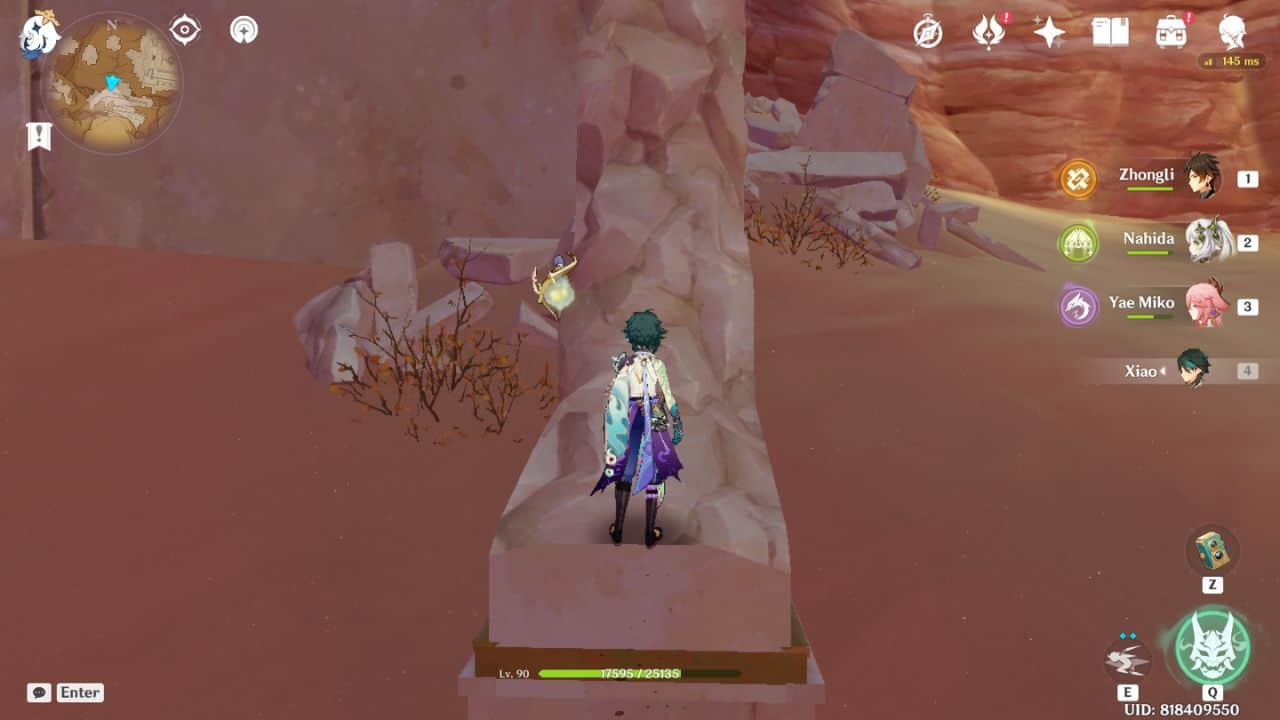
Two Primal Constructs will be guarding this seal. To obtain this seal, fly north from Khaj-Nisut’s southeast waypoint.
4. Ceremony
 |  |
| Map Location | In-game Location |
This seal lies next to the Plinth of the Secret Rites near the entrance of the Northern Trial ruin.
5. Valley
 |  |
| Map Location | In-game Location |
Head to the Southern Trial ruin from the west Khaj-Nisut waypoint. Plunge through the wind current to land on the bottom level. Grab the seal lying before some rocks.
6. Crocodile Head
 |  |
| Map Location | In-game Location |
Descend to the area below the Southern Trial ruin. You will find this seal near the Khaj-Nisut’s Primal Obelisk.
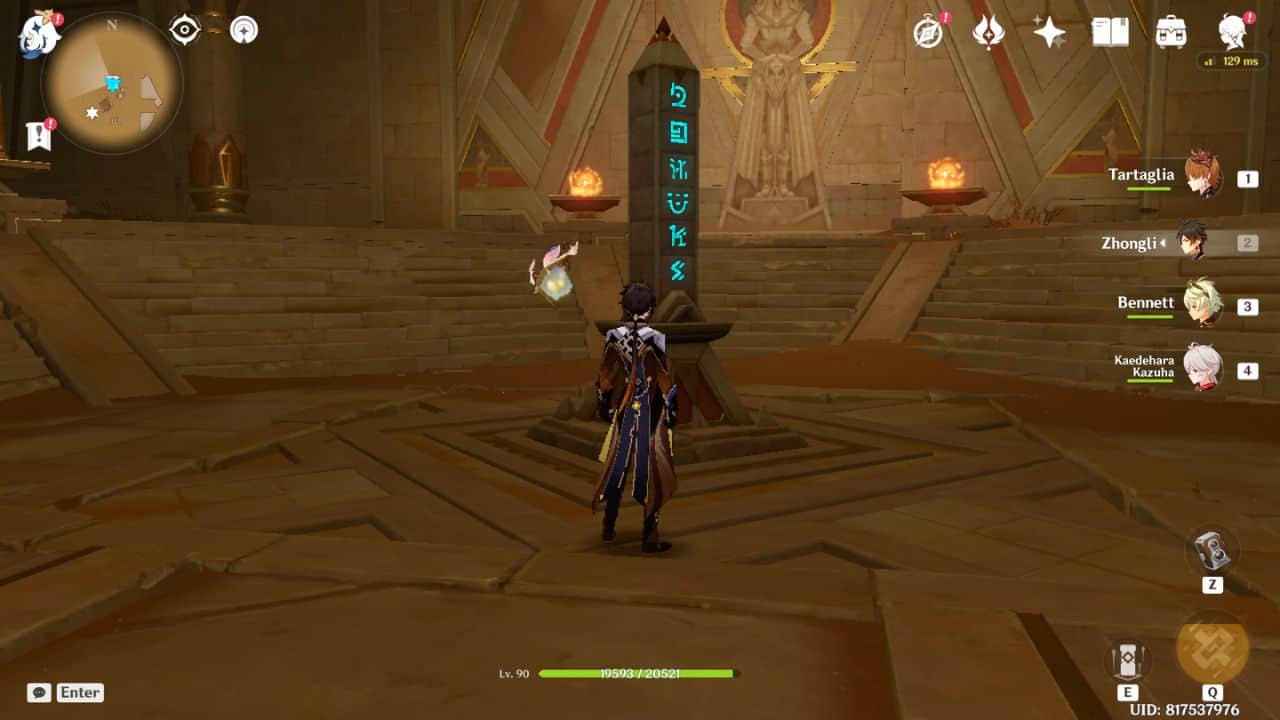
7. Primal Obelisk
 |  |
| Map Location | In-game Location |
The Primal Obelisk stands on the ground below the Southern Trial ruin.
Abdju Pit Sacred Seals

1. Sheep Head
 |  |
| Map Location | In-game Location |
Walk south of the Abdju Pit’s underground waypoint and enter the ruins. The seal is under a torch near the entrance.
2. Bird Head
 |
| Map Location |
- To obtain this seal, head southeast from Abdju Pit’s underground waypoint. Keep walking till you reach a room with two elevators and a Primal Construct.
- Use the elevator on your right side to descend. The seal lies near a mural on your left side.
3. Valley
 |
| Map Location |
- Head southeast from Abdju Pit’s underground waypoint. Proceed deeper into the ruins until you encounter a Primal Construct enemy and two elevators. You must take the elevator in the left corner.
- Keep walking and ride the elevator near some fungi.
- Descend the stairs before the elevator, and you will reach another elevator. Ascend to the top floor to grab the seal next to a Seelie court.
In the video demonstration, I traveled to this seal’s location from the previous seal’s spot.
4. Right to Rule
 |  |
| Map Location | In-game Location |
- Travel to the location of the third seal mentioned above. Interact with the plinth to unlock the door before the Seelie court.
- Keep walking until you reach the room with Abdju Pit’s Primal Obelisk. You will find the seal in this room.
5. Valley
 |
| Map Location |
- Head south from Abdju Pit’s underground waypoint and enter the ruins. Keep walking, and you will encounter a Primal Construct. Ignore it and take the elevator in the left corner.
- Press forward, and you will come across a familiar group of fungi. Descend the stairs to your right and pick up the seal next to the Seelie court.
6. Giant Serpent
 |  |
| Map Location | In-game Location |
- Remember the place where you met Benben for the first time? Travel to that place by taking an elevator near the fifth seal, Valley.
- Proceed to a room with an Everlight Cell puzzle and a Primal Construct. The seal lies next to a torch.
7. Primal Obelisk
 |  |
| Map Location | In-game Location |
The Abdju Pit’s Primal Obelisk shares the exact location as its fourth Sacred Seal, Right to Rule.
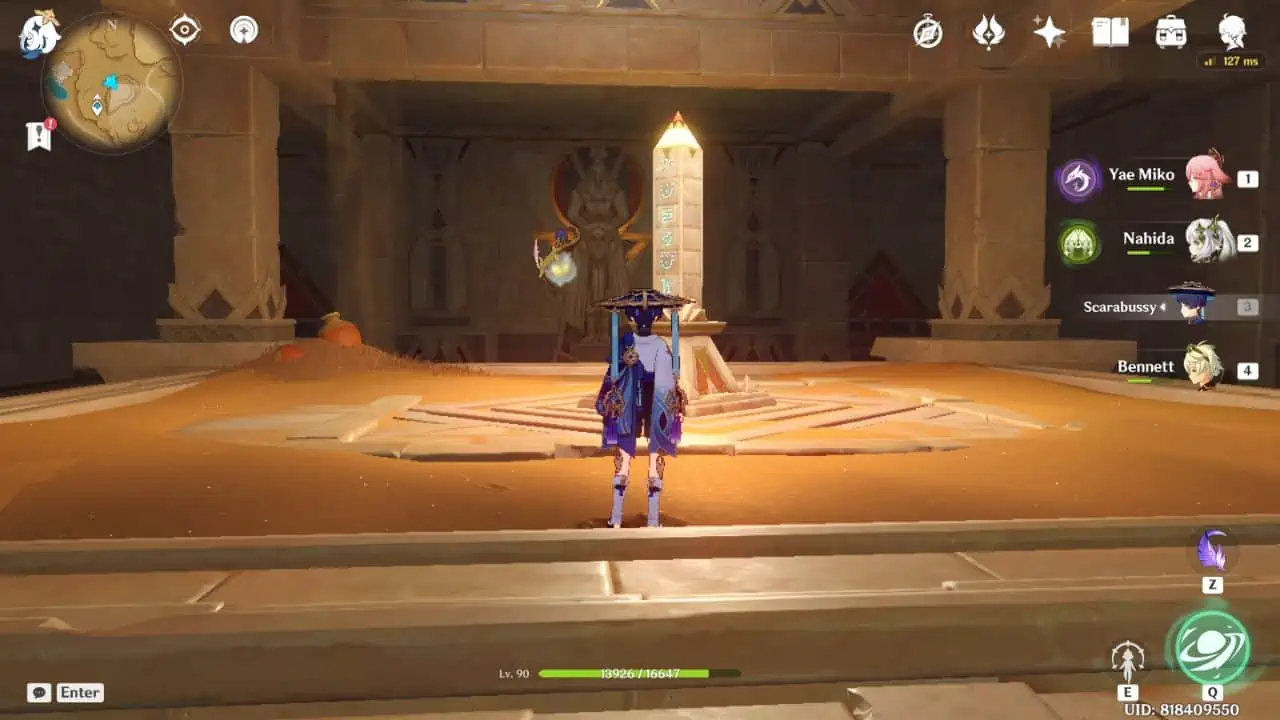
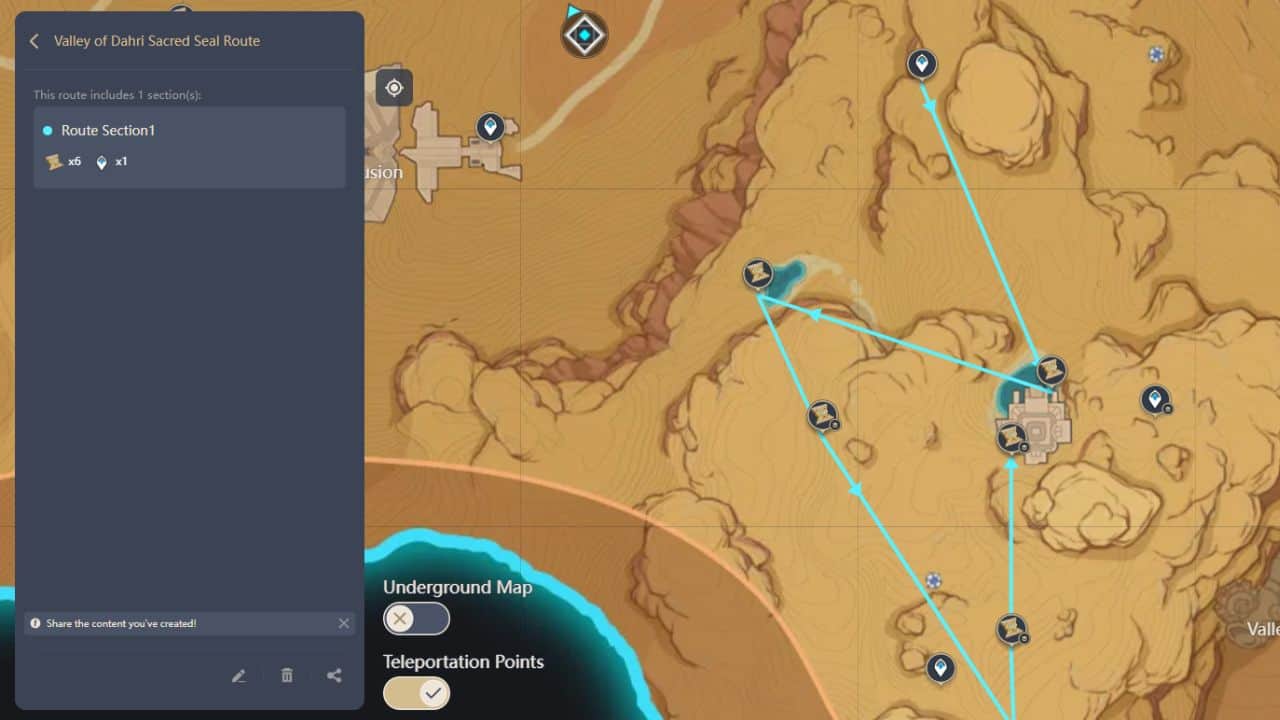
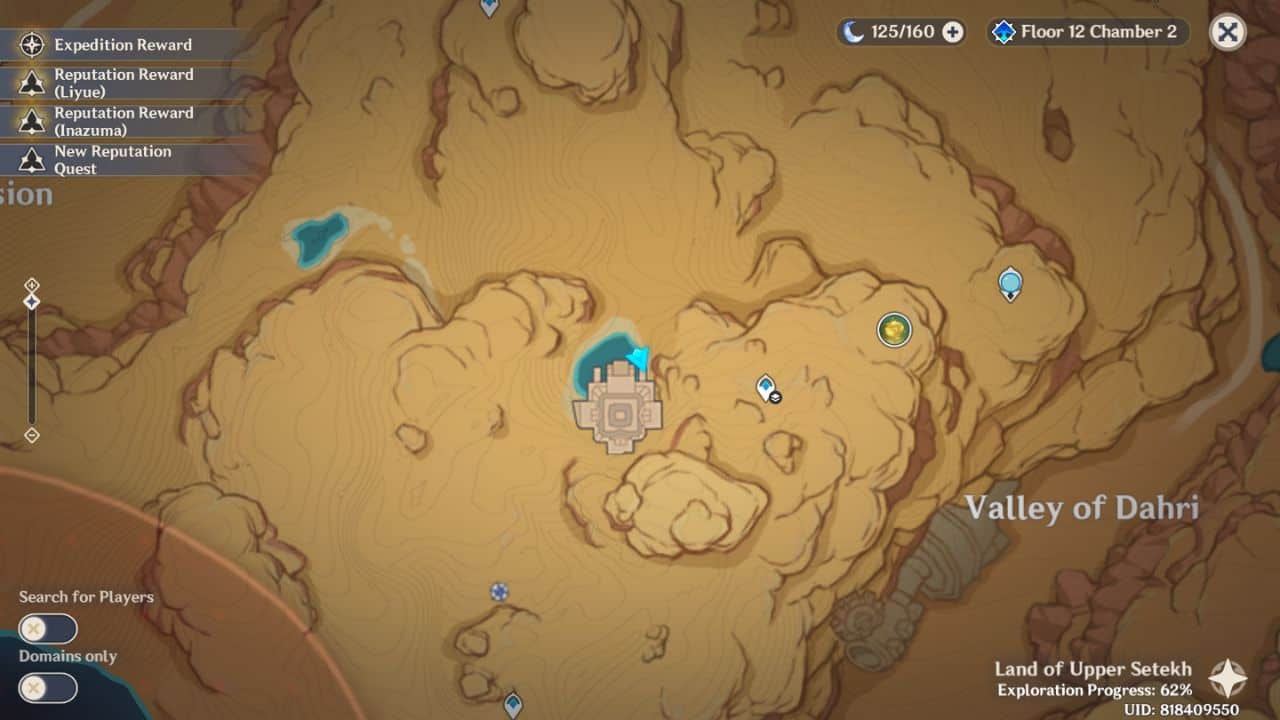
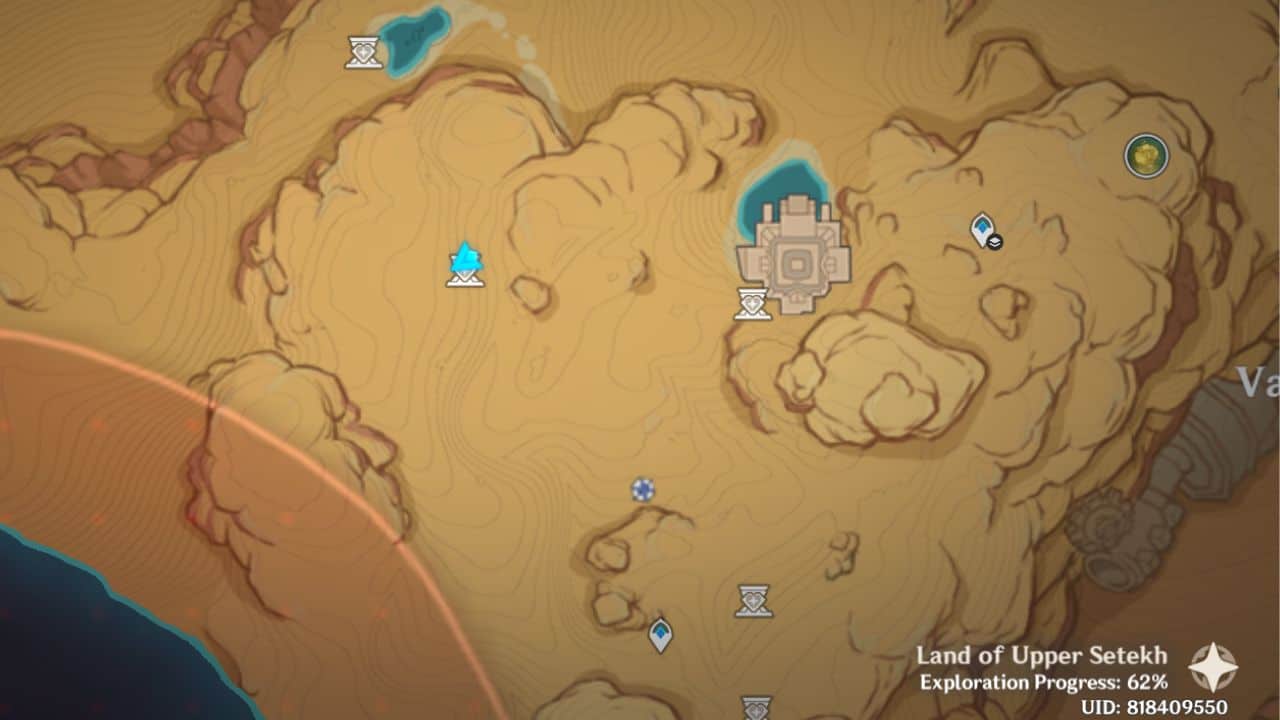
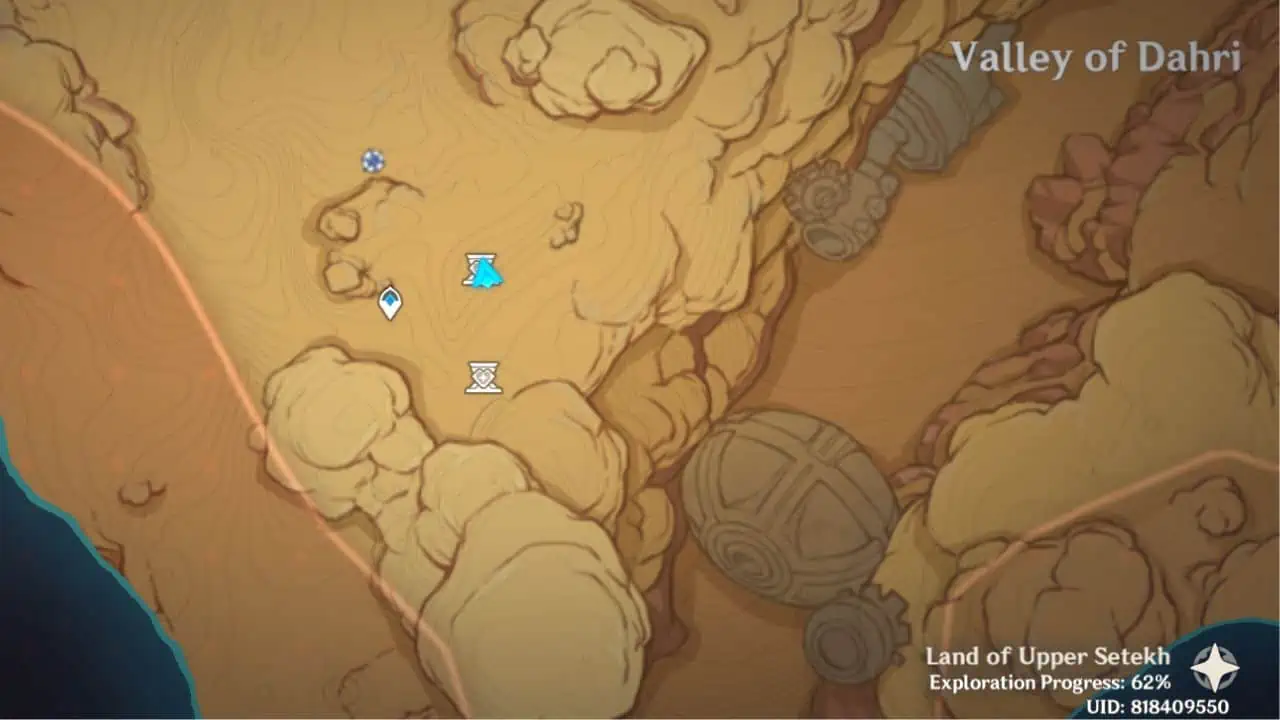
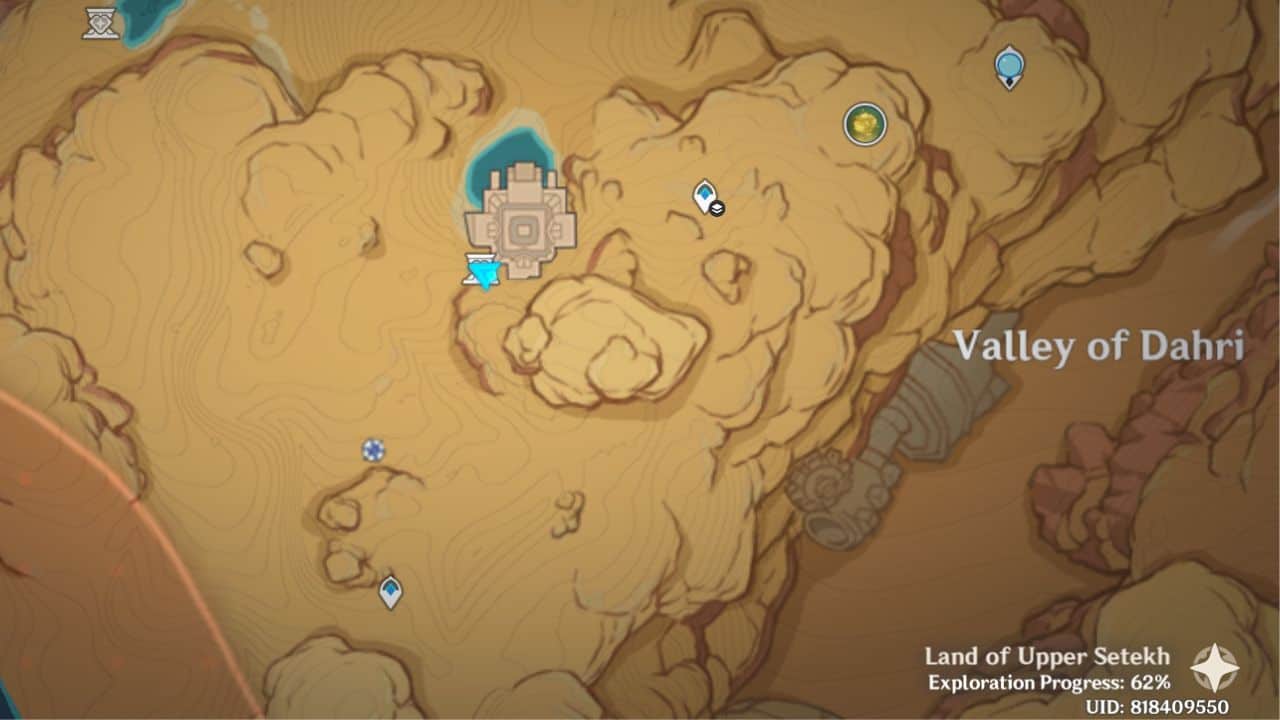
Valley of Dahri Sacred Seals
1. Valley
 |  |
| Map Location | In-game Location |
Head south toward the Water Pyramid in the Valley of Dahri. Pick up the seal lying below a black cat statue near the entrance.
2. Right to Rule
 |  |
| Map Location | In-game Location |
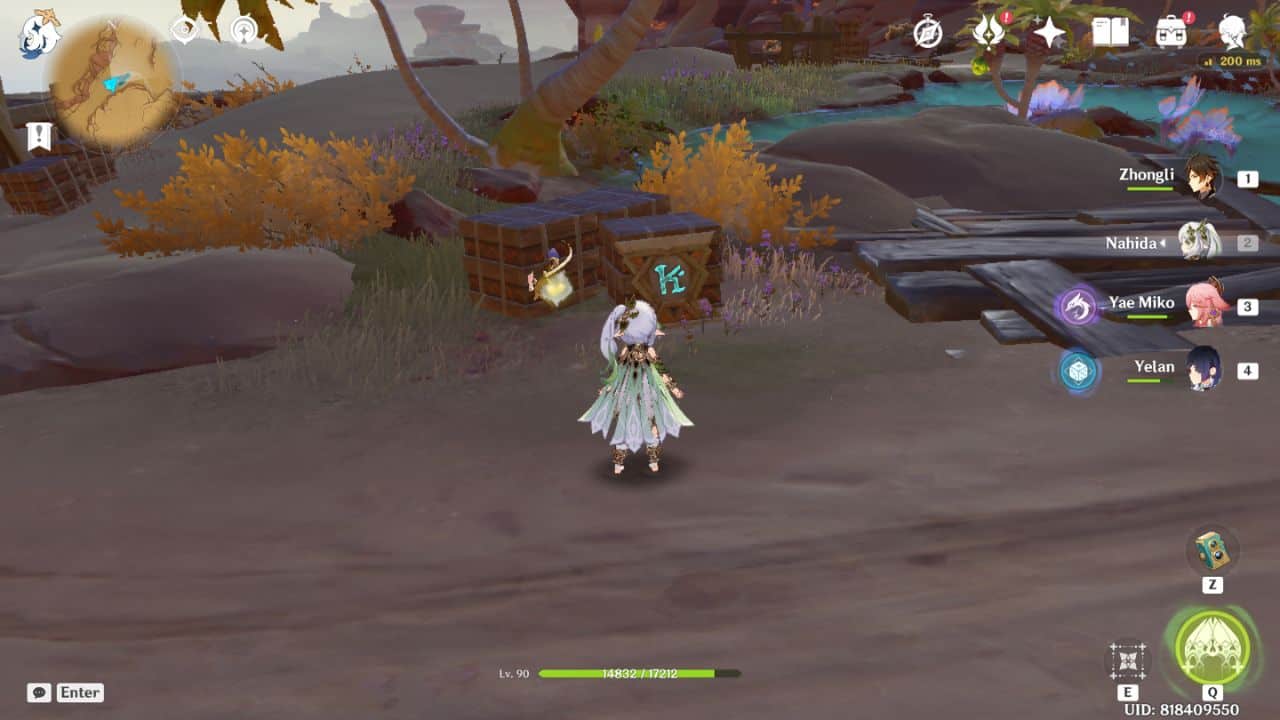
Travel to the oasis near the Lamb Devourer’s Rock. The seal is hidden behind a few crates in an Eremites’ encampment.
3. Crocodile Head
 |  |
| Map Location | In-game Location |
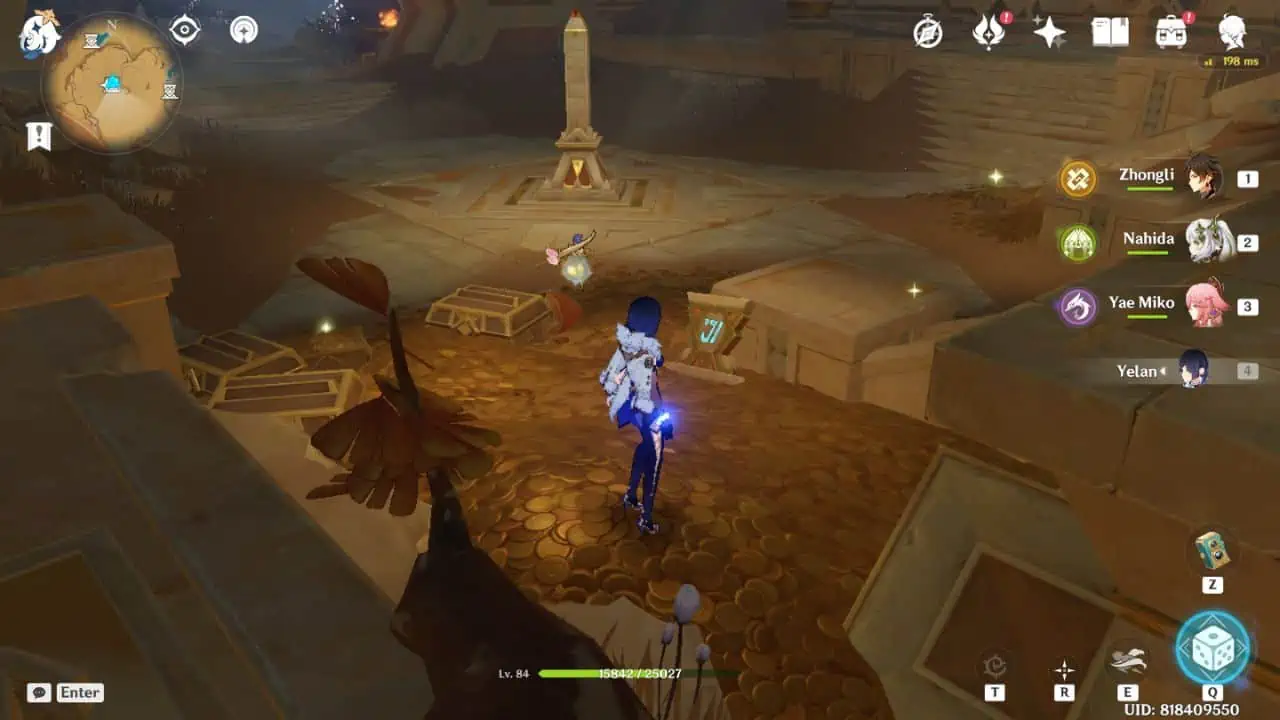
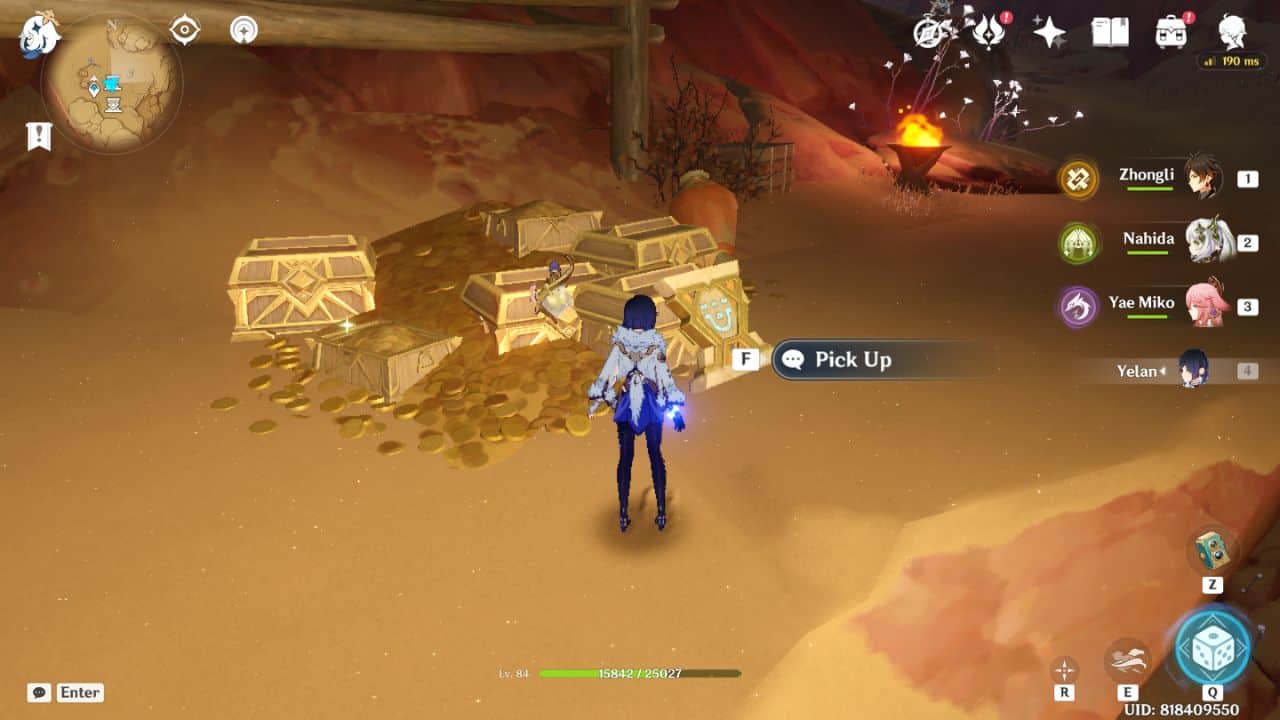
Enter Thutmose’s secret base inside the Lamb Devourer’s Rock. To enter this base, you must obtain the password from an Eremite guard during the ‘Hidden Mercenaries’ World Quest. The seal lies on a pile of gold in a hall near the Valley of Dahri’s Primal Obelisk.
4. Valley
 |  |
| Map Location | In-game Location |
Head into the tunnel adjacent to the Valley of Dahri Primal Obelisk’s location. Keep walking straight until you notice an enormous pile of gold and an Eremite camp. Climb up the stairs to your left. The seal is near a wooden cage.
5. Thunderstrike
 |  |
| Map Location | In-game Location |
The next seal is in the same room near a single Eremite, opposite the fourth seal.
6. Dune
 |  |
| Map Location | In-game Location |
Proceed deeper into the Thutmose Camp inside Lamb Devourer’s Rock until you reach a chamber with massive piles of gold. Head into the tunnel on the left side atop the stairs. You will find the seal near two regular Eremites.
7. Primal Obelisk
 |  |
| Map Location | In-game Location |
The Primal Obelisk is in a hall inside the Thutmose camp at Lamb Devourer’s Rock.
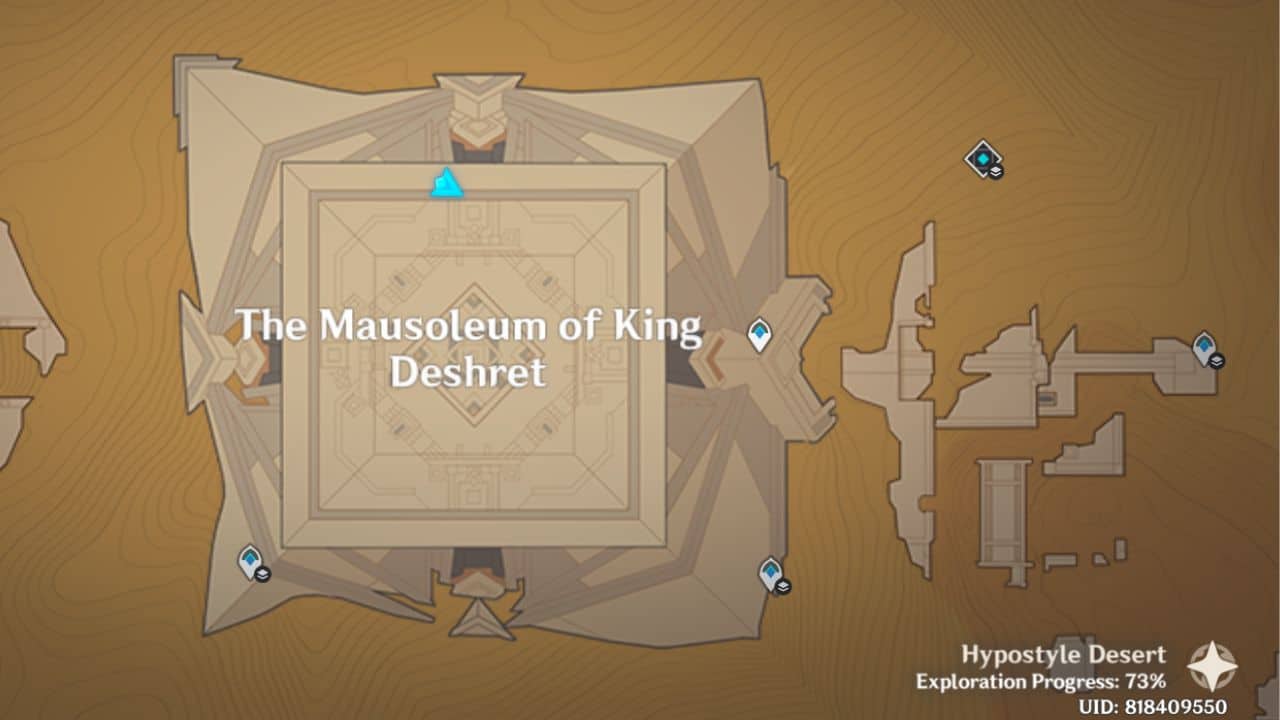
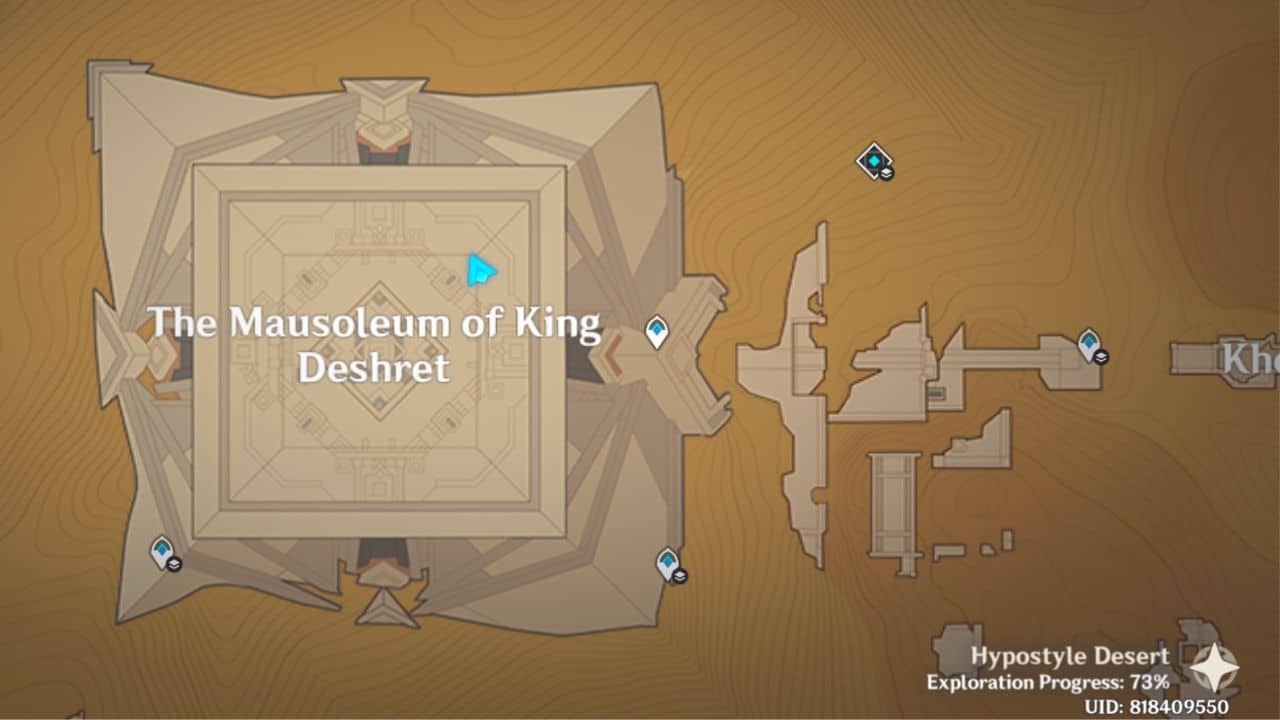
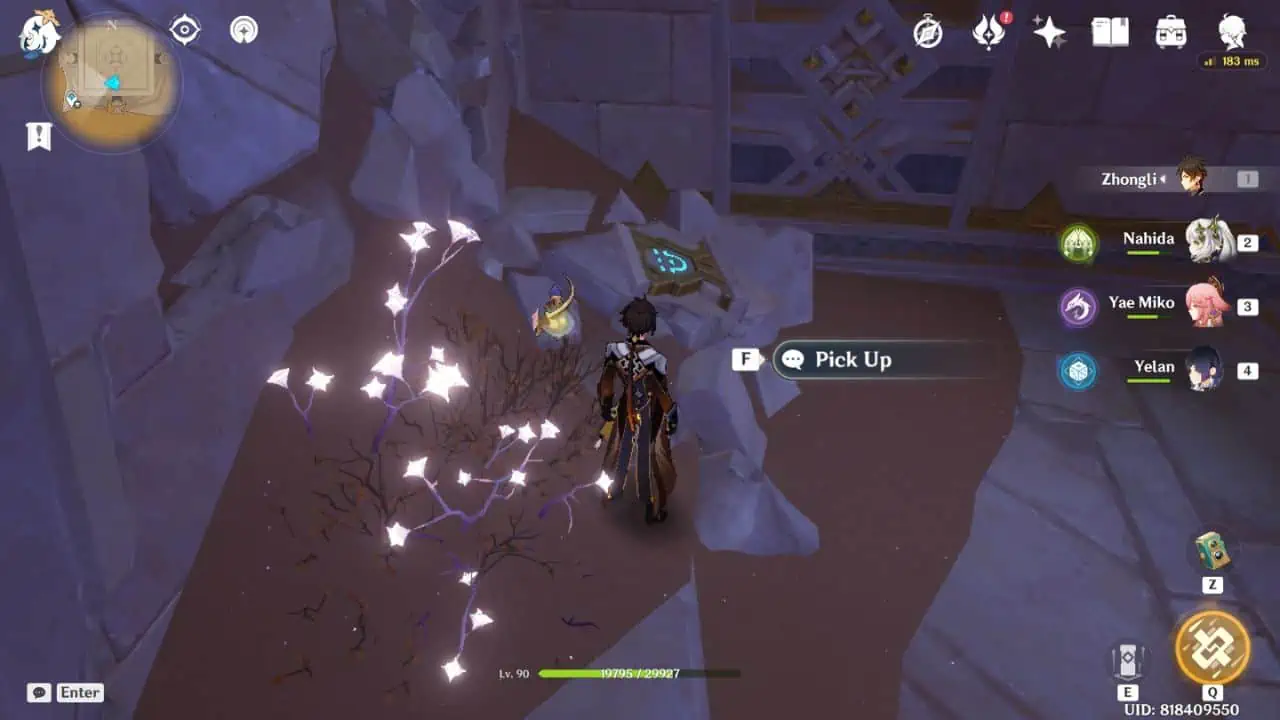
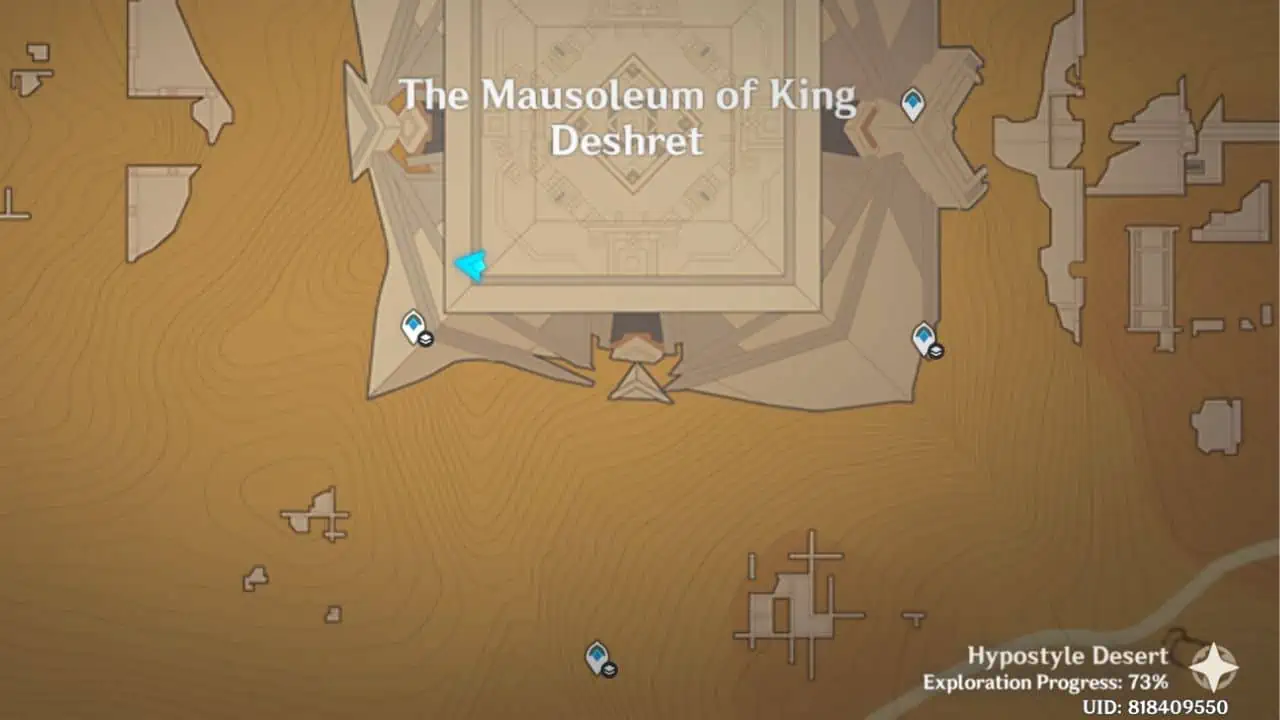
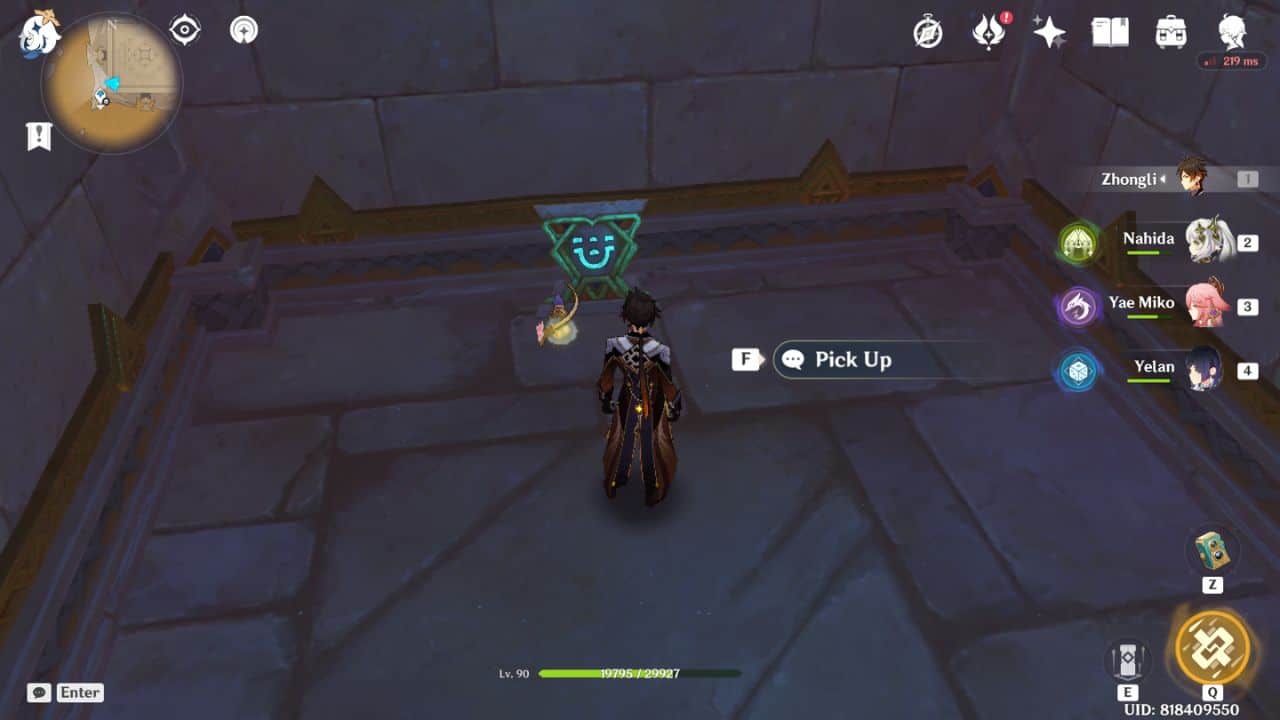
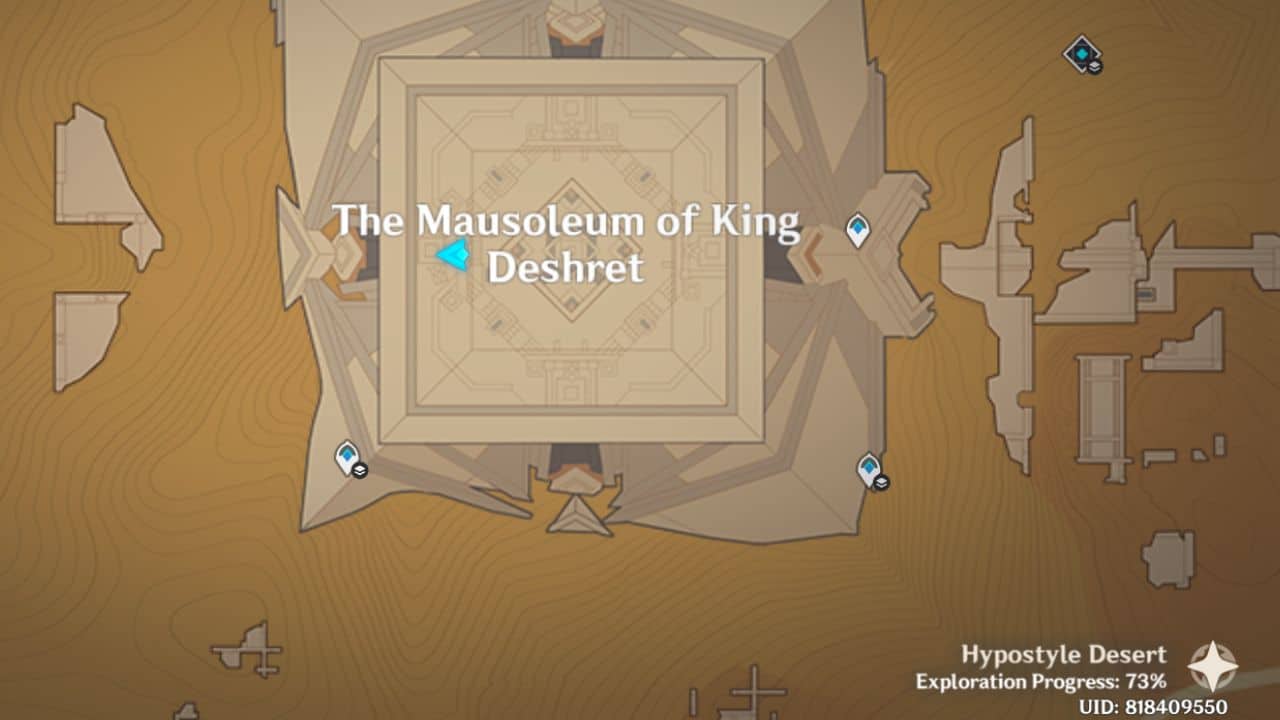
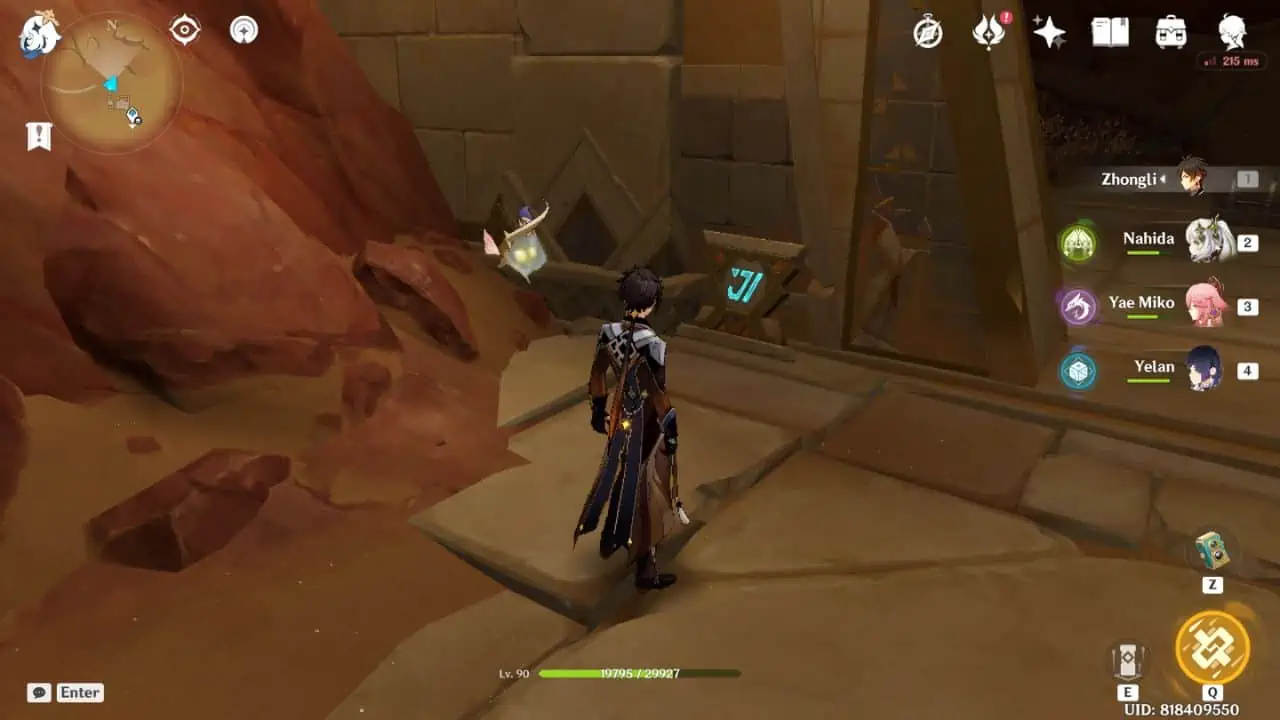
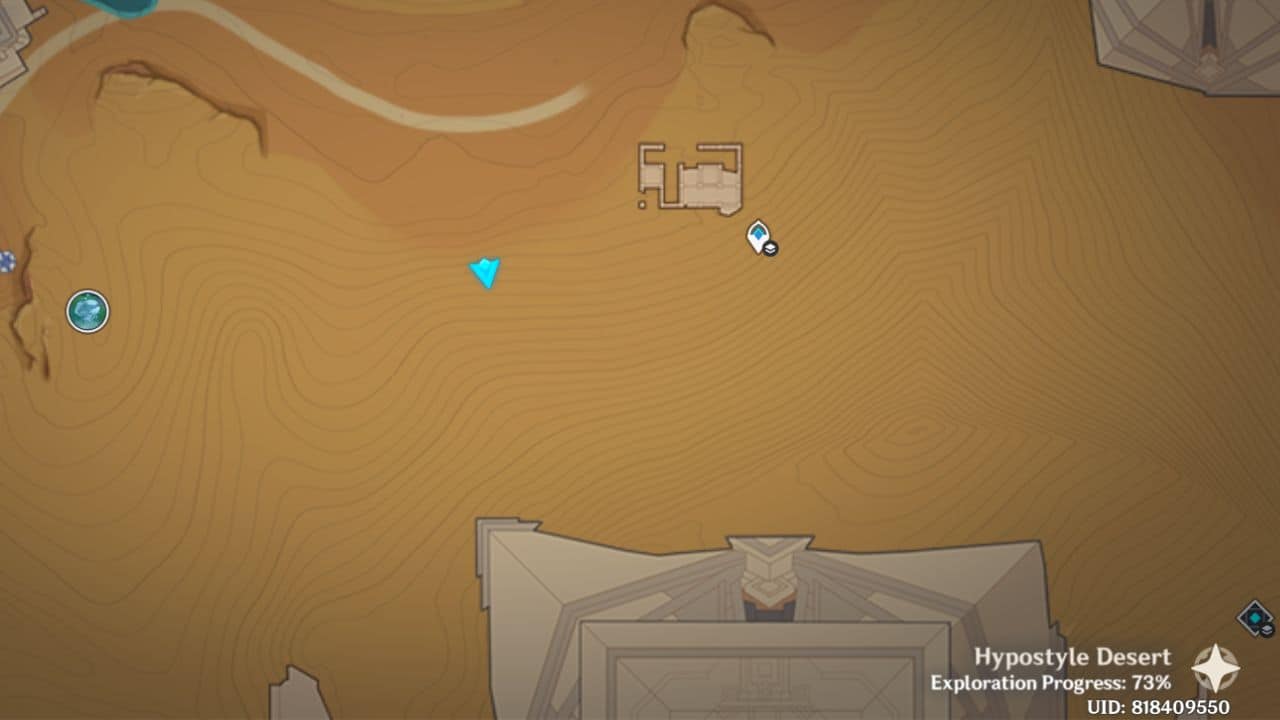
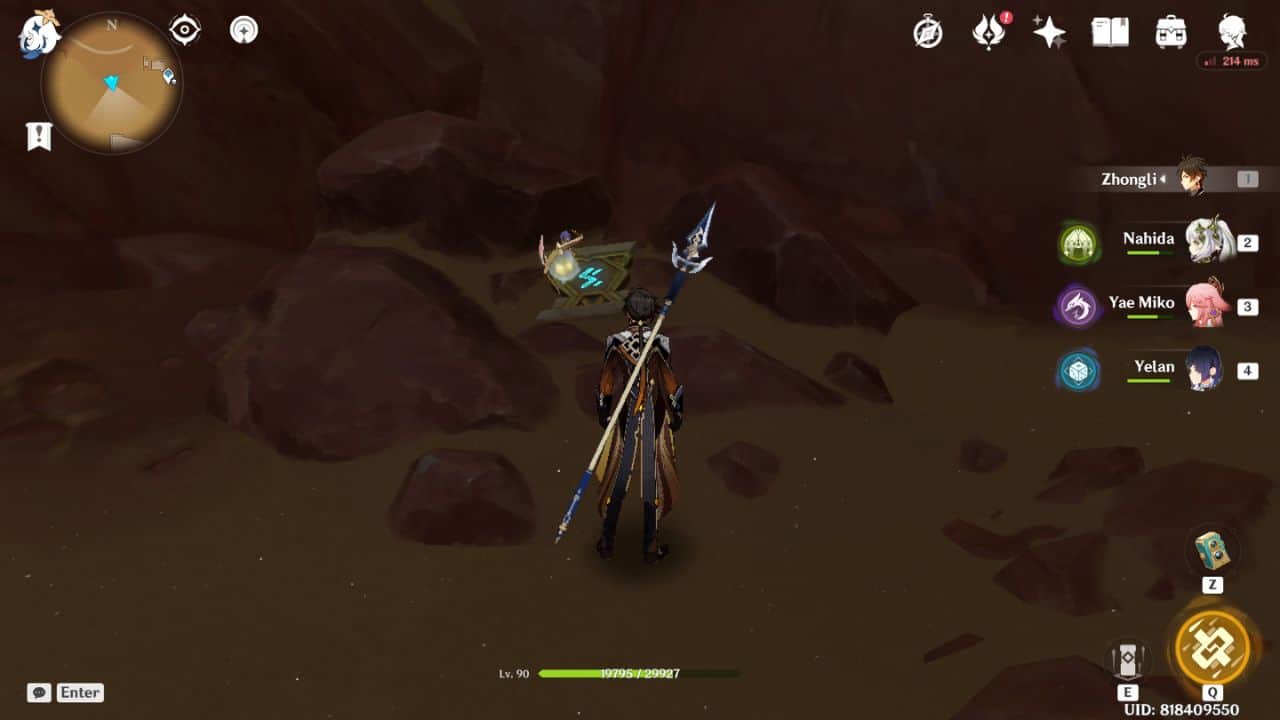
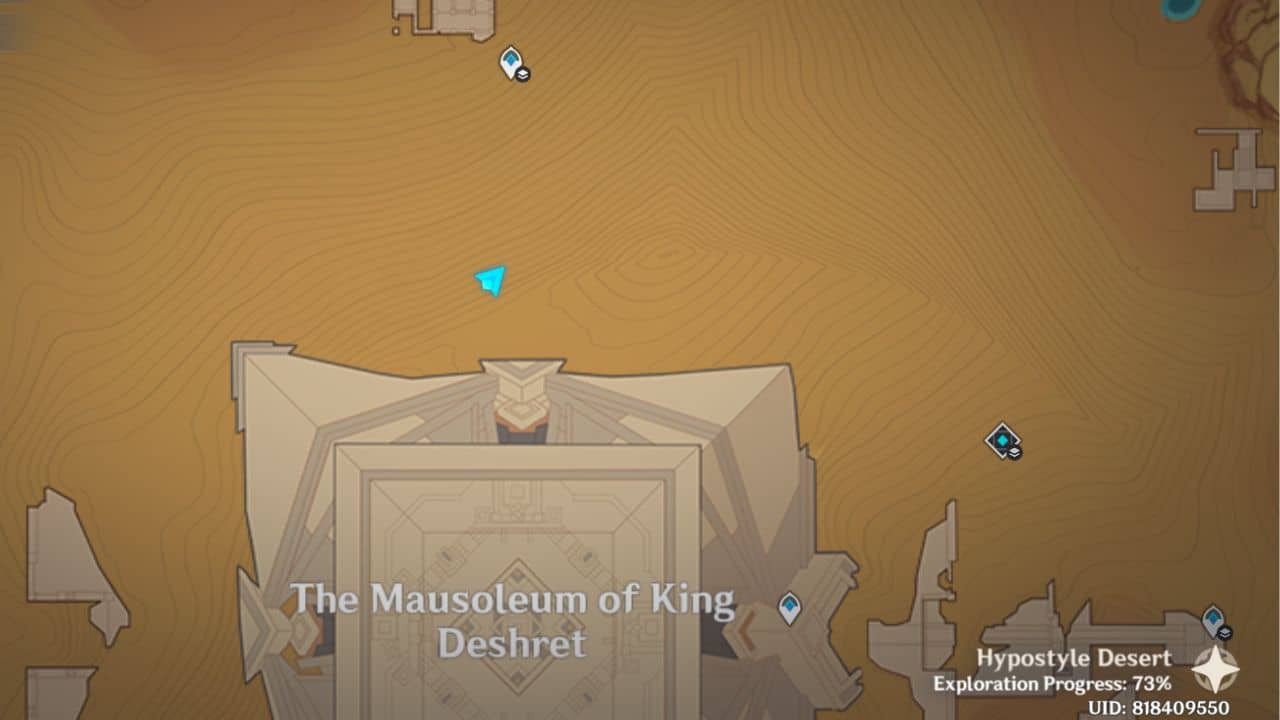
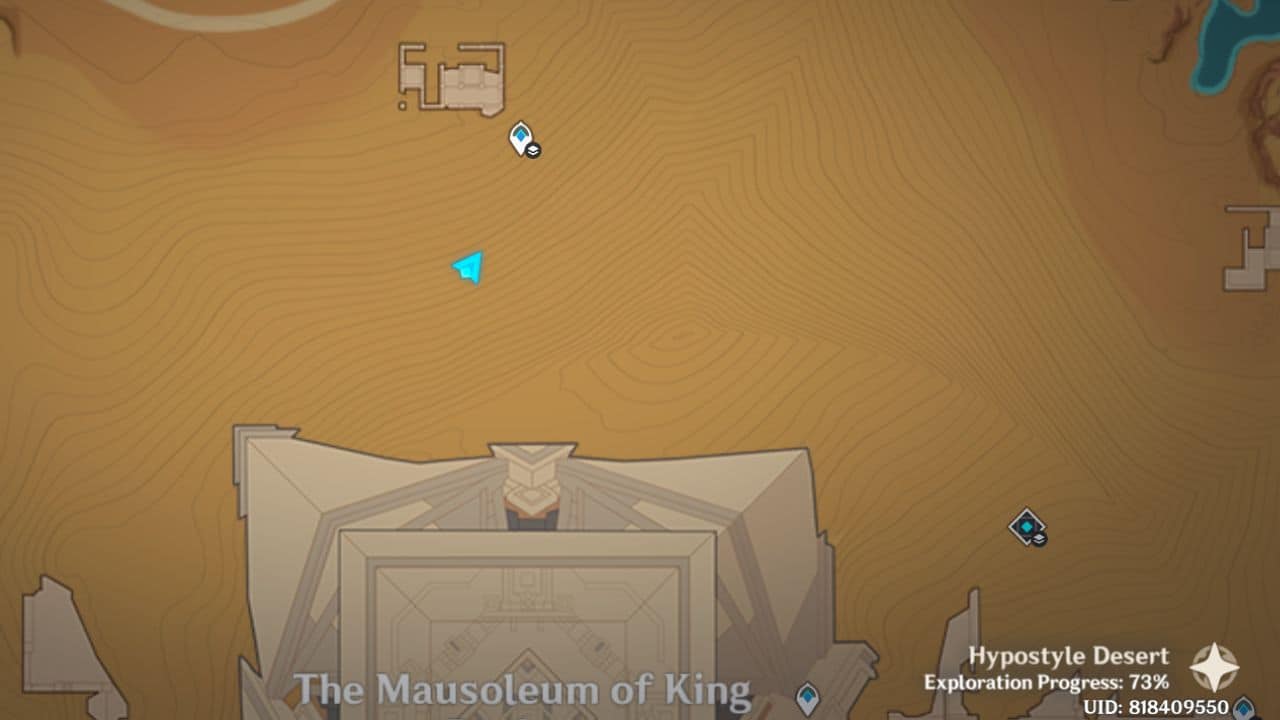
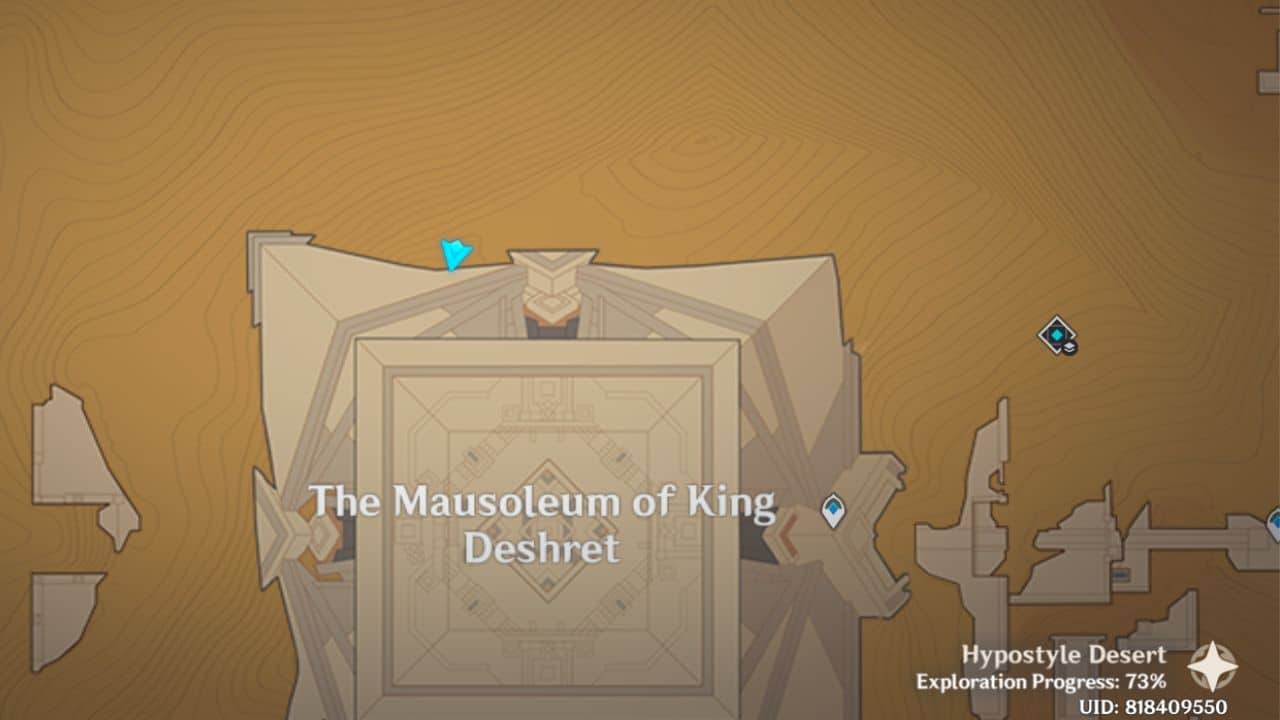
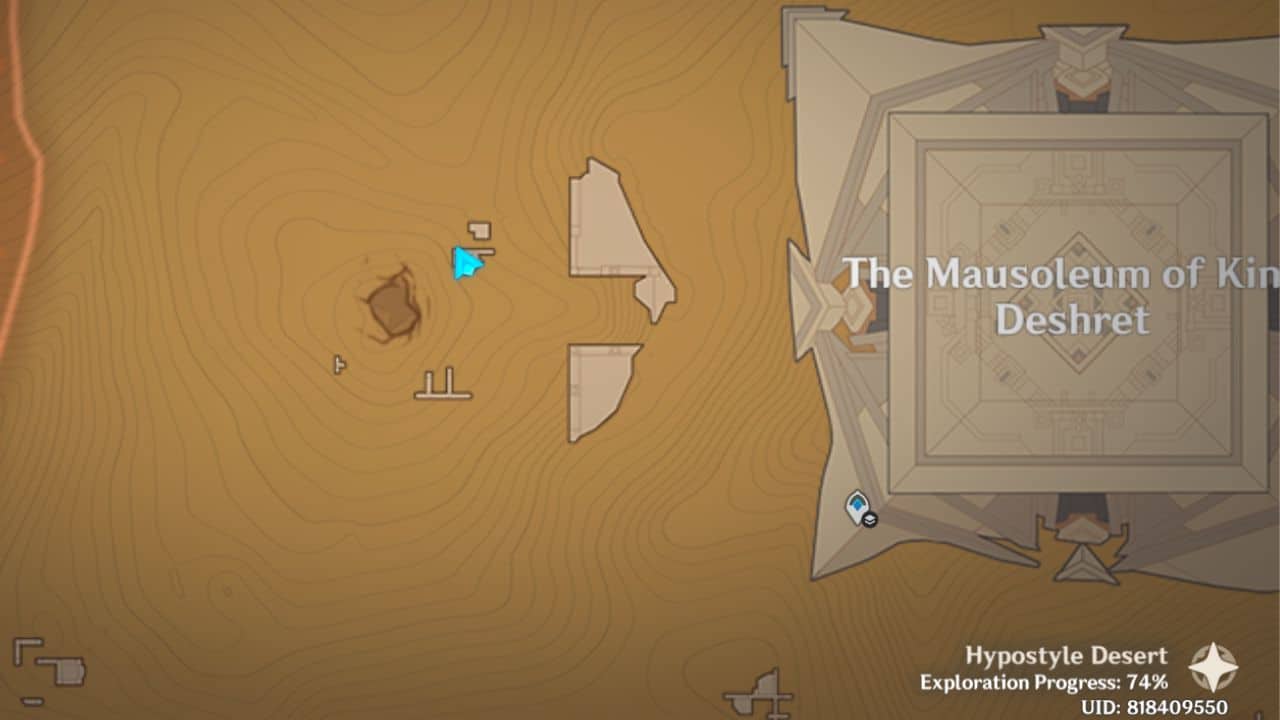
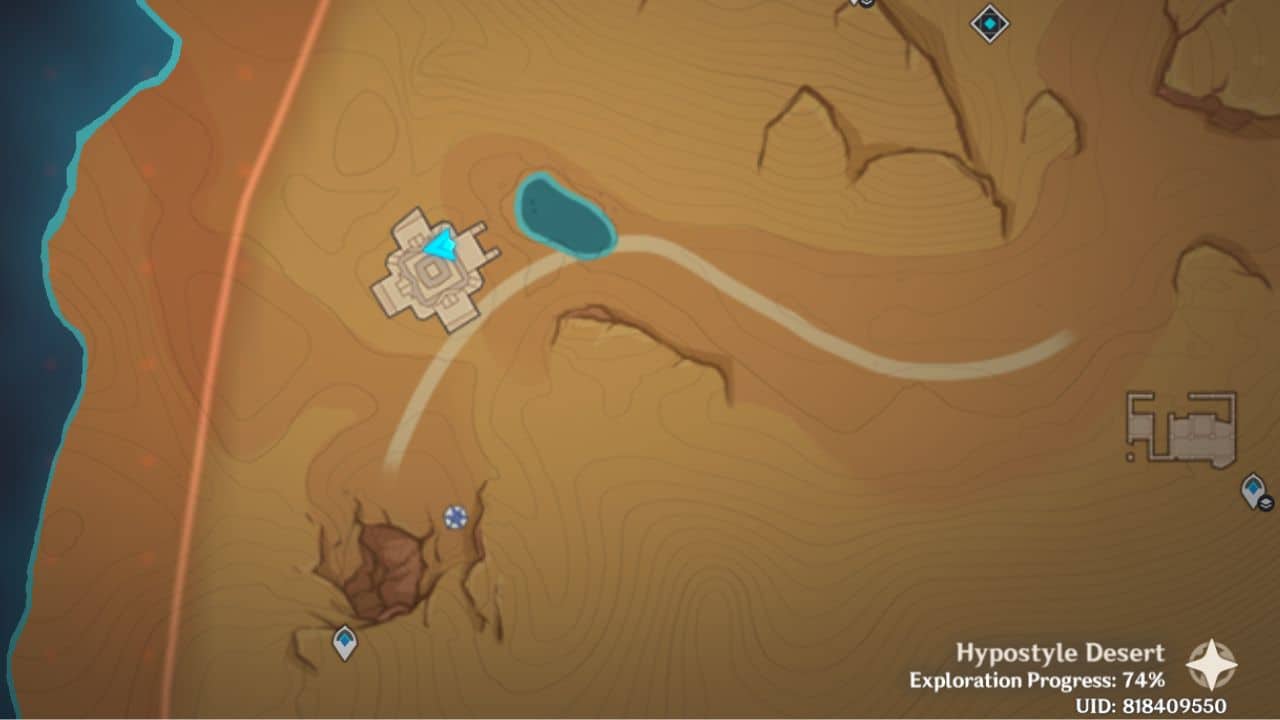
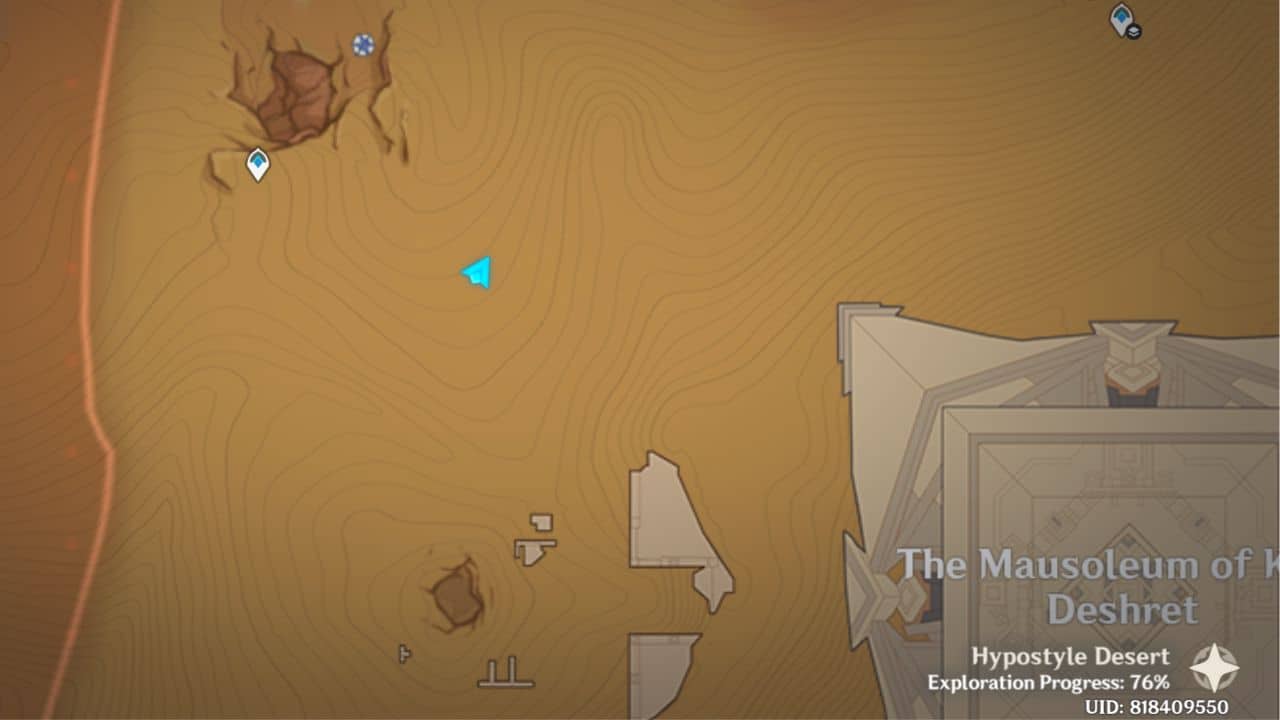
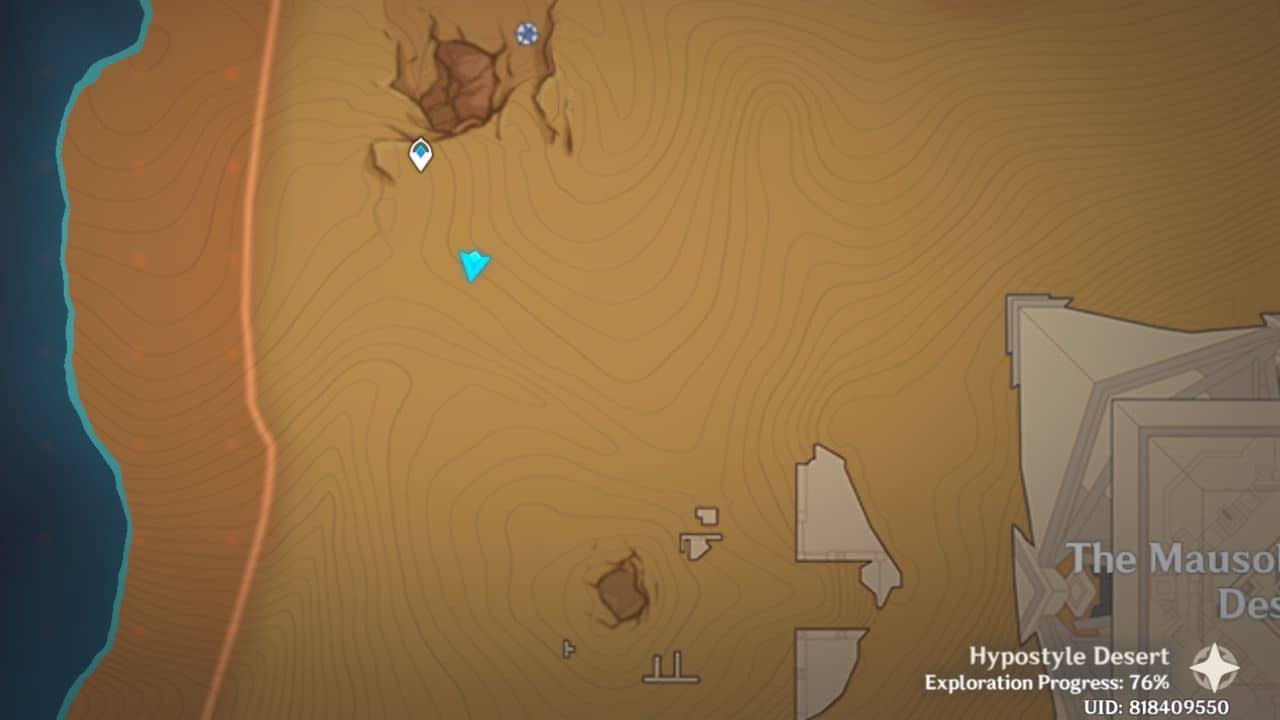
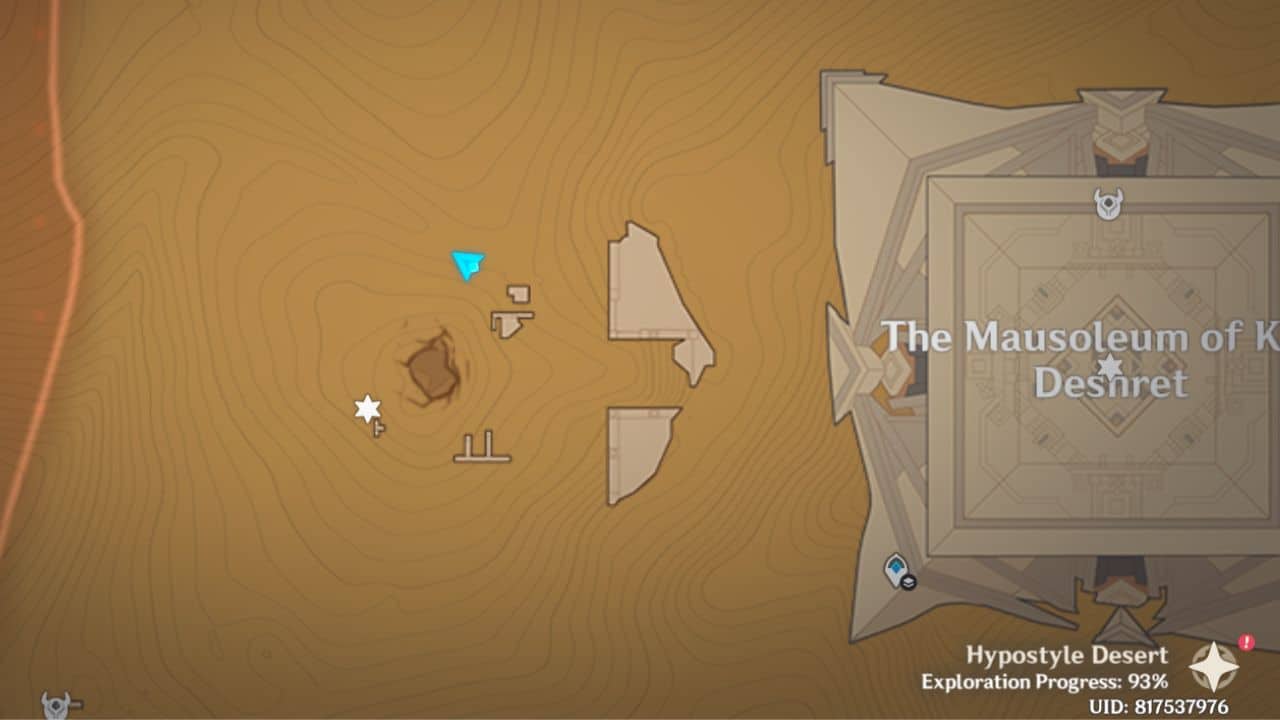
The Mausoleum of King Deshret Sacred Seals

1. Giant Serpent
 |  |
| Map Location | In-game Location |
Enter the Mausoleum of King Deshret. Use the elevator behind the coffin to travel to the top floor. You can access the seal by removing the barrier to the right side of the room through a plinth.
2. Ceremony
 |  |
| Map Location | In-game Location |
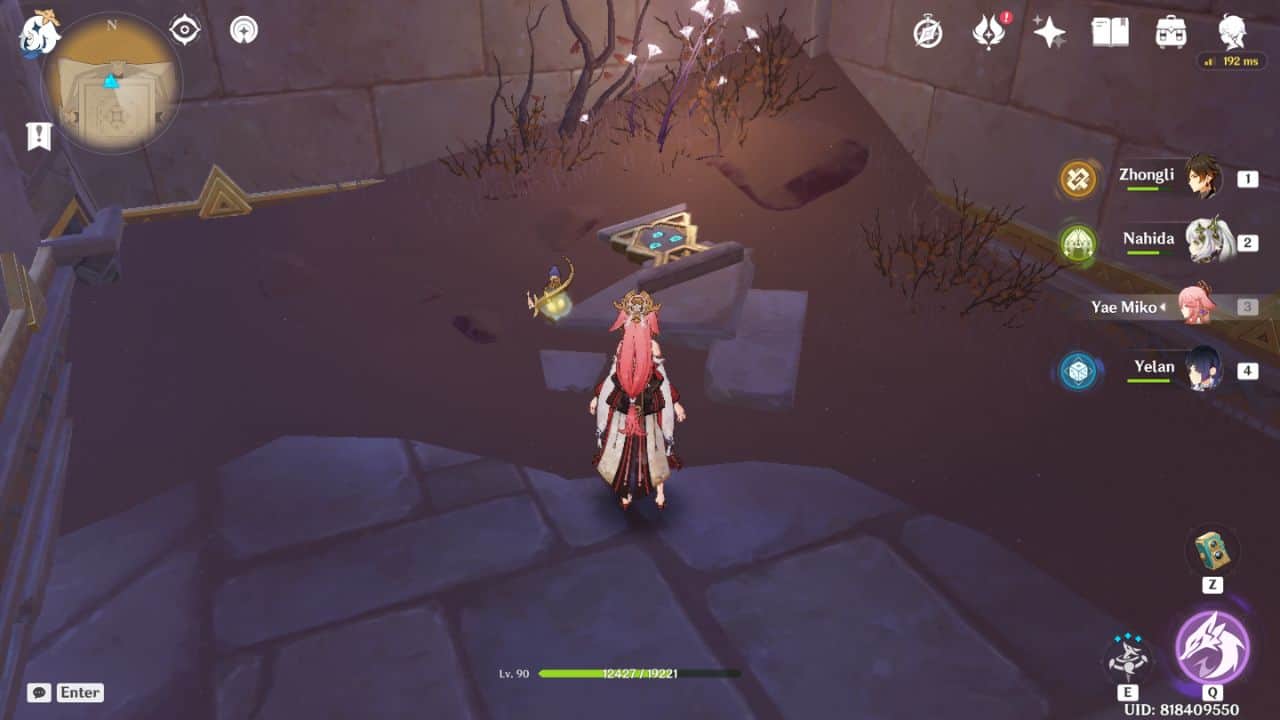
Head into the passage to the right side of the coffin. The seal is hidden inside a small space behind the half-wall.
3. Sheep Head
 |  |
| Map Location | In-game Location |
Head into the passage to the right of King Deshret’s coffin. Use the four-leaf sigil at the end of the corridor to zip atop the platform. The sigil lies in that small space above.
4. Valley
 |  |
| Map Location | In-game Location |
Enter the corridor on the left side of King Deshret’s coffin. Take the first left turn and enter the room with a huge fan. Use the plinth to turn off the fan and jump into the hole in front of the fan. You will find the seal at the end of the passage.
5. Valley
 |  |
| Map Location | In-game Location |
Enter the passage to the left of King Deshret’s coffin again. Head into the long passageway on your right side. The seal can be found beneath a collapsible floor at the very end of the corridor.
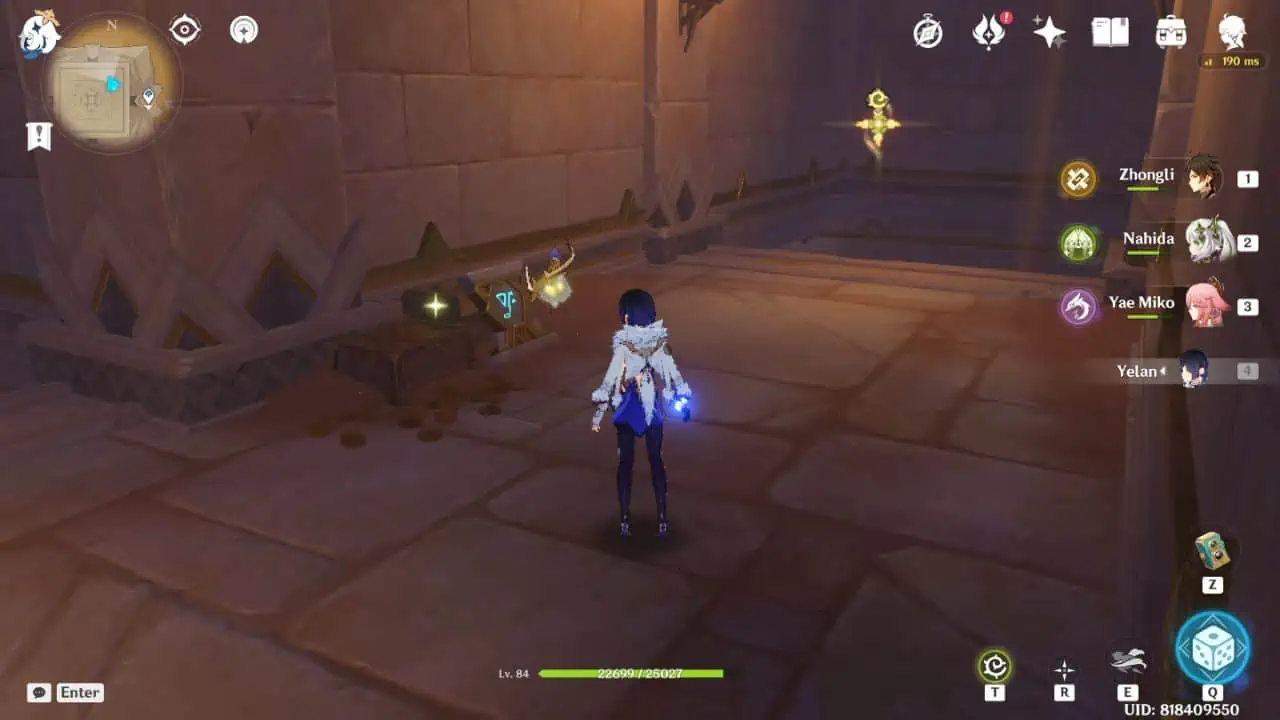
6. Crocodile Head
 |  |
| Map Location | In-game Location |
- You can access this seal only after you finish the ‘Old Notes and New Friends’ World Quest. Use Duat Hall’s waypoint to travel to the Great Hall of Truths.
- Travel to Aaru’s Shut through the Great Hall of Truths. Climb the staircase to pick up the seal between the huge plinth structure.
7. Primal Obelisk
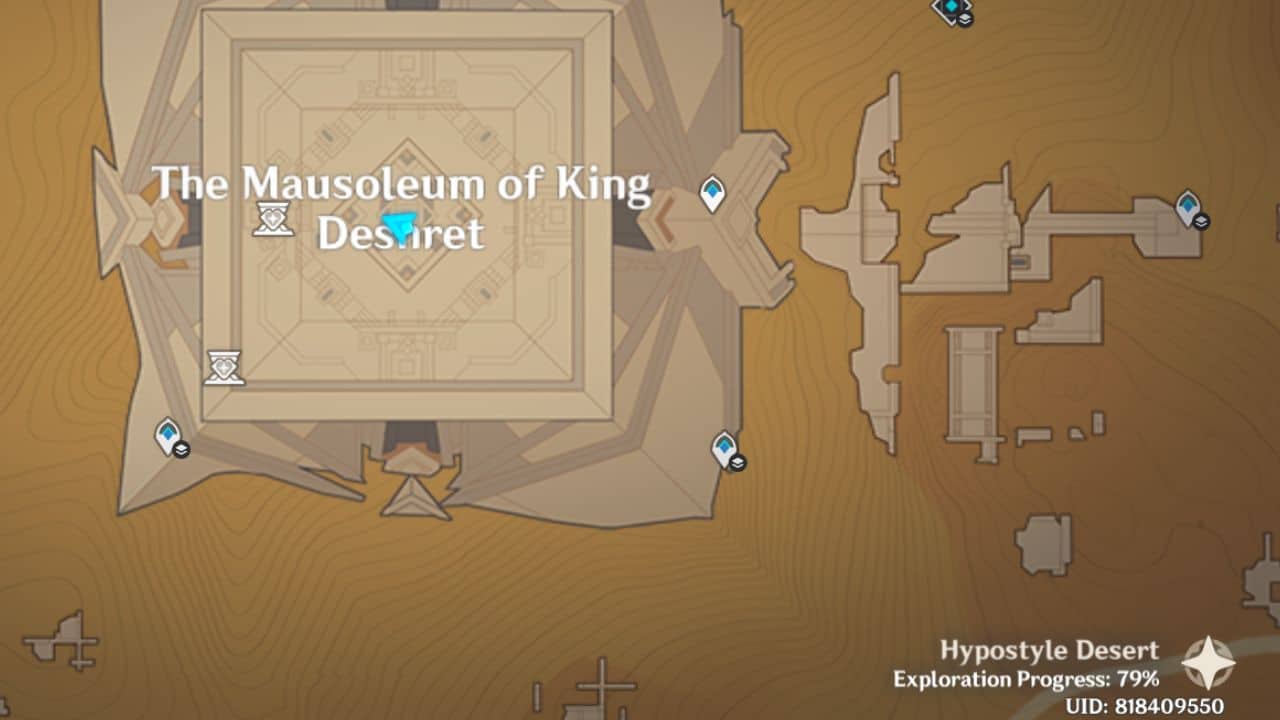 | 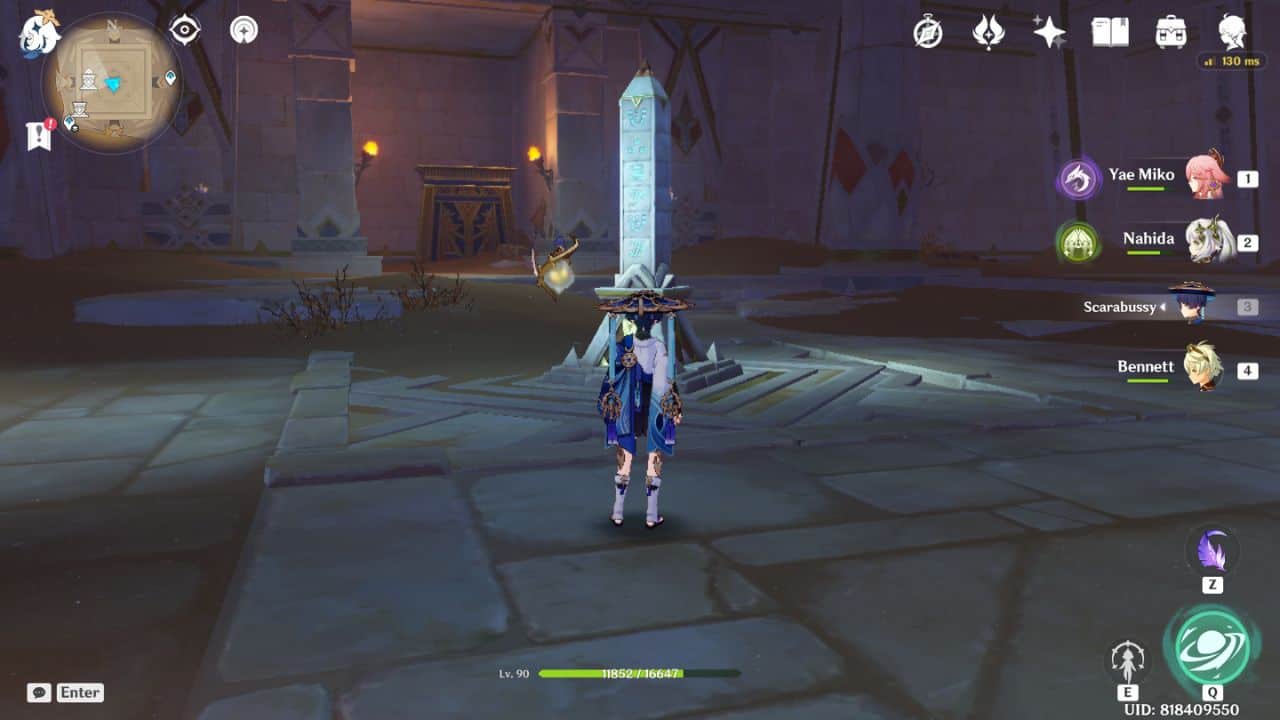 |
| Map Location | In-game Location |
Jump into the hole near the Mausoleum of King Deshret’s entrance to find this Primal Obelisk. Paimon will remark on the existence of this hole if you haven’t been to this Primal Obelisk before.
North Underground Sacred Seals

1. Crocodile Head
 |  |
| Map Location | In-game Location |
Teleport to the Mausoleum of King Deshret’s north underground waypoint and dive into the tunnel behind you. Take a left turn to find the seal once you encounter a Fatui camp.
2. Thunderstrike
 |  |
| Map Location | In-game Location |
Teleport to the Mausoleum of King Deshret’s north underground waypoint. Head into the tunnel behind the waypoint and pass by a Fatui Camp. Jump into the hole ahead of this camp to find this seal.
3. Danger
 |  |
| Map Location | In-game Location |
Zip to the entrance of Opet Hall from the Mausoleum of King Deshret’s north underground waypoint. The seal is on top of a crumbled wall to the right.
4. Sunrise
 |  |
| Map Location | In-game Location |
Jump down from the Mausoleum of King Deshret’s north underground waypoint. You can find this seal hidden inside an abandoned camp below.
5. Valley
 |  |
| Map Location | In-game Location |
Enter the bottom floor of Opet Hall through the entrance below the Mausoleum of King Deshret’s north underground waypoint. You will find the seal in a passage to your left, just after entering the Opet Hall.
6. Crocodile Head
 |  |
| Map Location | In-game Location |
- Enter the bottom floor of Opet Hall through the underground waypoint. Climb the stairs and enter the left passage.
- Turn left again, and you will reach a room with a Primal Construct. Press forward and enter the room to your right. The seal lies against a bookshelf, behind a Primal Construct.
7. Primal Obelisk
 |
| Map Location |
Enter Opet Hall from its lower entrance and keep walking left until you reach a massive hall. You will encounter two Primal Constructs. The Primal Obelisk lies in the room to the left of the second Primal Construct.
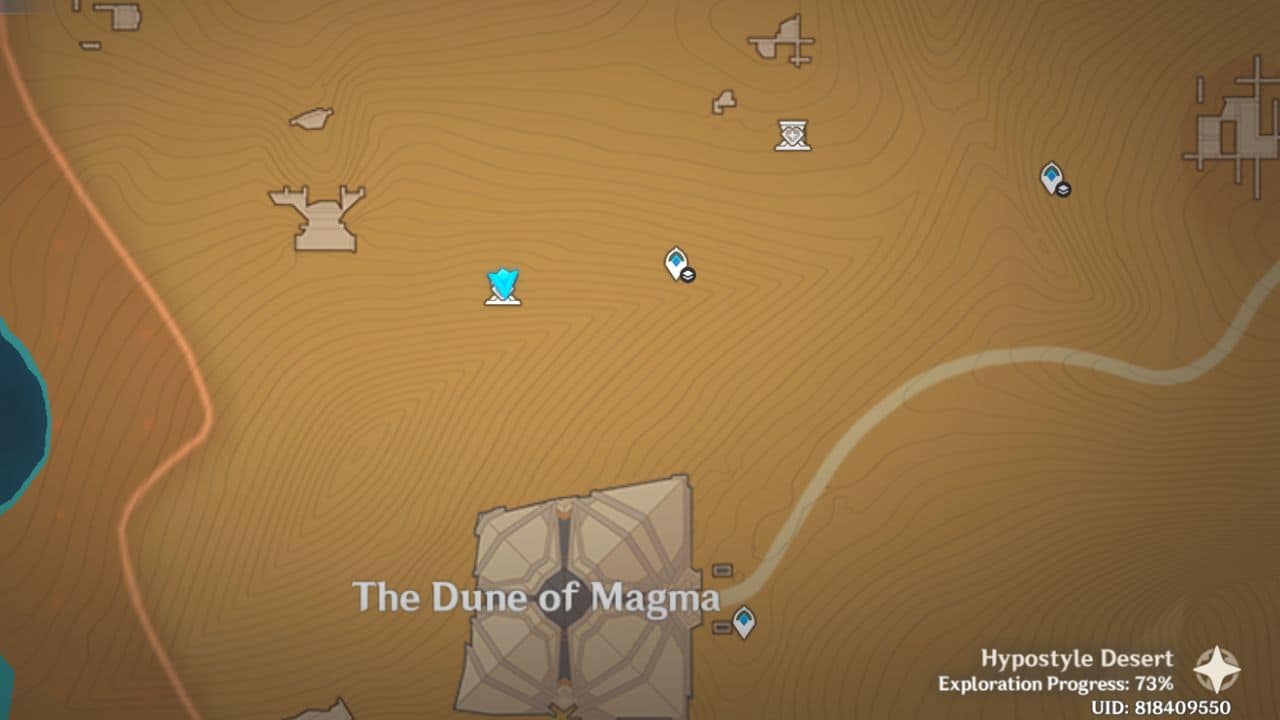
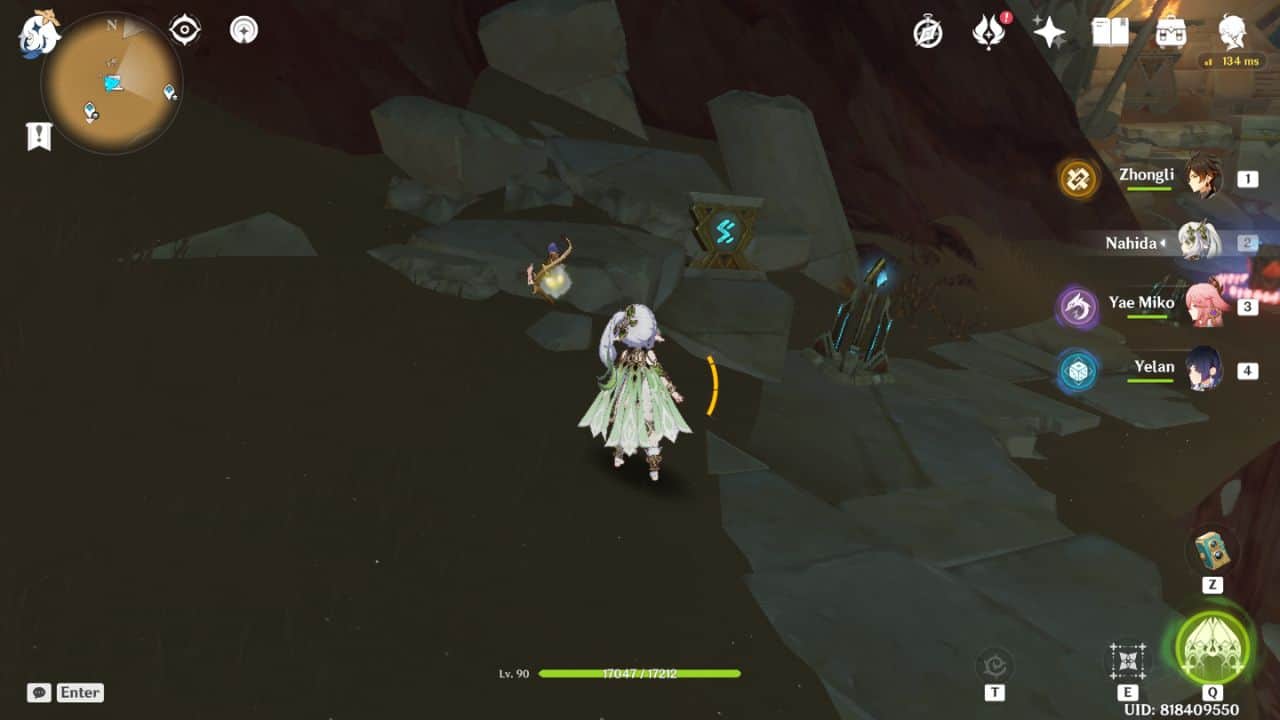
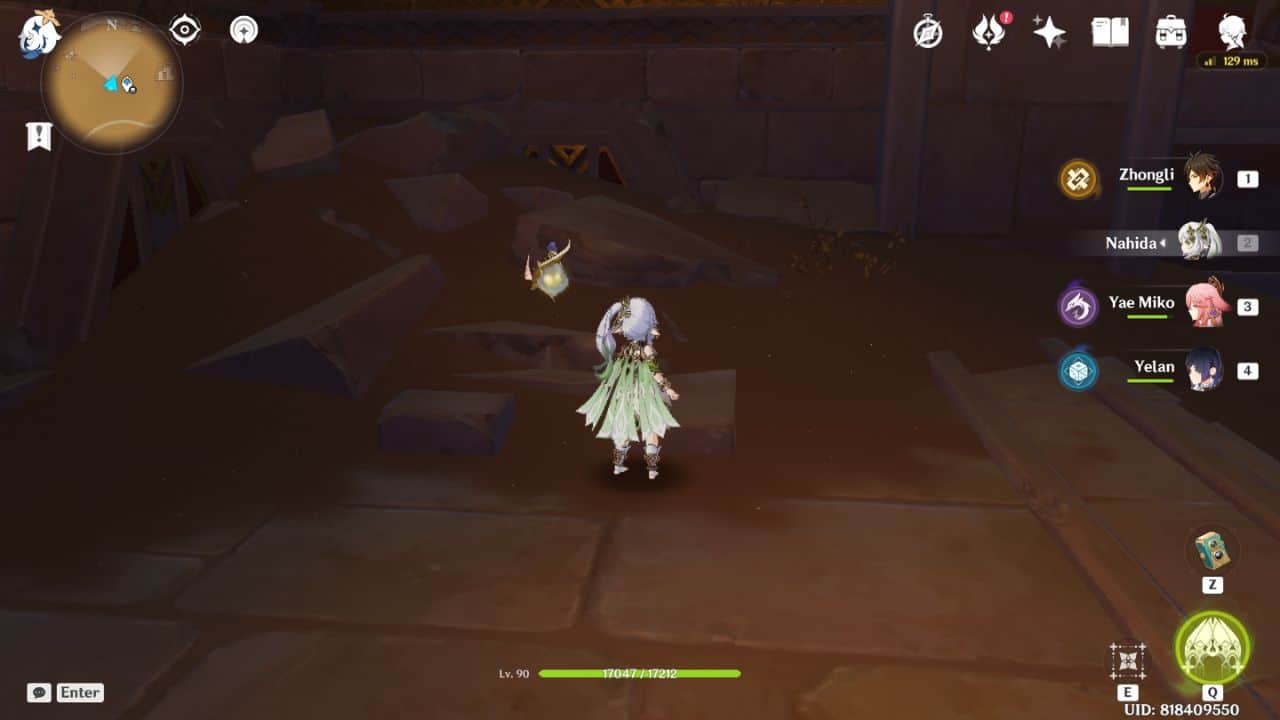
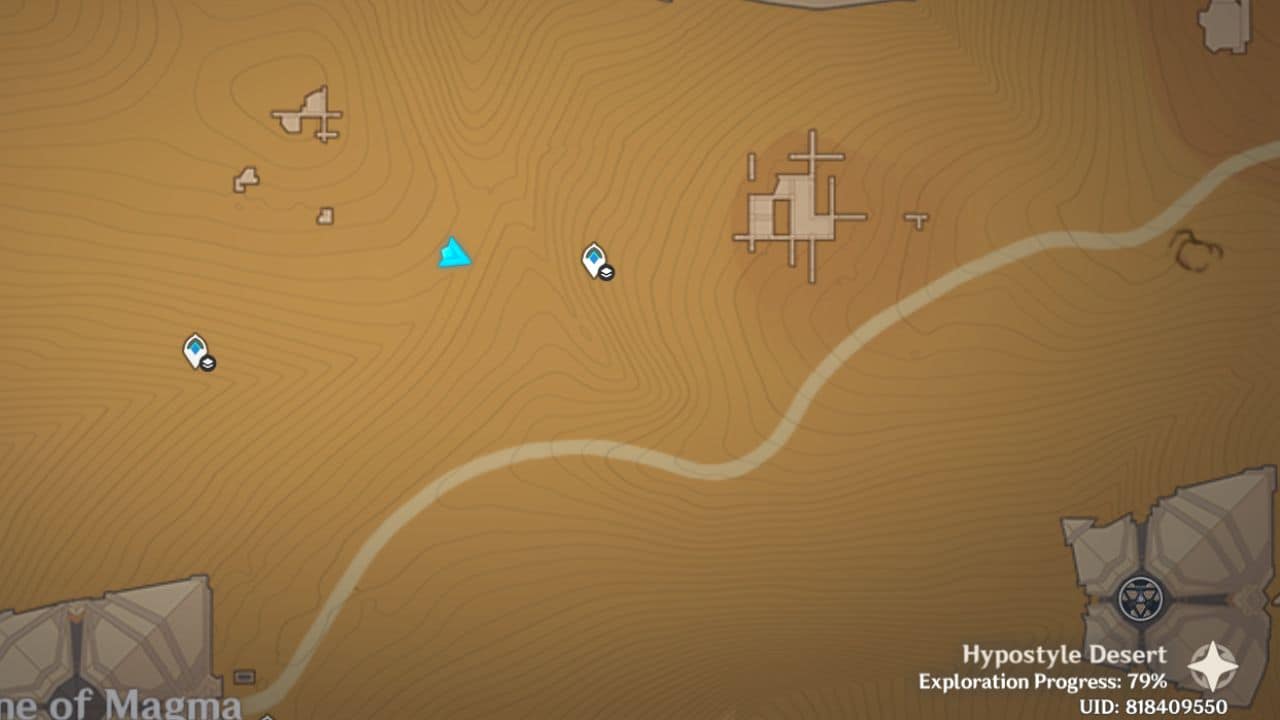
Dune of Magma Sacred Seals
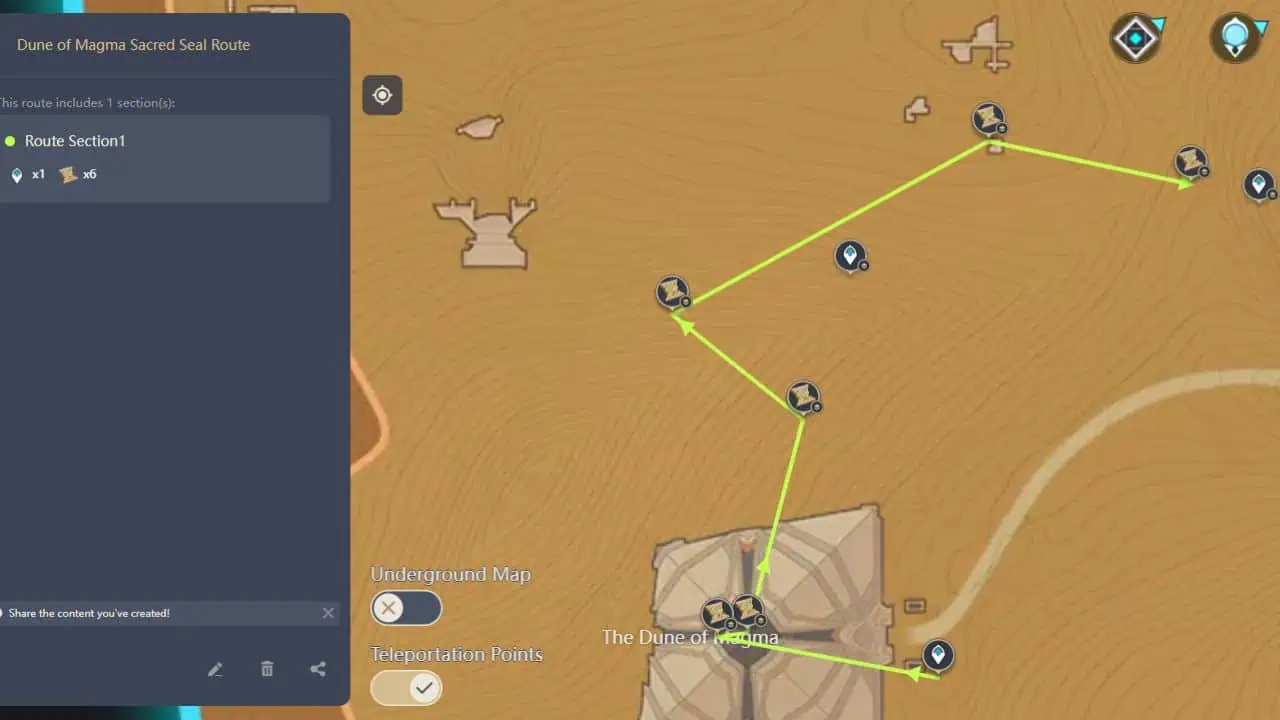
1. Raised Arm
 |  |
| Map Location | In-game Location |
Enter the Dune of Magma and head into the passage to your left. The seal will be lying near the fan.
2. Valley
 |  |
| Map Location | In-game Location |
Descend into the opening in front of the Dune of Magma’s entrance. Fly further ahead, and you will find the seal hidden behind a pair of blue fungi.
3. Valley
 |  |
| Map Location | In-game Location |
Teleport to Dune of Magma’s north underground waypoint. Glide south of the waypoint and pick up the seal lying near a sandglass.
4. Ceremony
 |  |
| Map Location | In-game Location |
From the Dune of Magma’s north underground waypoint, head into a tunnel until you encounter a couple of fungi and a puddle of water. Next to a huge glowing mushroom, the seal will be submerged under the water.
5. Thunderstrike
 |  |
| Map Location | In-game Location |
Teleport to the Dune of Magma’s north underground waypoint. Fly towards the Everlight Cell on the cliff to the left side of the stairs. You will find your seal beside the cell.
6. Labor
 |  |
| Map Location | In-game Location |
Teleport to Duat Hall’s waypoint. The seal can be found just across the waypoint, on the other side of the passage.
7. Primal Obelisk
 |  |
| Map Location | In-game Location |
Glide south from Dune of Magma’s north underground waypoint to find this Primal Obelisk.
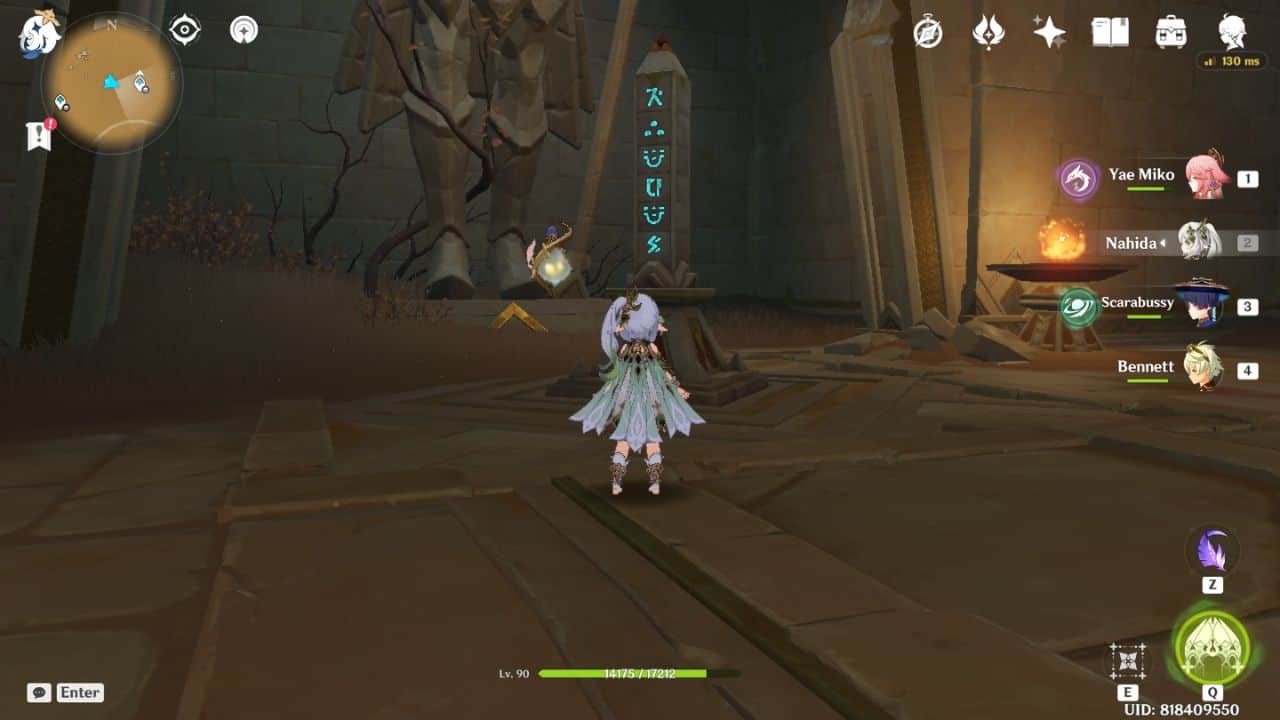
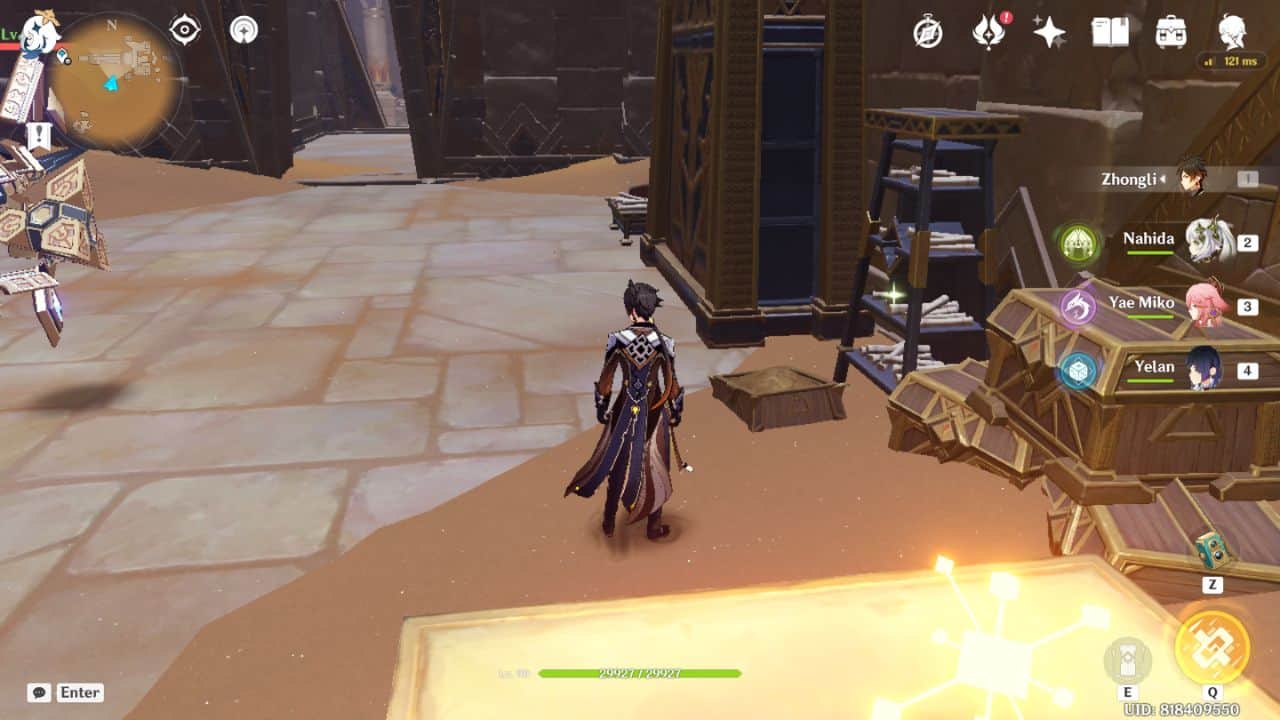
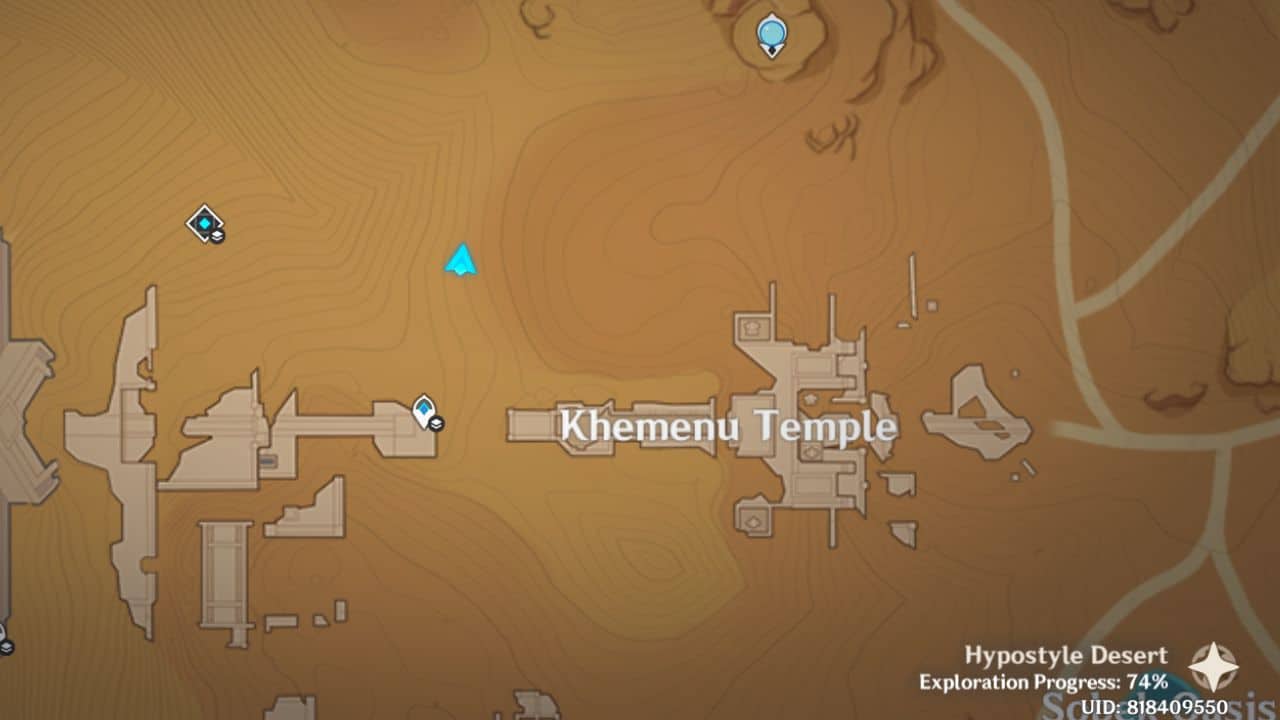
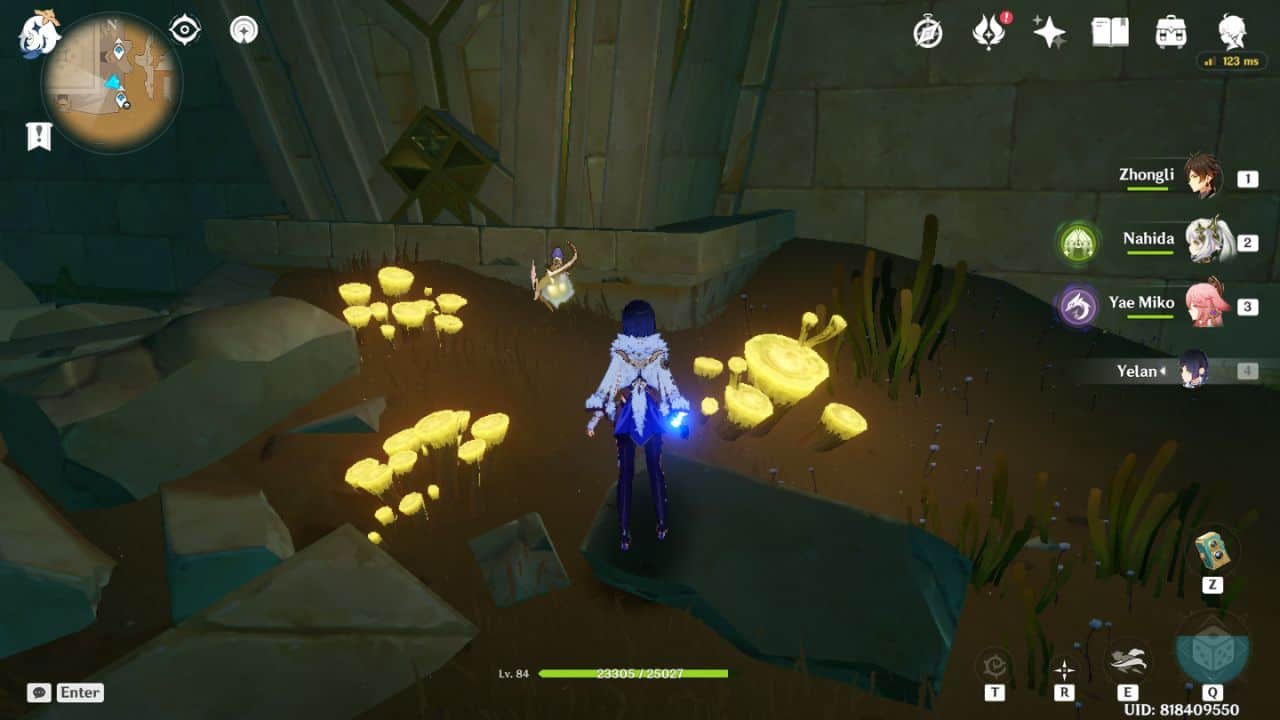
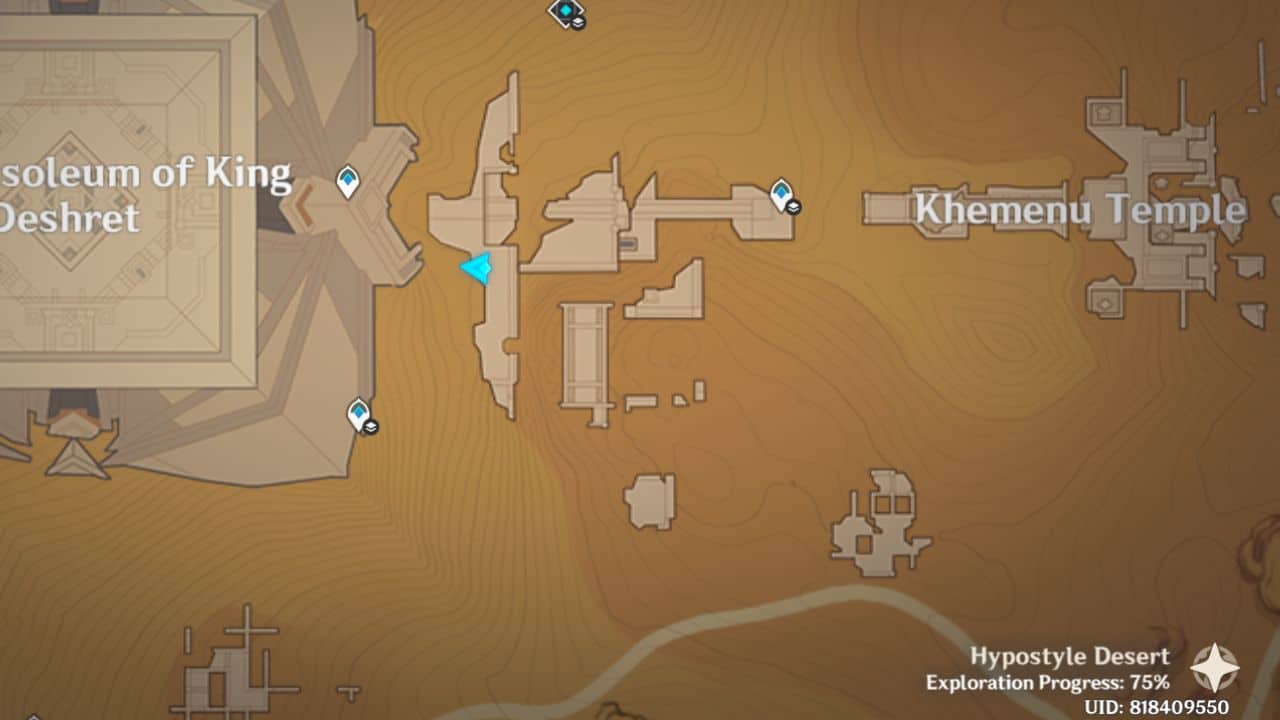
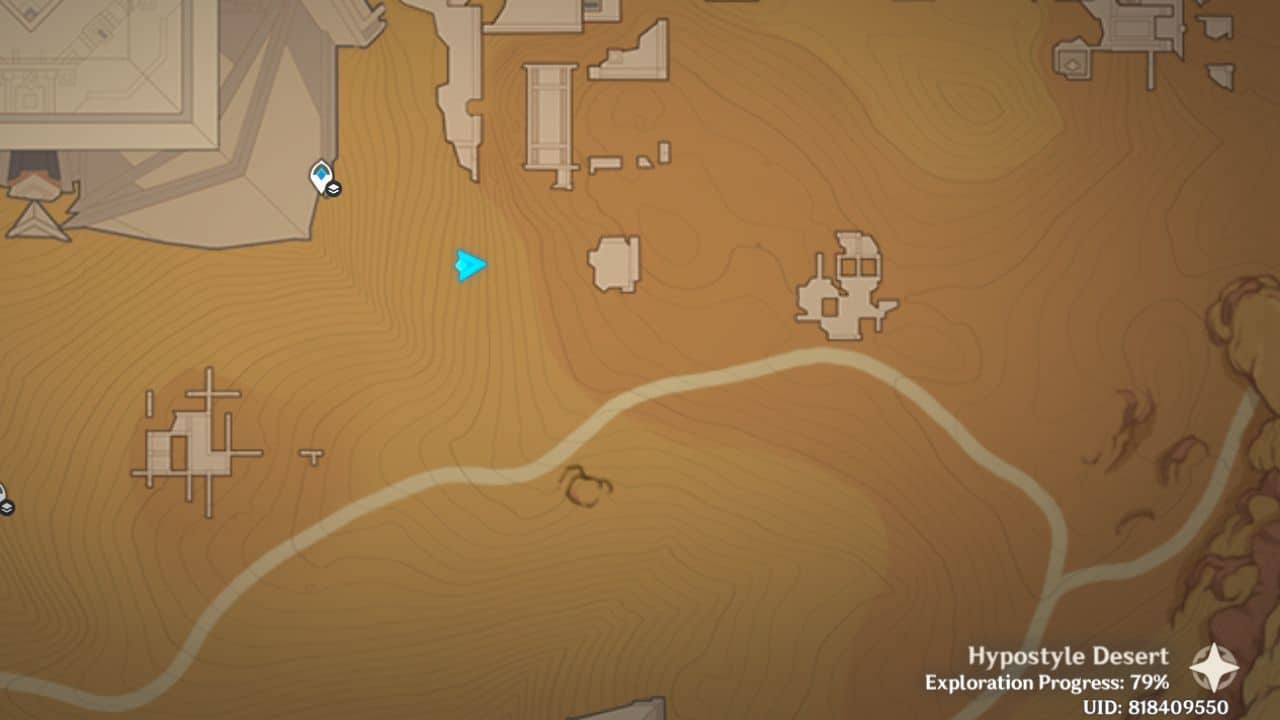
Khemenu Temple Sacred Seals
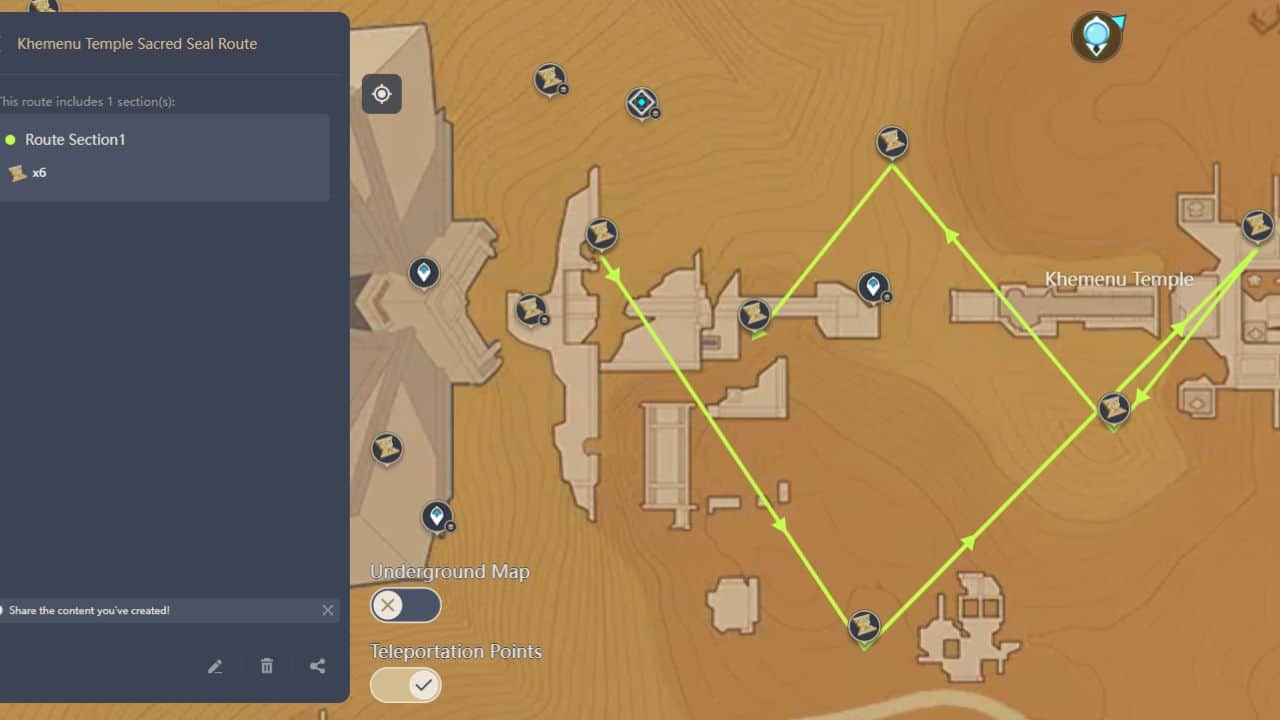
1. Thunderstrike
 |  |
| Map Location | In-game Location |
Walk south from King Deshret’s mausoleum entrance until you reach a broken platform. Jump down to pick up the seal lying on the ground.
2. Dune
 |  |
| Map Location | In-game Location |
Fly east from the mausoleum’s entrance. Continue to glide past the group of Treasure Hoarders. The seal will be near a Primal Construct: Repulsor ahead of the same Treasure Hoarders.
3. Raised Arm
 |  |
| Map Location | In-game Location |
To reach the next seal, teleport to the Statue of Seven near Khemenu Temple. Start walking south toward the temple, and you will find the seal near a broken Primal Construct.
4. Thunderstrike
 |  |
| Map Location | In-game Location |
Enter the first corridor on the left side of the Khemenu Temple’s entrance. The seal is beside the Primal Construct enemy.
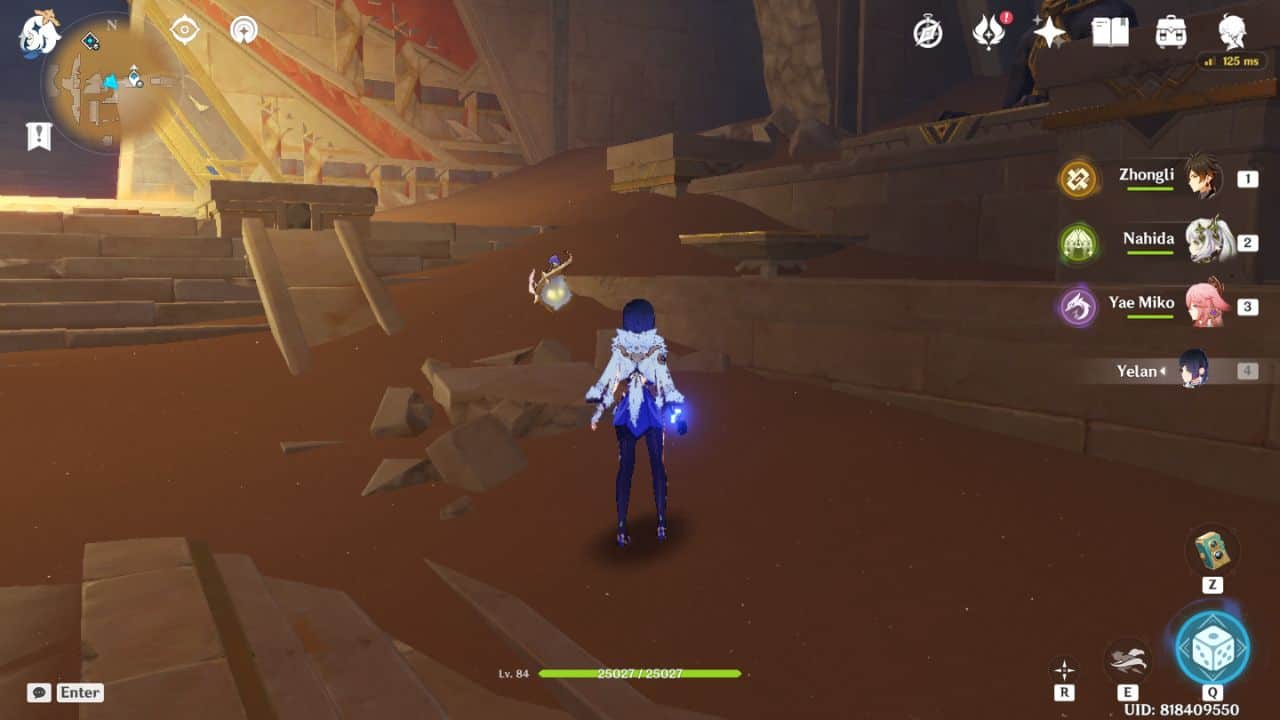
5. Valley
 |  |
| Map Location | In-game Location |
Teleport to the underground waypoint in Khemenu Temple. Turn right to enter a passage and jump down into the hole. The seal will lie near an invisible torch in the room at the end of the corridor.
6. Sunrise
 |  |
| Map Location | In-game Location |
Teleport to the Khemenu Temple’s underground waypoint. Descend to the bottom floor through the elevator located at the end of the passage. The room will have a King Deshret and his subjects’ mural. Pick up the seal lying in a corner.
7. Primal Obelisk
 |  |
| Map Location | In-game Location |
Glide southeast from the entrance of the Mausoleum of King Deshret to find this Primal Obelisk.
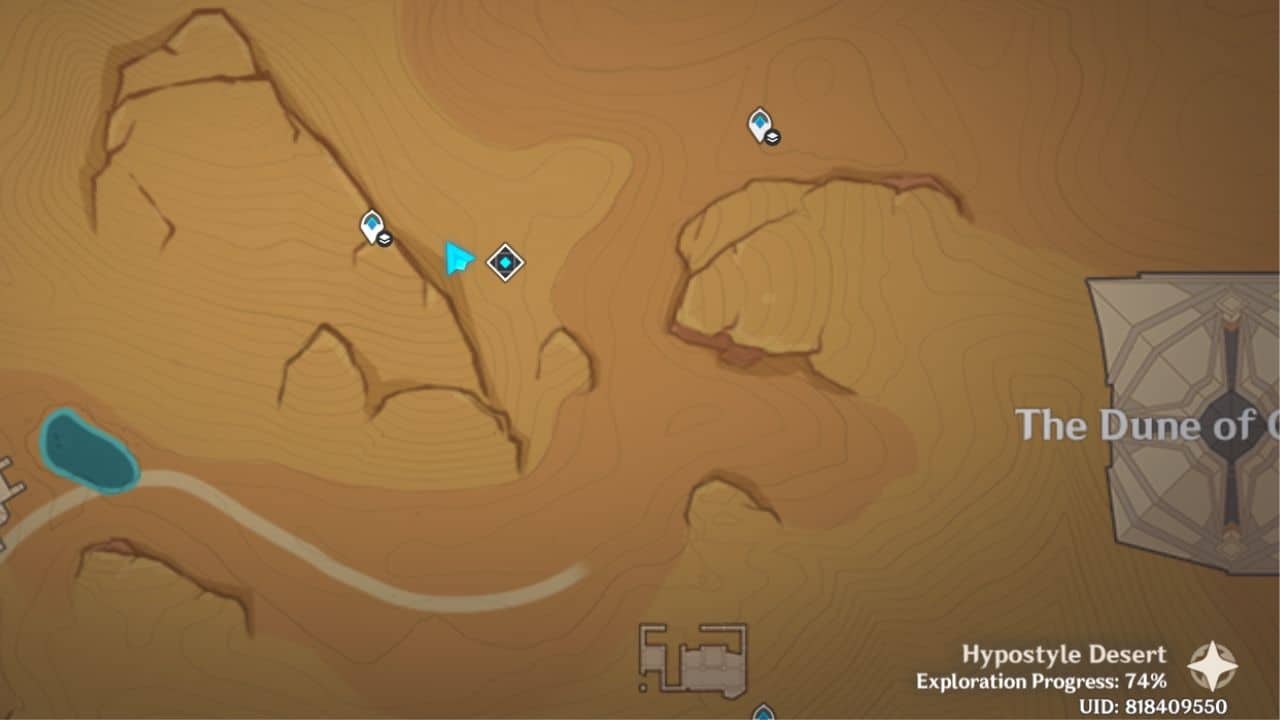
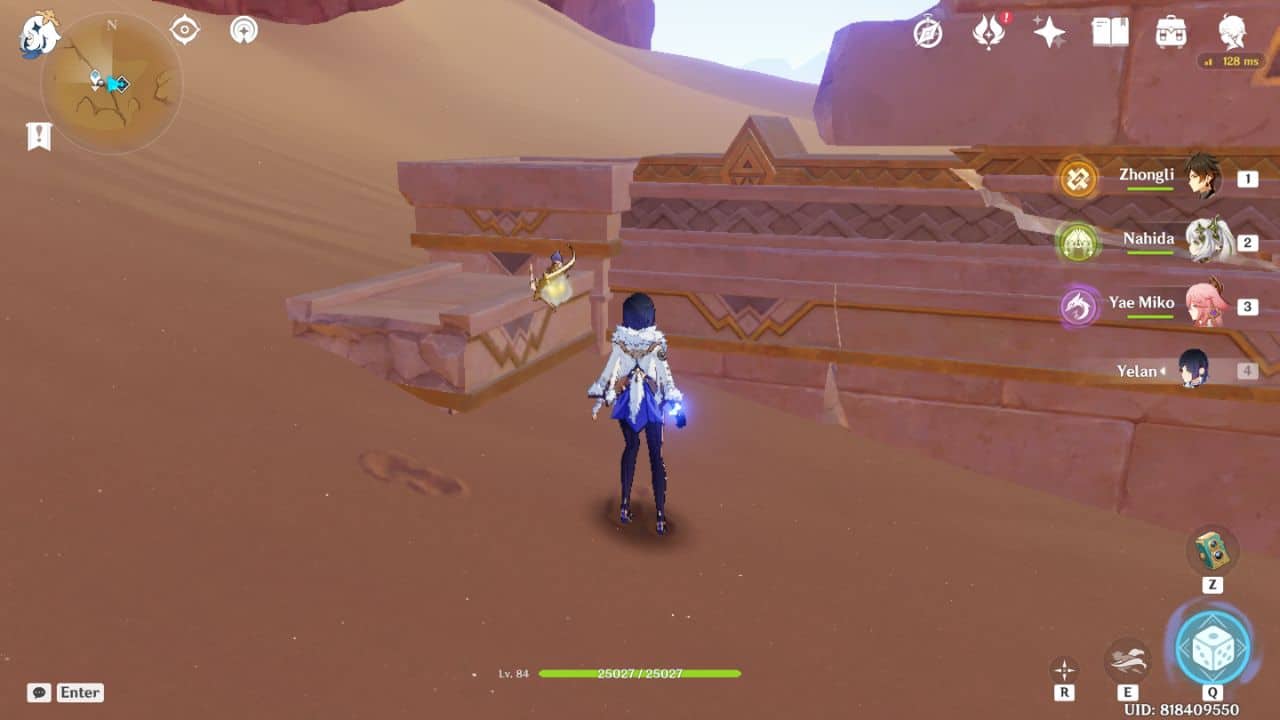
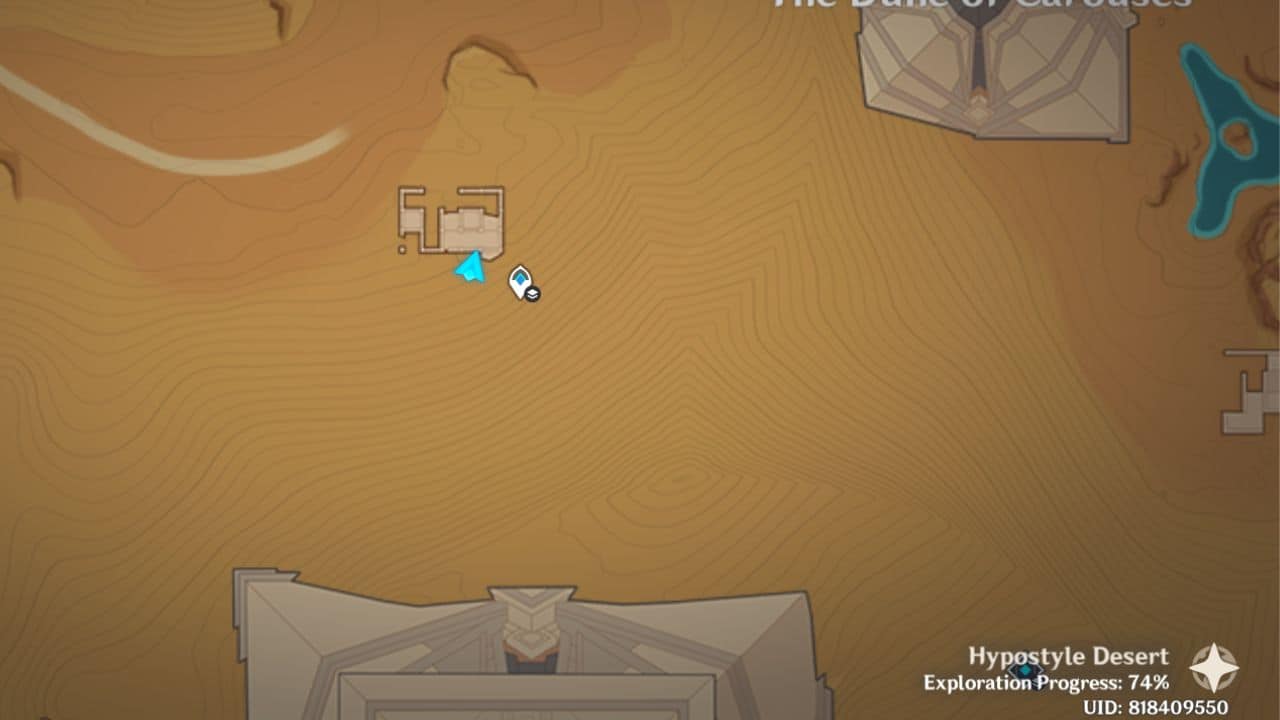
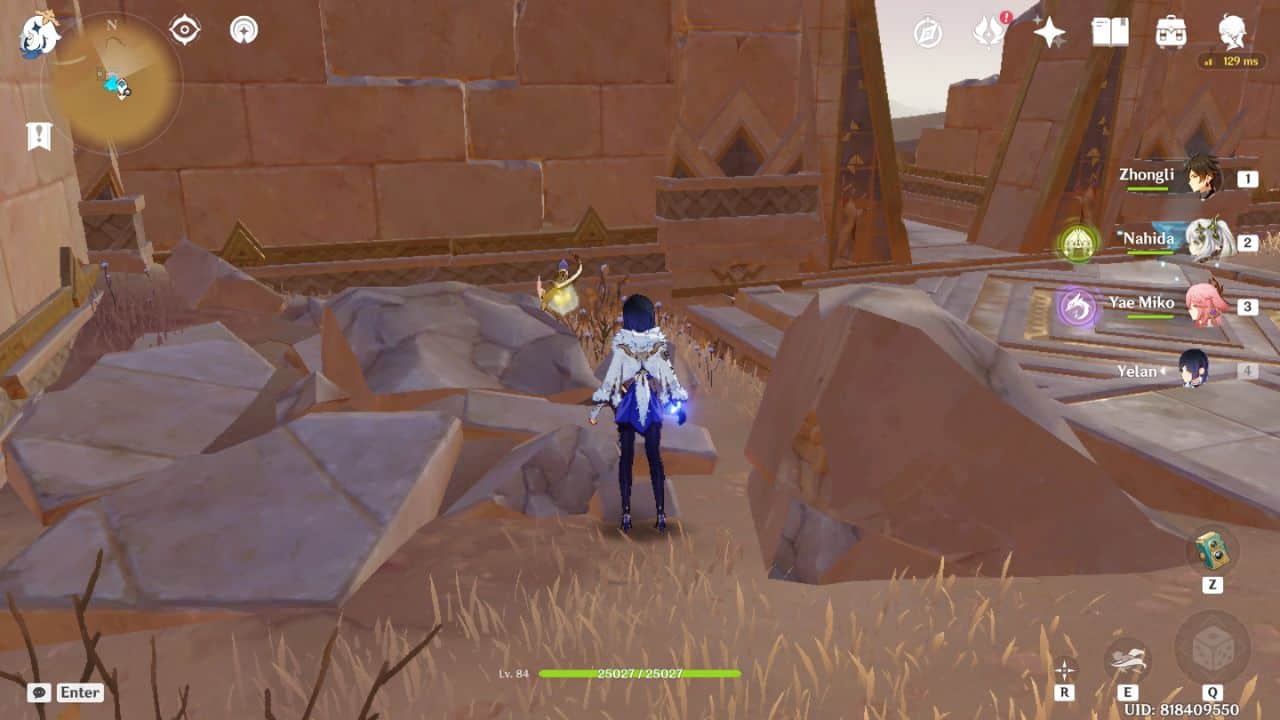
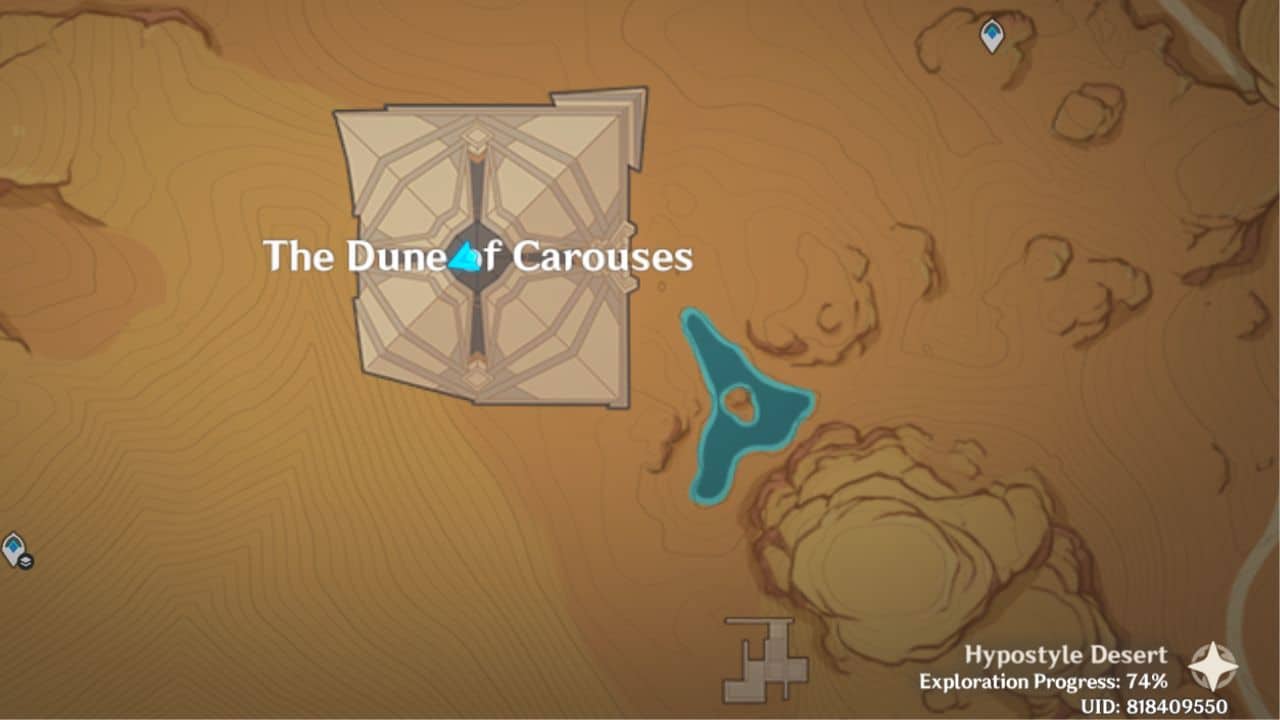
Dune of Carouses Sacred Seals
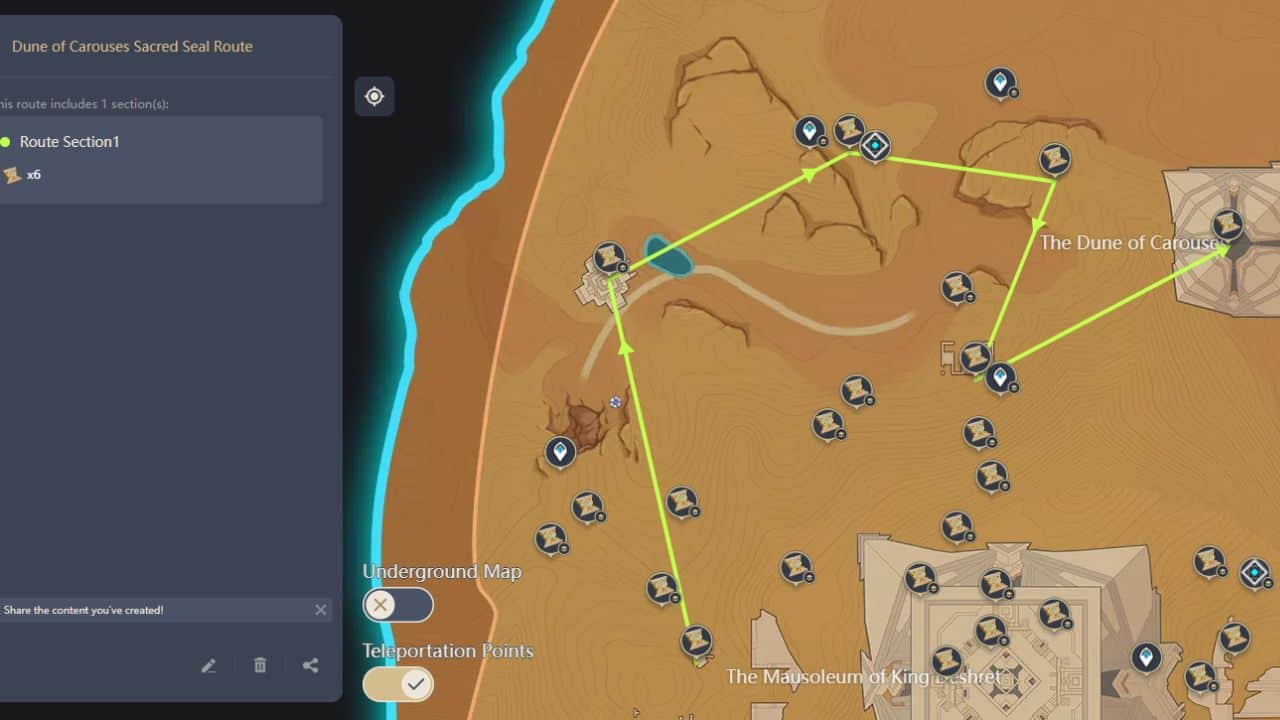
1. Bird Head
 |  |
| Map Location | In-game Location |
Teleport to the waypoint northwest of the Mausoleum of King Deshret and walk south. After you pass a group of Sumpter Beasts and a Fatuus, you will encounter some ruins. The seal will be lying in front of the ruins in a corner.
2. Thunderstrike
 |
| Map Location |
- You must solve a series of puzzles inside the northwest water pyramid to obtain this seal. Teleport to the waypoint northwest of the Mausoleum of King Deshret and jump into the hole ahead of you.
- The seal will be near the pyramid’s entrance, leaning against a wall.
3. Chisel Hammer
 |  |
| Map Location | In-game Location |
This seal is in a small group of ruins behind the ‘Garden of Endless Pillars’ domain.
4. Valley
 |  |
| Map Location | In-game Location |
Head east from the ‘Garden of Endless Pillars’ domain till you come across a cliff. Zip to the top of this cliff through a series of four-leaf sigils. The seal is near a crate in a Treasure Hoarders’ camp.
5. Valley
 |  |
| Map Location | In-game Location |
From the ‘Garden of Endless Pillars’ domain, walk south towards an underground waypoint. You will come across some ruins. The seal nests in a space between a solid wall and an invisible wall at the back of the ruins.
6. Thunderstrike
 | 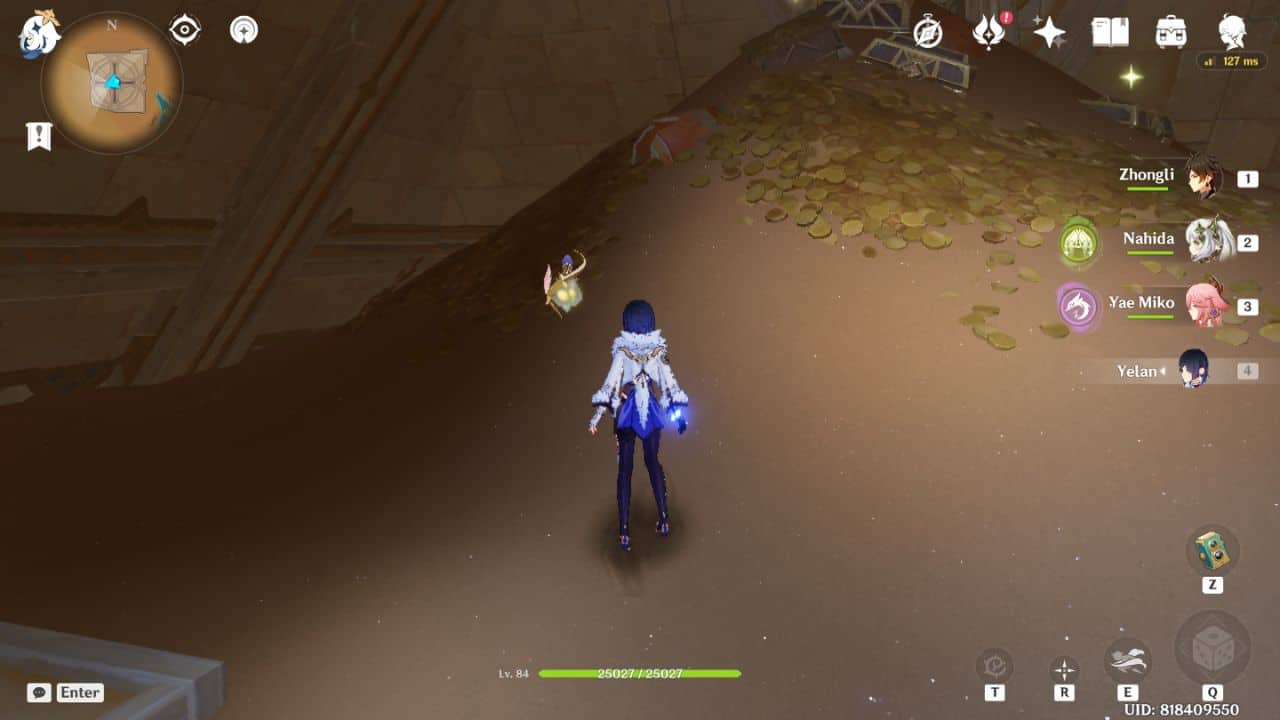 |
| Map Location | In-game Location |
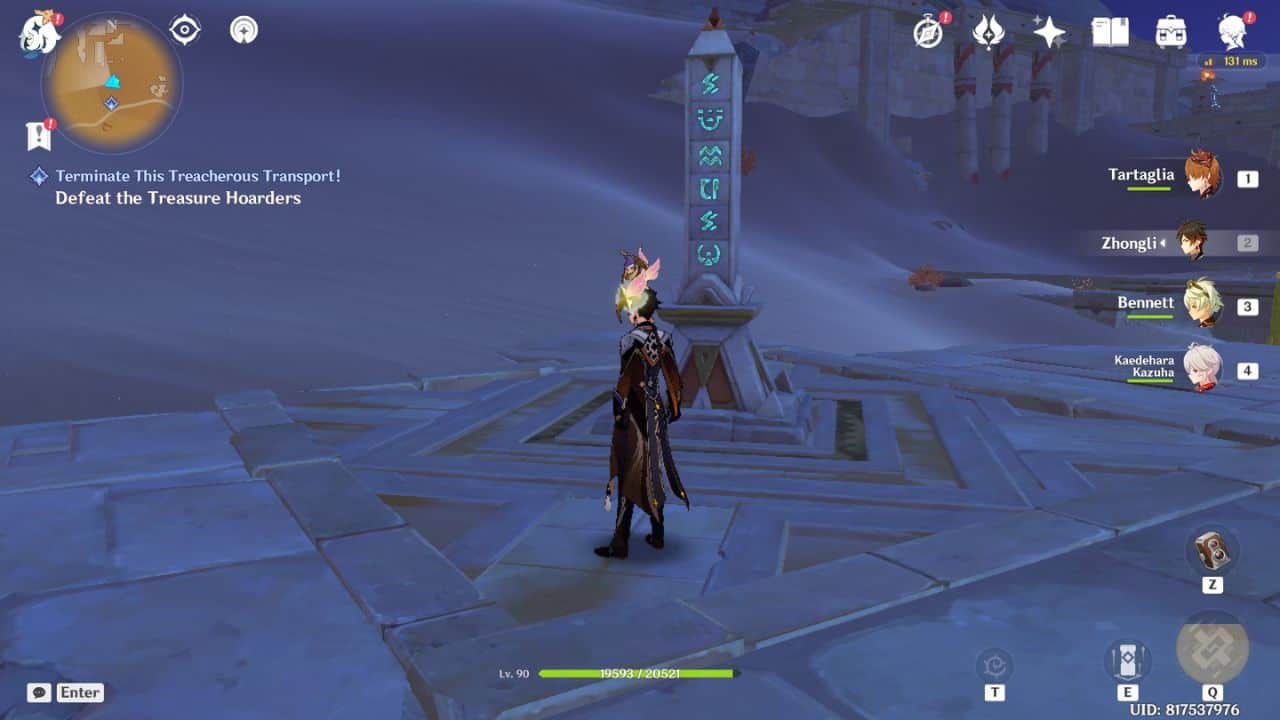
Enter the Dune of Carouses and glide to the top floor through the wind current in front of the entrance. The seal rests on the sand and gold coins pile.
7. Primal Obelisk
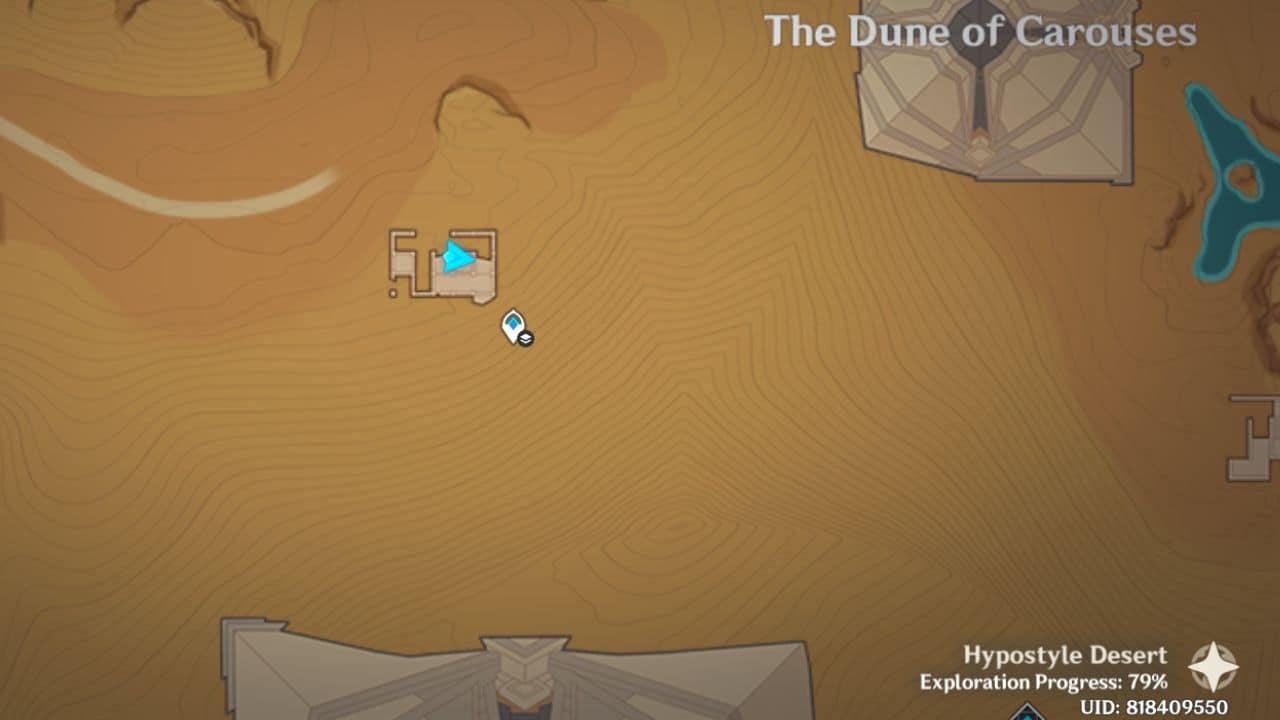 |  |
| Map Location | In-game Location |
This Primal Obelisk lies in an unnamed ruin to the southwest of the Dune of Carouses. Climb the walls to find the Primal Obelisk on the highest point of the ruin.
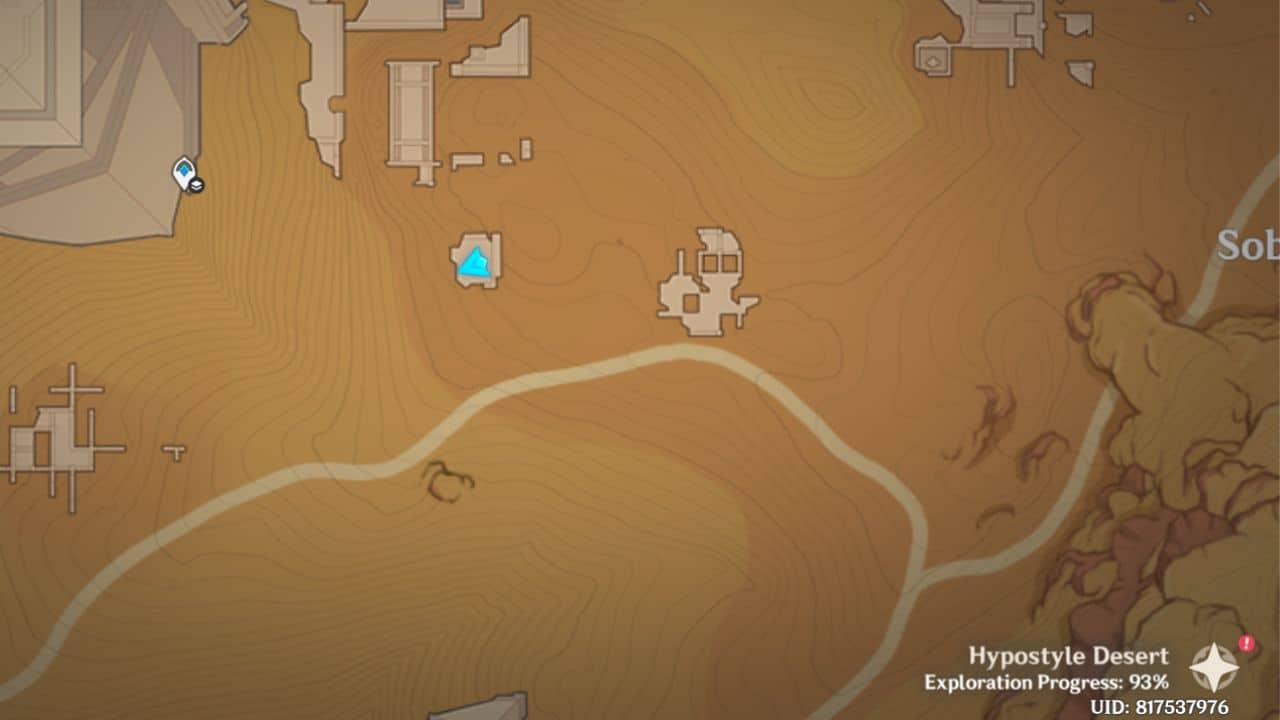
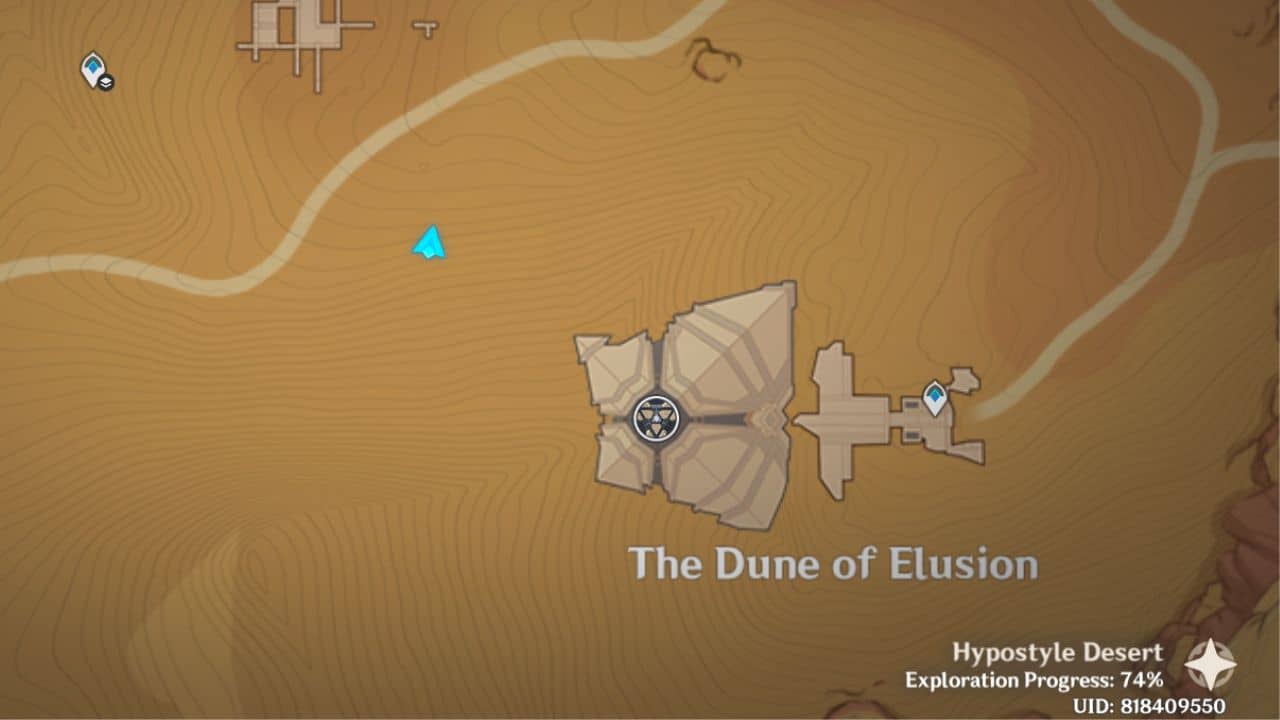
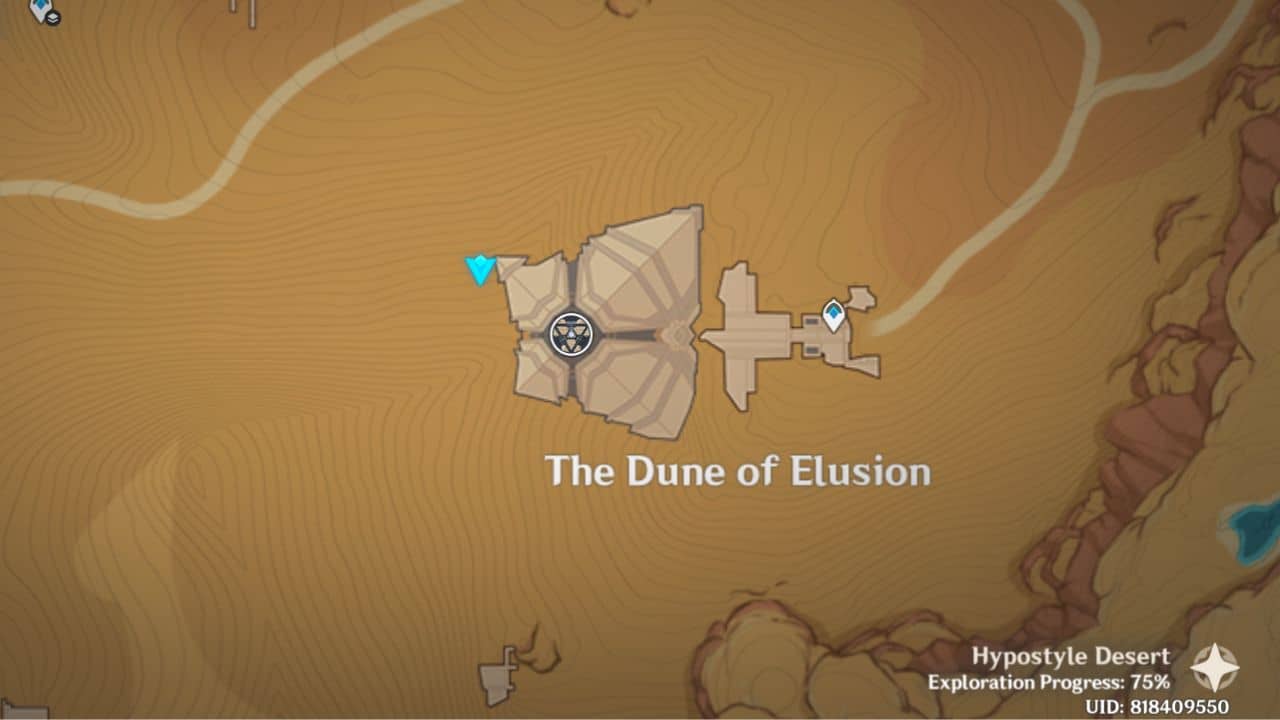
Dune of Elusion Sacred Seals
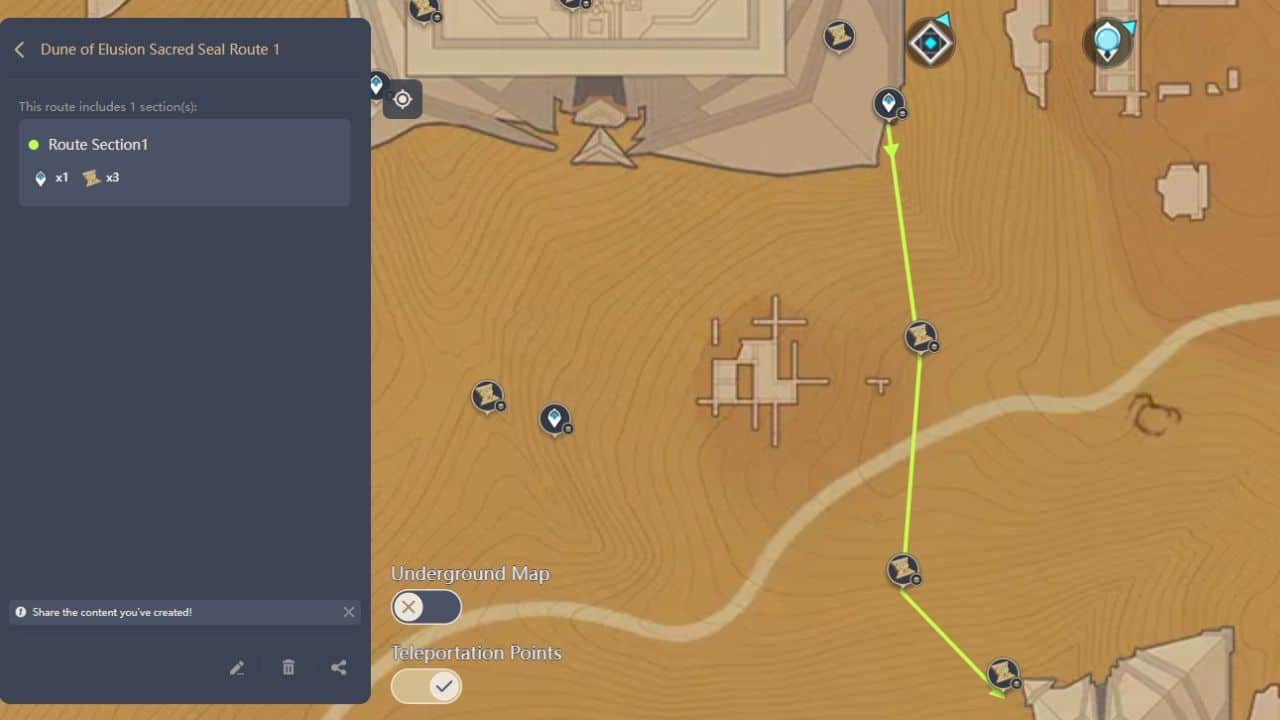
1. Valley
 | 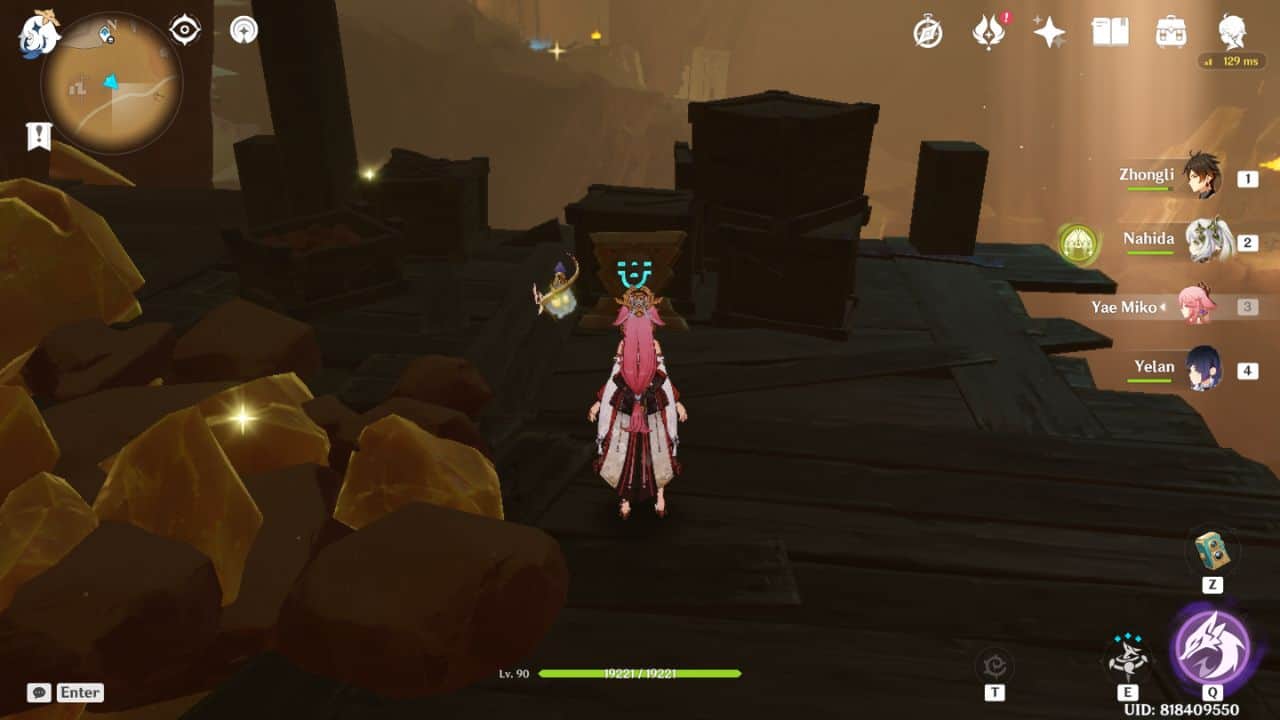 |
| Map Location | In-game Location |
Walk south from the Sekhem Hall underground waypoint till you encounter a Primal Construct. Zip to the wooden platform ahead of this opponent to pick up this seal.
2. Giant Serpent
 |
|
| Map Location | In-game Location |

Glide to your east from the previous seal’s location. The seal lies at the end of the wooden bridge on a cliff, directly above a Shrine of Depth.
3. Sheep Head
 |  |
| Map Location | In-game Location |
- Walk south from the Sekhem Hall underground waypoint and dive into the tunnel. Keep walking until you reach an area with a huge hole.
- Fly towards the Time Trial challenge below and activate it. Shoot down the slime barrels to blow up the stones blocking the entrance to a cave. Your seal lies inside that cave.
4. Raised Arm
 |  |
| Map Location | In-game Location |
Teleport to the Sekhem Hall waypoint. Jump below till you land on solid ground. The seal lies on top of some glowing vegetation to your right.
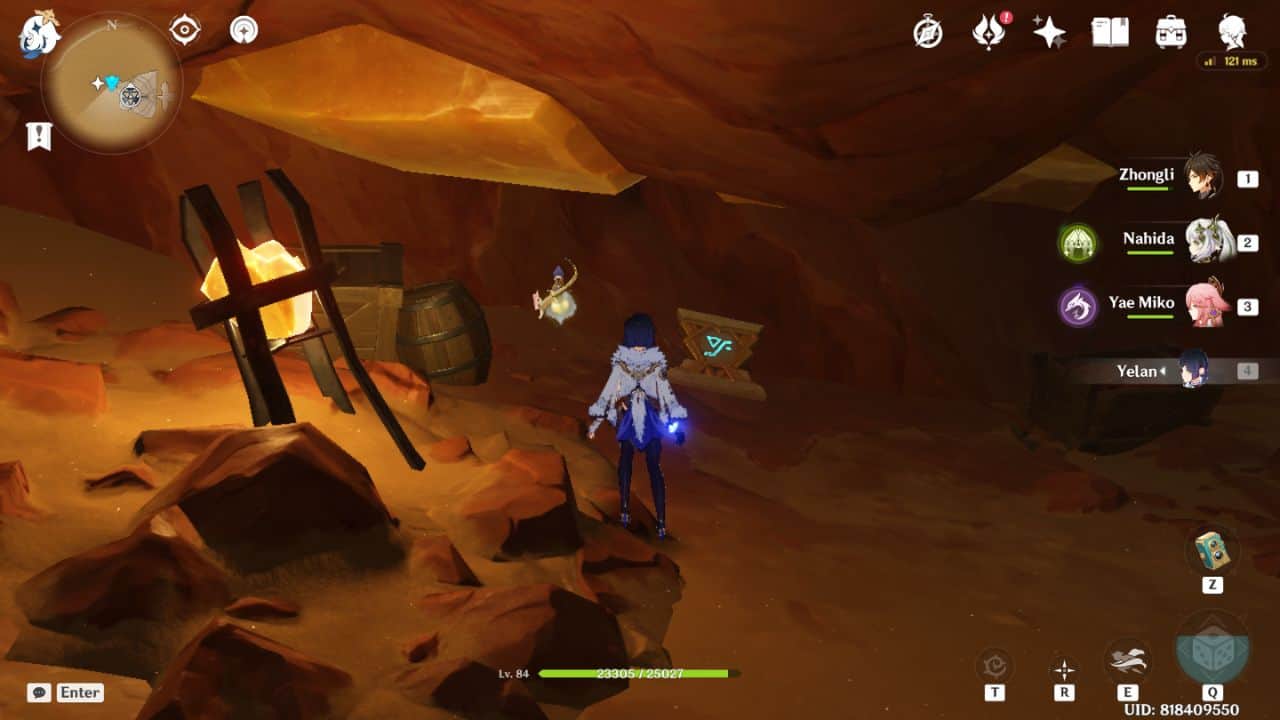
5. Forest
 |  |
| Map Location | In-game Location |
- From the Sekhem Hall waypoint, turn right and enter the first passage on the top floor. Continue walking and take the first left turn. You will come across a blue barrier.
- Use the plinth to remove the barrier and grab the seal lying on the top of the elevator.
6. Valley
 |  |
| Map Location | In-game Location |
Teleport to the Sekhem Hall waypoint and zip toward the passage in the hall’s center. Venture deeper into the passageway and jump down into a hole to enter a tunnel. Once you reach the very end of the tunnel, you will find the seal hidden inside a single Fatui camp.
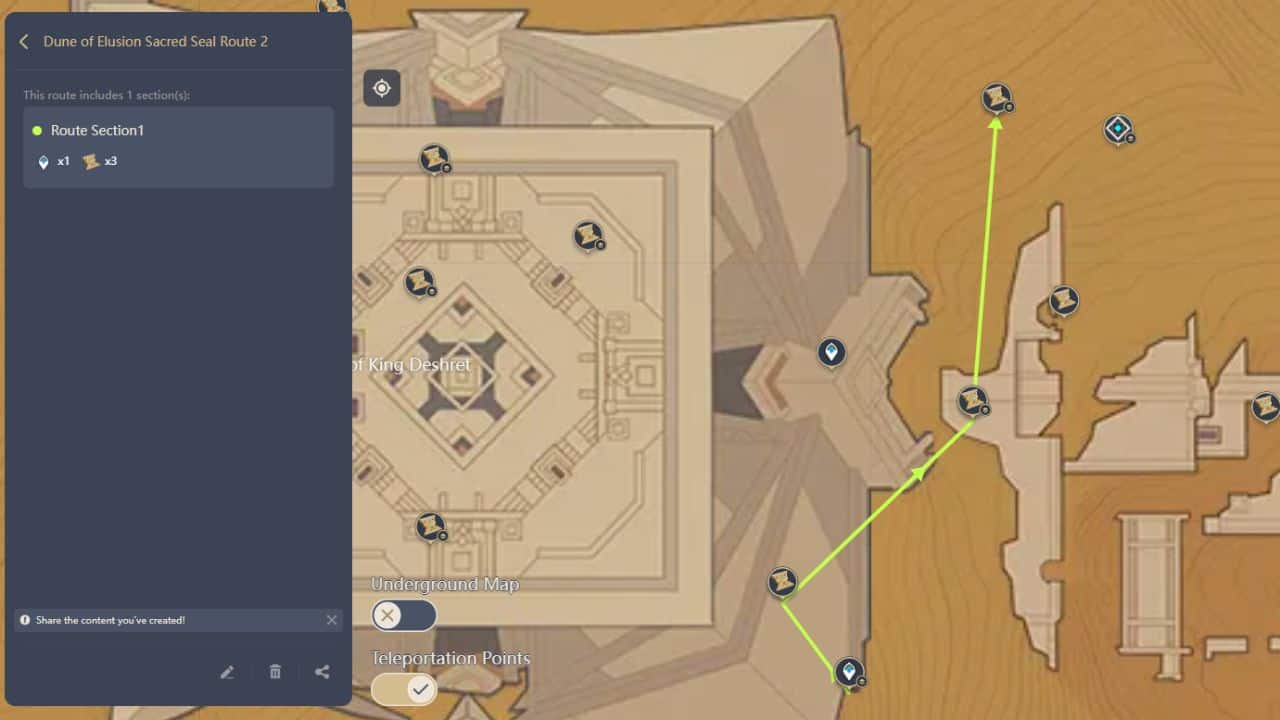
7. Primal Obelisk
 |  |
| Map Location | In-game Location |
- Teleport to the Khemenu Temple underground waypoint and head into the huge hall ahead. Walk into the left corridor and jump into the hole behind the plinth mechanism.
- Continue walking until you encounter a broken bridge. Jump into the gap between the bridge to land near the Primal Obelisk.
West Underground Sacred Seals

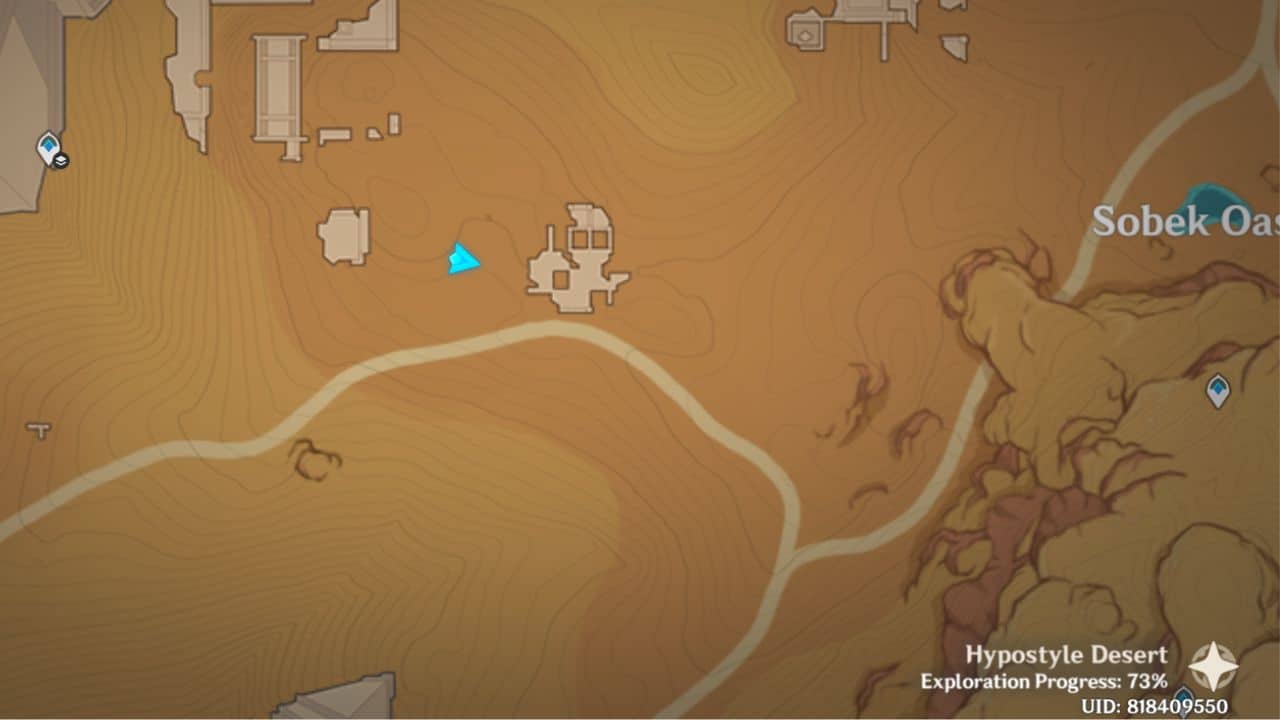
Gathering Sacred Seals for this Primal Obelisk is a complicated process, so I suggest following the route I have mentioned above strictly.
1. Thunderstrike
 |  |
| Map Location | In-game Location |
Teleport to the southwest waypoint of the Mausoleum of King Desheret. Travel to the hall on the top of a cliff through four-leaf sigils. The seal is located behind a Remarkable Chest at the end of the hall.
2. Right to Rule
 |
| Map Location |
- Teleport to the southwest waypoint of the Mausoleum of King Deshret. Enter a tunnel to your right. The tunnel’s entrance is flocked by a couple of blue fungi.
- Take a left turn until you reach a submerged hall with fungi enemies. The seal will be behind a blue barrier in a room near a Primal Construct.
3. Valley
 |  |
| Map Location | In-game Location |
- Return to the submerged hall from the previous seal’s location. Venture into the tunnel in front of you till you reach an open area. You will notice two giant statues—walk past them and enter the tunnel ahead.
- Jump into the hole below. The seal will be hidden inside the very first ruin below the cliff. You can access the seal by entering a hole in the side of the ruin’s wall.
4. Auricle
 |  |
| Map Location | In-game Location |
- You will notice another ruin in front of you from the previous seal’s location. Zip upward to a small tunnel on the top of the aforementioned ruin. Keep walking till you reach a withering zone.
- Now, head into the tunnel to your left. You will find the seal lying beside a fan.
5. Forest
 |  |
| Map Location | In-game Location |
Use the fan located near the previous Auricle seal’s location to fly. Zip forward to reach a Fatui camp, where the seal is inclined against a crate.
6. Sandstorm
 |  |
| Map Location | In-game Location |
Turn left from the Fatui camp I mentioned above and keep walking straight. You are on the right path if you pass a Seelie and an Anemo Fatui enemy on your way. You can find the seal near a locked door.
7. Primal Obelisk
 |  |
| Map Location | In-game Location |
- Teleport to the southwest underground waypoint of the Mausoleum of King Deshret. Head into the ruins below. Enter the passage to your left side.
- Use the Glinting Components hidden in various desert ruins to unlock the door and reach the Primal Obelisk.
Safhe Shatranj Sacred Seals
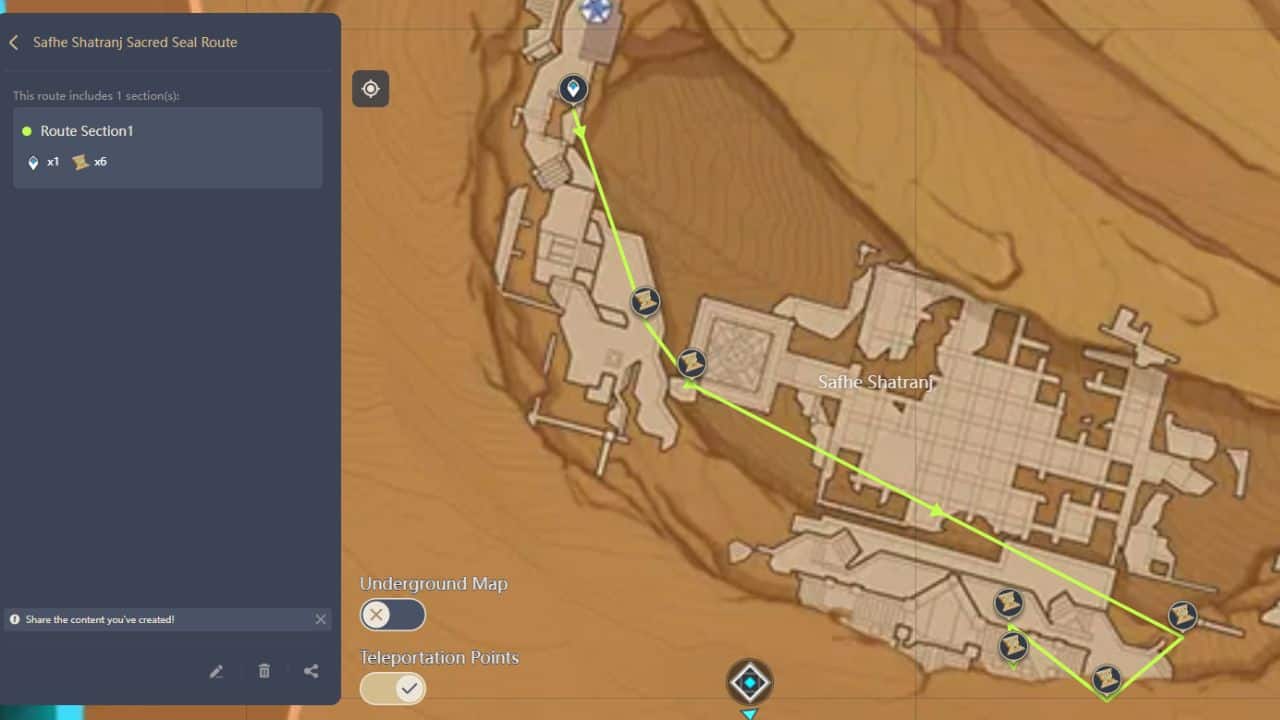
1. Ceremony
 |  |
| Map Location | In-game Location |
Teleport to Safhe Shatranj’s west waypoint. Descend to the platform below and pick up the seal from the Eremite camp ahead.
2. Raised Arm
 |  |
| Map Location | In-game Location |
Glide to the south of the Safhe Shatranj’s west Teleport Waypoint. The seal will be on a broken piece of the bridge.
3. Valley
 |  |
| Map Location | In-game Location |
- Return to the submerged hall from the previous seal’s location. Venture into the tunnel in front of you till you reach an open area. You will notice two giant statues—walk past them and enter the tunnel ahead.
- Jump into the hole below. The seal will be hidden inside the very first ruin below the cliff. You can access the seal by entering a hole in the side of the ruin’s wall.
4. Auricle
 |  |
| Map Location | In-game Location |
- You will notice another ruin in front of you from the previous seal’s location. Zip upward to a small tunnel on the top of the aforementioned ruin. Keep walking till you reach a withering zone.
- Now, head into the tunnel to your left. You will find the seal lying beside a fan.
5. Forest
 |  |
| Map Location | In-game Location |
Use the fan located near the previous Auricle seal’s location to fly. Zip forward to reach a Fatui camp, where the seal is inclined against a crate.
6. Sandstorm
 |  |
| Map Location | In-game Location |
Turn left from the Fatui camp I mentioned above and keep walking straight. You are on the right path if you pass a Seelie and an Anemo Fatui enemy on your way. You can find the seal near a locked door.
7. Primal Obelisk
 |  |
| Map Location | In-game Location |
- Teleport to the southwest underground waypoint of the Mausoleum of King Deshret. Head into the ruins below. Enter the passage to your left side.
- Use the Glinting Components hidden in various desert ruins to unlock the door and reach the Primal Obelisk.
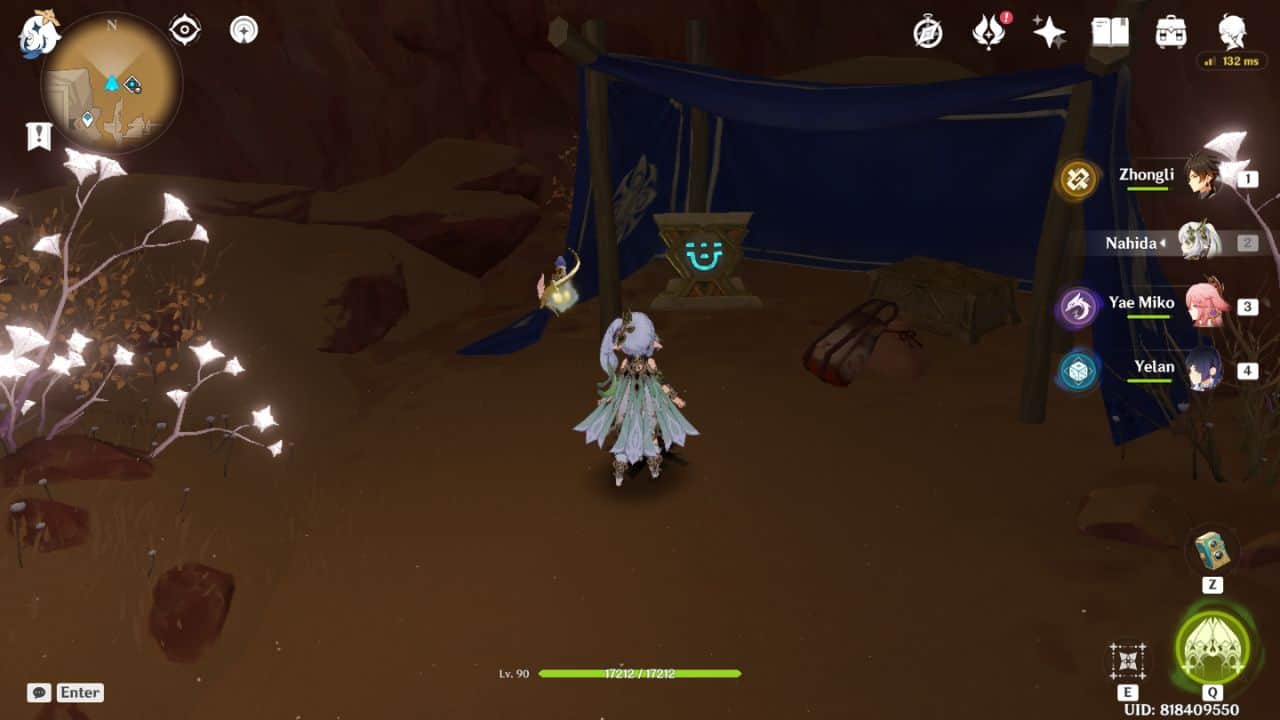
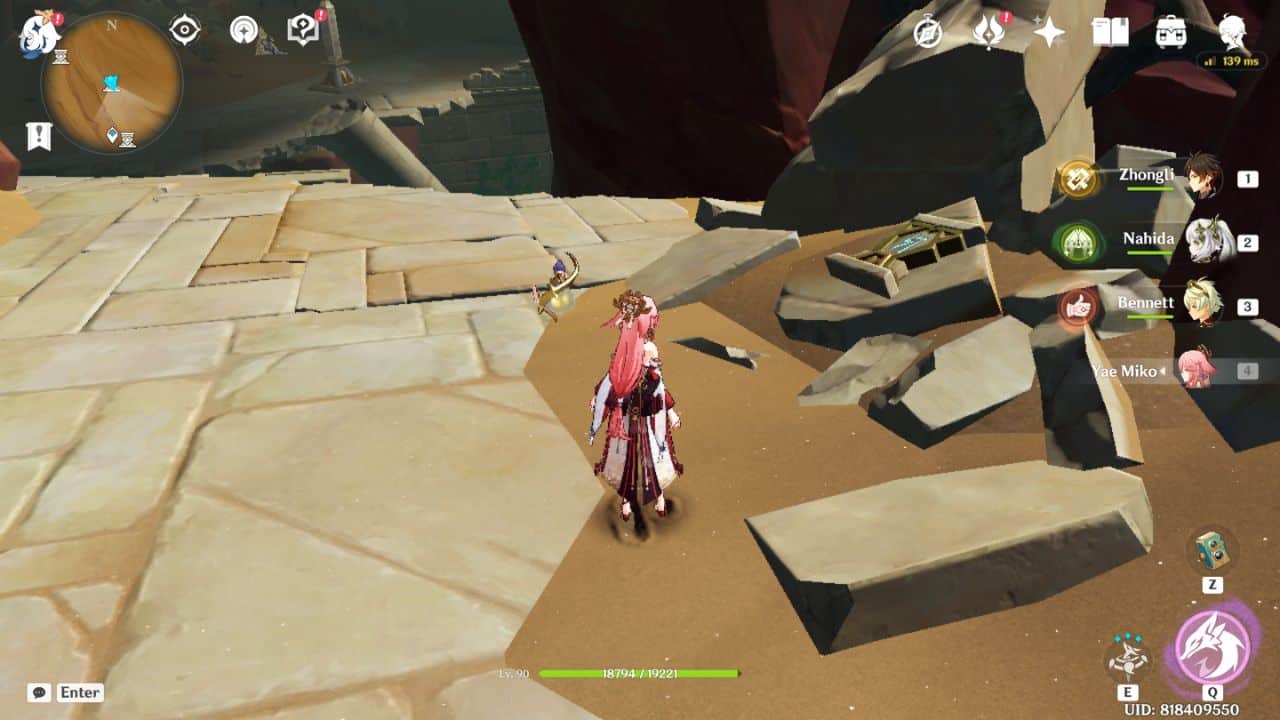
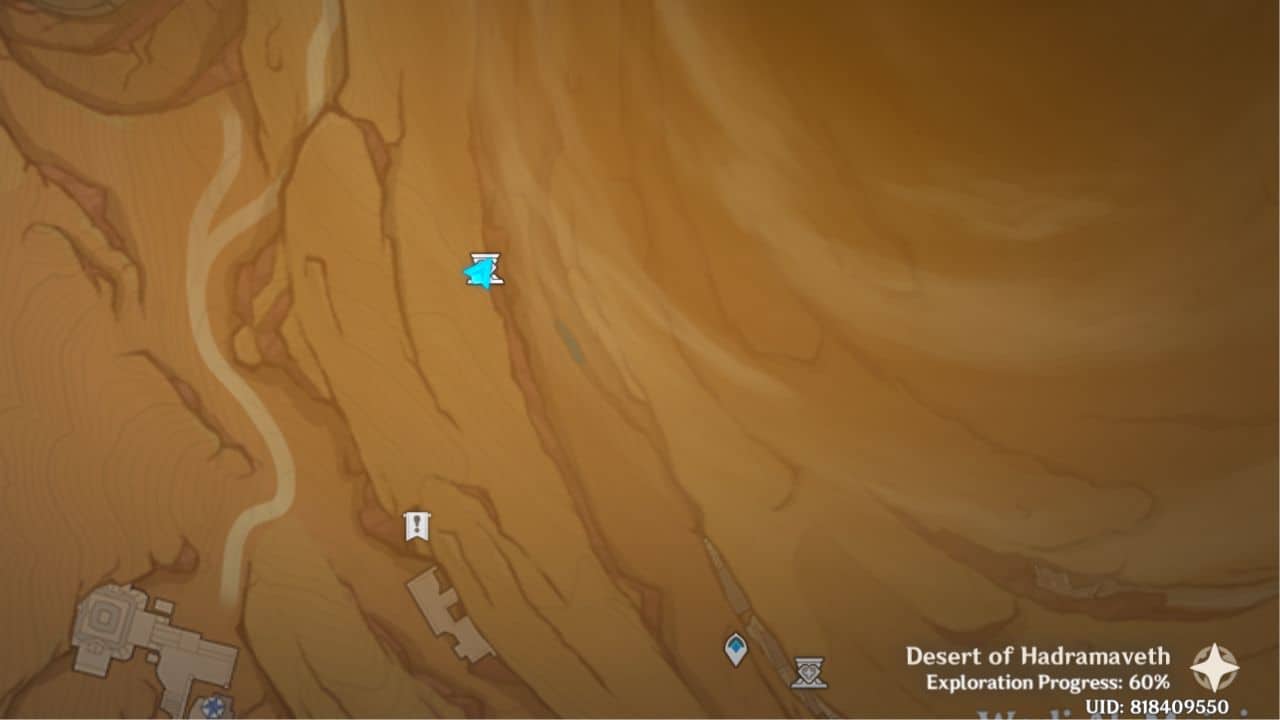
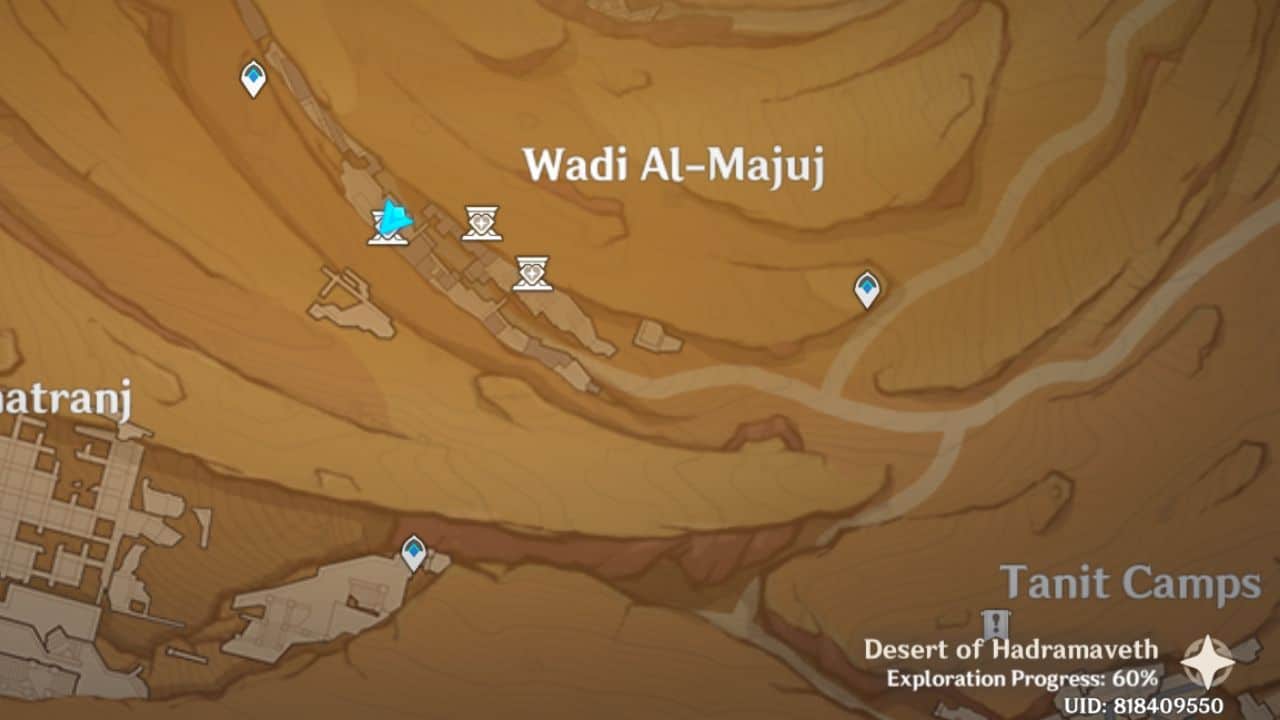
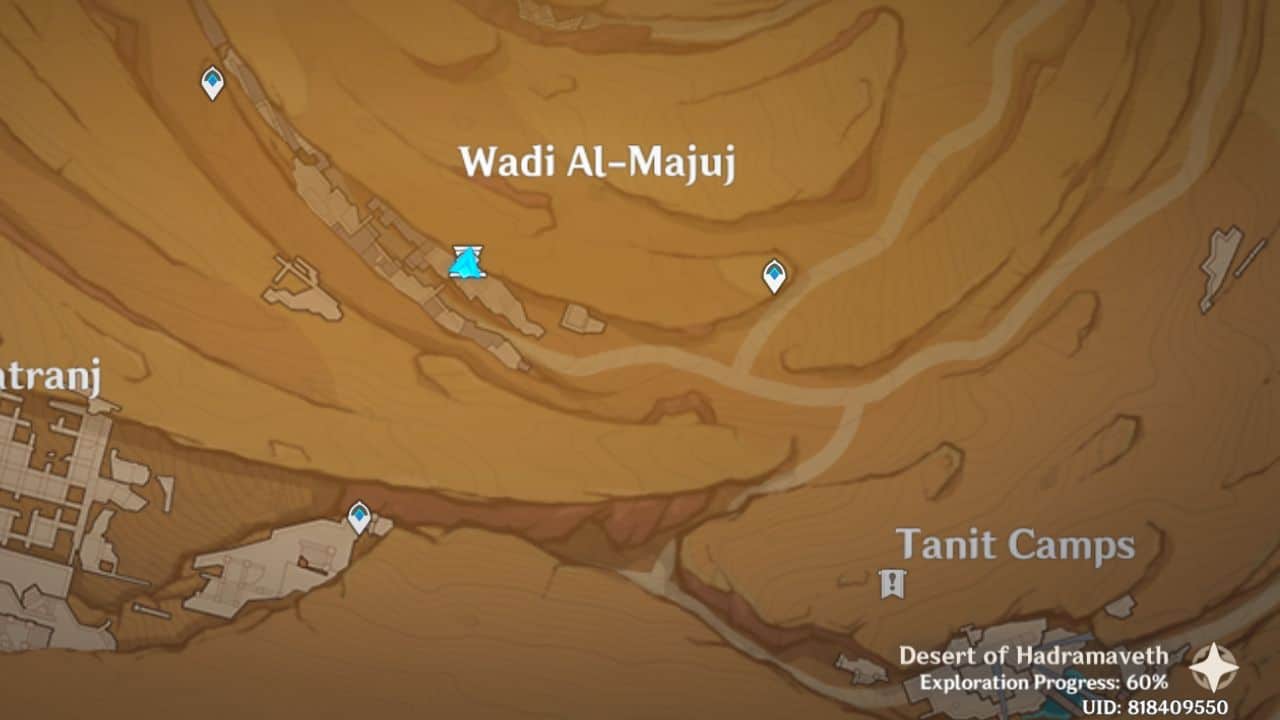
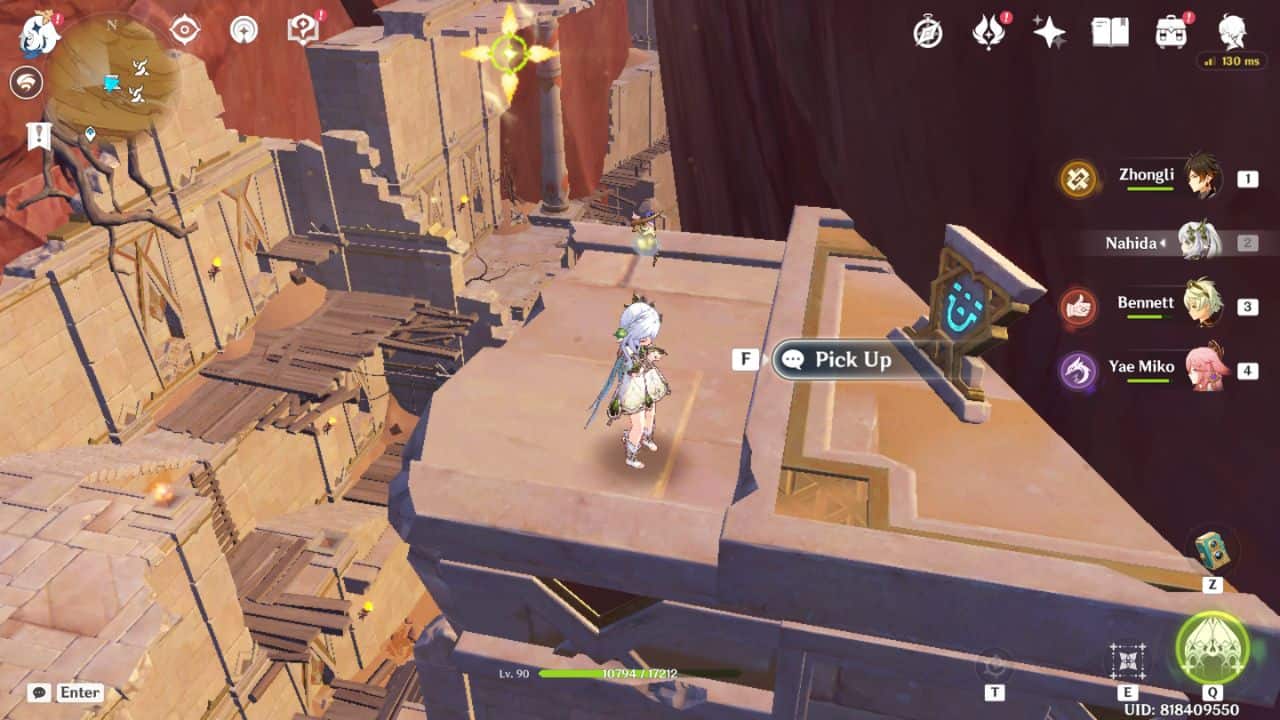
Wadi Al-Majuj Sacred Seals

1. Danger
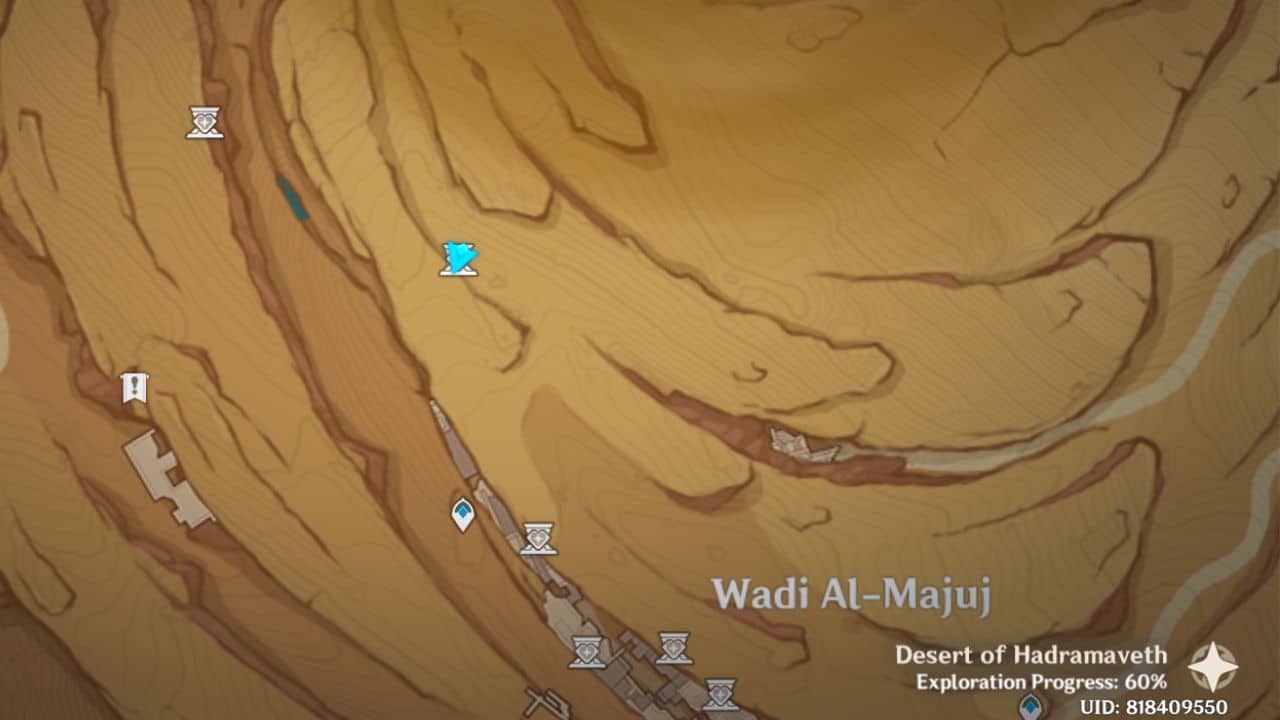 |  |
| Map Location | In-game Location |
- Teleport to the waypoint to the north of Safhe Shatranj. Jump into the hole in front of the waypoint and use a zip line to enter an opening to your right.
- Walk past the Primal Obelisk and jump over the gap in the bridge. The seal will be resting atop a pile of broken platform pieces.
2. Bird Head
 |  |
| Map Location | In-game Location |
Keep walking to the north from Safhe Shatranj’s north waypoint till you reach a group of blue fungi. Jump into the opening in front of those fungi. Your seal will be lying around a couple of purple fungi.
3. Right to Rule
 |  |
| Map Location | In-game Location |
Teleport to the waypoint located to the north of Safhe Shatranj. Walk a little to the right of the waypoint and glide down till you reach the ground. The seal will be leaning against a wall up ahead.
4. Grand Door
 |  |
| Map Location | In-game Location |
Press forward from the previous seal’s location till you come across a broken pillar blocking your path. Climb the pillar to enter a hidden space containing a Remarkable Chest. Grab the embedded seal above the torch.
5. Raised Arm
 |  |
| Map Location | In-game Location |
Glide towards the Sacred Seal pin of this seal from the north Safhe Shatranj waypoint. The seal is stuck to a wall, just behind a Primal Construct enemy.
6. Valley
 |  |
| Map Location | In-game Location |
Glide to the southeast of the north Safhe Shatranj waypoint. Use the four-leaf sigil zip lines to travel on top of a huge pillar. Grab the seal lying on the top of that pillar.
7. Primal Obelisk
 |  |
| Map Location | In-game Location |
Teleport to a waypoint north of Safhe Shatranj and glide down into a tunnel below. The Primal Obelisk will be just ahead.
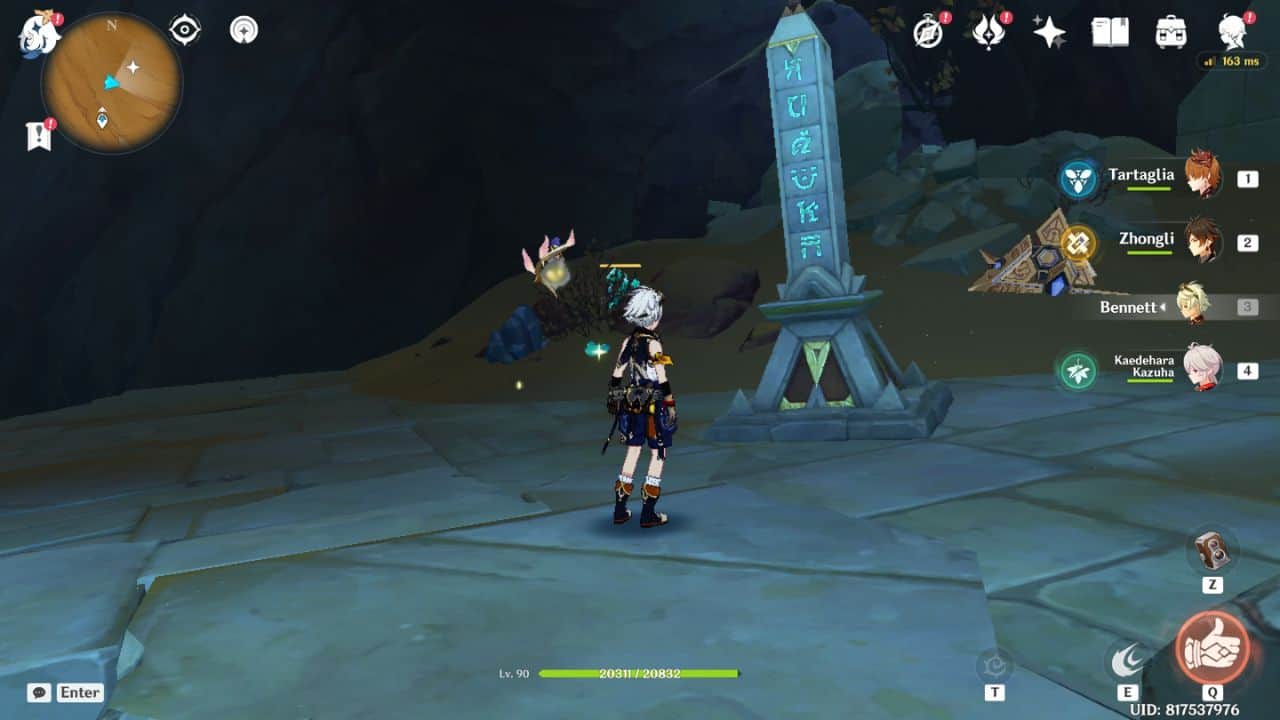
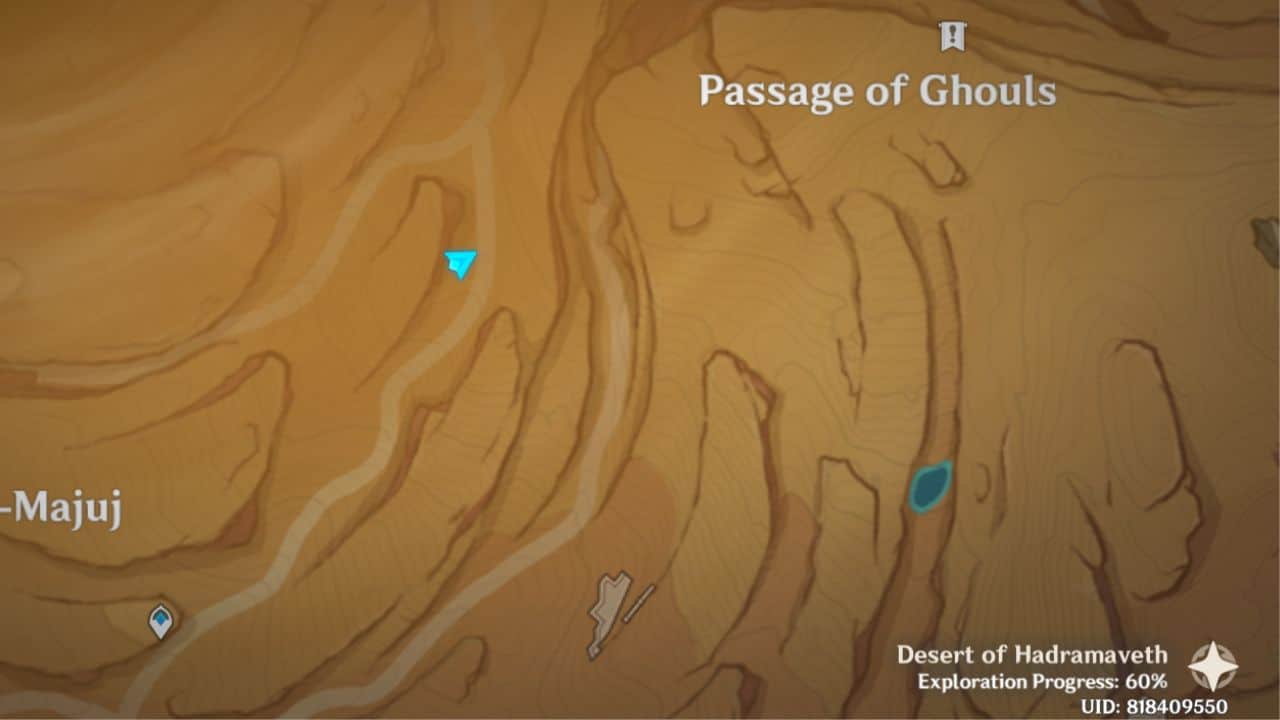
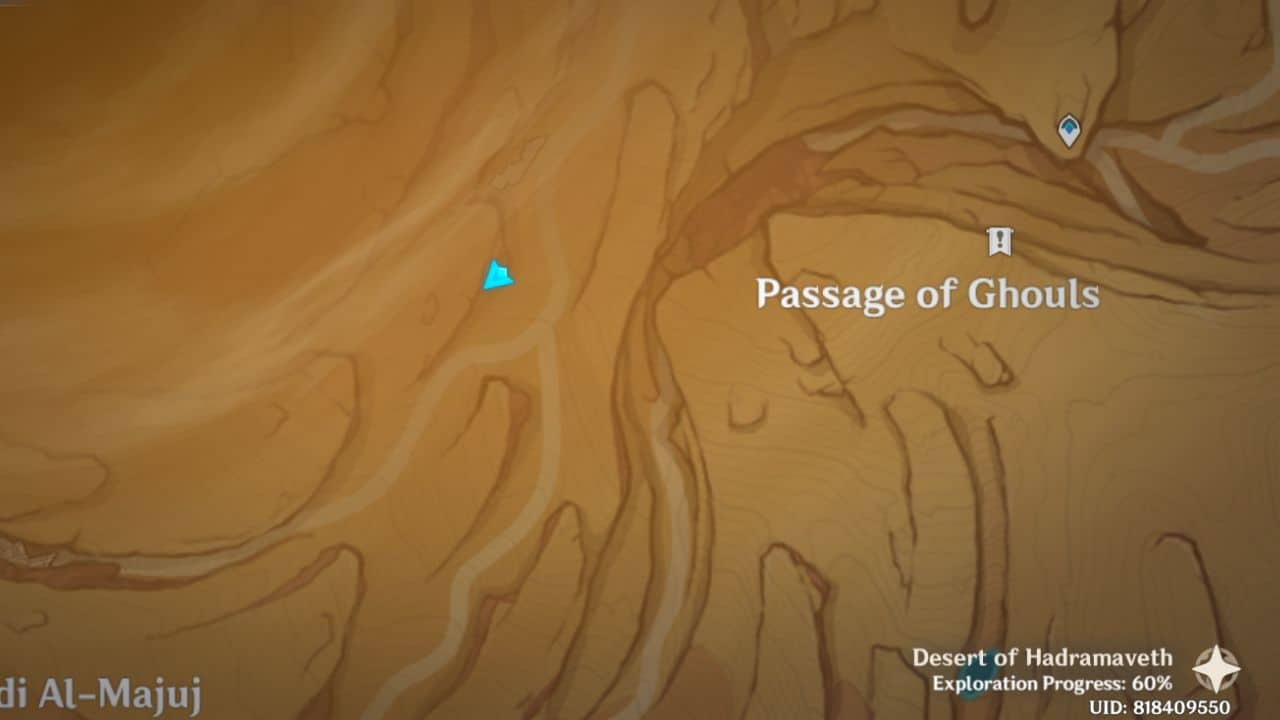
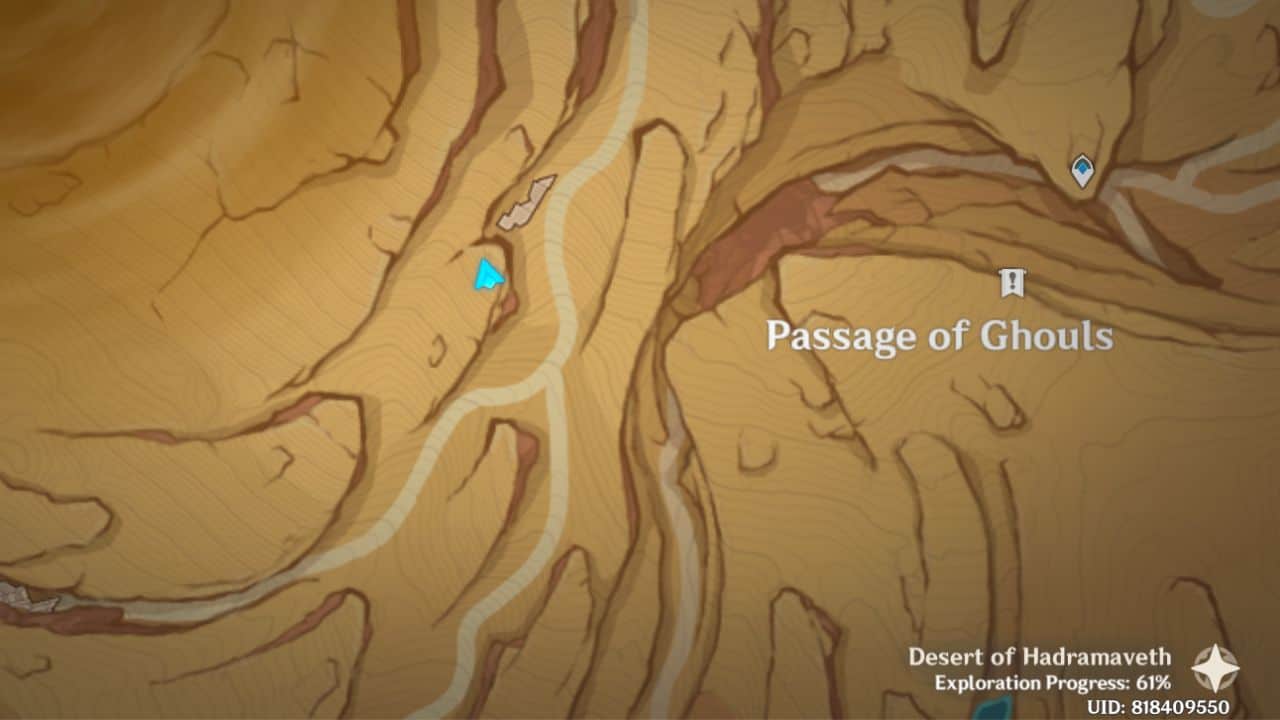
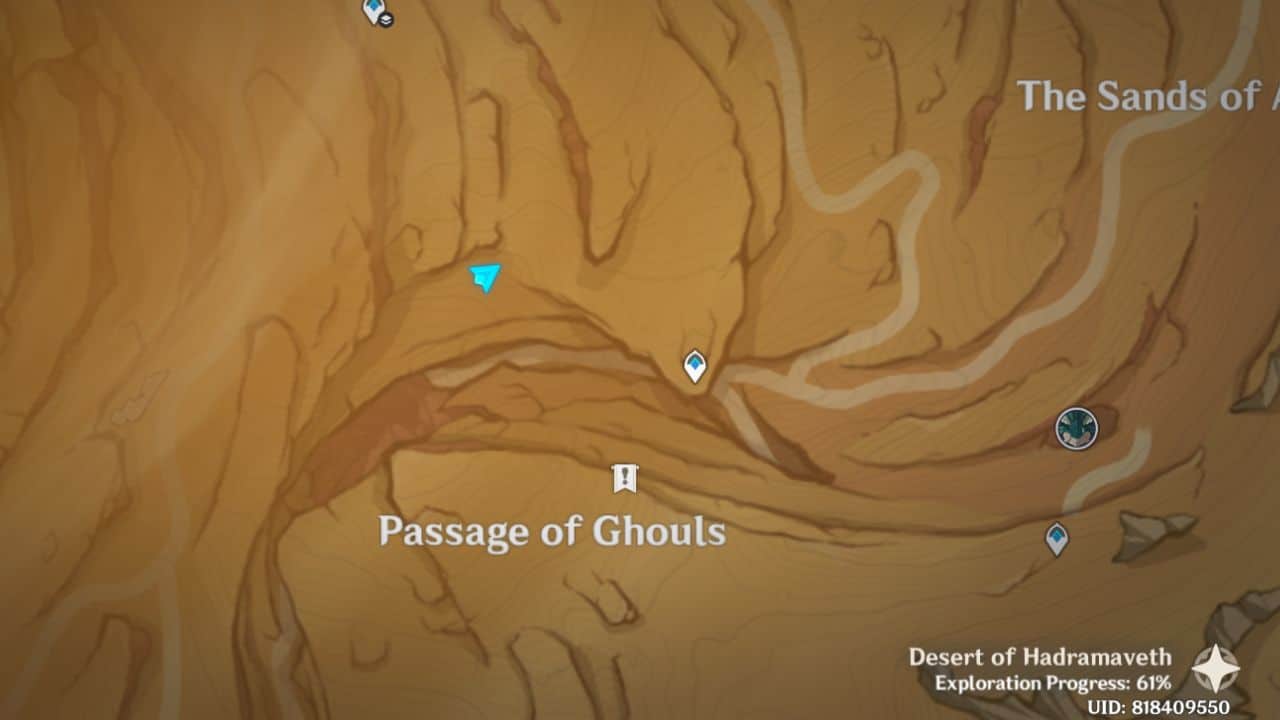
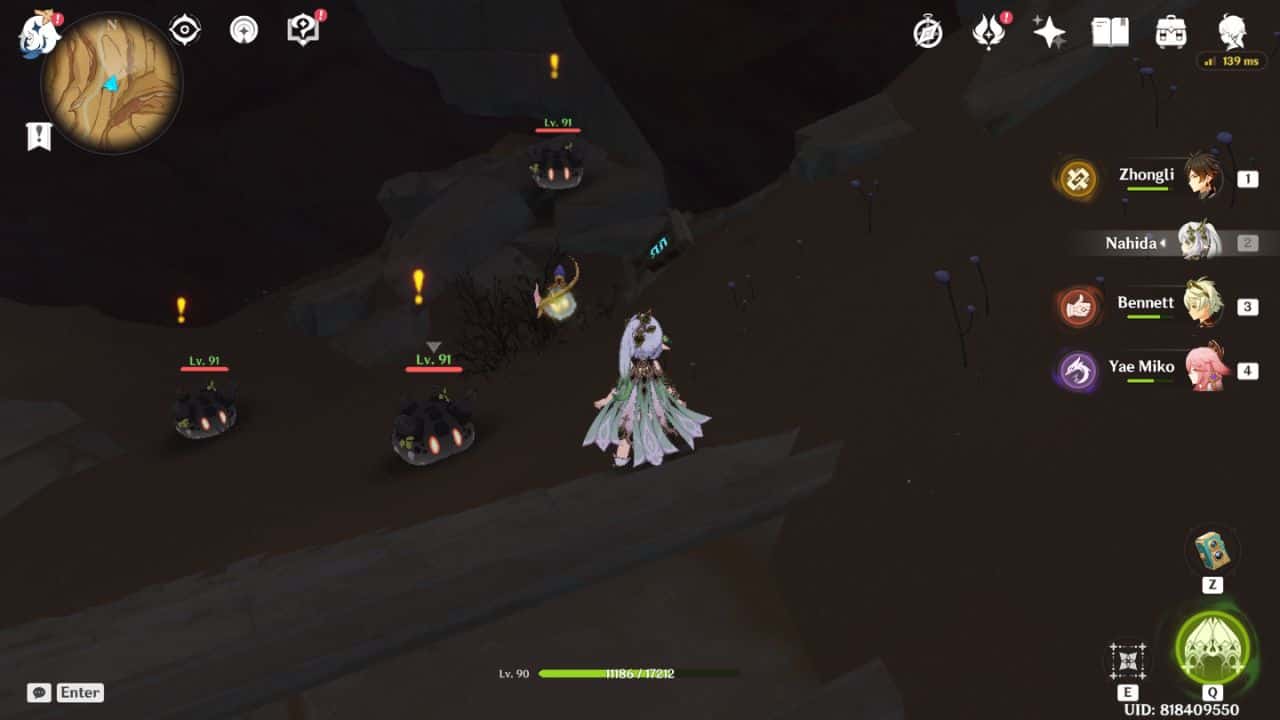
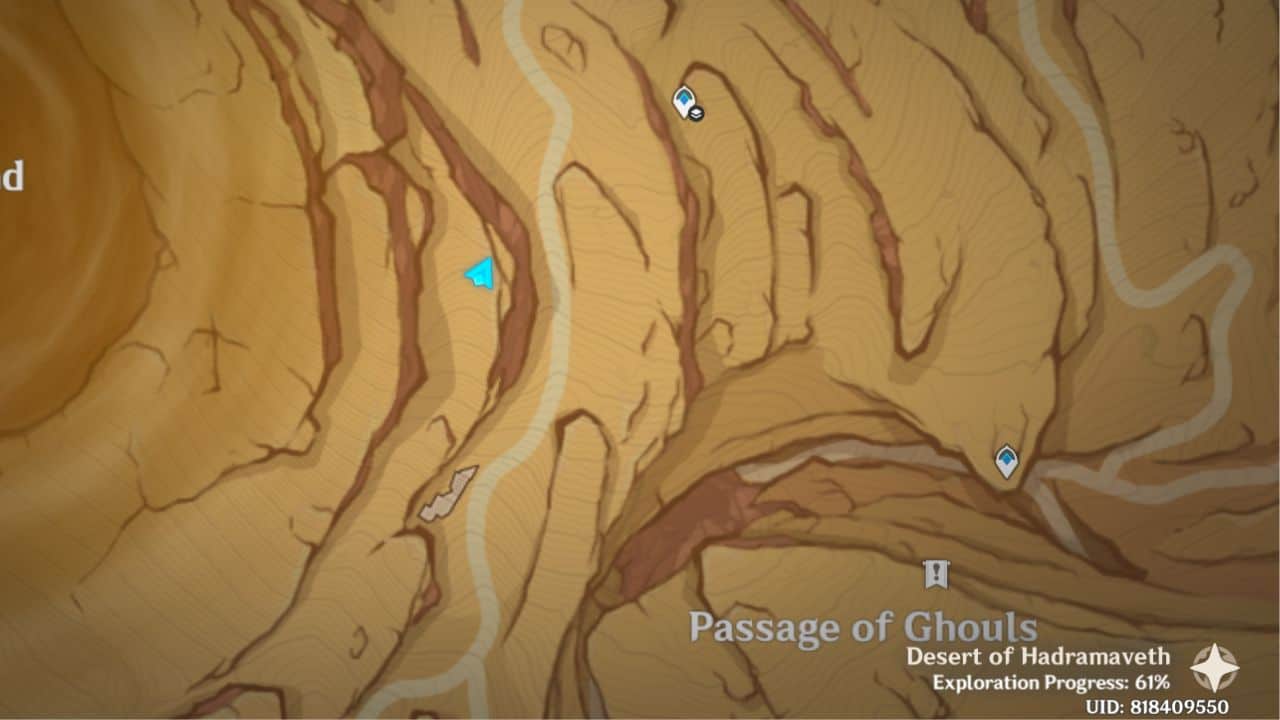
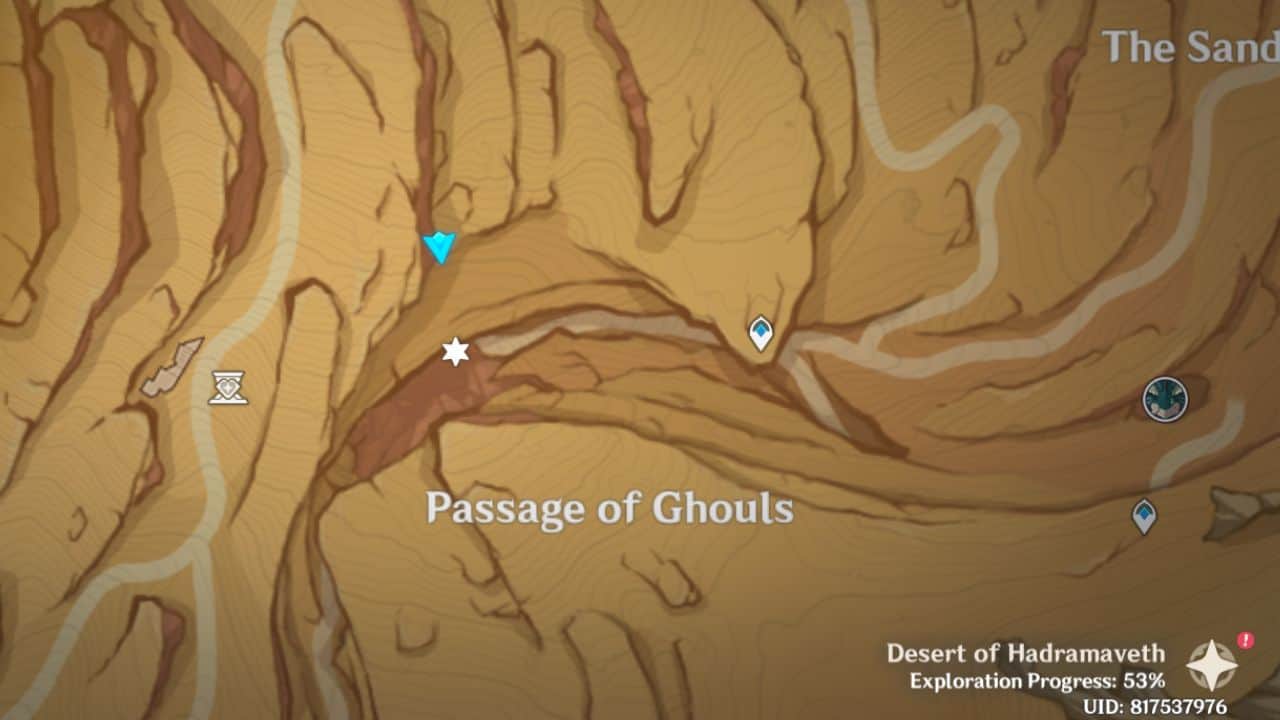
Passage of Ghouls (Overground) Sacred Seals
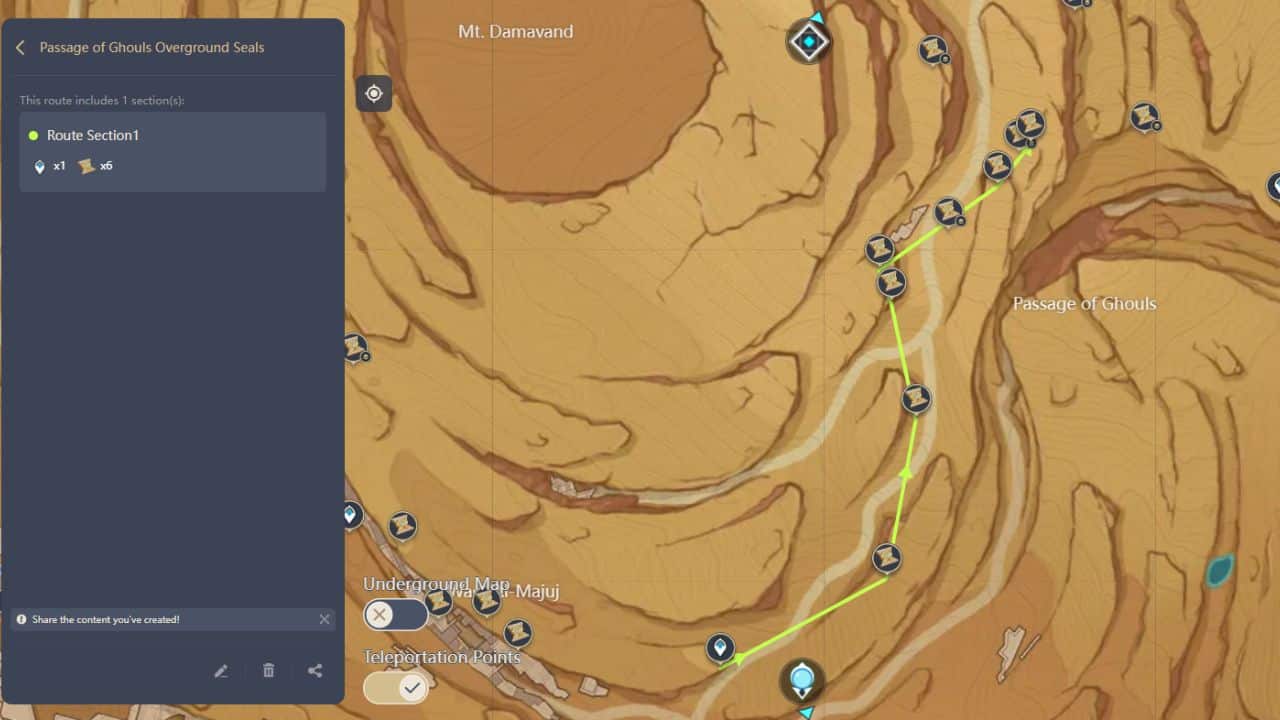
1. Forest
 |  |
| Map Location | In-game Location |
Teleport to the waypoint circled in red. Glide northeast till you see a flaming flower on the side of a cliff. The seal is next to this flower.
2. Valley
 |  |
| Map Location | In-game Location |
Jump from the Wadi-Al-Majuj’s west waypoint and head northwest. You will eventually encounter an Electro Scorpion enemy. The seal lies beside the Precious Chest, behind the scorpion enemy.
3. Crocodile Head
 |  |
| Map Location | In-game Location |
Continue walking northwest from the previous seal’s location or the Wadi-Al-Majuj waypoint. The seal lies on a rock behind three orange fungi running around a flaming flower.
4. Giant Serpent
 |  |
| Map Location | In-game Location |
Your Liloupar’s power must be at Level 3 at least to access this seal. Climb the cliff situated on the south of the Primal Obelisk. You can reach this cliff by running north from the waypoint indicated in the route map. Dispel the sandstorm on the top of the ridge to grab the seal.
5. Dune
 |  |
| Map Location | In-game Location |
This seal is on the cliff opposite the Passage of Ghouls (Overground) Primal Obelisk, in front of a Red Vulture.
6. Valley
 |  |
| Map Location | In-game Location |
The last seal is located in an Eremites camp, just below the cliff where you found the previous seal.
7. Primal Obelisk
 |  |
| Map Location | In-game Location |
Walk from the Wadi-Al-Majuj’s west waypoint towards some unnamed ruins to reach this Primal Obelisk.
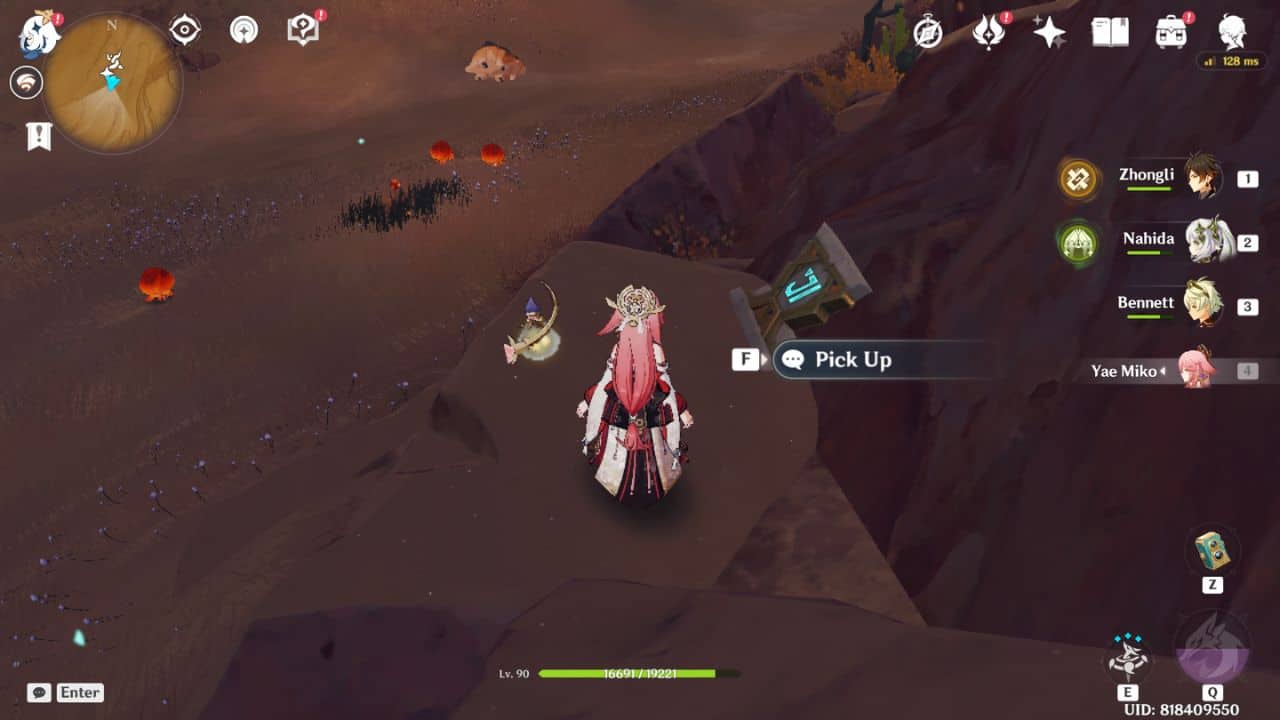
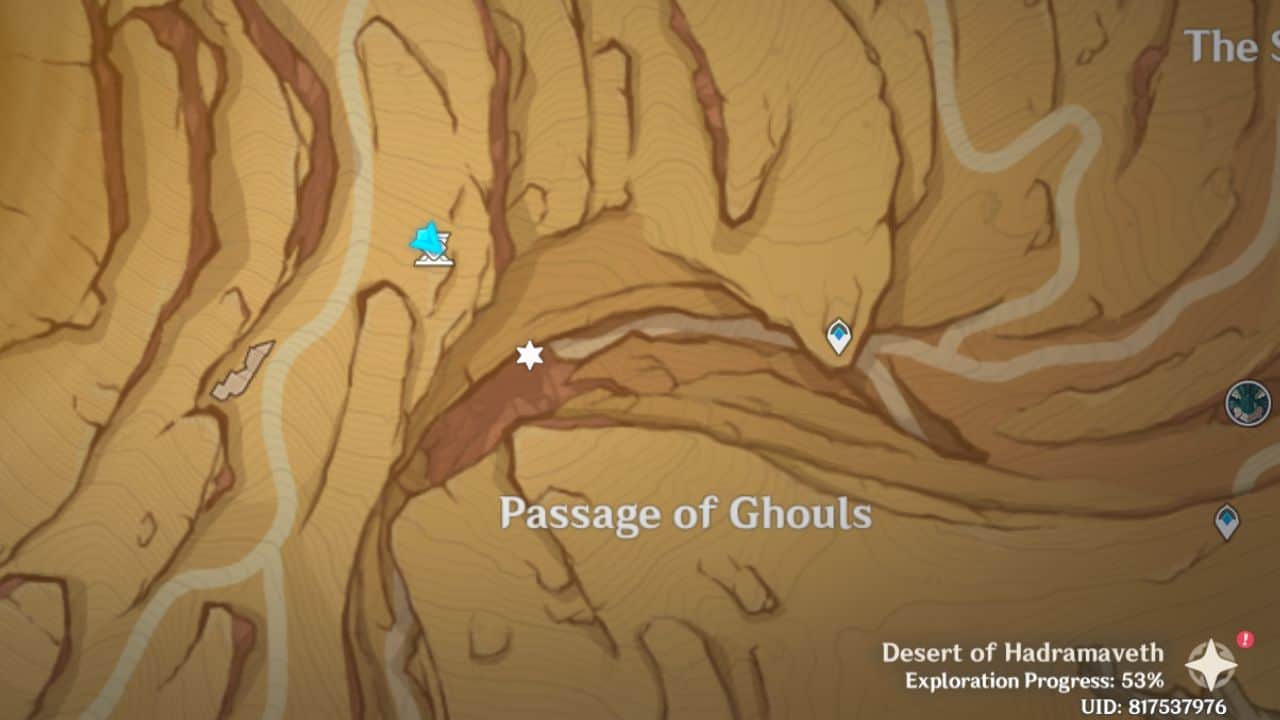
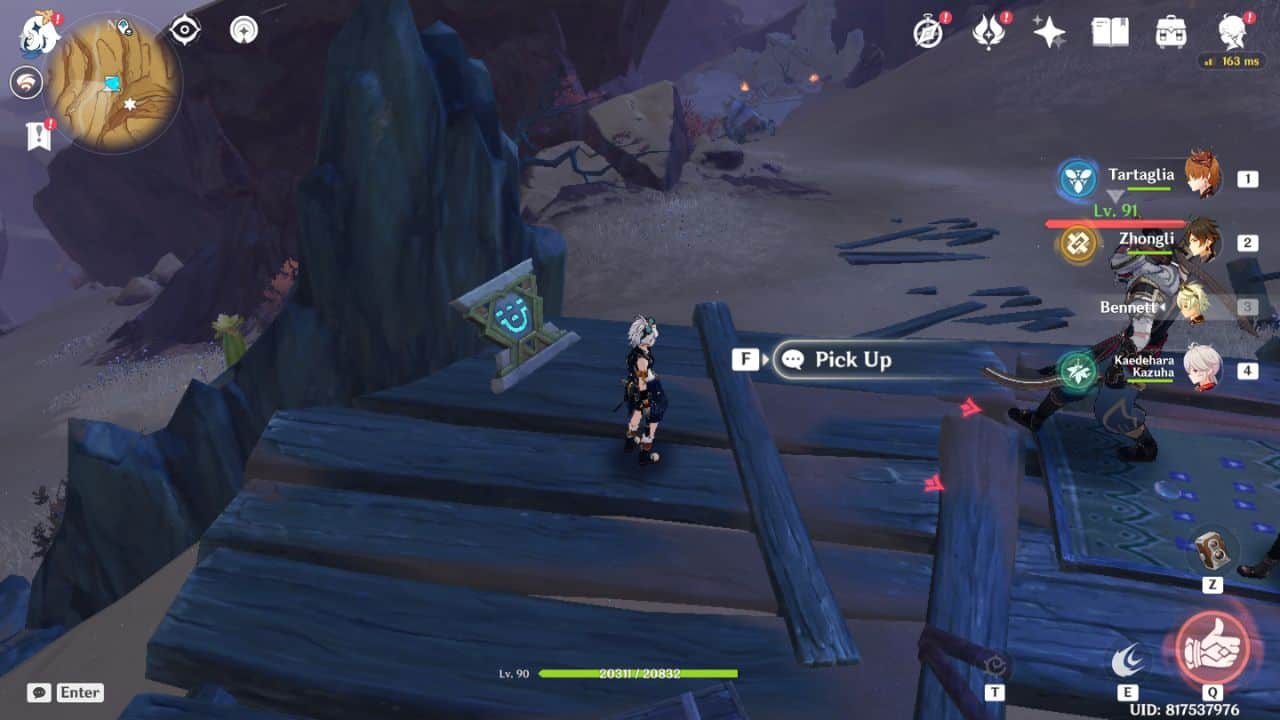
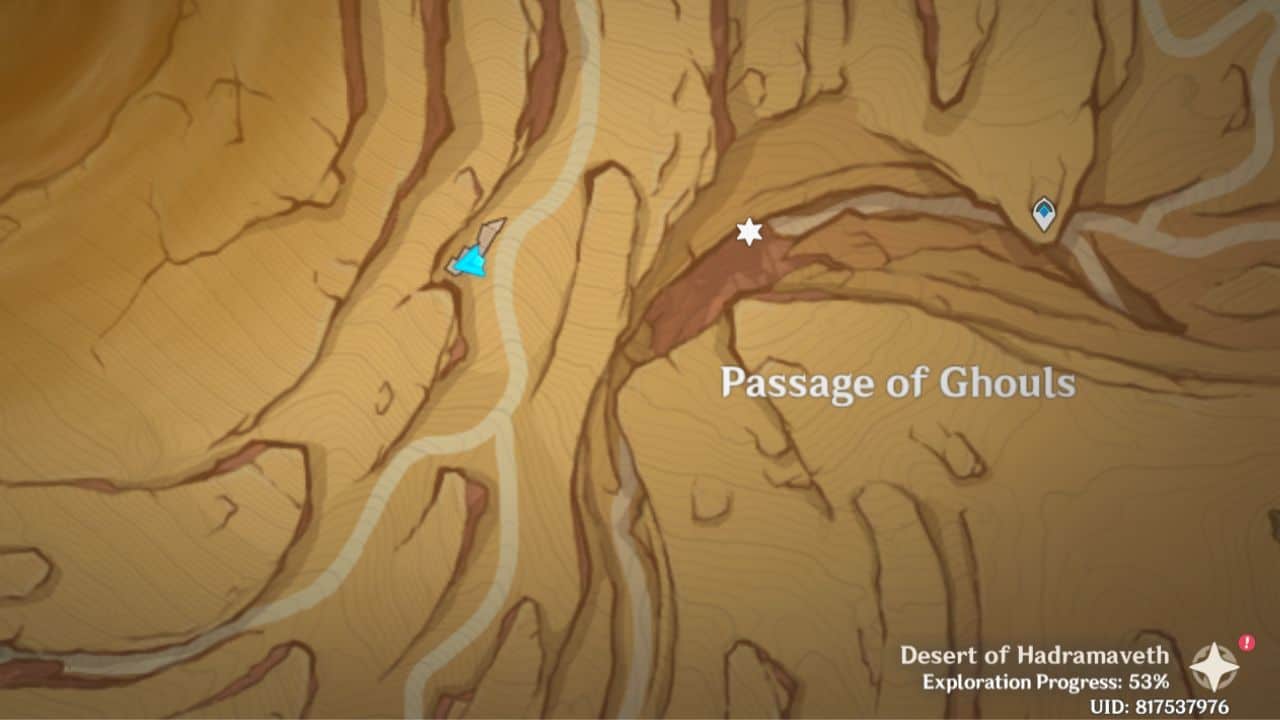
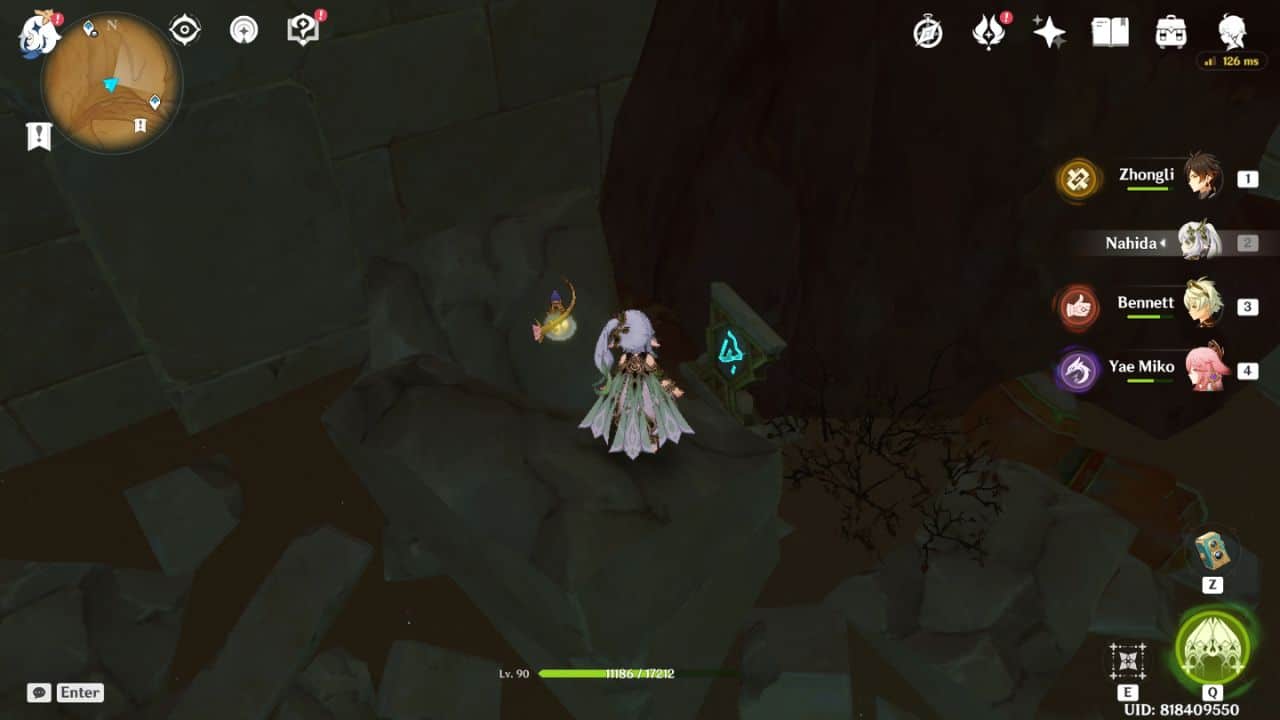
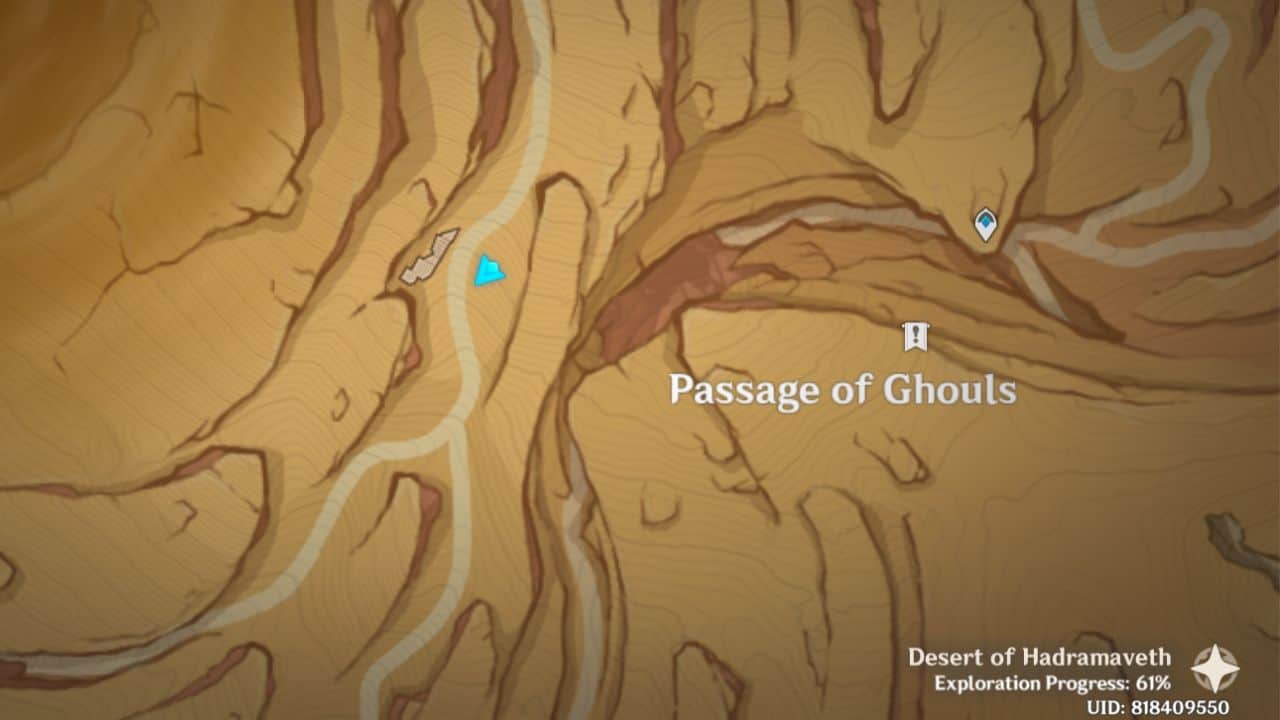
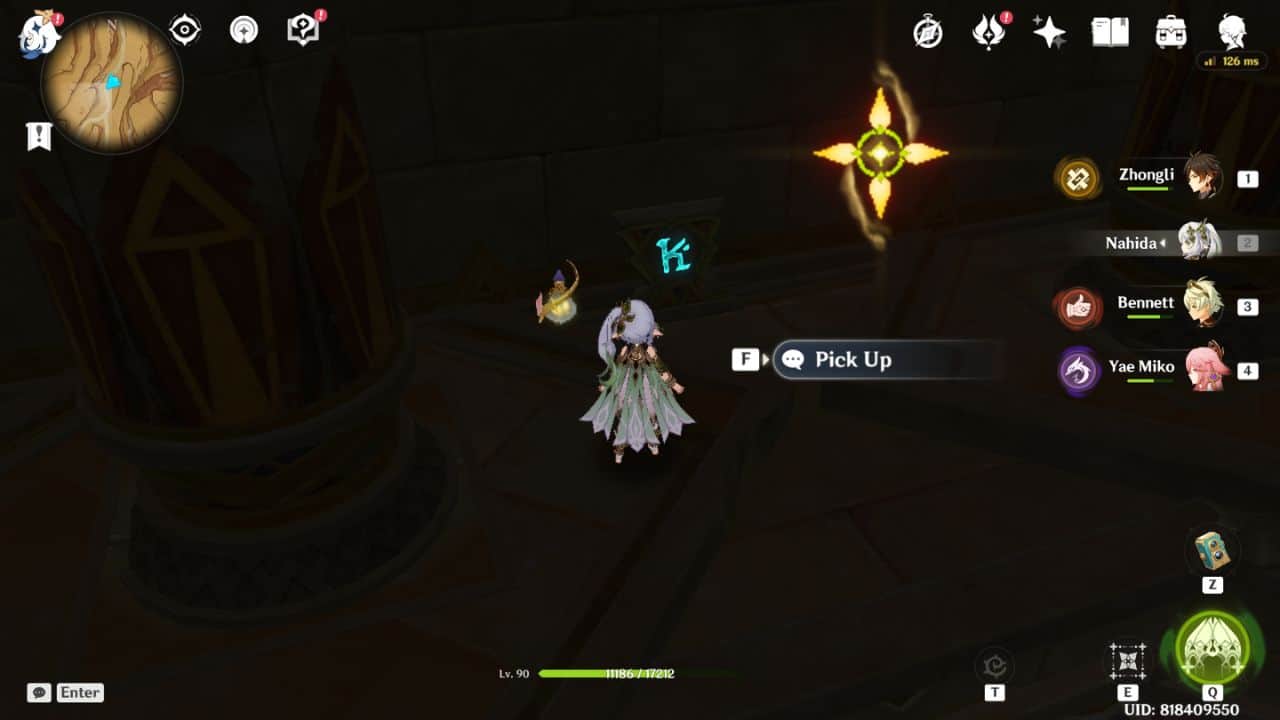
Passage of Ghouls (Underground) Sacred Seals

1. Auricle
 |  |
| Map Location | In-game Location |
This seal can be found southeast of the Passage of Ghouls underground waypoint, near a group of purple fungi and a Remarkable Chest.
2. Forest
 |  |
| Map Location | In-game Location |
Circle around to the left from the previous seal location, or walk northwest from the Passage of Ghouls underground waypoint till you spot the seal near a broken Primal Construct.
3. Precipice
 |  |
| Map Location | In-game Location |
You can reach these ruins from the previous seal’s location. Head into the ruins where you found a Liloupar’s fragment during the Dirge of Bilqis quest. This seal is wedged between a few stones on the right side of the room where you found Liloupar’s fragment.
4. Right to Rule
 |  |
| Map Location | In-game Location |
Head deeper into the ruins where you found Liloupar’s fragment till you spot a Pipe Diverter Valve mechanism. Turn to your right and use the zip line to pick up the seal from the platform’s top.
5. Giant Serpent
 |  |
| Map Location | In-game Location |
This seal is found near a group of three Geo slimes. Enter the passage in front of the fourth seal’s location to reach the location of this seal.
6. Thunderstrike
 |  |
| Map Location | In-game Location |
This seal can be found in the last room of the ruin leading to King Deshret’s Goblet, right where the golden glowing device from the Dirge of Bilqis quest is located. Once you enter this room, zip to your left to grab this seal on top of a landform.
7. Primal Obelisk
 | 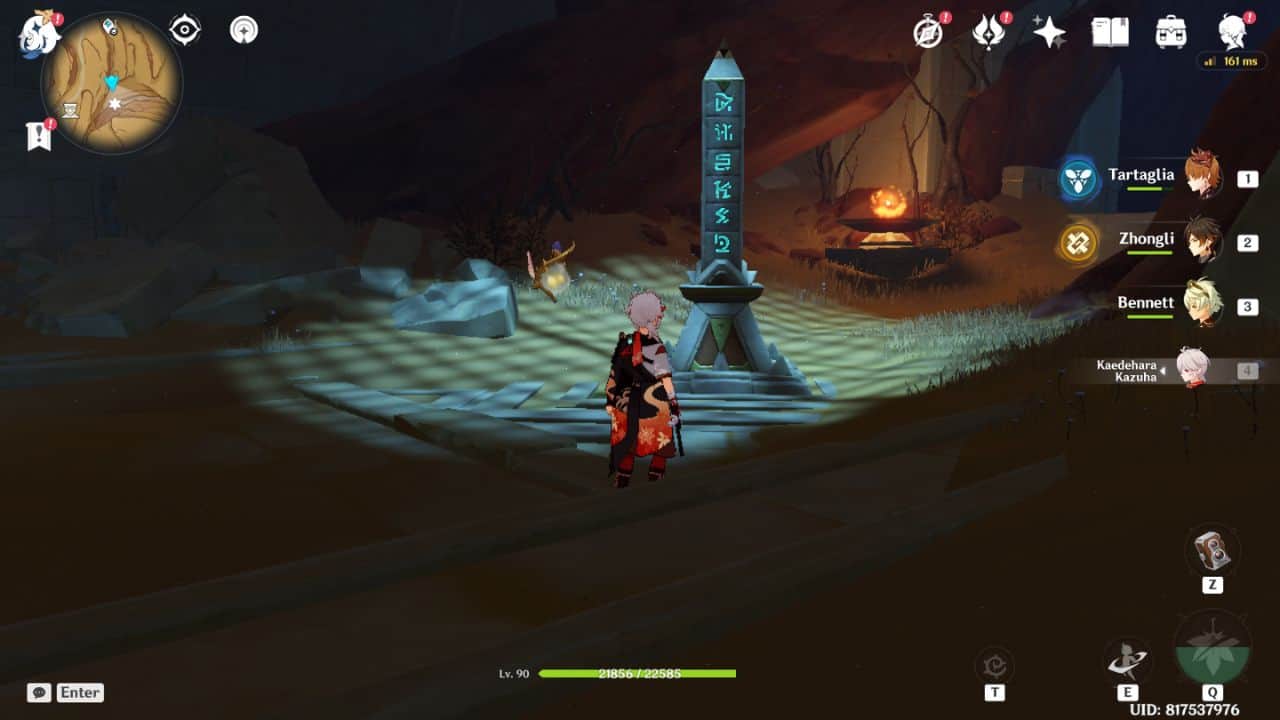 |
| Map Location | In-game Location |
From the underground waypoint to the north of Passage of Ghouls, head until you come across a large door. Open the door, and you will find the Primal Obelisk inside the ruins.
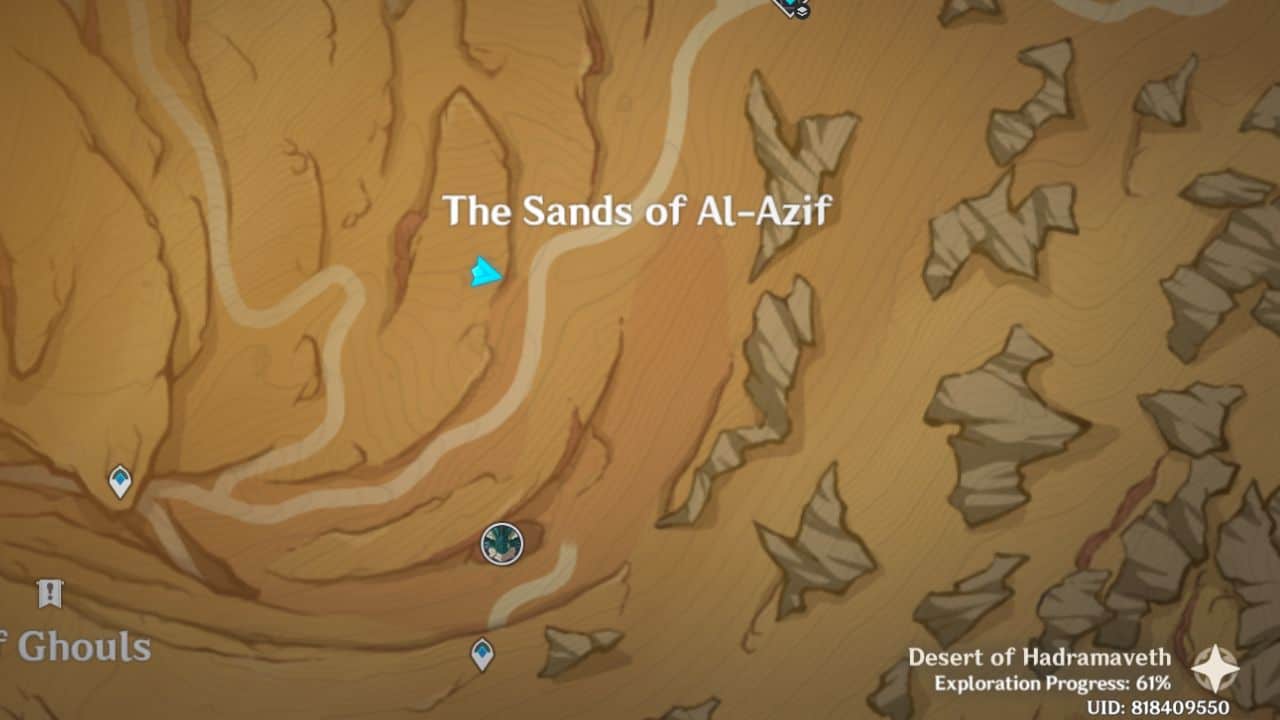
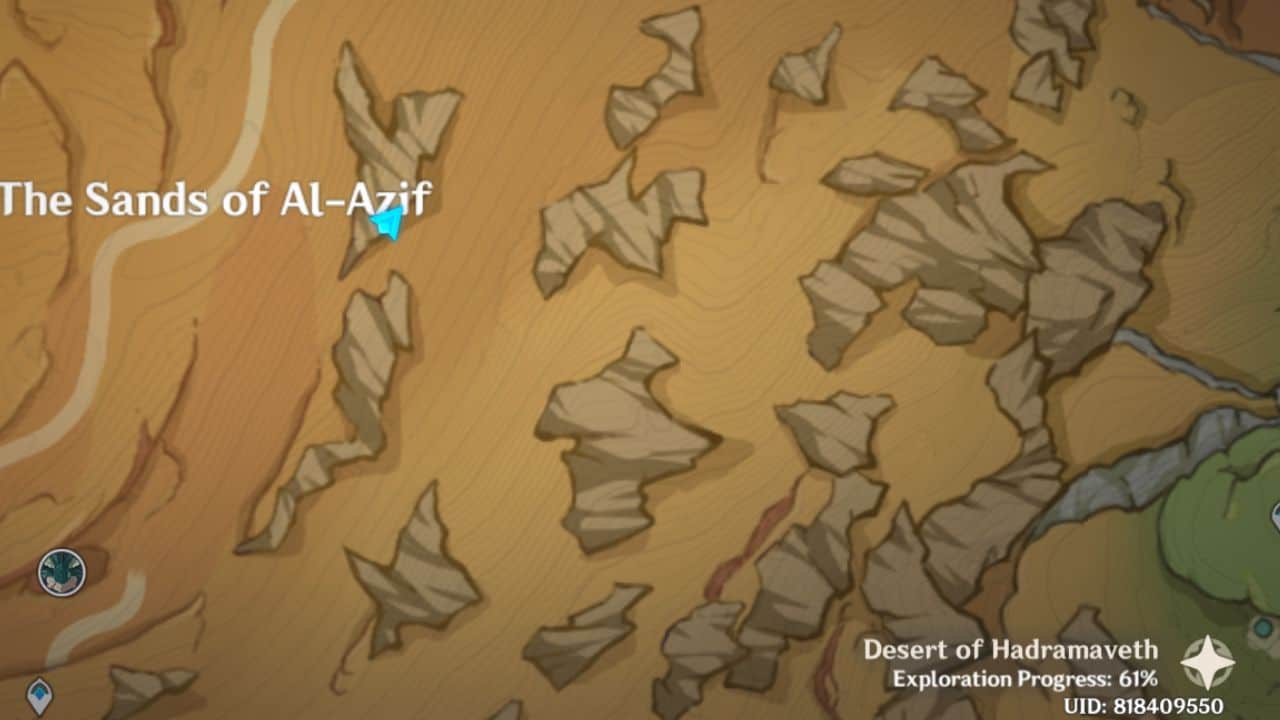
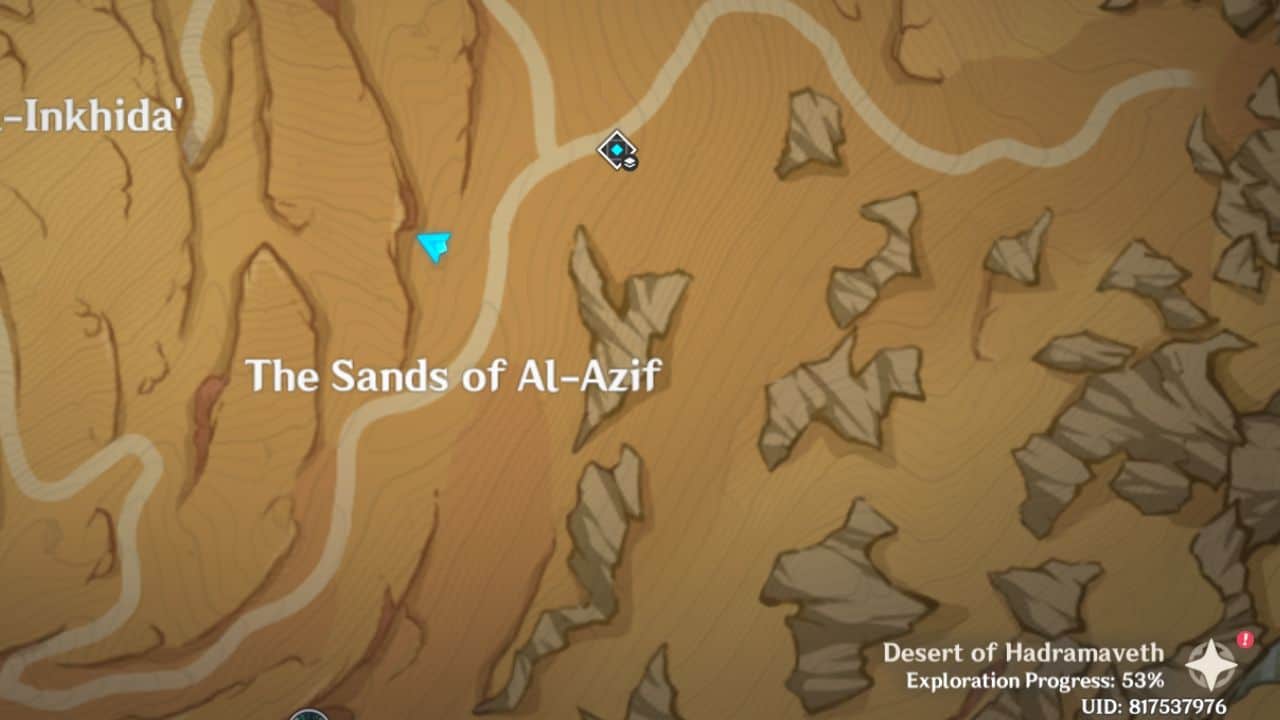
Sands of Al-Azif Sacred Seals

1. Valley
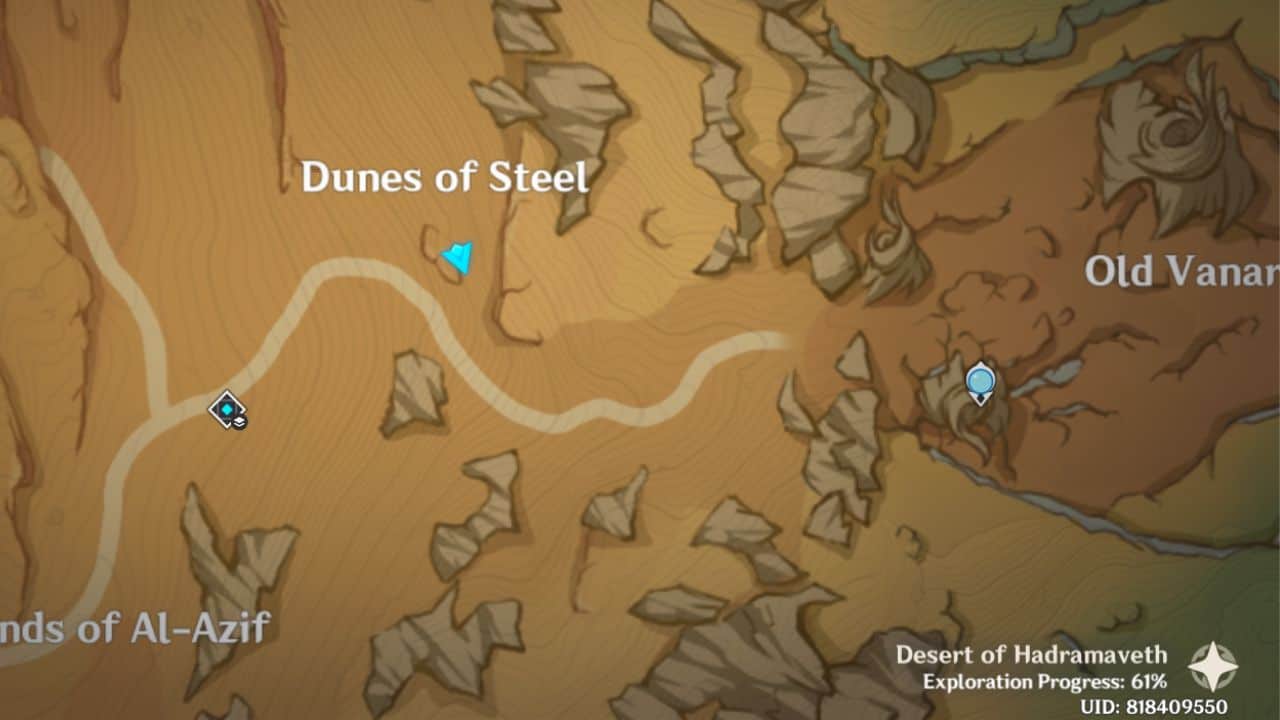 |  |
| Map Location | In-game Location |
This seal is in an Eremites camp south of the north Dunes of Steel waypoint.
2. Valley
 |  |
| Map Location | In-game Location |
Teleport to the waypoint circled in red. The seal is hidden in an Eremite camp south of that waypoint.
3. Crocodile Head
 |  |
| Map Location | In-game Location |
This seal is located near an Eremite tent. Teleport to the waypoint that lies northwest of the City of Deceased domain and keep walking in the southwest direction to reach this location.
4. Crocodile Head
 |  |
| Map Location | In-game Location |
You can find the seal hidden under a crate in a Hilichurl camp. The location of this seal is easily accessible from the site of the previous seal since the camp is just opposite the last seal.
5. Labor
 |  |
| Map Location | In-game Location |
This seal is located in an Eremite camp as well. Grab the seal lying under the stairs of the Eremites camp.
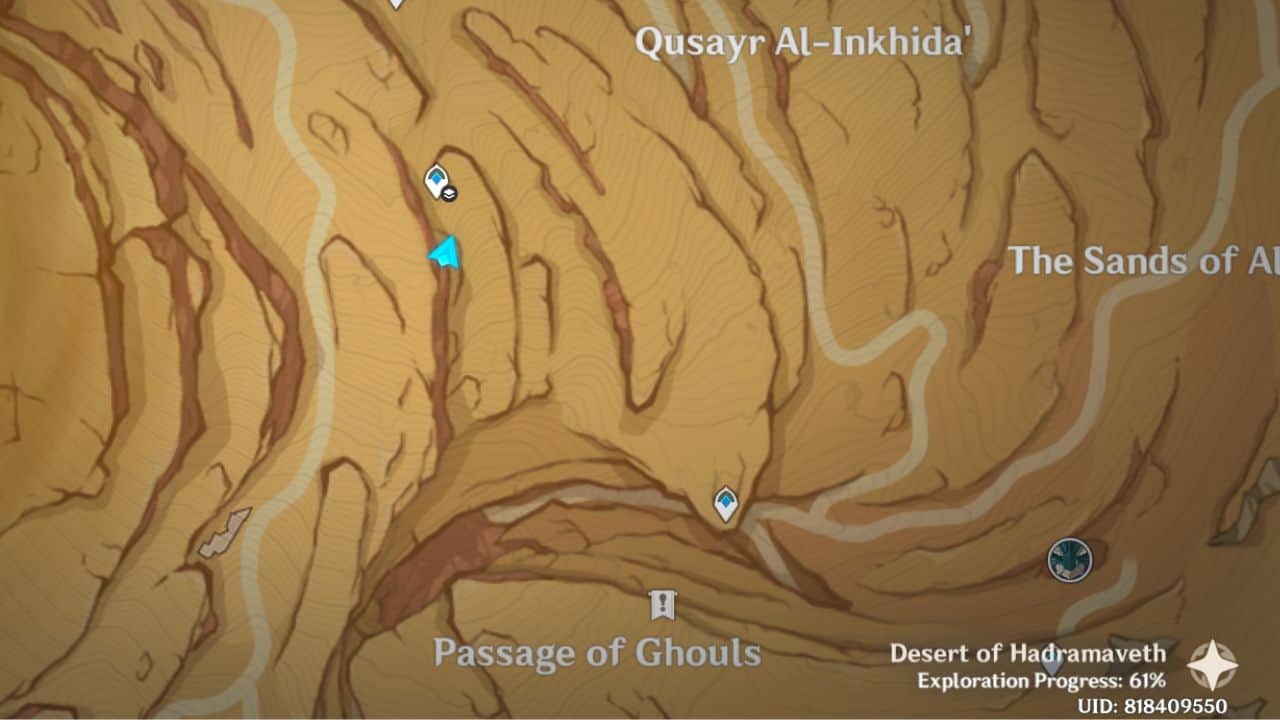
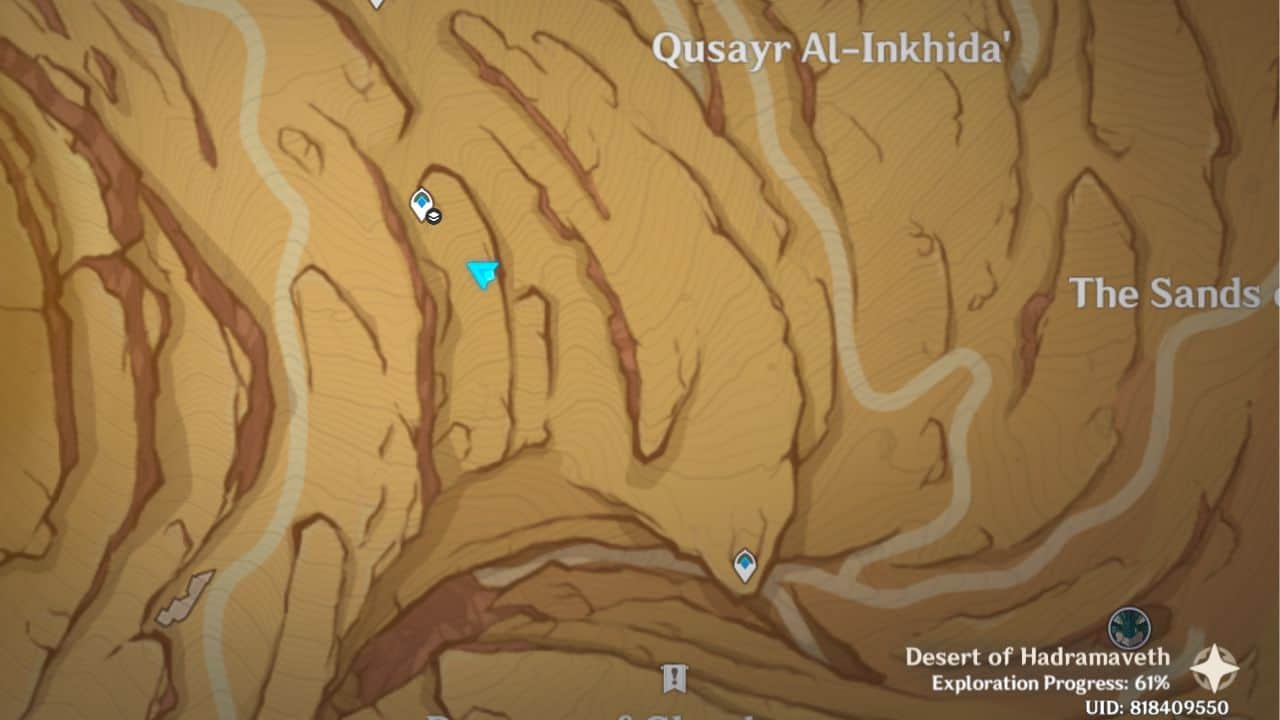
6. Ceremony
 |  |
| Map Location | In-game Location |
The final seal lies near a weathered obelisk puzzle southeast of Qusayr Al-Inkhida’s waypoint.
7. Primal Obelisk
 |  |
| Map Location | In-game Location |
Fly southeast from Qusayr-Al-Inkhida’s northwest waypoint to find this Primal Obelisk.
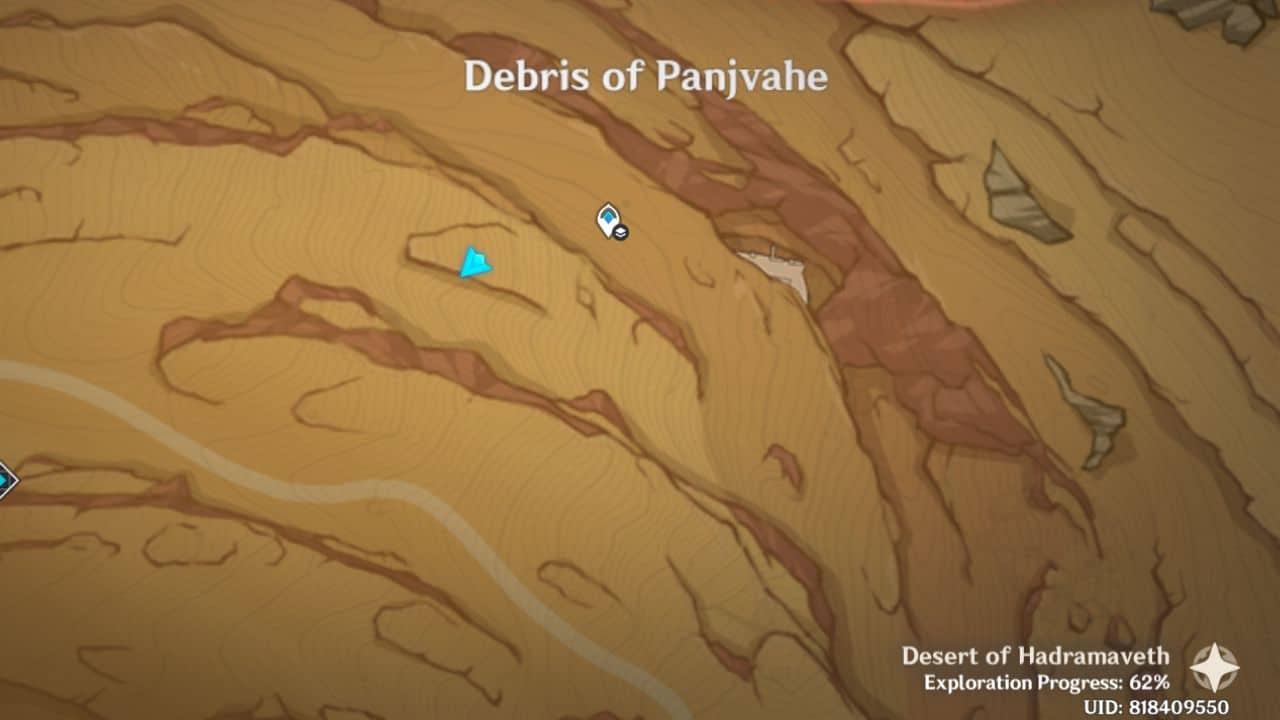
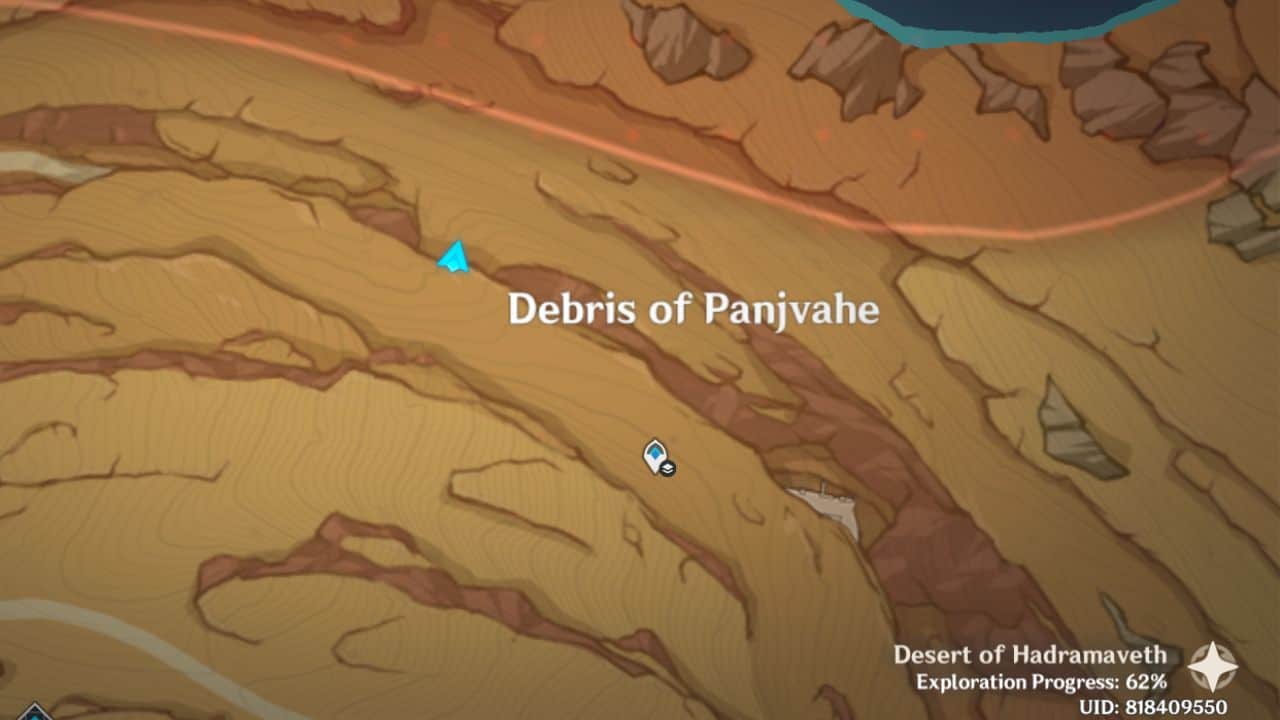
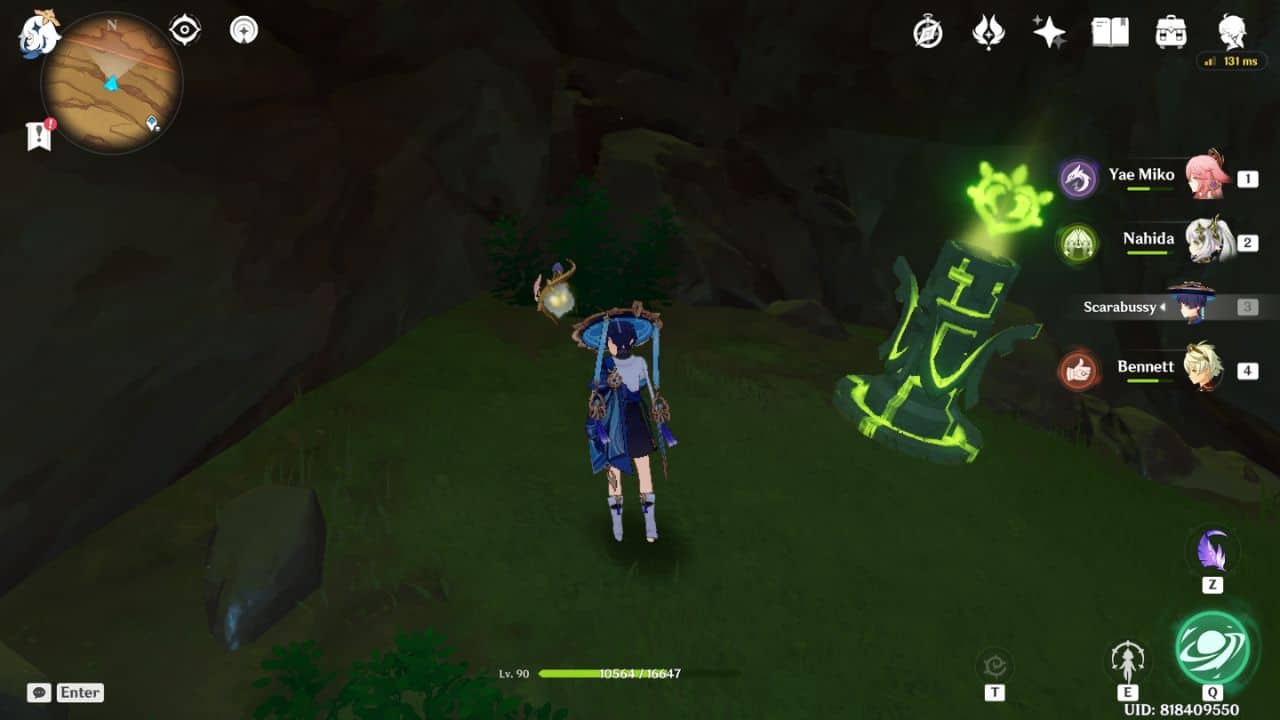
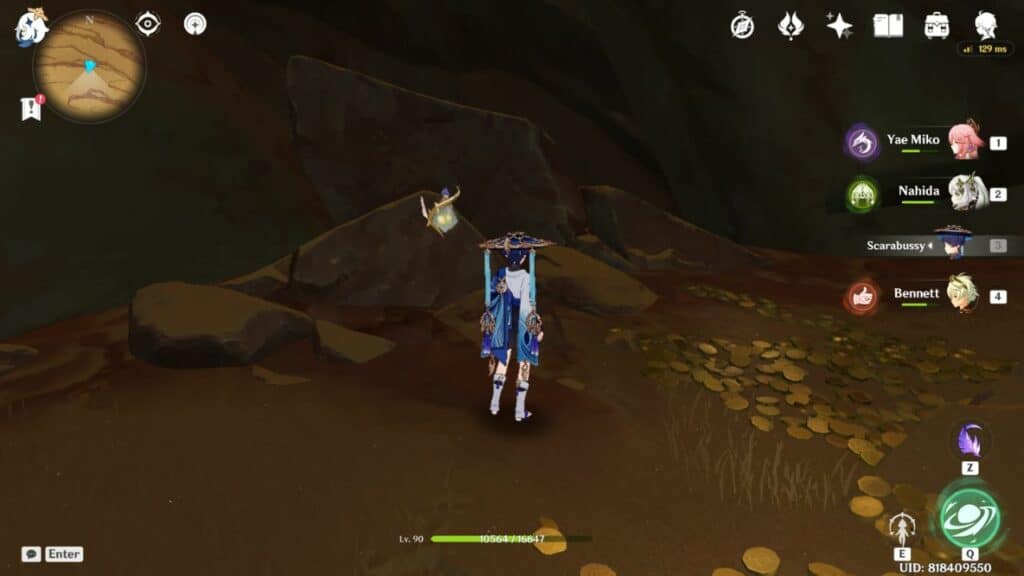
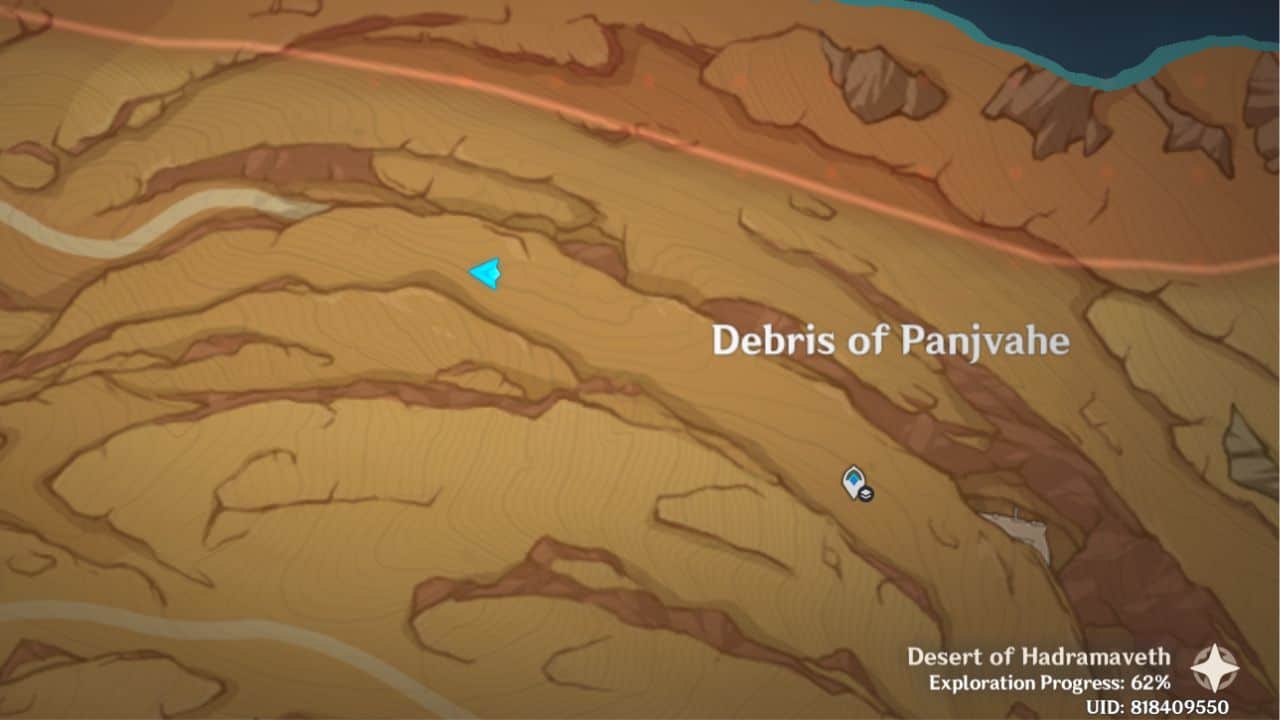
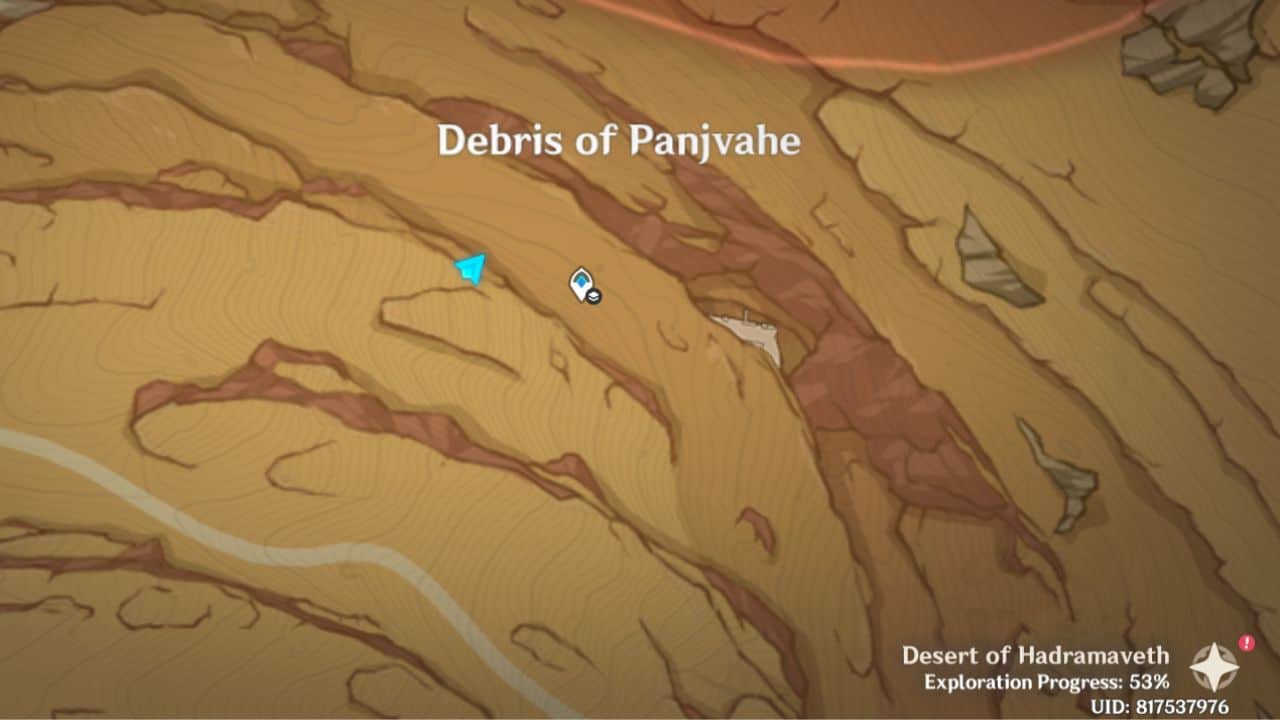
Debris of Panjhave Sacred Seals
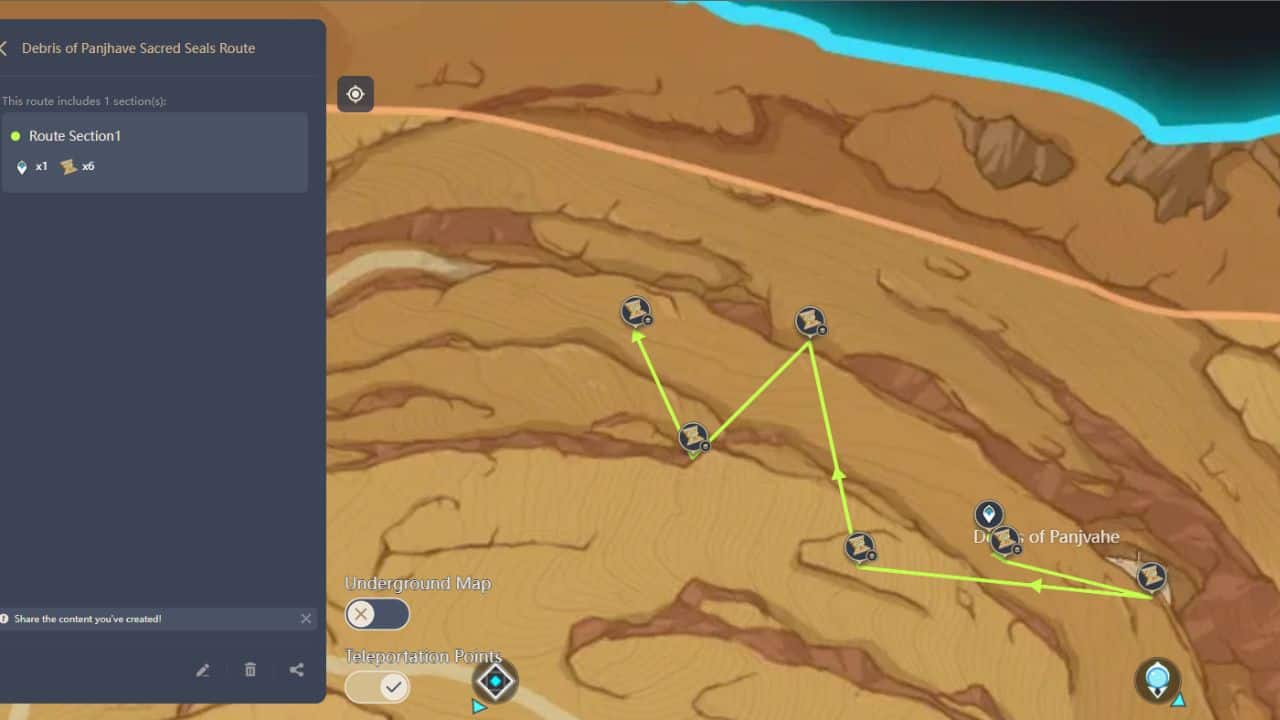
1. Forest
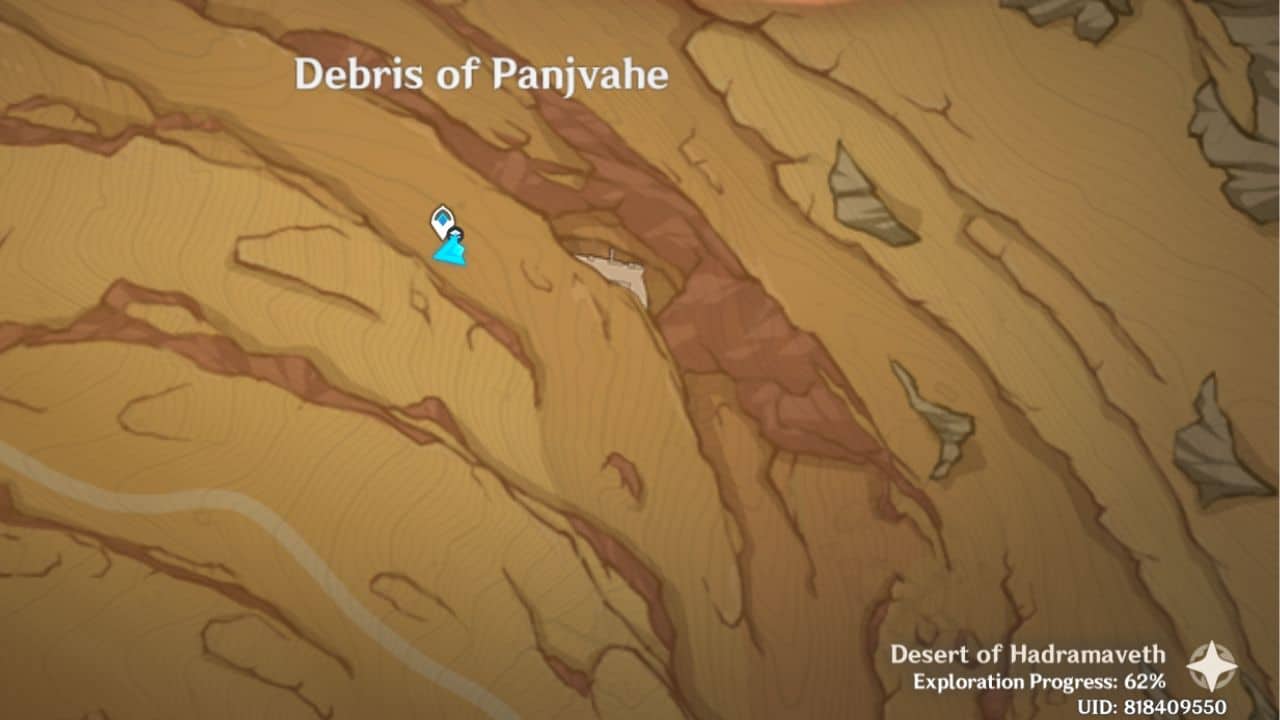 |  |
| Map Location | In-game Location |
The first seal is near the Debris of Panjhave’s underground waypoint.
2. Valley
 |  |
| Map Location | In-game Location |
This seal lies near some Hilichurls in a ruin to the east of the Debris of Panjhave’s underground waypoint. Use the four-leaf sigil zipline to travel to this location.
3. Crocodile Head
 |  |
| Map Location | In-game Location |
Climb to the top of the building behind the Debris of Panjhave’s Primal Obelisk to grab this seal.
4. Giant Serpent
 |  |
| Map Location | In-game Location |
This seal is hidden under a breakable pile of rocks. You will also find a Dendro Elemental Monument beside this seal.
5. Crocodile Head
 |  |
| Map Location | In-game Location |
This seal is on a plateau where a consecrated red vulture is roaming. A few golden coins will be scattered near this seal.
6. Sunrise
 |  |
| Map Location | In-game Location |
To obtain this seal, jump down from the previous location. The seal will be located behind an Eremite Floral Ring-Dancer enemy.
7. Primal Obelisk
 |  |
| Map Location | In-game Location |
This Primal Obelisk can be found just ahead of the Debris of Panjhave’s underground waypoint.
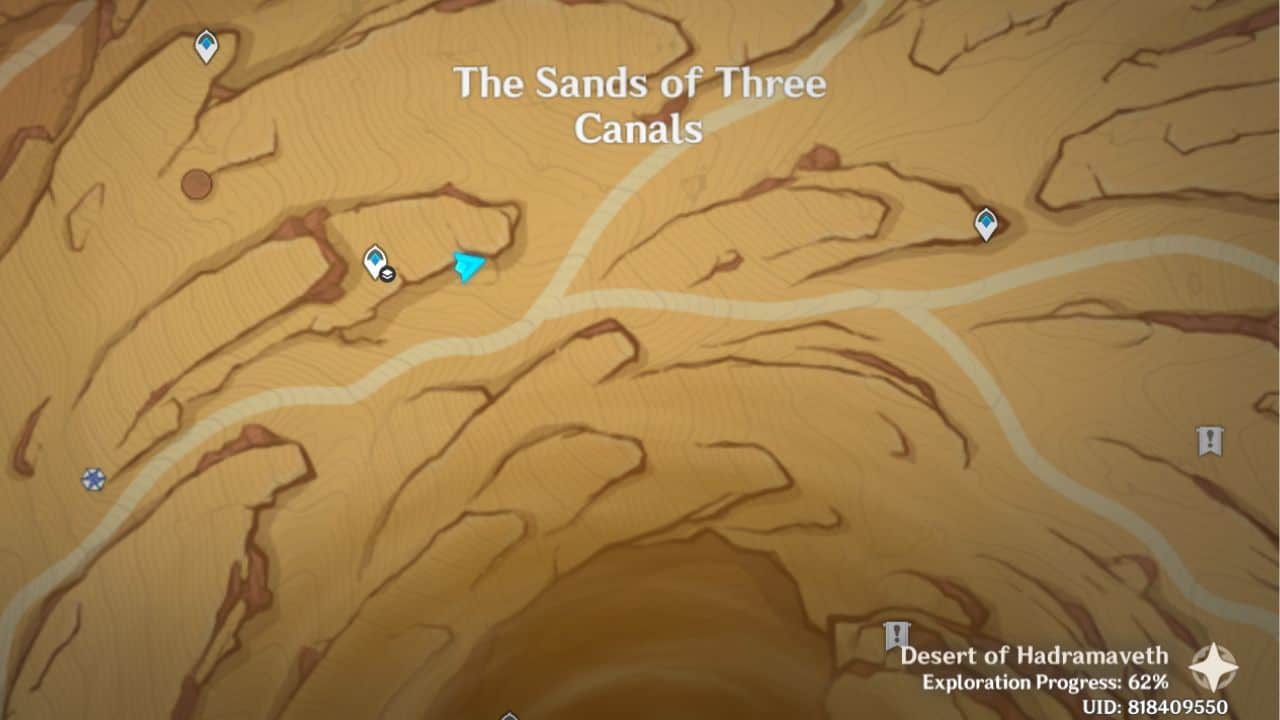
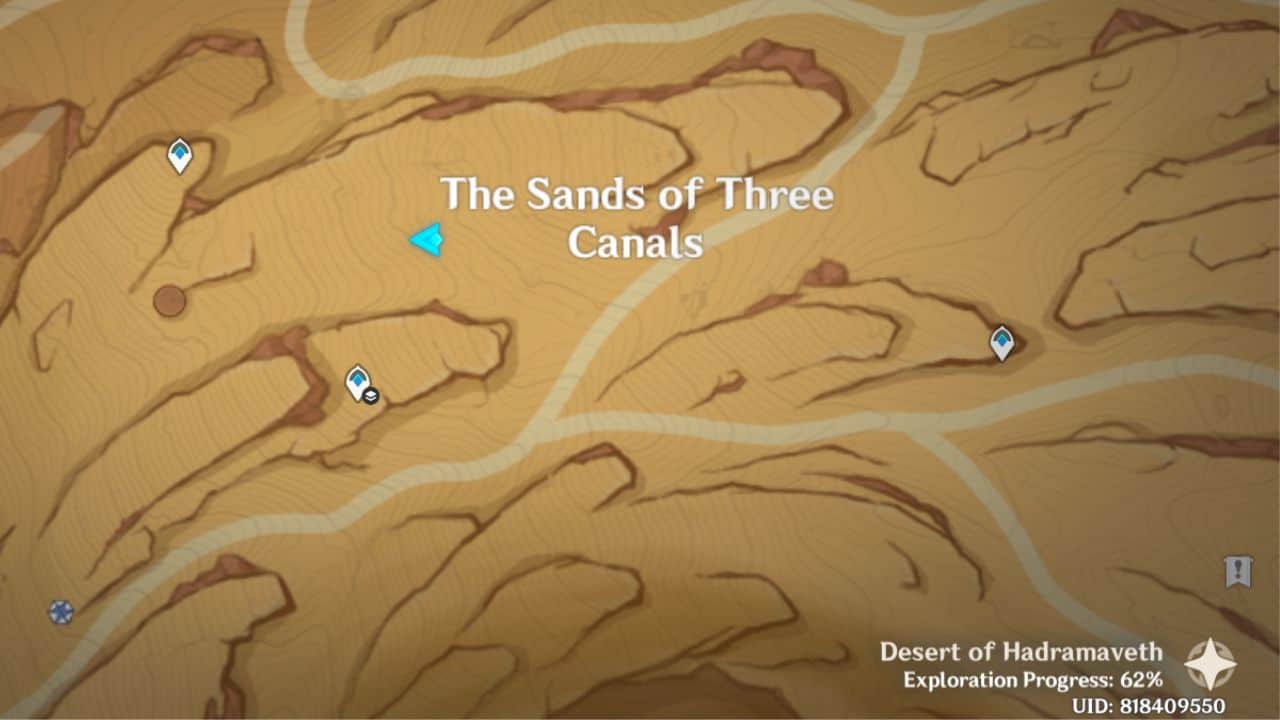
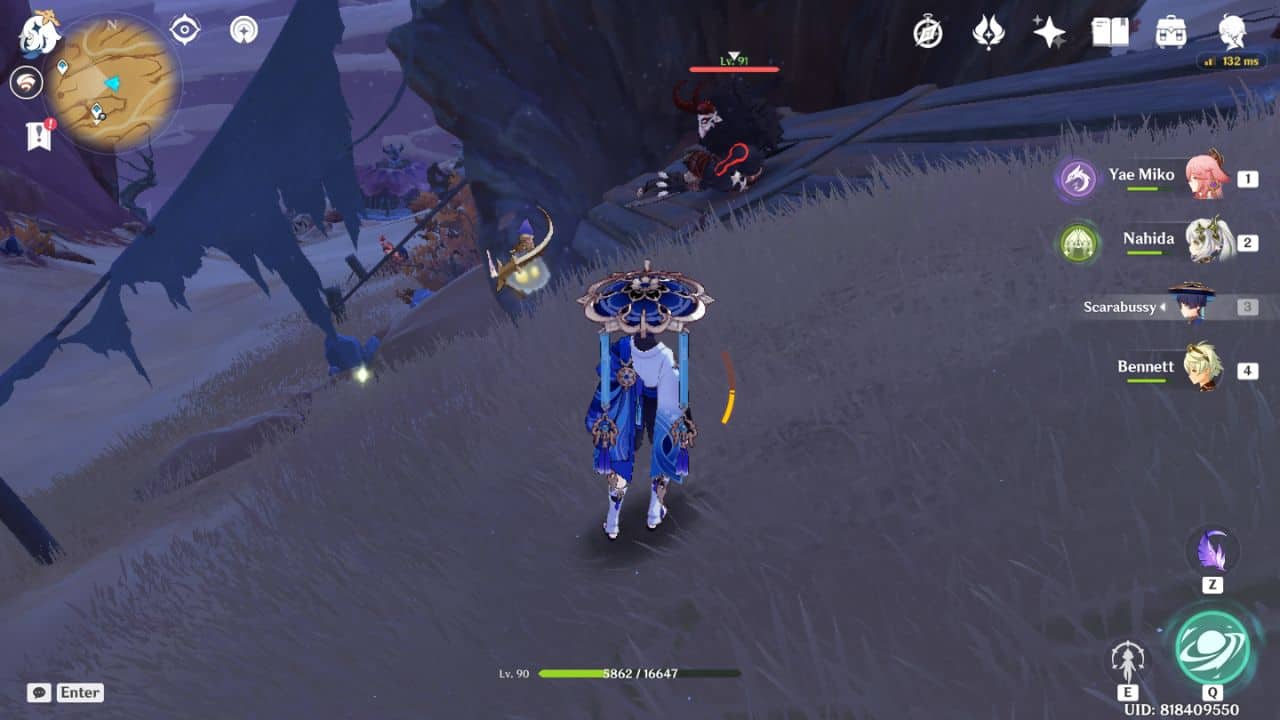
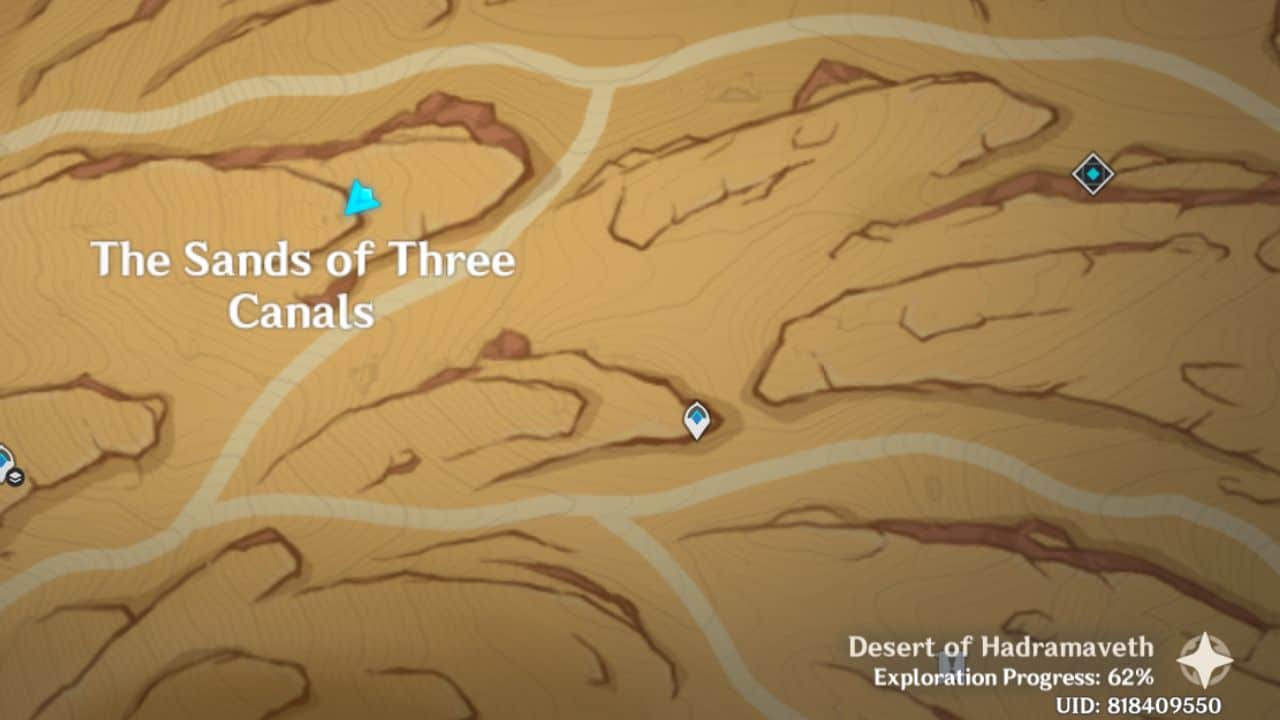
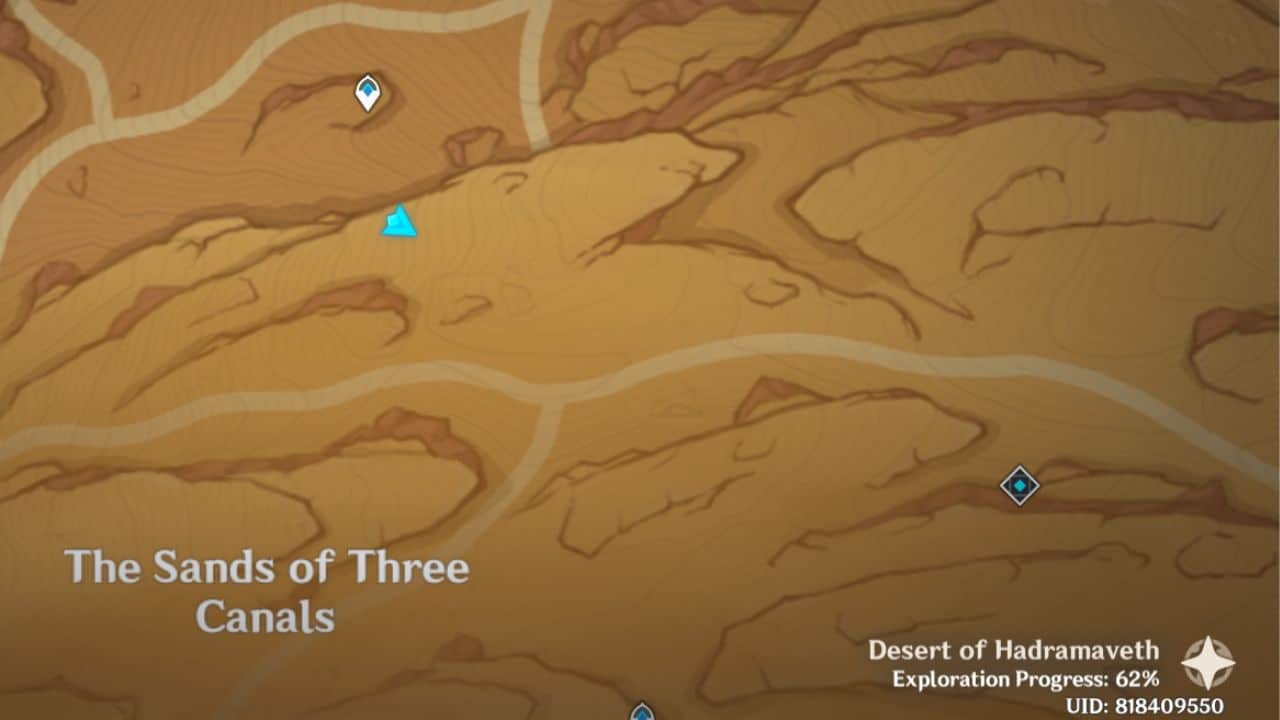
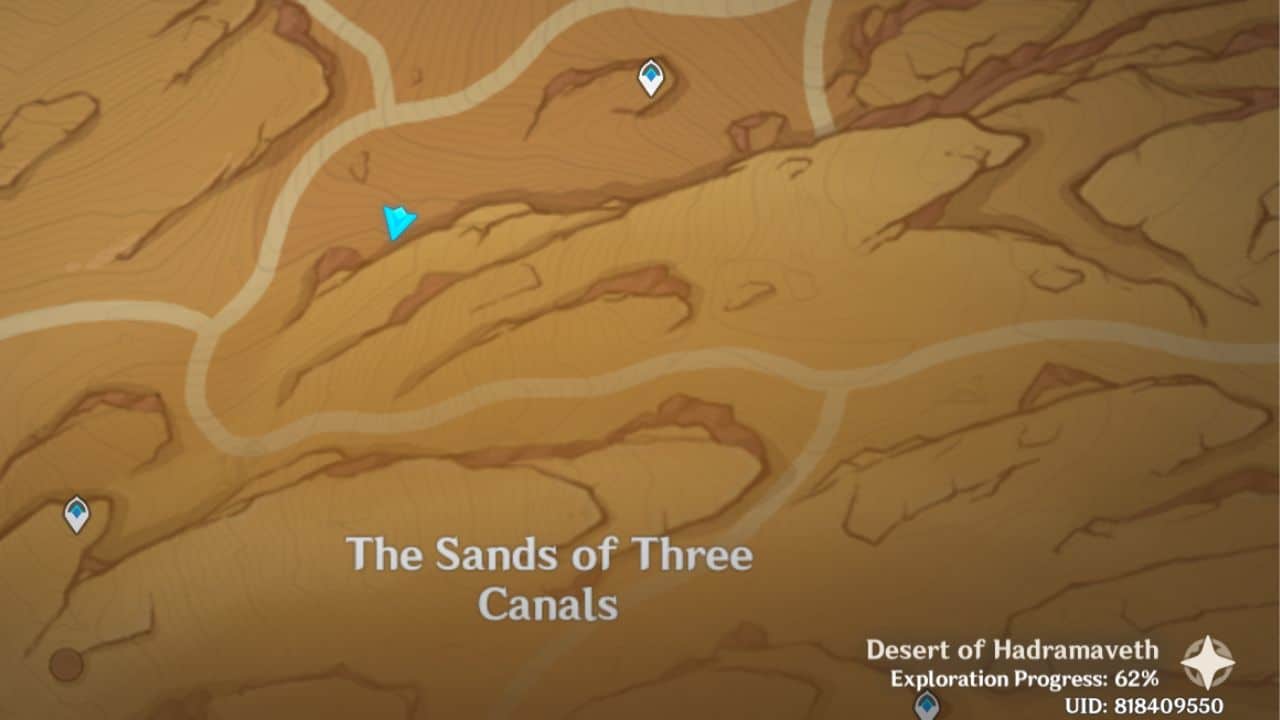
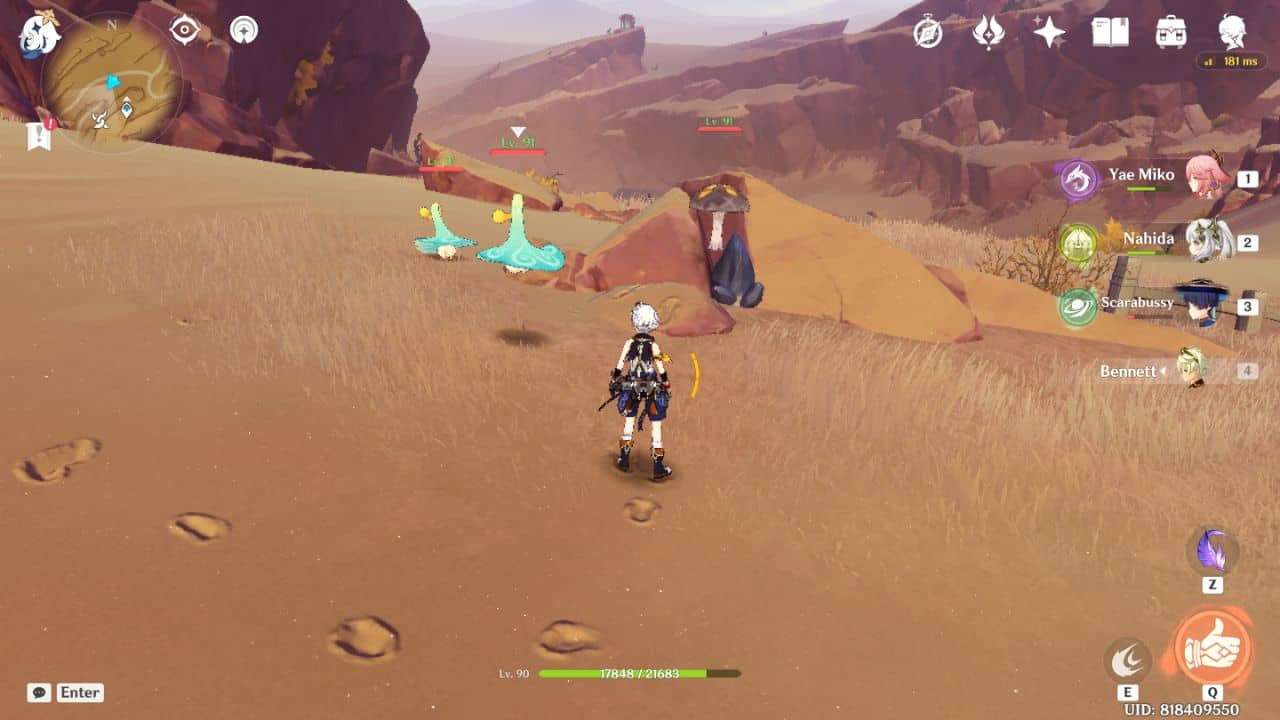
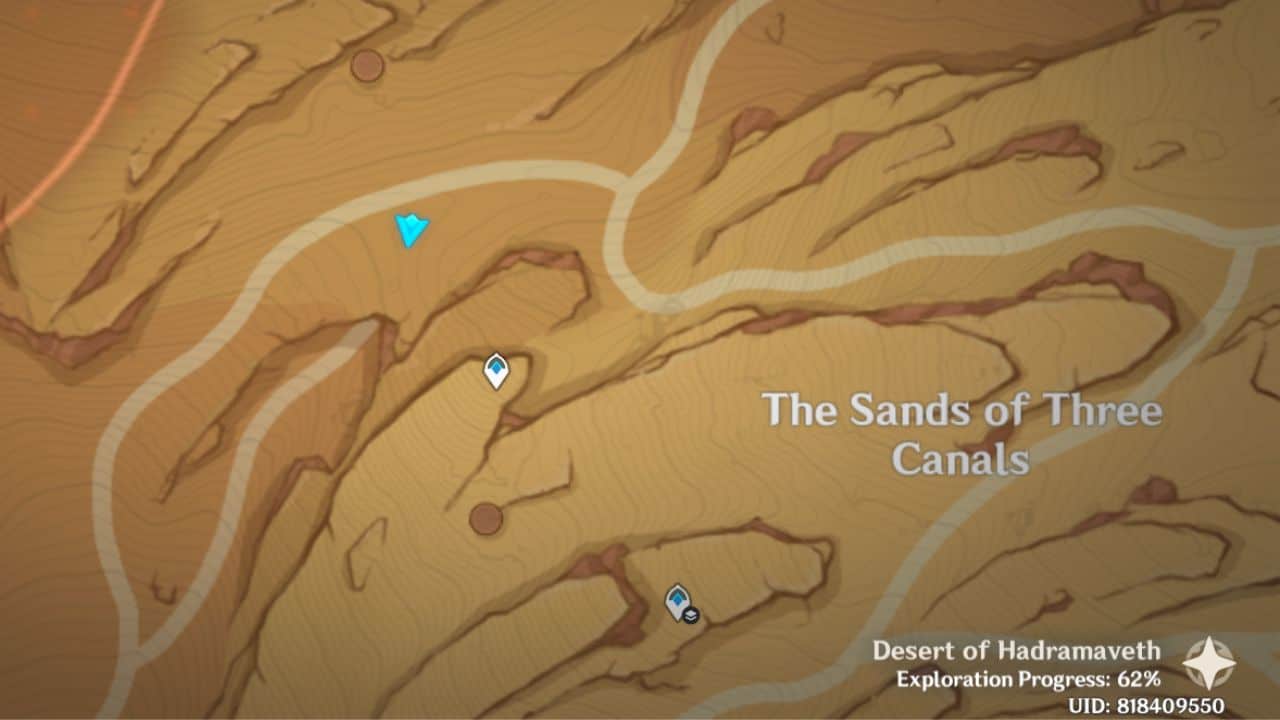
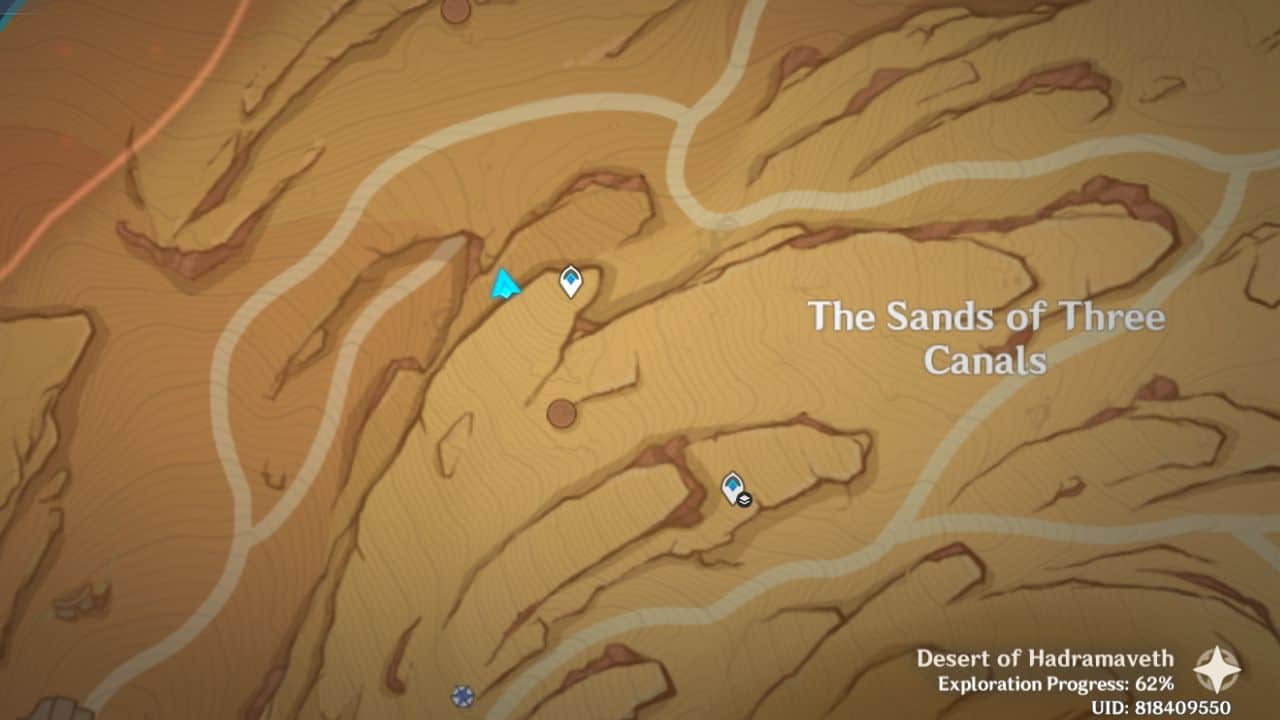
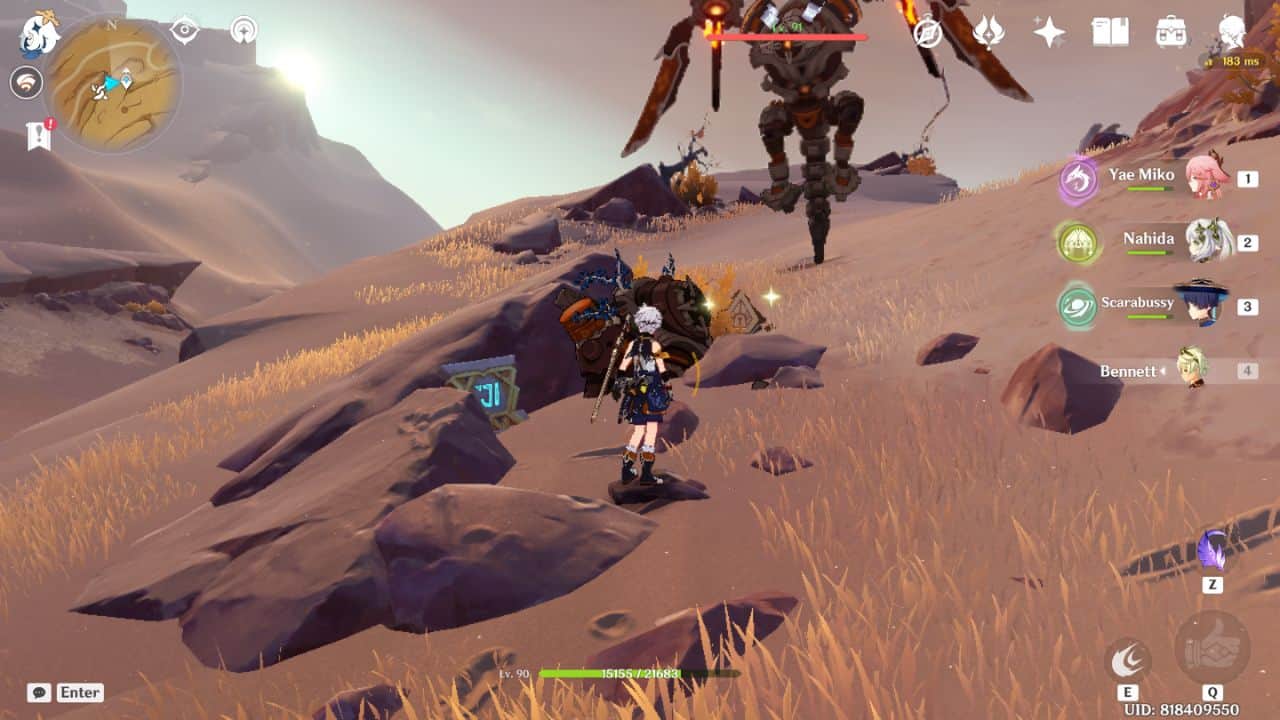
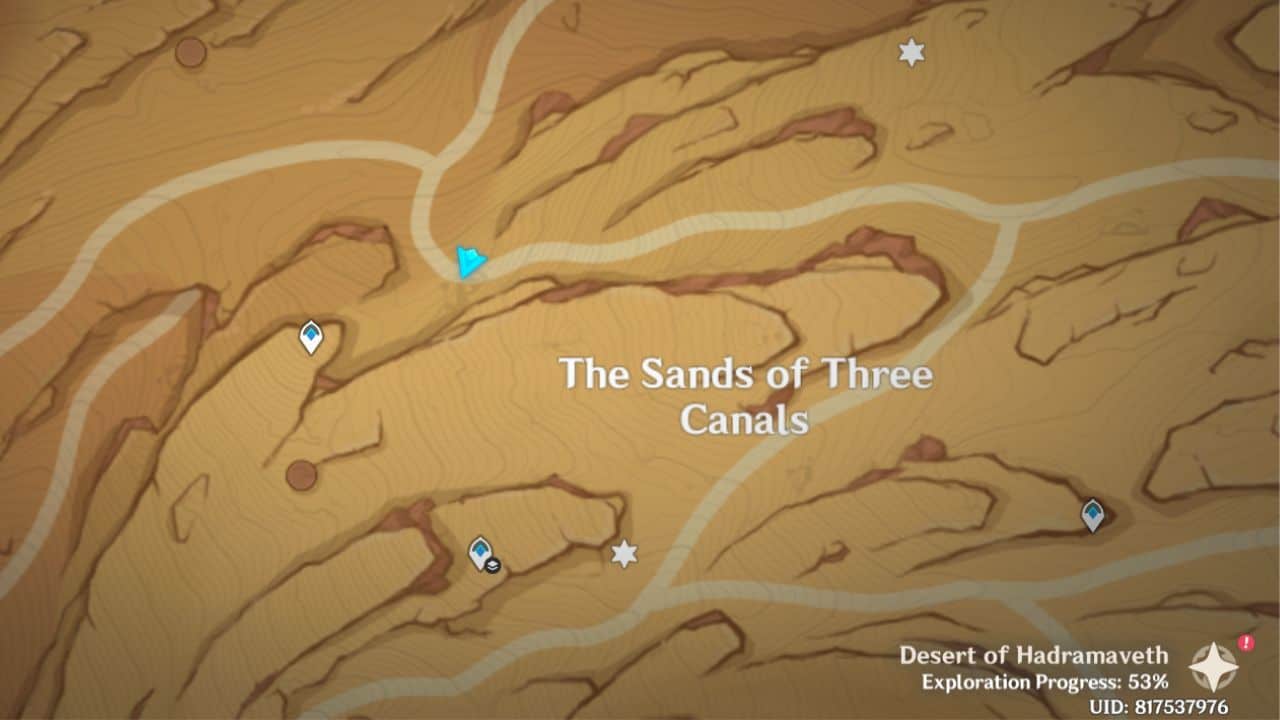
The Sand of Three Canals Sacred Seals
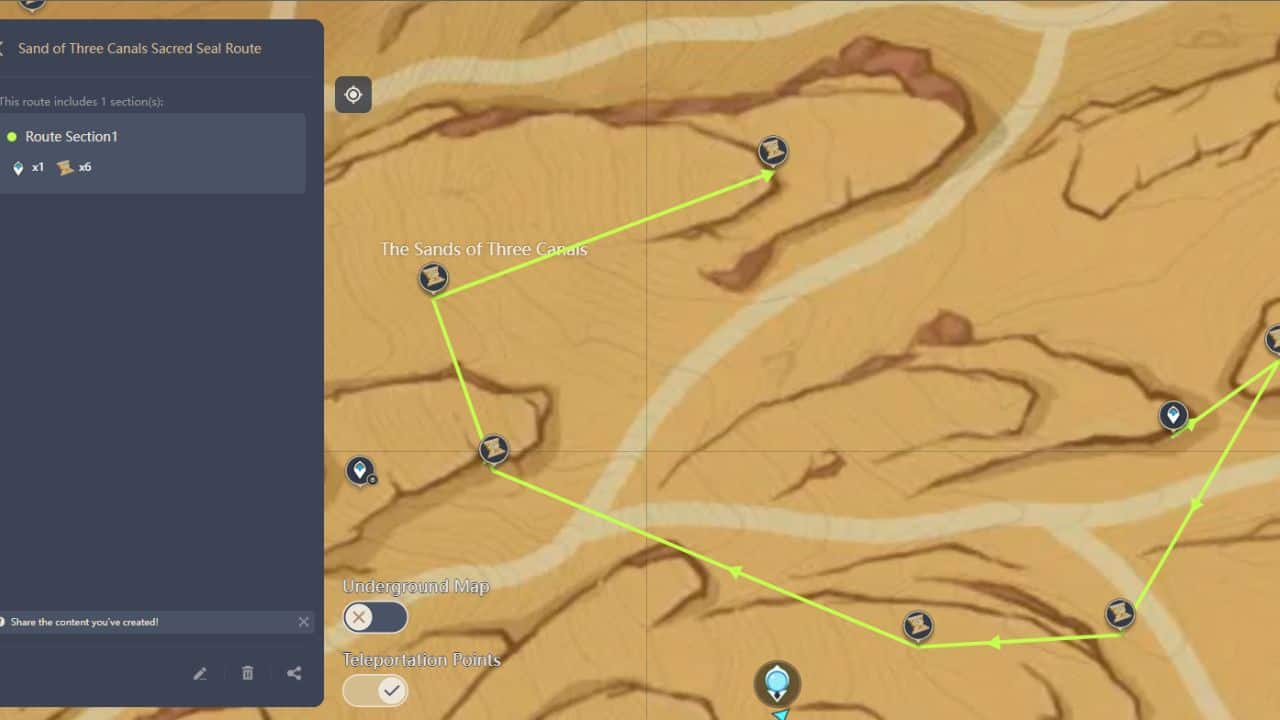
1. Sheep Head
 |  |
| Map Location | In-game Location |
You can find this seal among some bushes on a cliff, just ahead of the south overground Sand of Three Canals waypoint.
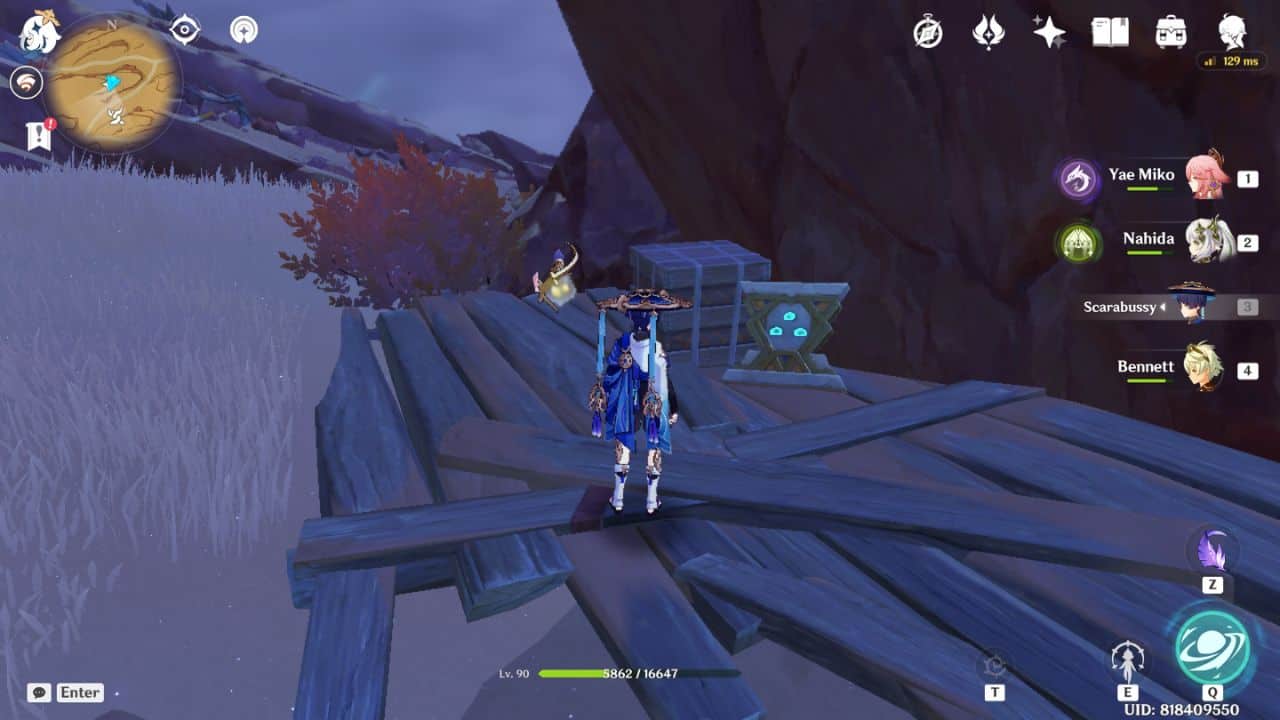
2. Ceremony
 |  |
| Map Location | In-game Location |
Head to the south from Sand of Three Canals’ south overground waypoint and grab the seal lying against a bunch of crates.
3. Right to Rule
 |  |
| Map Location | In-game Location |
This seal is wedged between a couple of rocks. You can reach the seal’s location by climbing the cliff from the previous seal’s spot and walking southward.
4. Crocodile Head
 |  |
| Map Location | In-game Location |
Head west from the location of the third seal until you see an Eremite camp. Pick up the seal lying on the top of some crates.
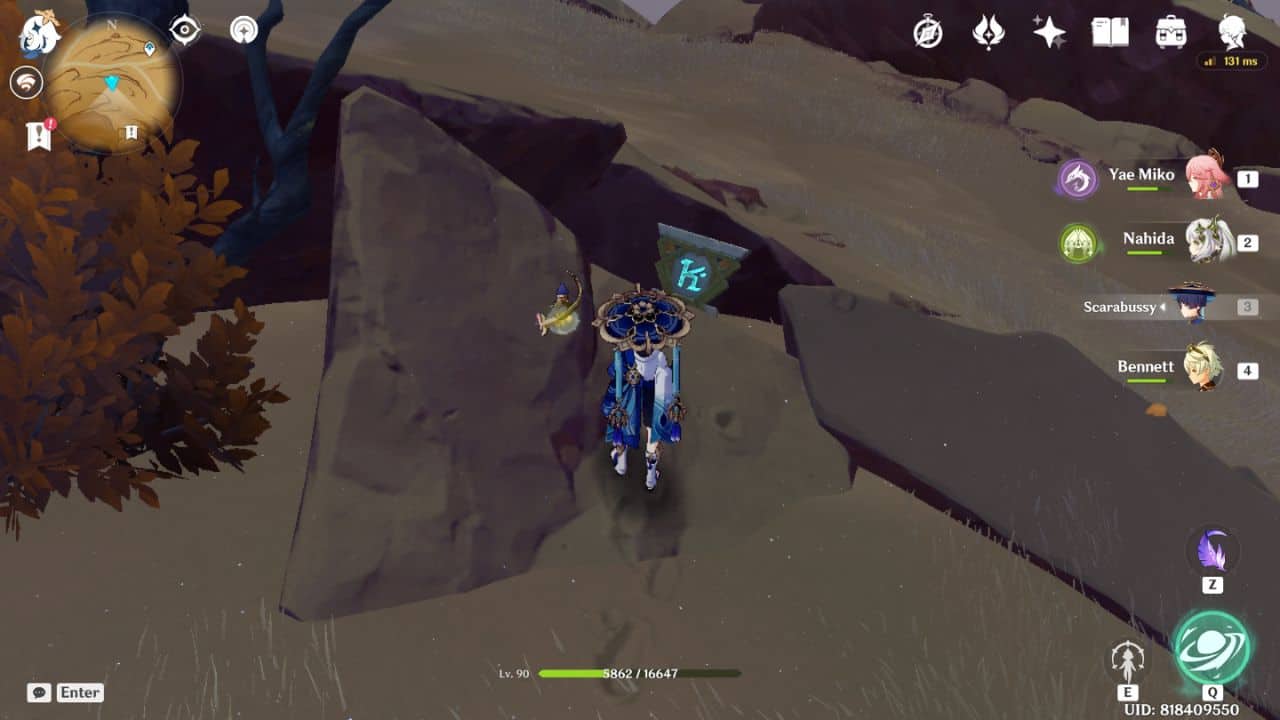
5. Dune
 |  |
| Map Location | In-game Location |
This seal can be found inside a trunk guarded by a Mitachurl. You can travel to this location by walking south from Sand of Three Canals’ south overground waypoint.
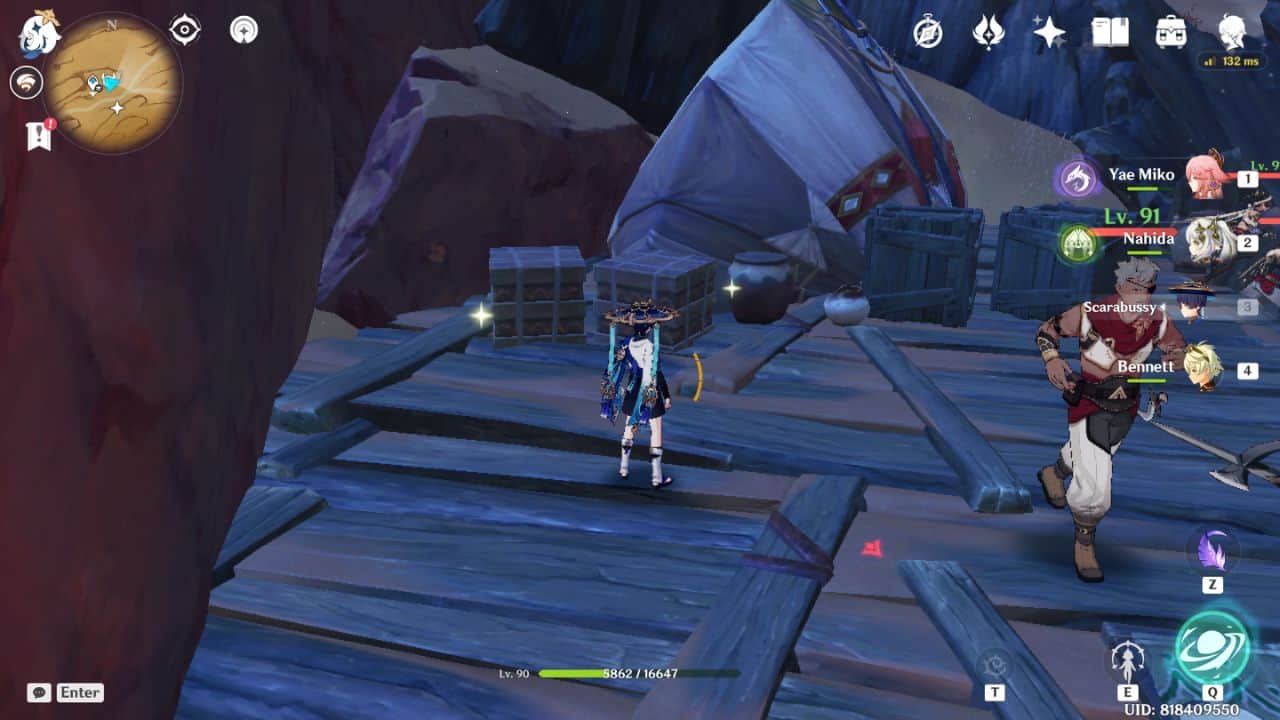
6. Ceremony
 |  |
| Map Location | In-game Location |
Head north from the Mitachurl I mentioned earlier and jump from the cliff to land near some crates. Pick up the seal lying under this cliff.
7. Primal Obelisk
 |  |
| Map Location | In-game Location |
Glide to this Primal Obelisk from the Sand of Three Canals’ southwest waypoint.
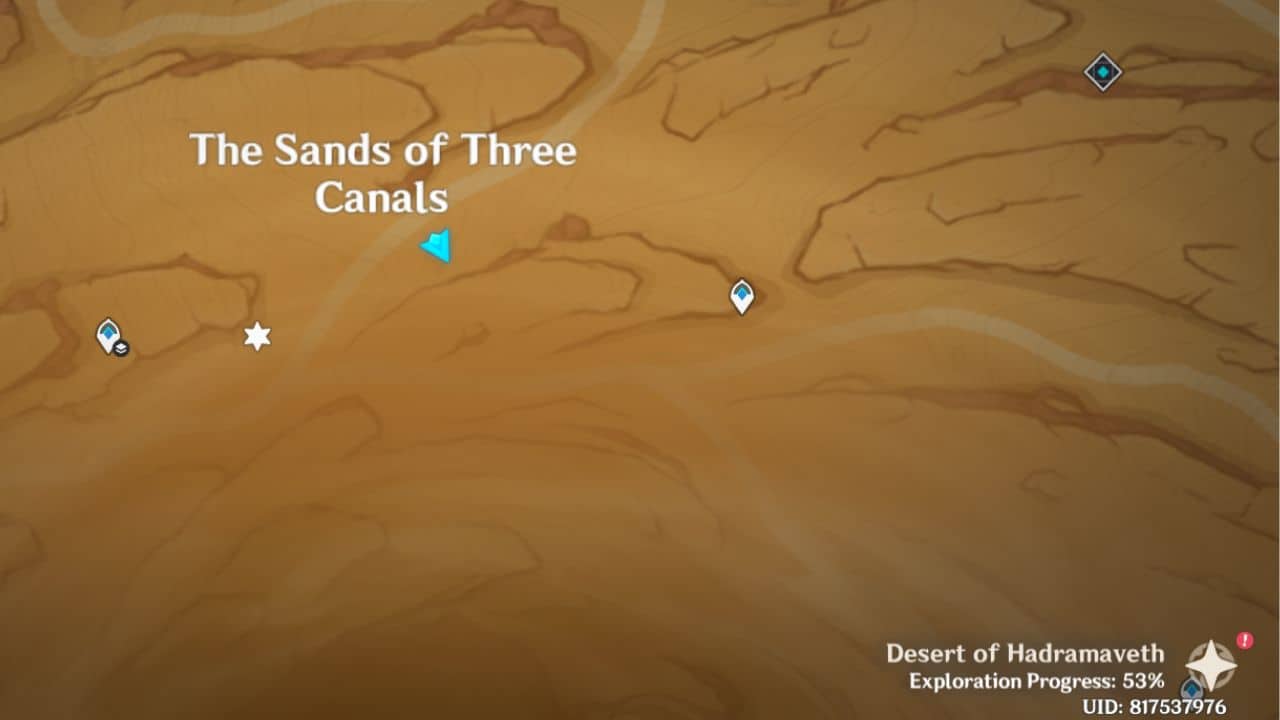
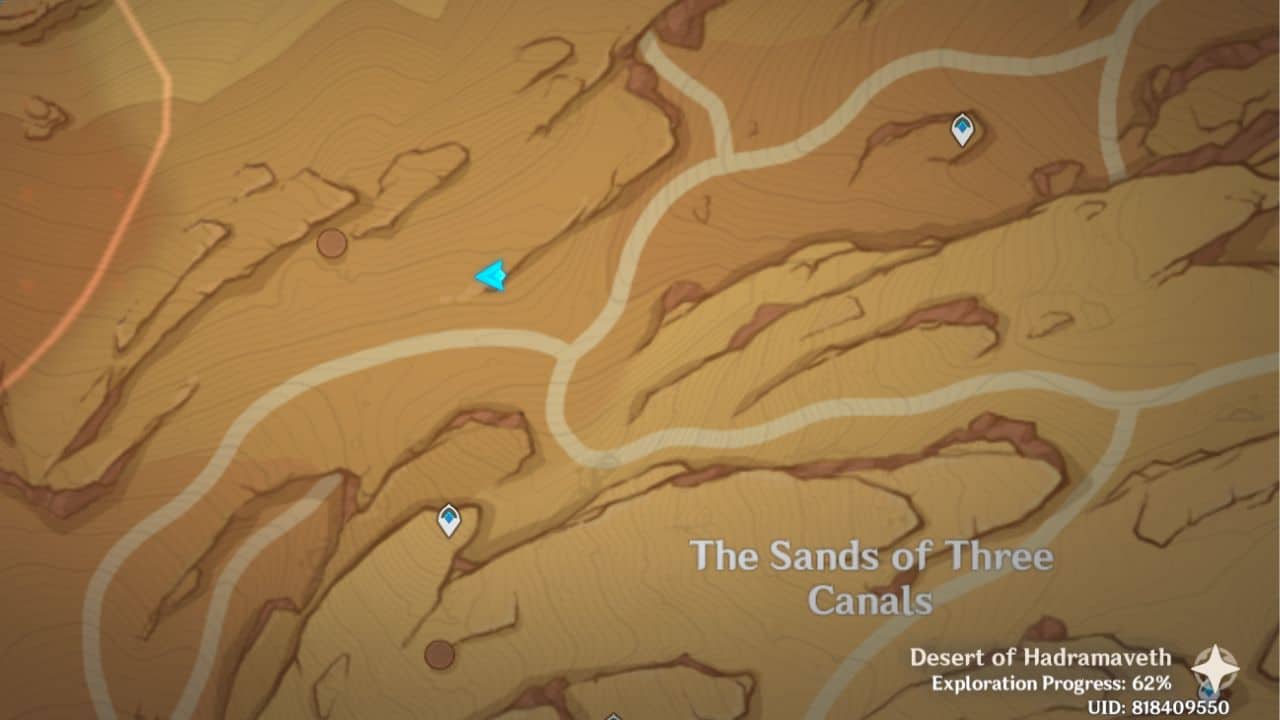
The Sand of Three Canals North Sacred Seals
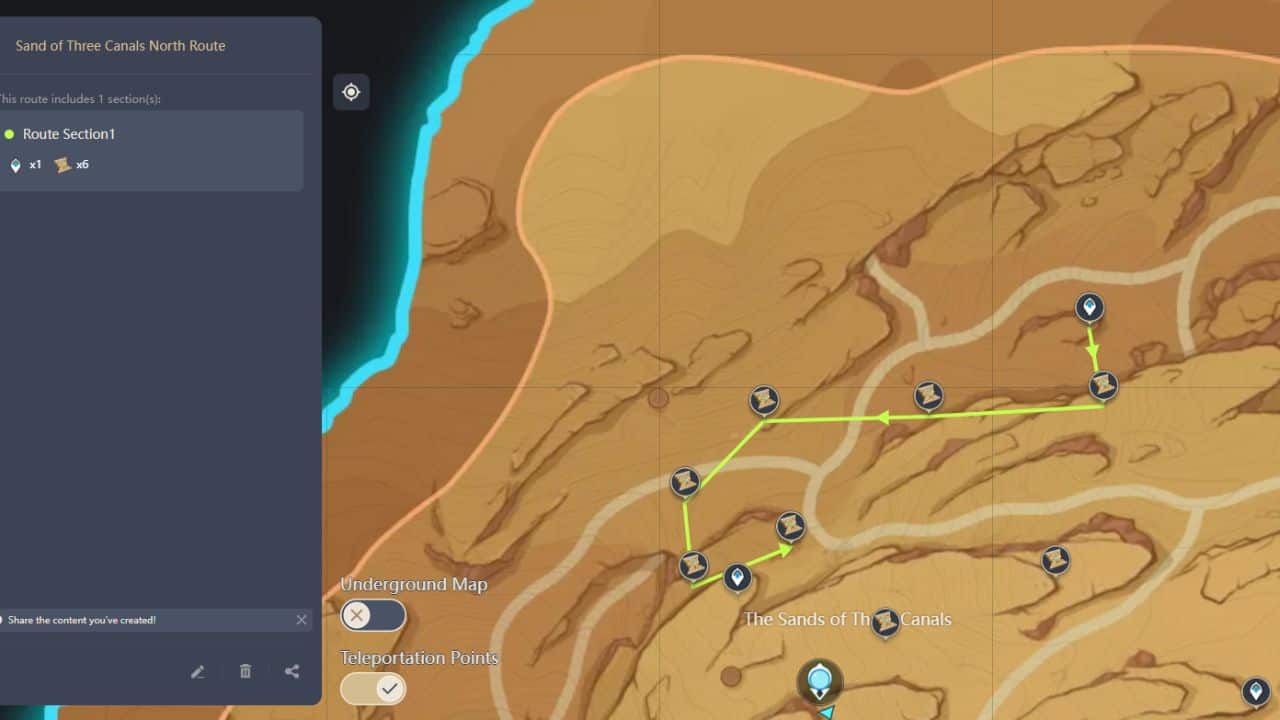
1. Thunderstrike
 |  |
| Map Location | In-game Location |
Climb the cliff south of the Sand of Three Canals’ north waypoint to obtain this seal.
2. Thunderstrike
 |  |
| Map Location | In-game Location |
Walk to the southwest of the north Sand of Three Canals waypoint. You will find the seal inside a tent in an Eremite camp.
3. Right to Rule
 |  |
| Map Location | In-game Location |
The next seal is surrounded by a group of fungi. You can either travel to this location from the Sand of Three Canals waypoint or from the location of the previous seal.
4. Giant Serpent
|
|  |
| Map Location | In-game Location |
This seal is surrounded by a group of fungi as well, just ahead of the location of the third seal.
5. Crocodile Head
 |  |
| Map Location | In-game Location |
This seal lies west of the Sand of Three Canals’ west waypoint. There’s a Ruin Drake near this seal, so it’s easy to hunt it down.
6. Forest
 |  |
| Map Location | In-game Location |
This seal lies behind a pile of rocks before the Primal Obelisk. Break the rocks to pick up the seal.
7. Primal Obelisk
 |  |
| Map Location | In-game Location |
Head north from the Sand of Canals’ west waypoint to reach this Primal Obelisk. Alternatively, you can travel to this spot from the final seal’s location.
Rewards
Primal Obelisks will shower you with tons of Primogems, trust me. Even though the prospect of combing through every speck of sand might sound awful, collecting all the seals is worth it. Upon restoration, every Primal Obelisk grants a Precious Chest full of 20 Primogems and Hero’s Wits.
Additionally, activating every Primal Obelisk in the Sumeru Desert will give you the following Achievements.
1. A Well-Trained Archaeologist: 5 Primogems
2. Parvezravan Khwarrah: 5 Primogems
Sacred Seals Locations Guide: FAQs
Question: How can I find a missing Sacred Seal?
Answer: I highly recommend keeping track of every Sacred Seal through the Teyvat Interactive Map. Alternatively, you can mark the Sacred Seals with the help of a Primal Obelisk to find out which seals you are missing.
Question: Where can I find the Glinting Components to unlock the secret Primal Obelisk inside the Mausoleum of King Deshret?
Answer: The Glinting Components are in the following locations: Khaj-Nisut, Abdju Pit, the Mausoleum of King Deshret, Sekhem Hall, and Underground Ruins between Dune of Magma and Dune of Elusion.
Final Thoughts
After pouring several hours over a few weeks, I finally managed to hunt down every single of these sneaky stone tablets.
However, I must admit that I had made the not-so-rookie mistake of not keeping track of the seals I had collected. I had to comb through the whole map again to find the few seals I had missed.
Consequently, I was so exhausted after the ordeal that I could barely complete my commissions for the next few days. But the sense of accomplishment I felt after completing yet another exploration mechanic was unmatched.
But thanks to this guide, you won’t have to suffer as much as I did. Nevertheless, accessing the locations of some Sacred Seals requires special ‘clearance’, so do check out our ‘Clearance Guide.’ Or, if you plan to go on another mission to collect special items in Genshin Impact, you can start collecting Aranaras using our handy Aranara Guide.
When they aren't gaming, Vaishnavi returns to their weeb roots by catching up with their long to-watch anime and manga list. But if they feel inspired enough, they can occasionally be seen furiously typing away their original fictional stories!
- Genshin Impact As the Khvarena’s Light Shows Guide - June 25, 2023
- Genshin Impact vs Honkai Star Rail - June 12, 2023
- Sacred Seals Locations Guide - April 8, 2023