Ah, the smell of fresh cut grass, rays of light bursting through the canopy formed by trees, or a simple Summer breeze. These refreshing and revitalizing moments are unparalleled little pockets of bliss that just can’t be replicated. However, what if there was a way to surround yourself with luscious foliage, a sea of green and beautiful vistas depicting nature’s bounty? Well, thanks to the introduction of the Sumeru Region in Genshin Impact, and the arrival of the long-anticipated Dendro Element, this dream can become a reality.
Although there has been a Dendro element in the game, it was never at the players’ disposal. But this time, some characters can use this element and harness the power of Dendro to change the flow of a battle. Not only are the new Dendro characters unique in their abilities, but they also have a fascinating plot of their own.
Once you reach Sumeru through the Chasm, you will soon be introduced to these characters and learn about surprising revelations. You will go through a series of events to experience unique phenomena and have a one-to-one with residents of this land of the green. And these new characters will play a crucial role in the start of your whole new journey.
In this Genshin Impact Tighnari Guide, we will discuss the details of these new characters and learn about them. From his talents to his exceptional food, best weapons to artifacts, and eventually the best team comps, I will be your partner on this beautiful journey to make the best use of him in your team.
Tighnari, An Interesting Character
First, if you want to pet his hair and wonder what his reaction would be, you better check out his hangout quest. Don’t worry; I won’t spoil much of it, but all I can say is it’s a good hangout quest. Honestly, I didn’t try Tighnari on trials and went to his banner just because I liked his caring character.
After I tried Tighnari, I fell in love with his fast-paced gameplay and how easy it is to use his skills. Have to say, I love to shoot those tracking arrows to burn down enemies’ health bars.
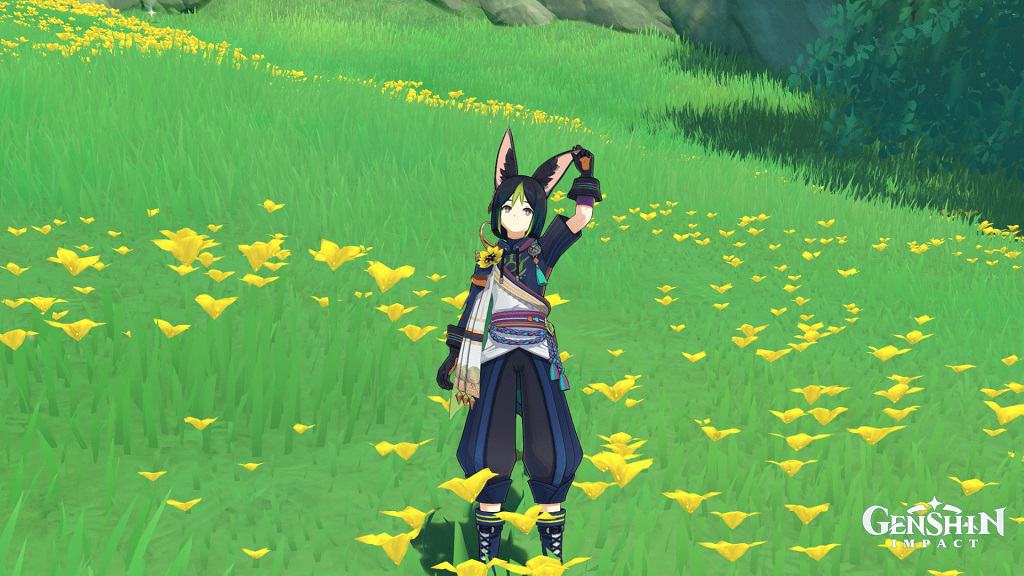
Though it looks like Tighnari belongs to a particular race of beings, he’s quite knowledgable, wise, and careful of his companions. Just like Gorou, he’s quite dependable and leads his companions with responsibility. As the story progresses, you learn more about him and his ordeals with the Akademiya. I found Tighnari to be quite a good character, like a good teacher who cares for his student.
Coming to the gameplay, I like fast-paced gameplay where you can use skills fast enough to turn enemies into dust. Though, sometimes I want to get things done quickly and pull out the Raiden Shogun. Well, Archons are archons. As for Tighnari, you will see that his skills are good for exploration if you want to apply Dendro in an area or just use a charged shot to apply Dendro to a totem. There were a few places where there were quite a bunch of totems, and Tighnari saved me there to carry out fast activation of those totems.
Ascension & Talent Level Up
I had no idea what Tighnari’s ascension material was because I got him just as I reached Sumeru and didn’t collect a single thing. I admired the environment’s design for the first few minutes and listened to the soothing music. In my opinion, as a region, Sumeru has top-tier music, and it’s bliss to the ears.
But you know what? It’s not what it looks like. Sure, there are cute little birds, beautiful flowers, and jumpy mushrooms, but also those big jungle cats and alligators who will come at you out of the blue, and your only options are fight or flight. Beware, Traveler, Sumeru is a beauty and a beast.
Tighnari needs Jadeplume Terrorshroom’s drops as his ascension material, and Nilotpala lotus is found near the water bodies. The best thing about Tighnari is that you can see Sumeru’s local specialties on your mini-map if you have him on the team, all thanks to his passive.

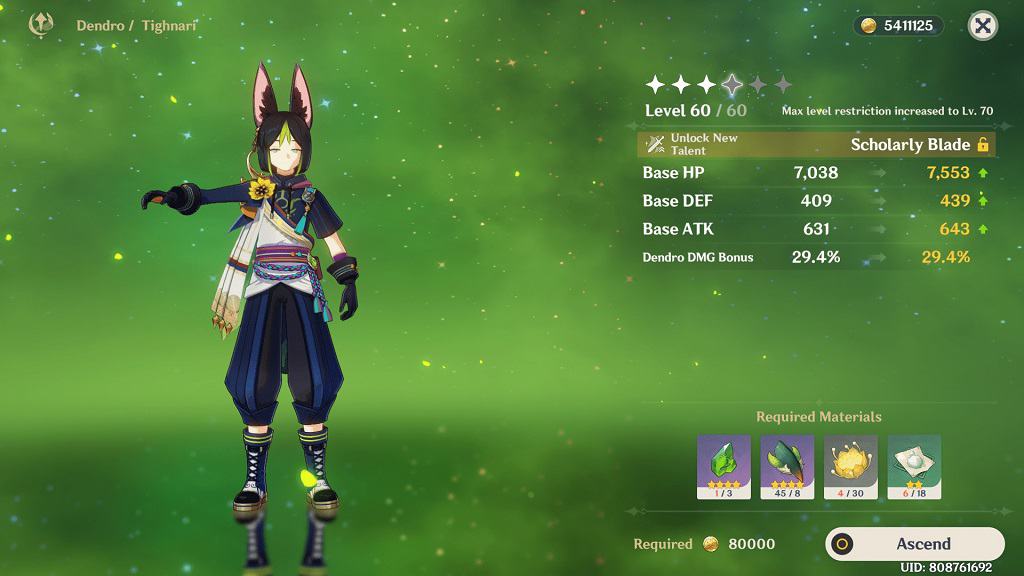
Ascension Material:
- Nagadus Emerald Sliver x 1
- Nagadus Emerald Fragment = 9
- Nagadus Emerald Chunk = 9
- Nagadus Emerald Gemstone = 6
- Fungal Spores = 18
- Luminescent Pollen = 30
- Crystalline Cyst dust = 36
- Nilotpala Lotus = 168
- Nagadus Emerald Sliver = 1
- Majestic Hooked Beak = 46
- Mora = 420,000
Once you are done with ascension, you can either start leveling up your talent levels or pre-farm them to upgrade at a later date. Here’s a list of Tighnari’s Talent level-up materials you need to ascend his single talent.
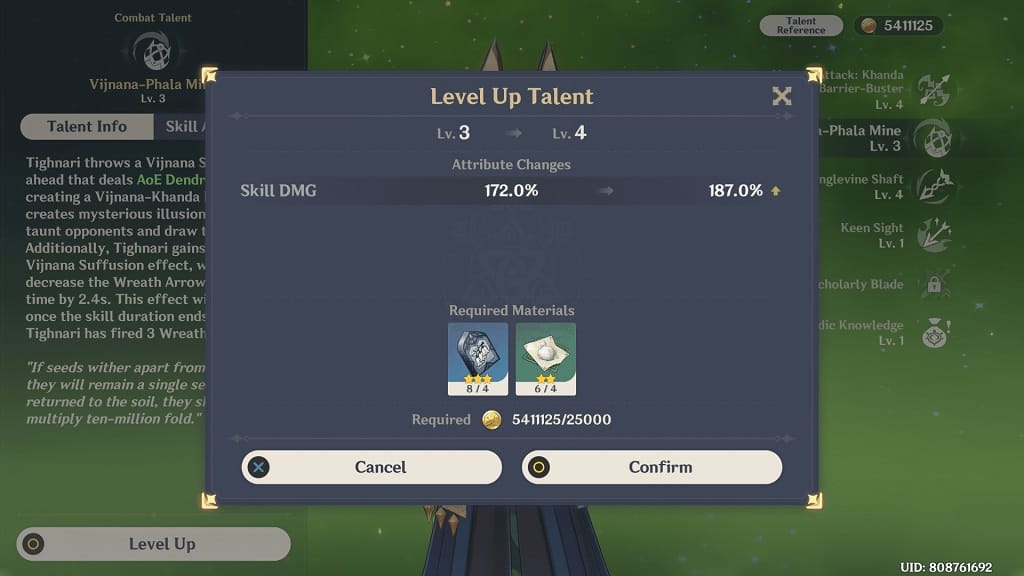
Talent Requirements for a Single talent:
- Teachings of Admonition=3
- Guide to Admonition = 21
- Philosophies of Admonition = 38
- Fungal Spores = 6
- Luminescent Pollen = 22
- Crystalline Cyst dust = 31
- The Meaning of Aeons = 6
- Mora = 1,652,500
- Crown of Insight = 1
Talents
Normal Attack: Khanda Barrier-Buster
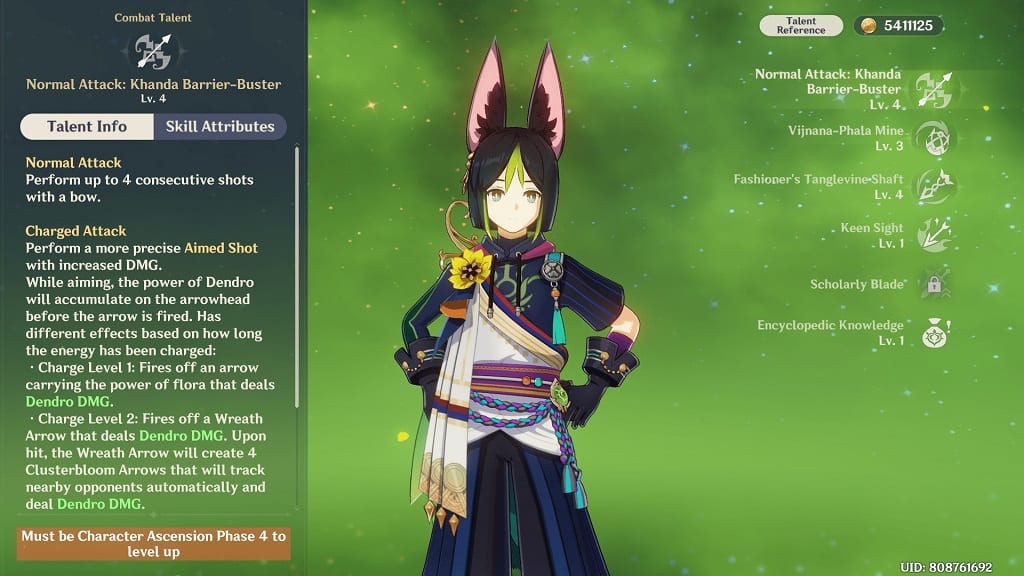
Normal Attack – Tighnari shoots up to 4 shots with a bow in a row.
Tighnari’s Normal attacks are helpful in situations where you must remove Withering zones. You will often notice areas affected by Withering zones where you have to attack the corrupted plants with Dendrogranum.
Once you collect a Dendrogranum, you can attack the plants with a bow’s charged attack. You can also use other weapon types, but I find a bow easy and effective.
The area is already filled with enemies, and it’s better to maintain a distance, so you don’t lose health.
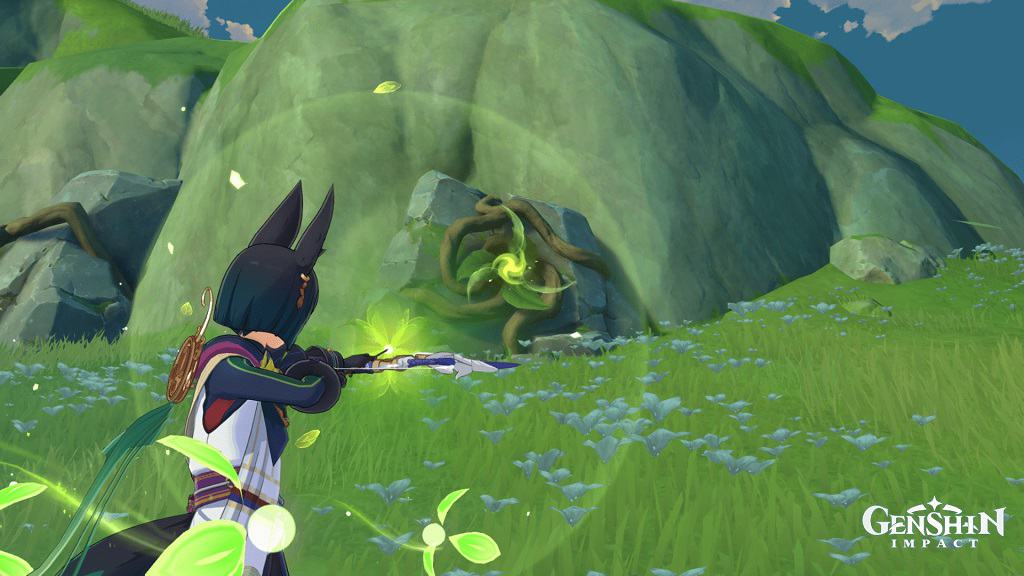
Charged Attack – Tighnari performs a more focused aim shot that deals better damage. In the aim mode, the power of Dendro will focus on the tip before the arrow is shot. This charged attack has unique effects based on how long the energy has been charged:
Charged level 1: Tighnari shoots off an arrow carrying the power of flora that deals Dendro damage

Charge level 2: Tighnari shoots off a Wreath Arrow that deals Dendro damage. Upon impact, the Wreath Arrow will create 4 Clusterbloom arrows that will home to nearby enemies, automatically dealing Dendro damage.
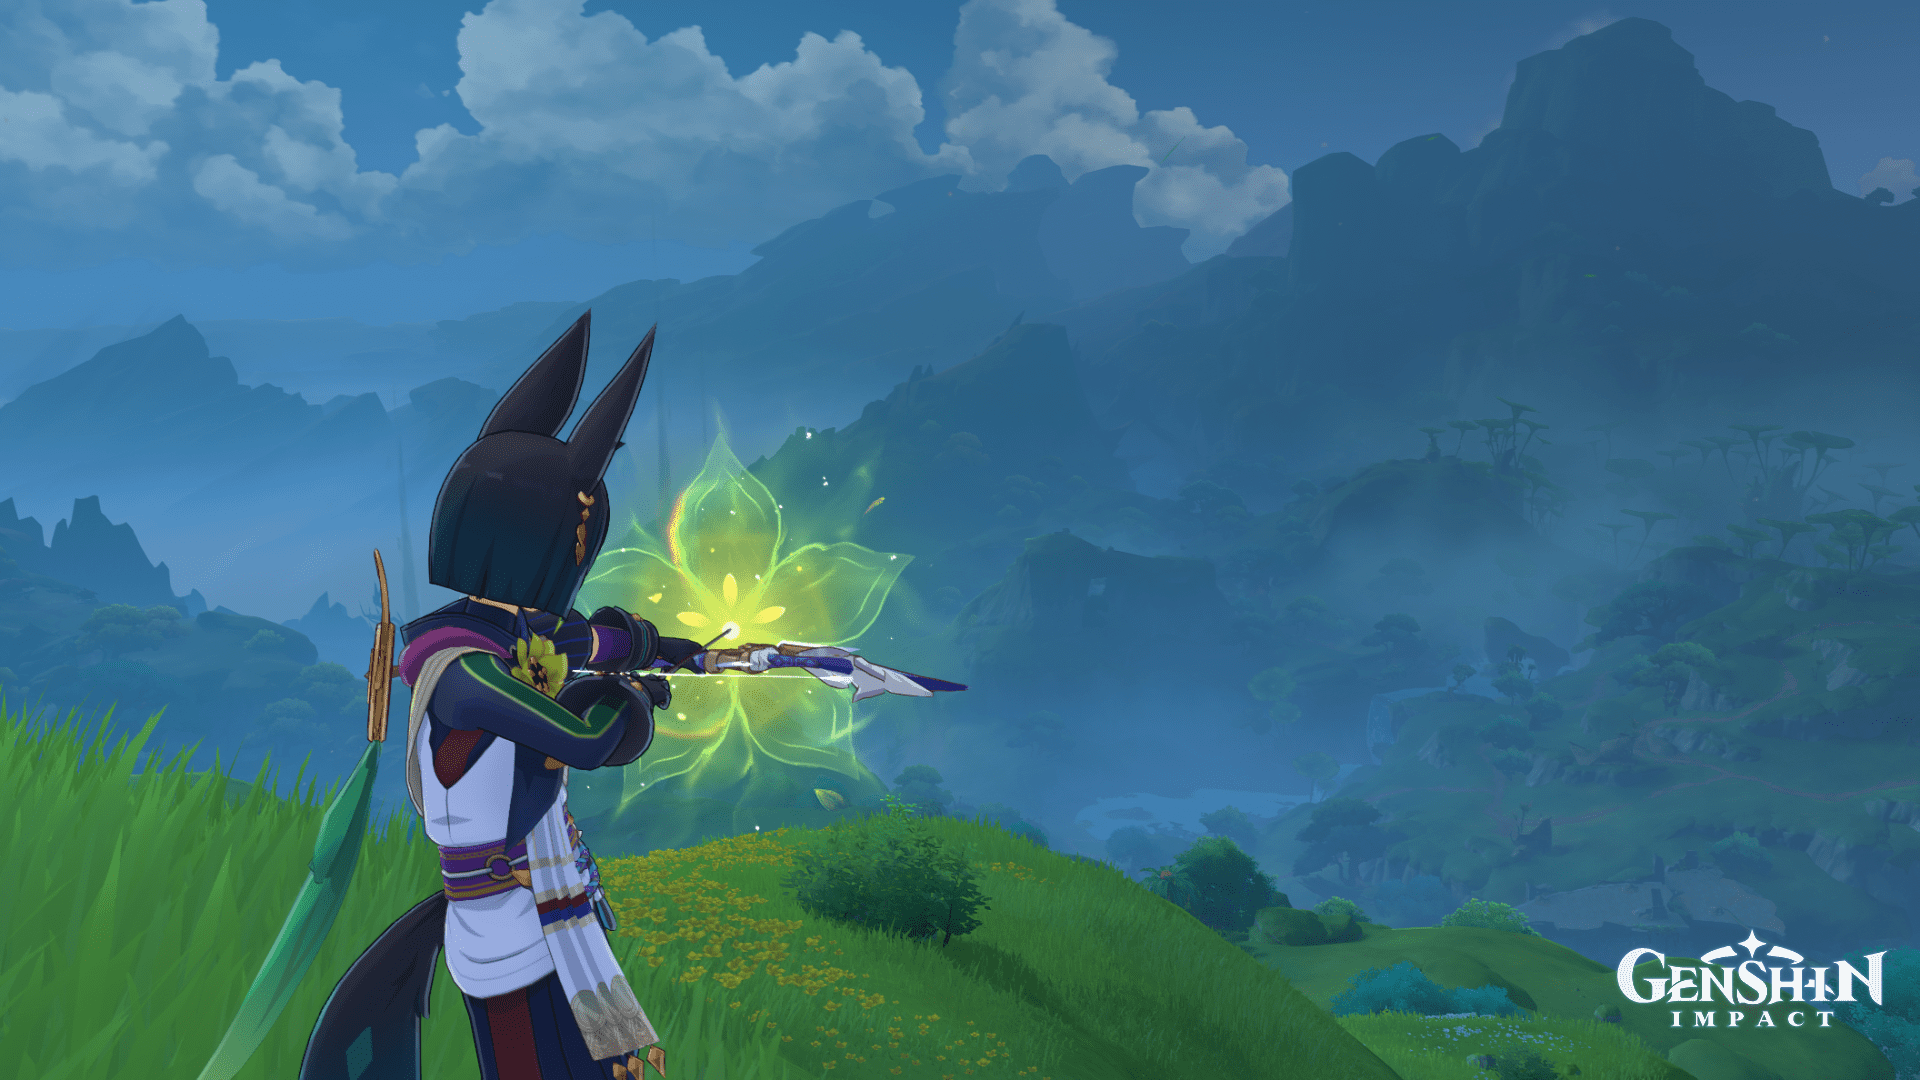
Tighnari’s charged attacks at different levels are subject to a combat situation. Sometimes, you just need to apply Dendro, that’s apt for the usage of Charged level 1. However, sometimes you may need to use Wreath Arrows on enemies and switch to Charged level 1 attack pattern to output better damage.
Plunging Attack: Tighnari shoots off a shower of arrows in mid-air before falling and striking the ground, dealing area-of-effect damage upon impact.
You rarely need to use a bow character’s plunging attack unless you want to save yourself from fall damage and just make an attack on the ground.
Vijnana – Phala Mine
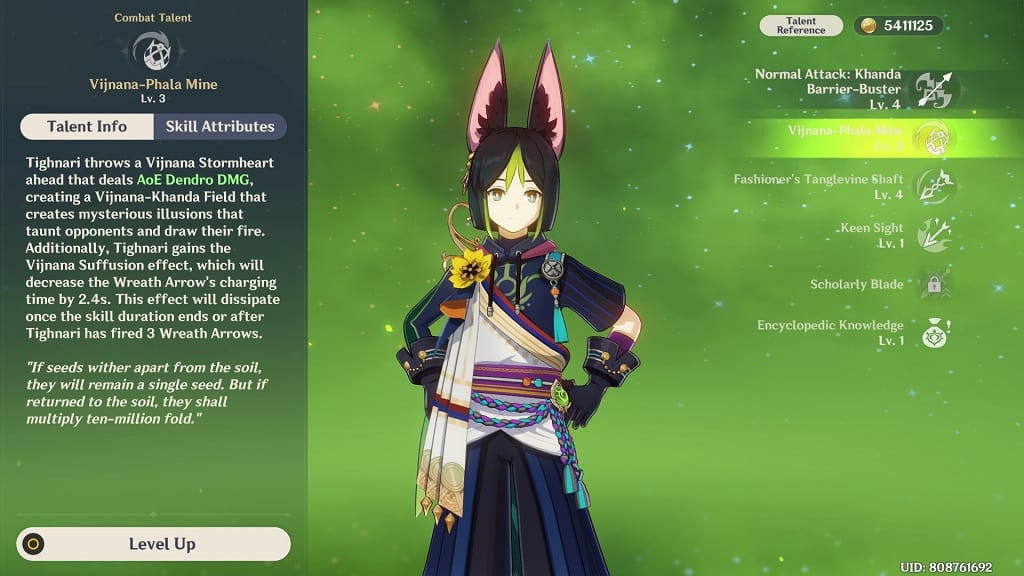
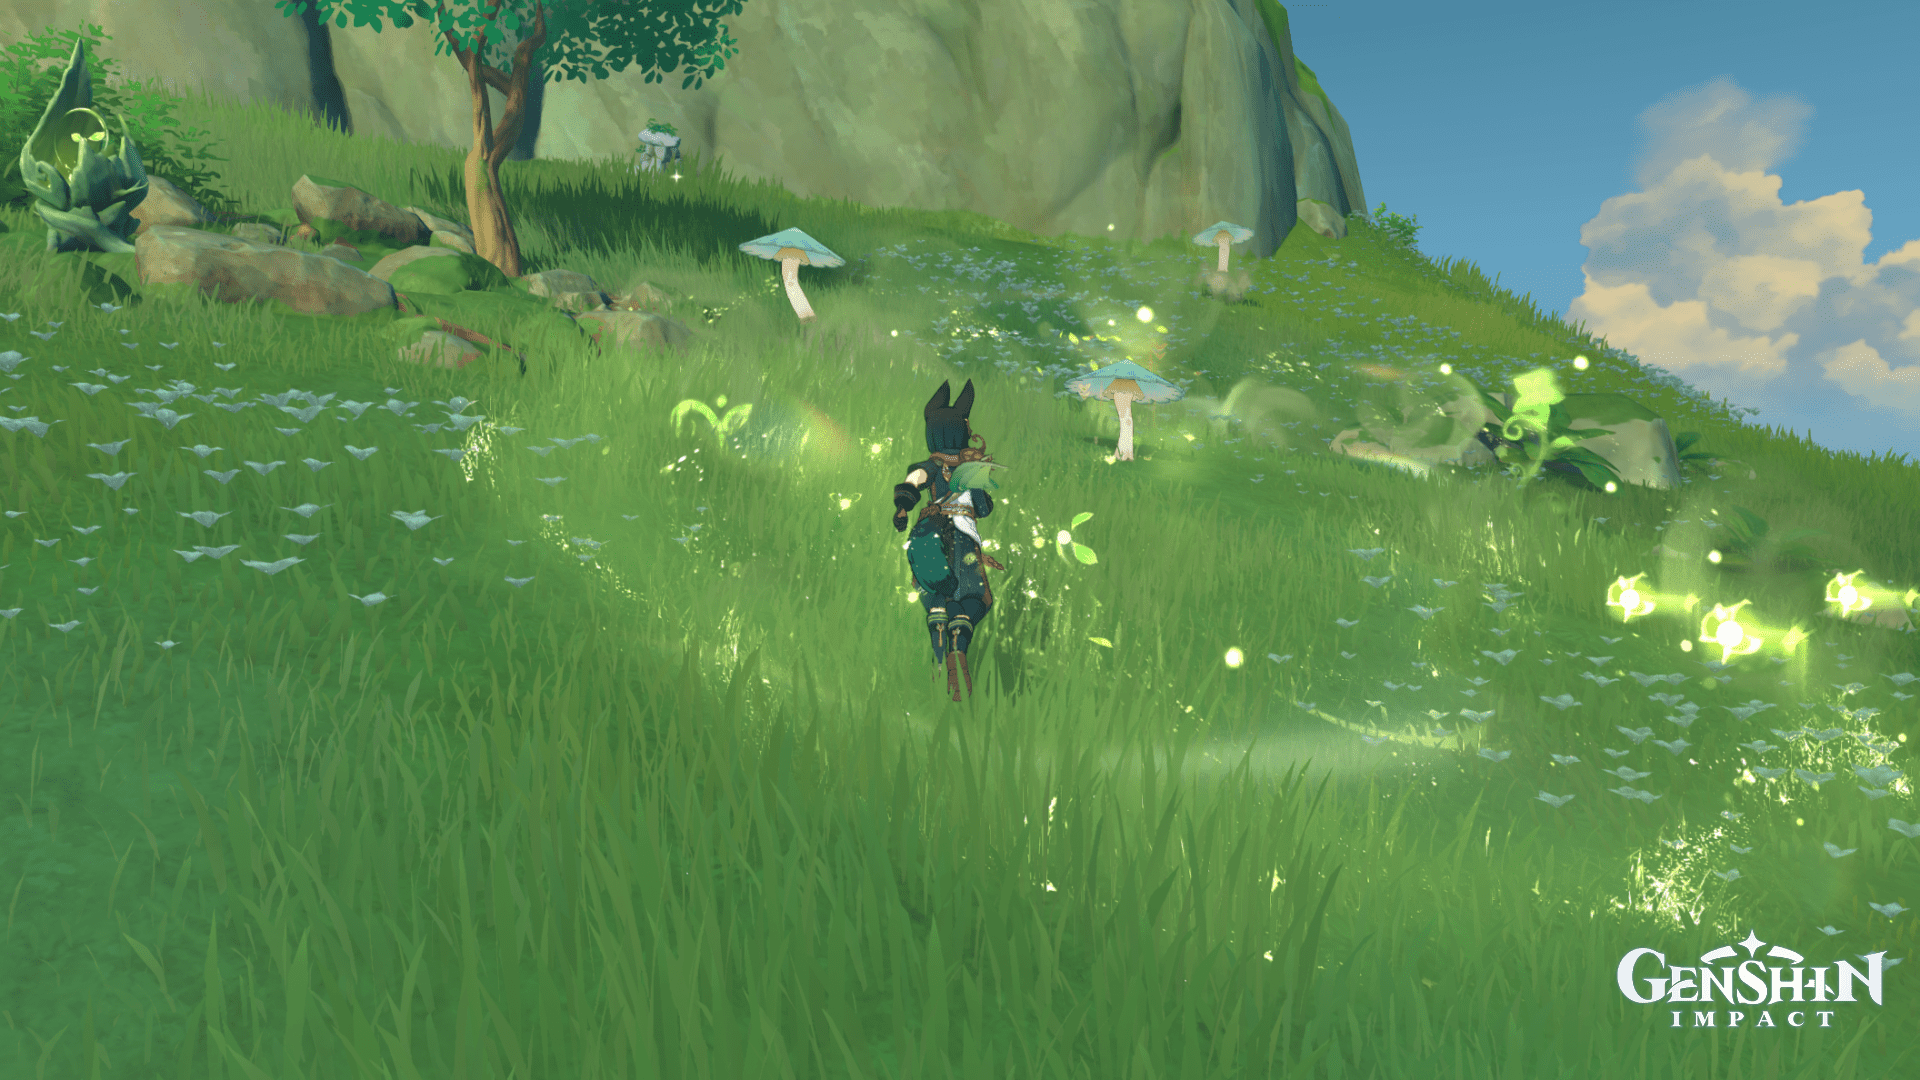
Tighnari throws a Vijnana Stormheart ahead that deals area-of-effect Dendro damage, creating a Vijnana-Khanda field that creates mysterious illusions. These illusions distract the enemies from drawing their fire. Additionally, Tighnari gains the Vijnana Suffusion effect that decreases the charging time of Wreath Arrow by 2.4s. This effect dissipates after the skill duration ends or 3 Wreath Arrows are used.
This is an important skill in Tighnari’s kit that makes his skills unique from other characters’ elemental skills. Once you use this elemental skill, an area field will be created where enemies will be taunted. You can easily position yourself to hit them with precision. Here’s the special thing about this elemental skill. After you use the Elemental skill, you can use Tighnari’s Wreath Arrows to deal damage quickly, which works quite well in Spread team compositions. I’ll discuss the Spread team compositions; however, if you don’t know what it means, check out our Dendro reactions guide.
Fashioner’s Tanglevine Shaft
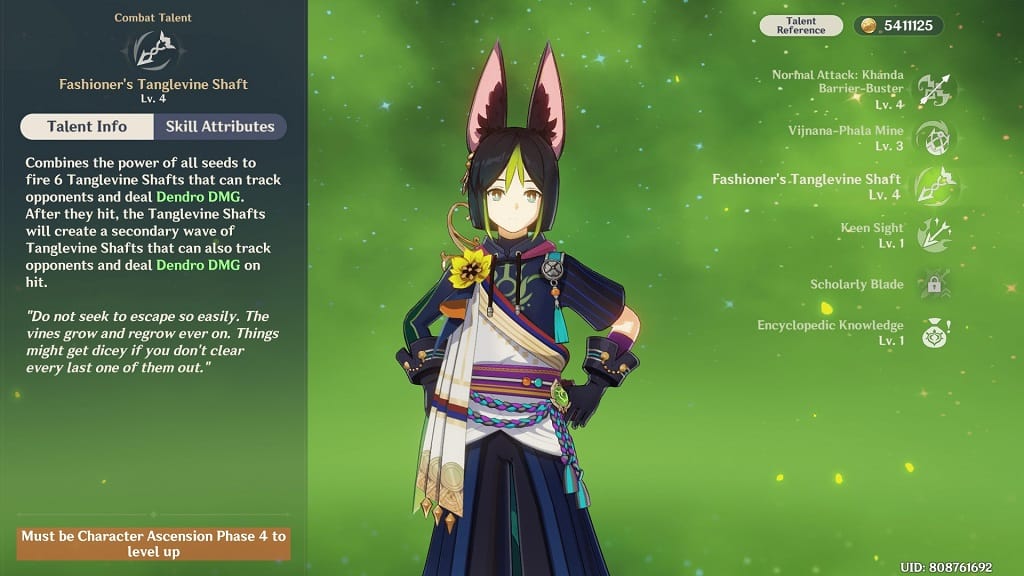

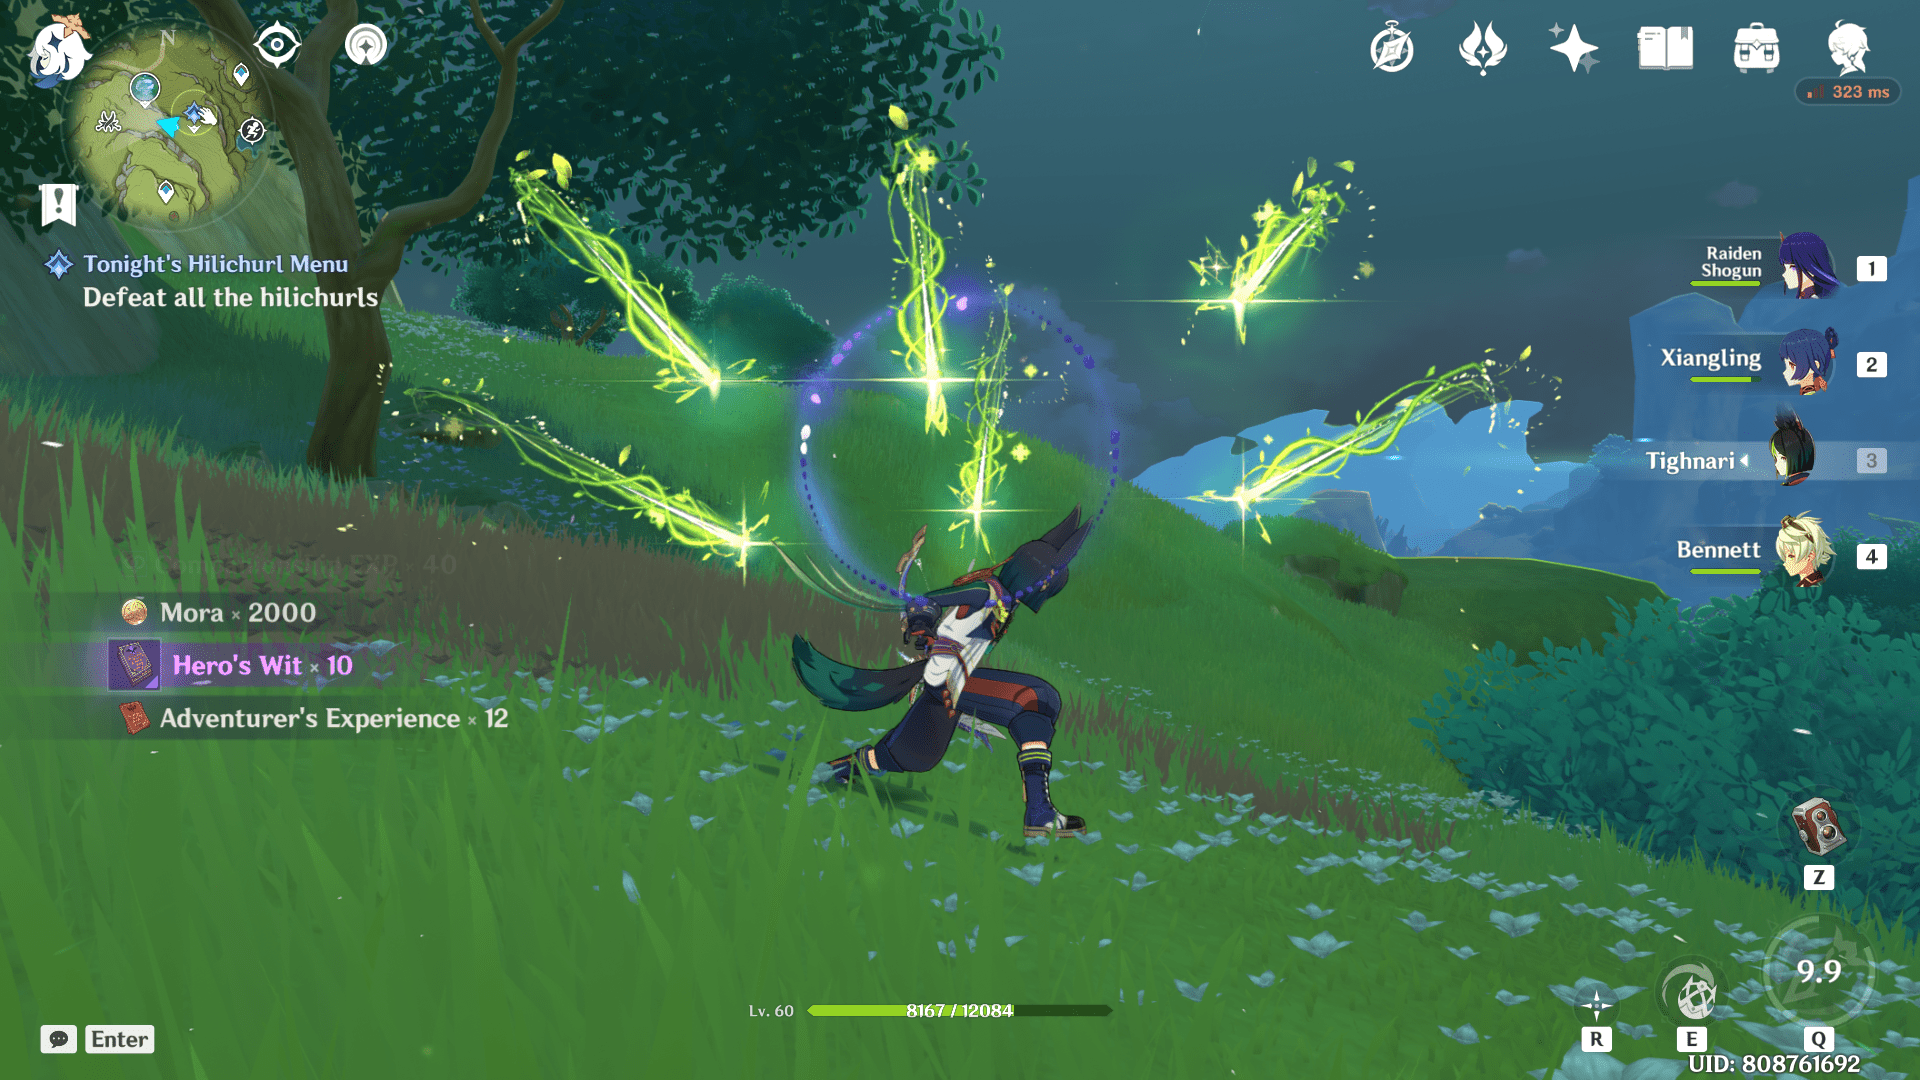
Tighnari combines the power of all seeds to fire 6 Tanglevine Shafts that can track enemies to deal Dendro damage. On impact, the Tanglevine shafts will create a second wave of Tanglevine Shafts that can also track enemies to deal Dendro damage.
I’m in love with this elemental burst. I like to play characters with less elemental burst cost, so I can often use them. Tighnari’s elemental burst is self-explanatory, but check your terrain and environment so the arrows can hit the enemies. If you are using his burst in quite a narrow area, it might happen that the vines don’t hit the enemies.
Passives
Keen Sight
After Tighnari shoots a Wreath Arrow, his EM increases by 50 units for 4 s.
Not much of a massive EM boost, but viable in teams where you consistently use Tighnari to trigger reactions. A minor damage upgrade but not game-changing.
Scholarly Blade
For every point of EM, Tighnari’s Charged attack and Fashioner’s Tanglevine Shaft damage increase by 0.06%. You can obtain a maximum of 60 % damage bonus only.
This passive is decent if you are going for an EM build Tighnari in team composition. Not only are you getting Charged attack and Tanglevine shaft damage bonus, but also more EM will help you to trigger reaction damage.
Encyclopedic Knowledge
This passive helps to show the location of the Local specialties of Sumeru on the mini-map.
A life-saving passive if you are farming for local specialties of Sumeru. I didn’t have to hunt for Nilotpala Lotuses because, with Tighnari in my team, I could locate them easily.
Constellations
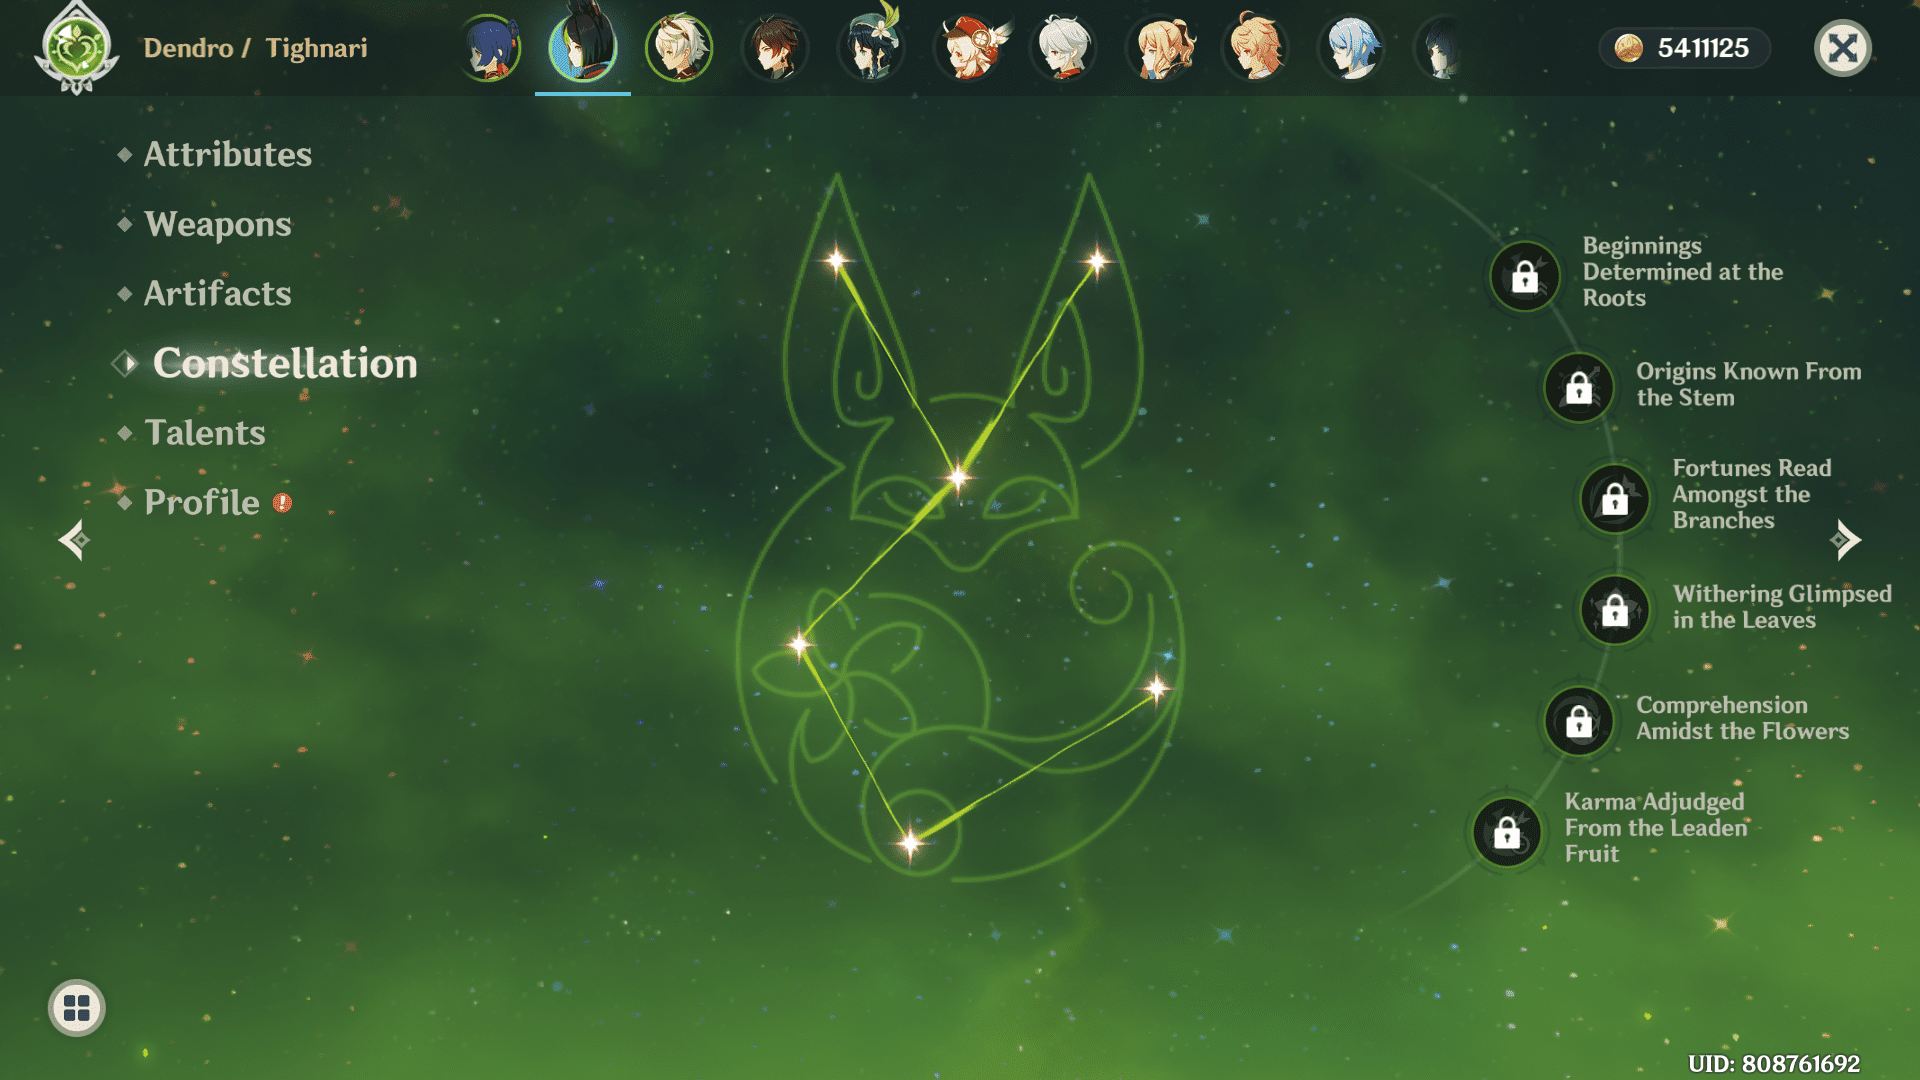
Beginnings Determined at the Roots
- Tighnari’s Charged attack CRIT rate increases by 15 %
Although this constellation looks like you will be getting a boost in CRIT rate and don’t have to do anything, here’s a tip from my experience. If you have enough CRIT rate from the substats, you can swap out the CRIT rate circlet for CRIT damage. Most of the time, you will use Tighnari’s charged attack for damage, so it’s better to manage the stats to get better value. A usual CRIT rate to CRIT damage ratio is 1:2. But if you want to tweak that a little bit feels free to do so. Don’t go with a 10 % CRIT rate and massive CRIT damage; that’s more like a meme build than actual use.
Origins Known From the Stem
When there are enemies within the Vijnana-Khanda field created by the Vijnana-Phala mine, Tighnari gains a 20 % Dendro damage bonus. The bonus will last up to 6 seconds if the field’s duration expires or there are no enemies in it.
A boost in Dendro damage will help Tighnari output potent damage. But also, this constellation is more oriented towards a main DPS Tighnari gameplay so that you can benefit from it.
Fortunes Read Amongst the Branches
With a maximum cap of level 15, the constellation increases Fashioner’s Tanglevine talent level by 3.
Withering Glimpsed in the Leaves
When Fashioner’s Tanglevine Shaft is unleashed, all nearby team members gain 60 EM for 8 s. Suppose the Fashioner’s Tanglevine shaft triggers a Burning, Bloom, Quicken, or Spread reaction. In that case, their EM will further increase by 60. These latter cases will also refresh the buff state’s time.
Indeed a decent boost for Tighnari in reaction-based teams. This is a promising constellation because if you have enough energy to recharge on Tighnari, you can build more EM on him and get more value out of these reactions.
Comprehension Amidst the Flowers
With a maximum cap of level 15, this constellation increases the Vijnana-Phala Mine talent level by 3.
Karma Adjudged from the Leaden Fruit
Wreath Arrow’s charging time decreases by 0.9s and produces 1 additional Clusterbloom Arrow upon impact. The arrow deals 150 % of Tighnari’s attack as damage.
The last constellation focused on the main DPS Tighnari, where he gets a reduction in Wreath Arrow’s charging time.
Special Food
Forest Watcher’s Choice

- Rarity: 2-star
- Original Dish: Mushroom Hodgepodge
- Recipe: 1 x Mushroom, 1x Starshroom, 1 x Rukkashava Mushroom
- Effect: Increases all team members’ defense by 151 for 300s. In co-op mode, this effect is applicable to your characters only.
Though it seems like a beautiful dish, collecting Rukkashava Mushroom is an ordeal you have to bear. Not only do you need them for Collei’s ascension, but they are found in the most unreachable parts of the region. I would honestly suggest you create only a few of these dishes, as the payoff isn’t worth the hassle of foraging for more of them. Secondly, there’s not much use for DEF-boosting dishes in the game unless you are running characters like Noelle, Arataki Itto, Albedo, and such. Thus, a flat defense increase doesn’t contribute to the overall damage by a massive margin.
Artifact Sets
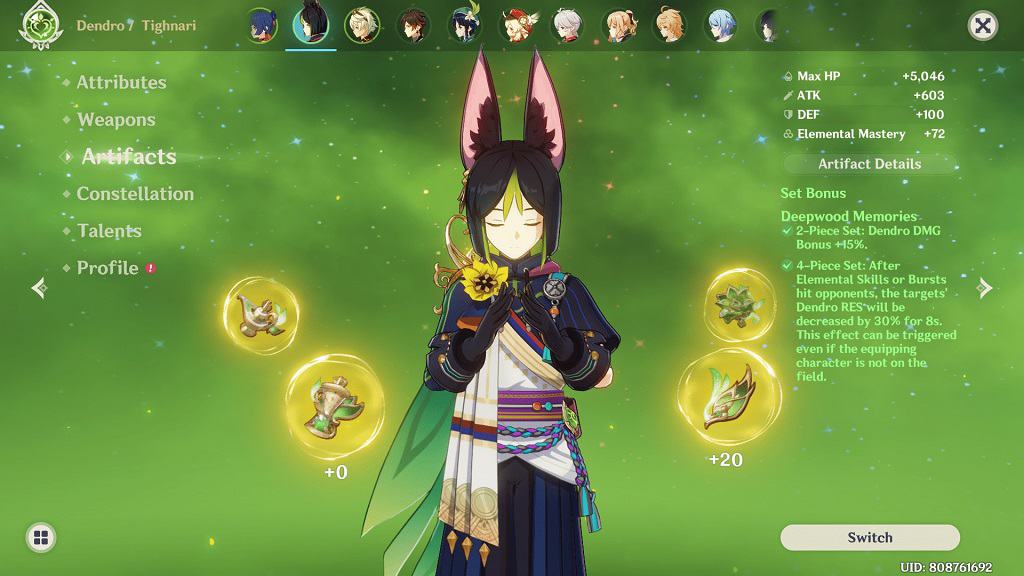
I would say you can go with two types of builds for Tighnari. One, using ATK%, Dendro DMG Bonus, and CRIT rate/damage for DPS role. And the other EM, Dendro DMG Bonus, and EM for reaction role. Depending on your requirements, you can go with a full EM build if you want him to trigger powerful reactions. Overall, it will depend on your team composition, but his low burst cost makes him relatively easy to build.
Gilded Dreams

- 2-piece set bonus: Increases EM by 80 units
- 4-piece set bonus: Within 8s of triggering a reaction, the character equipping this set will obtain buffs based on the element of the other team members. The attack increases by 14% for each team member whose Elemental Type is the same as the equipping character, and EM increases by 50 for every team member with a different Elemental Type. Each of the buffs, as mentioned earlier, will count up to 3 characters. The effect triggers once every 8 s and can still trigger if the character is off the field.
A goto set for reaction-based teams where you have different elemental characters. If you want to have a few characters from the same element, then you will get a boost in your attack. However, I would recommend using characters from different elements and trying to get a new flavor of team composition. You can have one team purely focusing on reactions.
Wanderer’s Troupe

- 2-piece set bonus: Increases EM by 80 units
- 4-piece set bonus: Increases charged attack damage by 35 % if the character uses a catalyst or bow
It works best if you have a character equipping Deepwood memories to remove enemies’ Dendro RES by some % age. Once your support is good, you can equip this artifact set on Tighnari to take advantage of charged attack damage boost.
Deepwood Memories

- 2-piece set bonus: Increases Dendro damage bonus by 15 %
- 4-piece set bonus: After elemental skills or bursts hit enemies, the targets’ Dendro RES decreases by 30 % for 8 s. The set bonus is available even if the character is off the field.
Suppose you don’t like to play Collei or Dendro Traveler for some reason. In that case, you can equip this artifact set on Tighnari to benefit from the Dendro resistance decrease. Otherwise, this is a really good artifact set for supporting characters. Not only can you use this artifact set on Dendro supports like Collei or the Dendro Traveler but also on other supports like Zhongli, Kokomi, or Fischl. You can equip other artifact sets on Tighnari and use this set on your supports to benefit from Dendro RES decrease and deal more Dendro damage.
Weapons
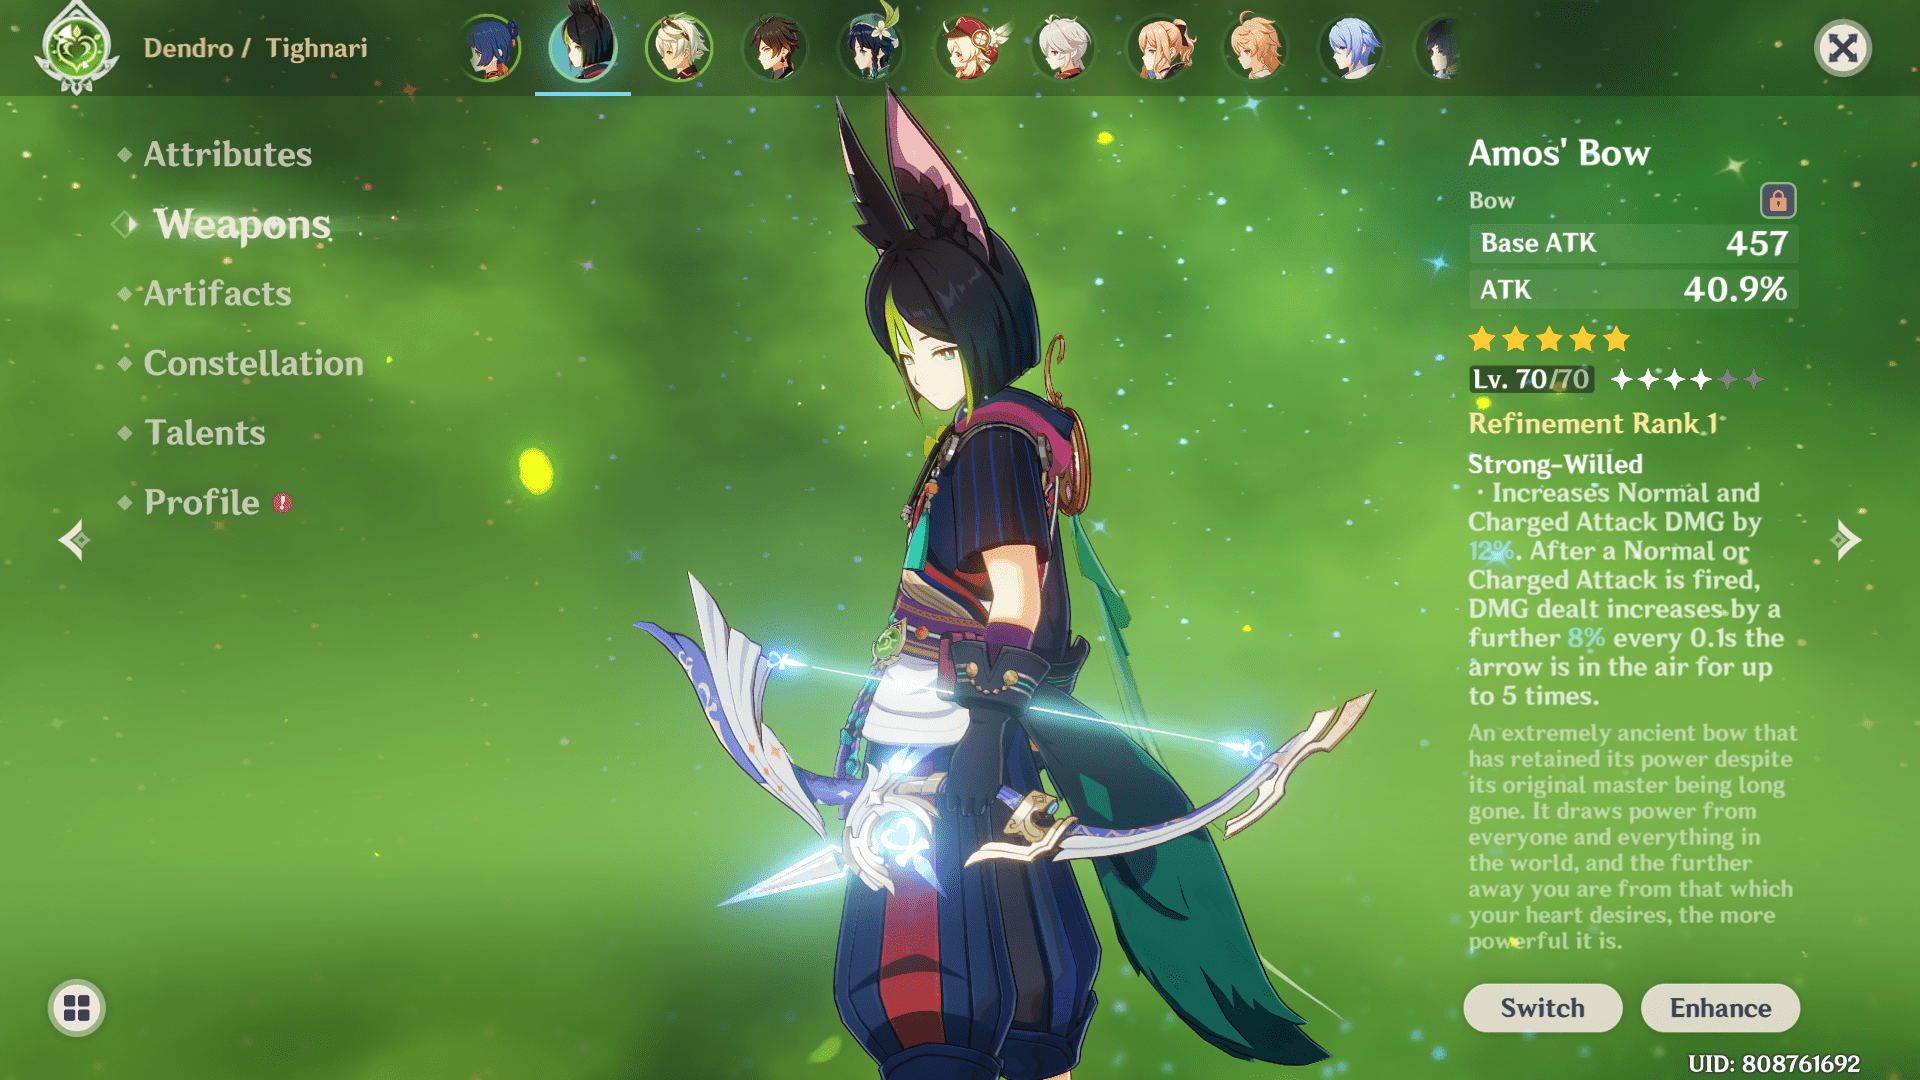
Let’s go over a few weapons that are good on Tighnari. I would say Tighnari is a character on whom most of the weapons in the game is apt, depending on the team you are using. If you want to make him act as the main damage dealer, you should opt for weapons with offensive stats like ATK %, CRIT rate, and CRIT damage. However, if you want him to go into reaction-based teams or act as support, then EM or Energy recharge would be awesome choices.
Hunter’s path (5-star)
The weapon features a CRIT rate secondary stat that goes up to 44 % at level 90, and the passive helps to increase charged attack damage and elemental damage bonus. This weapon is tailor-made for Tighnari and is even featured alongside his banner. You can easily use this weapon on Tighnari if you wish to get this weapon from the weapon’s banner.
As for other 5-star weapons, I would say Tighnari is a versatile character suitable for all 5-star weapons. Hunter’s path takes the top spot in case of damage comparison and synergy with the character. Still, that’s also perfectly fine if you use other 5-star weapons. Most 5-star weapons feature CRIT rate, Attack %, or CRIT damage substat, so you can equip either CRIT rate or CRIT damage on circlet depending on your CRIT ratios. The odd one is Elegy for the end, which is good if you want to use Tighnari in a support role and benefit from the bow’s passive.
Viridescent Hunt (4 – star)
Viridescent Hunt is a battlepass exclusive weapon that you can obtain only from the battlepass and features a CRIT rate secondary stat. You can say it will work well on the main DPS Tighnari, who wants to capitalize on dealing more Dendro damage. It will be an awesome choice if you want to use Tighnari in Spread reaction teams.
Stringless (4 – star)
Stringless is a goto weapon for characters who want to take the benefit from weapons’ passive to boost skill and burst damage. On top of that, you get EM as its secondary stat that helps you to trigger better reaction damage.
Prototype Crescent (4 – star)
Prototype Crescent is a craftable weapon you can refine to the maximum level if you have Northlander billets. The weapon features Attack % as its secondary stat, and the passive helps to boost charged attack damage and movement speed if you hit enemies’ weak spots.
Slingshot (3 – star)
Slingshot is an underrated weapon for Tighnari because of how good it is being a 3-star weapon. You can easily refine this weapon to the maximum level, giving you a CRIT rate secondary stat so you can easily equip the CRIT damage circlet. The passive also synergizes well with Tighnari’s kit as it focuses on increasing the charged attack damage.
Team Compositions
Before moving on to the team compositions, I recommend you check out the Dendro reactions guide. Even if you don’t have enough time to go in brief, check the infographic I’ve made there to get a gist of overall Dendro reactions. I’ve given Dendro’s reaction names to the team so that you have an idea of what you will be doing in the team.
Still, before you move on, I suggest you look over the Dendro reaction guide. Or, follow the reaction sequence mentioned, so you don’t mess up the reactions or sub-reactions. A heads up that I’ve mentioned Anemo characters so that you can shred other elements’ resistance with the Viridescent venerer complete set bonus.
Quicken, Spread, or Aggravate
Tighnari Electro Anemo Flex

This team focuses on increasing the overall Dendro/ Electro damage once you have Quickened status on the enemy. Apply the Dendro element on the enemy and then trigger Quickened Status by applying Electro or vice-versa. Once you see Quicken status that looks like a lightning aura, you can deal Dendro/Electro damage that will be counted as an additive reaction, meaning more Dendro/Electro damage. Tighnari, Kazuha, Collei, and Kuki Shinobu is a good examples where you can trigger Aggravate or Spread at the same time.
You can chip in Collei or Dendro Traveler with Deepwood memories artifact set to shred Dendro resistance from the enemies so that Tighnari can deal more Dendro damage. I’ve noticed that Aggravate and Spread usually go together if you have an Electro character like Fischl in your team. In a nutshell, after Quicken, apply Dendro for Spread and Electro for Aggravate damage.
Kazuha, Sucrose, Fischl, Dendro Traveler, and Yae Miko are a few characters who perform really well in these team compositions. Just follow the basic structure of Tighnari, Electro, and Anemo, and add in any other character to compensate for your team’s requirements.
Mono-Dendro
Tighnari Collei Traveler Flex

Sometimes, I like to run mono-element teams where I can deal a single type of elemental damage. You can have Collei and Dendro Traveler support Tighnari in this team and have an Electro character apply for Quicken status on the enemy. A character like Zhongli can also help you shred Elemental resistance from the enemies with Deepwood Memories set on him.
Others can go with Noblesse Oblige ( Dendro Traveler) or Emblem of the Severed Fate artifact set (Collei). However, do keep in mind that this team is limited in damage potential and might have some changes with new Dendro characters in the future.
Bloom
Tighnari Hydro Anemo Dendro
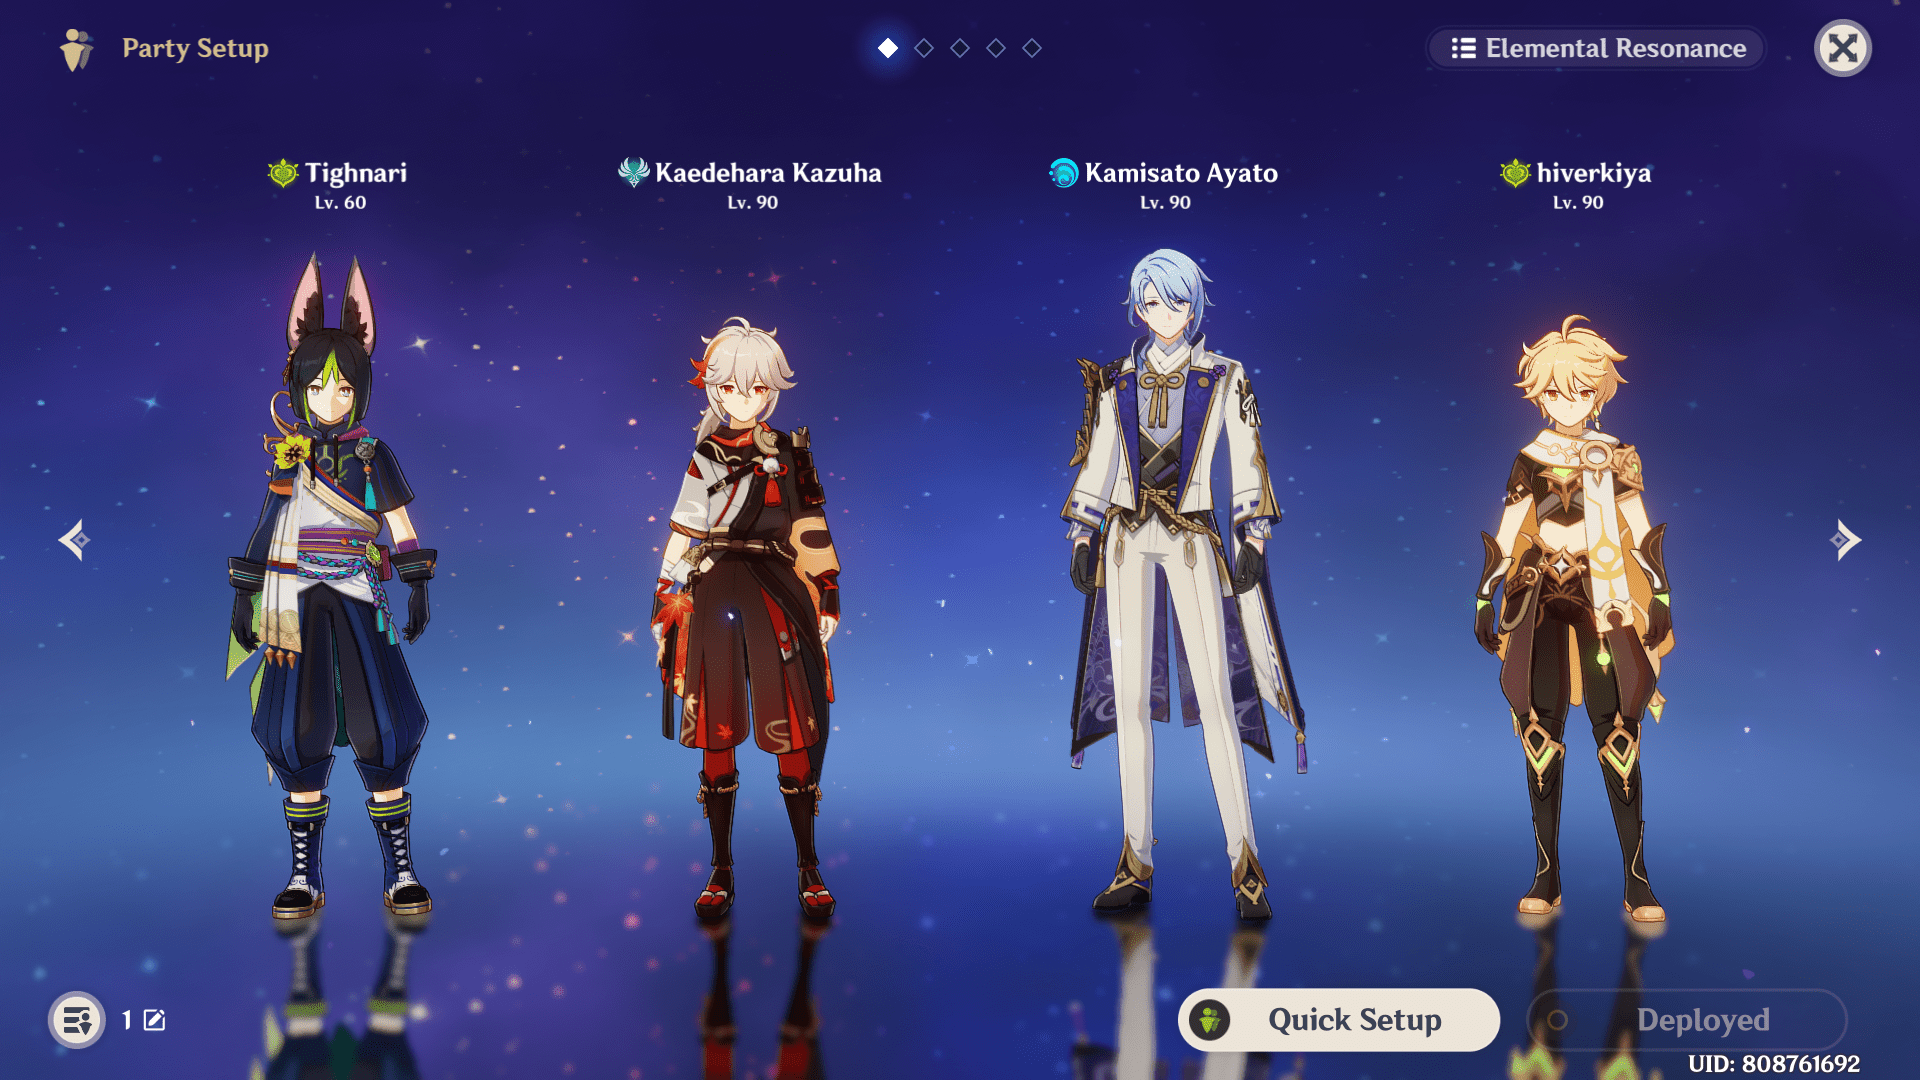
All you have to do in bloom teams is to react Dendro with Hydro, which will spawn Bloom seeds that explode after some time. Characters like Kokomi, Xingqiu, Yelan, or Kamisato Ayato can help you apply Hydro to enemies. Additionally, you can use Collei or Dendro Traveler to act as Dendro support with the Deepwood Memories artifact set to shred Dendro resistance. I would say this is a good team composition, and you should try it to see if it fits your playstyle.
Hyperbloom
Tighnari Electro Anemo Hydro
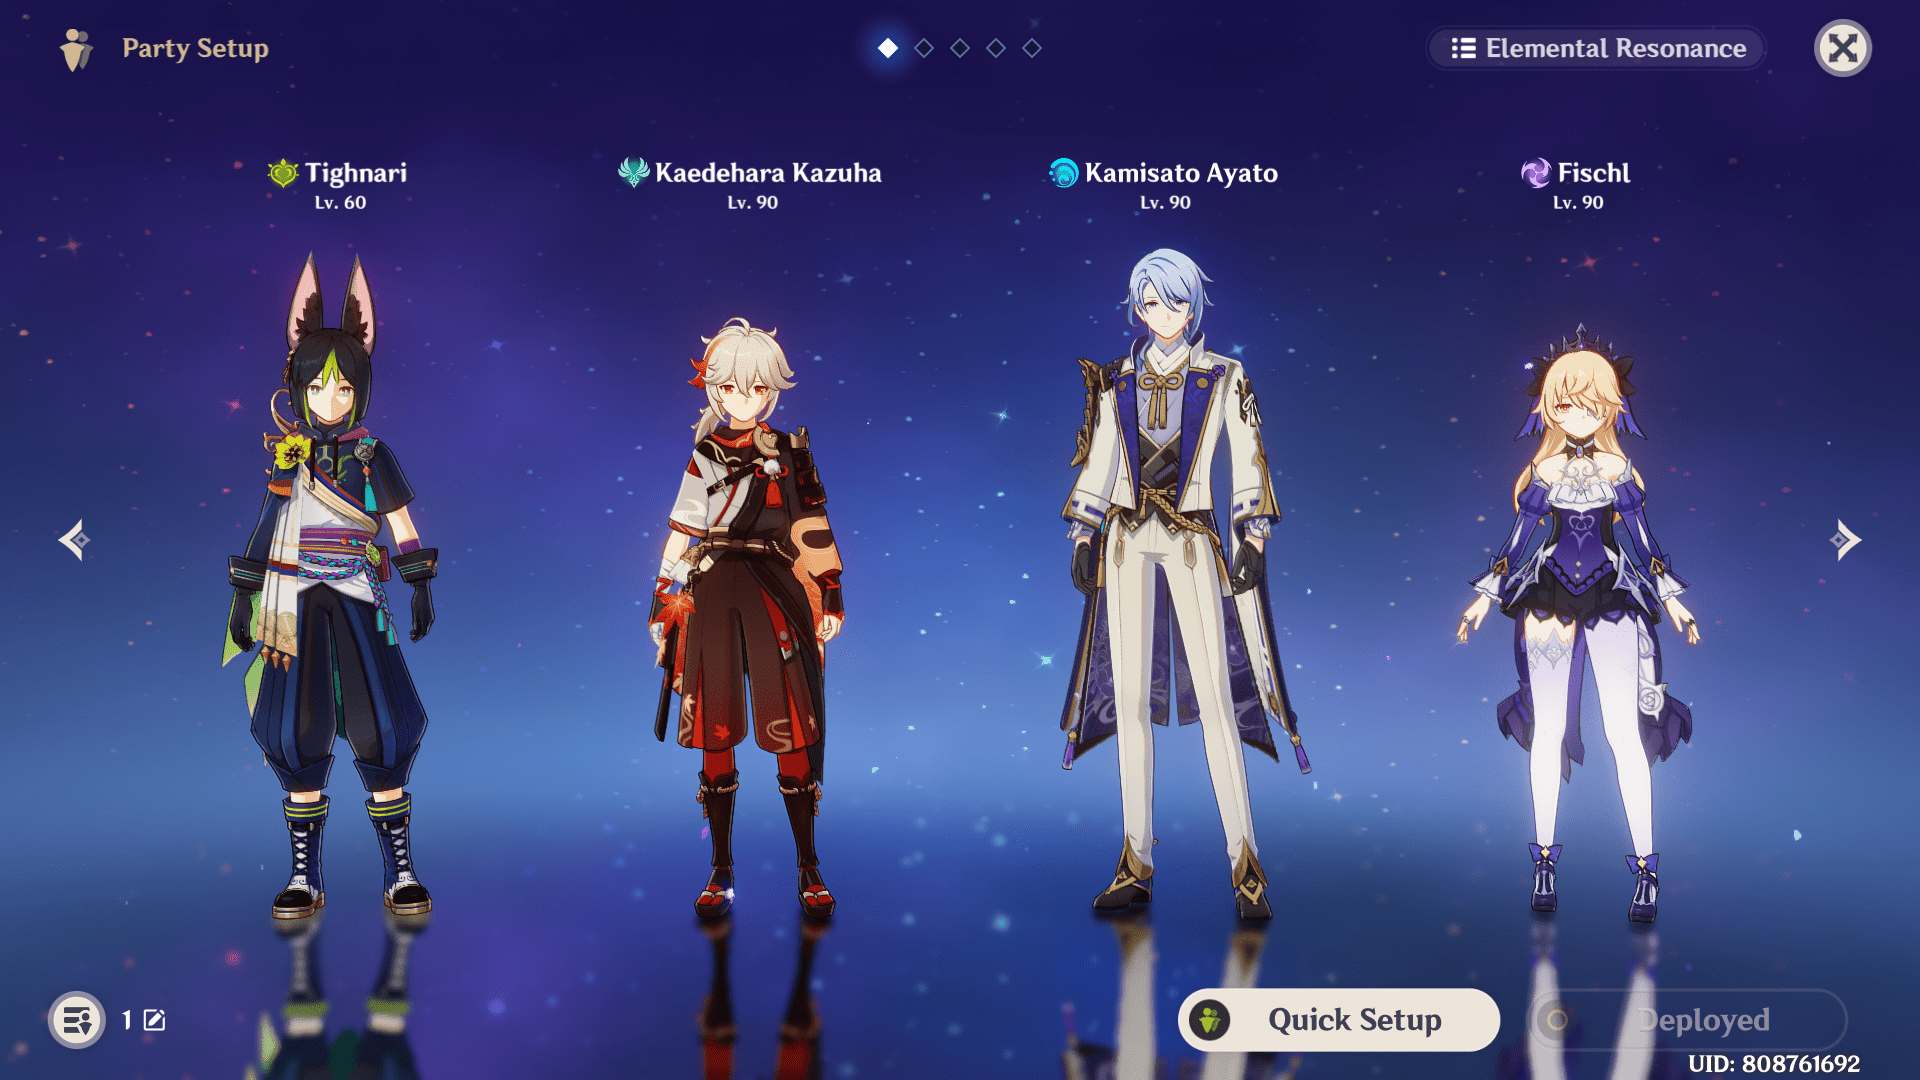
After you have Bloom seeds, you can use Electro on them to turn them into homing projectiles toward enemies. A character like Fischl would be a fantastic choice here as she can benefit most from this team composition. You can use Deepwood memories or Gilded Dreams on Tighnari to capitalize on either Dendro damage or reaction damage.
Ask About Tighnari
Question: Should I pull Tighnari from the promoted banner or wait for his introduction to the standard banner?
Answer: You should wish on his banner unless you have plenty of standard fates. Once he moves to the standard banner, the possibility of getting him will be reduced as other characters and weapons are in that banner. To this day, I don’t have Mona in my account being a day one player because of the RNG, and it’s not okay with me. I have C3 Qiqi on my account and all other standard characters with a few constellations but no Mona. I pulled for Tighnari because I didn’t want to test my luck on the standard banner. I’m not spending much on the game and usually depend on the primogems for promoted banner fates.
Question: Do you use Tighnari in Sumeru’s exploration? How useful did you find him there?
Answer: I love using Tighnari in Sumeru! His charged attacks are so helpful in applying Dendro to the enemies or solving some exploration objectives like Dendro totems or stones buried underneath the ground. I highly recommend you use Tighnari or a bow character like Collei while exploring Sumeru because of their benefits. Tighnari’s passive also helps you to locate local specialties that help you to farm them faster.
Question: What kind of reaction do you love the most with Tighnari?
Answer: I usually try to go with Catalyze reactions that constitute Quicken, Aggravate and Spread. Although Quicken is just a status on the enemies, I can access Aggravate or Spread after that. My goto team is Tighnari, Fischl, Kazuha and Jean. Kazuha can give awesome elemental damage and EM boost to the team, which helps to benefit from reaction damage.
Writer Remarks on Tighnari
You should pull for Tighnari if you like a fast-paced playstyle and want to use Dendro’s reactions with him. So far, in my experience, I’m in love with Tighnari because of how easy he is to use and his low-cost elemental burst. I can instantly get his burst back and spam it often on the enemies.
Not only is Sumeru a game-changing region, but it has also finally introduced the final element of the game. All I can say is that the Dendro element is a game changer that has introduced a plethora of teams to the players, and everyone’s excited to try out new reactions. Plus, if you don’t know what these reactions are? Worry not! We already got a guide on Dendro reactions that’s gonna make you a pro at them.
Wrapping up the crux of the Tighnari guide, I hope to meet you soon in another exciting guide! Till then, take care of yourself and have fun playing Genshin Impact. Get those primogems!
- Genshin Impact Fontaine Region Guide - January 5, 2024
- Genshin Impact Wild Fairies of Erinnyes Guide - December 17, 2023
- Genshin Impact All Dendroculus Locations - December 12, 2023

