

Starting out my journey in the fantasy world of Genshin Impact has been a memorable experience. Ever since I started playing, I’ve met so many characters in the game that occasionally, I redo their hangout quests to refresh my memory.
It can be tough to keep up with the abundance of content within Teyvat. With so many Humans, other-worldly races, and everything in between, it can make your head spin.
Among these non-human characters is a feline lady whom you meet on your journey and accompany on adventurous missions! Diona is a young lady from Mondstadt who’s an exceptionally talented bartender.
She’s been an amazing character since her launch and provides a lot of utility to the team. To emphasize that, in this Diona Genshin Impact guide, I will go over her unique abilities, weapons, and team compositions and share my experience with her in the game.
Without further ado, let’s learn about this popular bartender from the Cat’s Tail tavern, a rising star of Mondstadt’s wine industry!
Diona, a Bartender who hates Alcohol
Diona is a fun character whom you meet in Mondstadt. Despite being exceptionally talented in mixing drinks together, she’s not a fan of alcohol because of her father’s miserable alcohol addiction. She’s the daughter of a hunter, Draff, whom you meet in Springvale and get to know more about in her hangout quest.
I won’t spoil the fun, but Diona shares her experiences with the Traveller, and the interaction is quite wholesome. I love the fact that she always cares and helps others in every possible way.
Diona has a caring nature though she doesn’t reveal it in front of people. She’s not someone who pops up often in the story, but she is a memorable character.
She’s not a fan of Diluc, whom she sees as a competitor, and blames him for her father’s alcohol problem. I remember reading her story in the game and got to know that the only reason she got hired by the owner of Cat’s tail was that she was just too cute. That’s hilarious!
Character Overview
- Title: Popular bartender of the Cat’s Tail tavern
- Nationality: Mondstadt
- Rarity: 4-star
- Weapon Type: Bow
- Vision: Cryo
- Constellation: Feles
- Specialty Dish: Definitely Not Bar Food!
- Birthday: July 18th
Ascension & Talent Level Up Materials
Diona has a typical Cryo damage bonus ascension stat that doesn’t contribute much to her abilities because most of her abilities scale off health. It may seem weird initially, but that’s how most of the ascension stats are in the game.
It may feel tempting to center your character around an ascension stat, but it’s better to avoid that because they really don’t make that big of a difference. That’s why you should invest in your characters and level their talents so that you can fully benefit from character abilities.
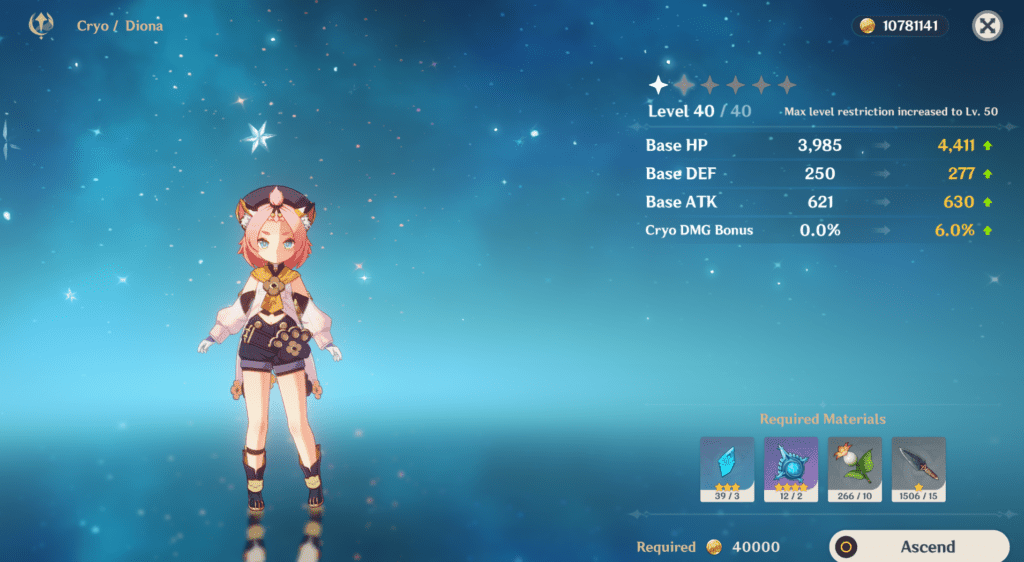
Diona requires the following ascension materials to go past the level 6 ascension:
- Mora x 420,000
- Hoarfrost core x 46
- Calla lily x 168
- Firm arrowhead x 18
- Sharp arrowhead x 30
- Weathered arrowhead x 36
- Shivada jade sliver x 1
- Shivada jade fragment x 9
- Shivada jade chunk x 9
- Shivada jade gemstone x 6
Here are materials to level up a single talent
- Mora x 1,652,500
- Firm arrowhead x 6
- Sharp arrowhead x 22
- Weathered arrowhead x 31
- Crown of insight x 1
- Shard of a foul legacy x 6
- Teachings of freedom x 3
- Guide to freedom x 21
- Philosophies of freedom x 38
I would suggest you focus on her skill and burst because they provide healing and shielding to your characters. You shouldn’t invest in her normal attacks because her skills revolve around providing support to the team. Besides that, you should farm Hoarfrost core from the Cryo regisvine in Mondstadt and stack up talent materials.
Talents
Normal Attack: Katzlein Style
Normal attack: Diona shoots up to 5 arrows with her bow in a row
Charged attack: Diona shoots a precisely aimed shot that deals increased damage. Once you fully charge the aimed shot, you can deal Cryo damage to the target.
Plunging attack: Diona hits the ground in mid-air and deals area-of-effect damage on impact
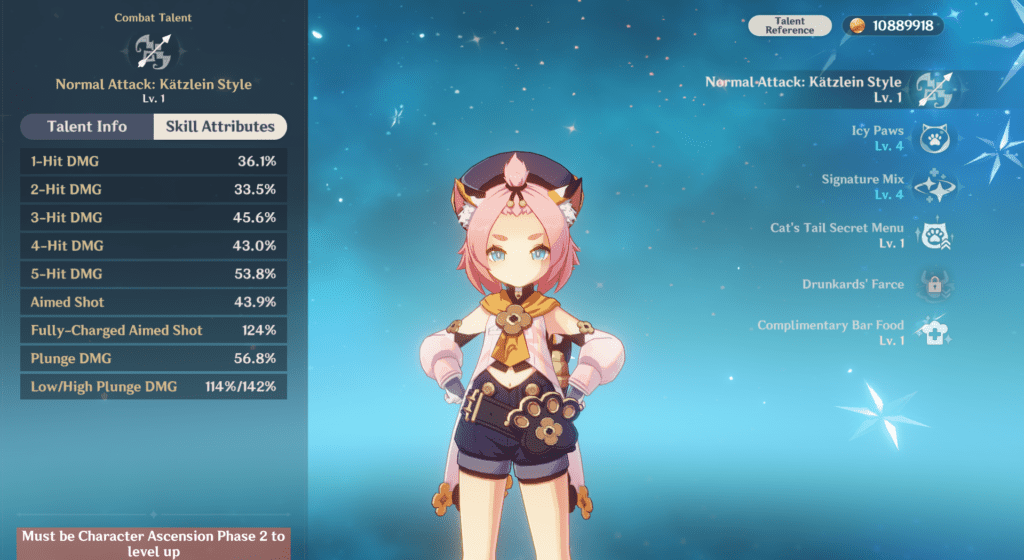
As mentioned earlier, her normal attacks don’t bring much value. However, her charged attacks are useful to activate the Cryo totems in the overworld.
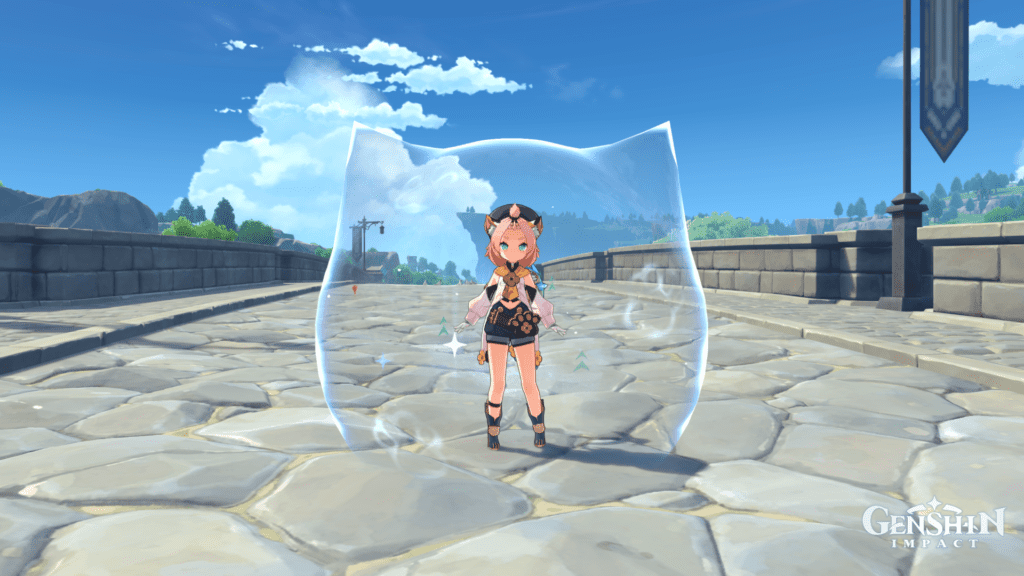
Elemental Skill: Icy Paws
Diona fires off icy paws toward enemies that deal with Cryo damage and forms a shield upon hitting them. The shield’s duration depends on the number of icy paw hits and scales of Diona’s maximum health.
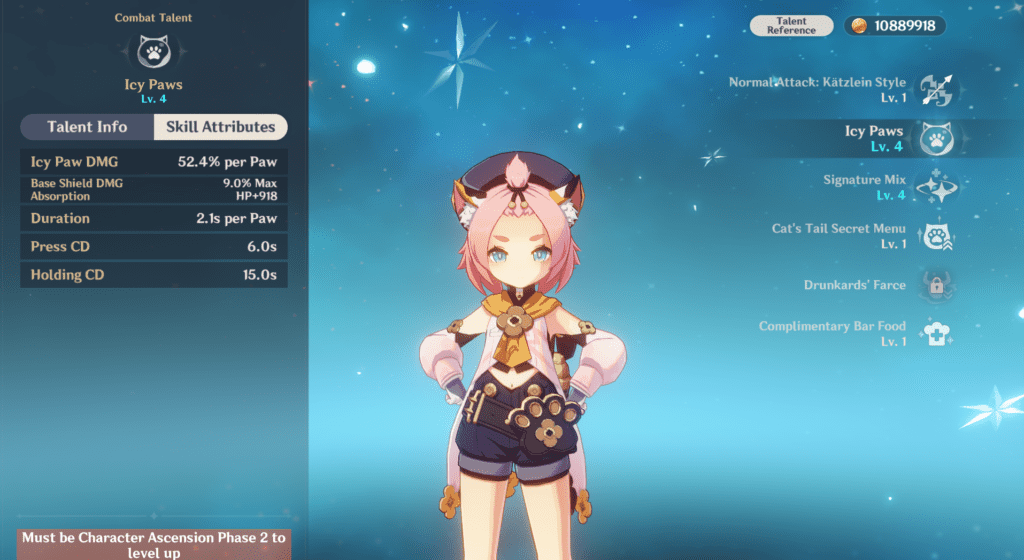
Press: Instantly fire off 2 Icey Paws
Hold: Diona dashes back instantly and fires five icy paws resulting in a shield that gains a 75 % damage absorption bonus.
The shield affects the active character with Cryo for a short duration and has a 250 % Cryo damage absorption bonus.
Diona’s elemental skill helps her to form a shield around her. You may compare it to Zhongli’s shield, but his shield is in a league of its own. Diona’s shield doesn’t have extra resistance shred effects, so it acts as a simple Cryo shield for characters.
You should use the hold version of this skill because that results in a better shield that can tank extra damage.
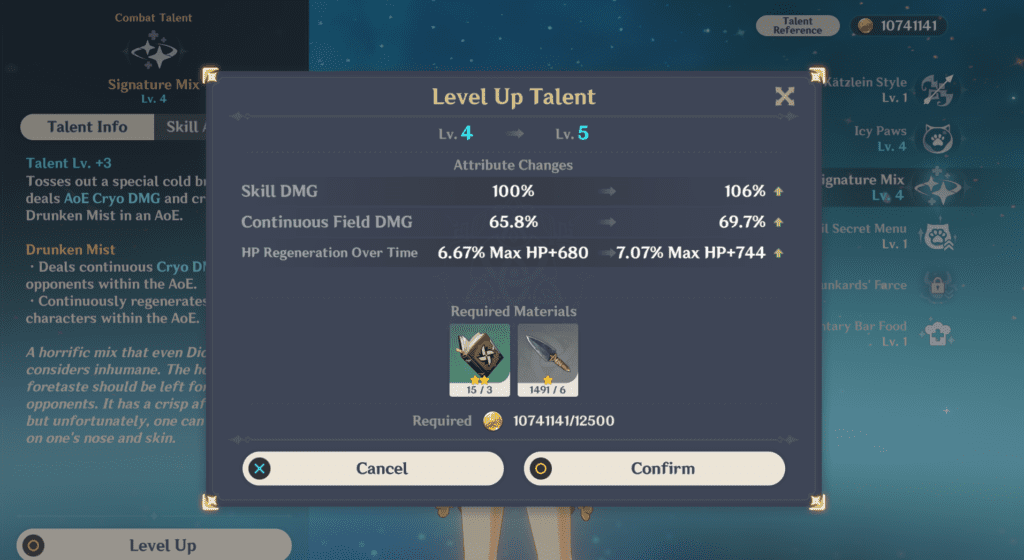
Elemental Burst: Signature Mix
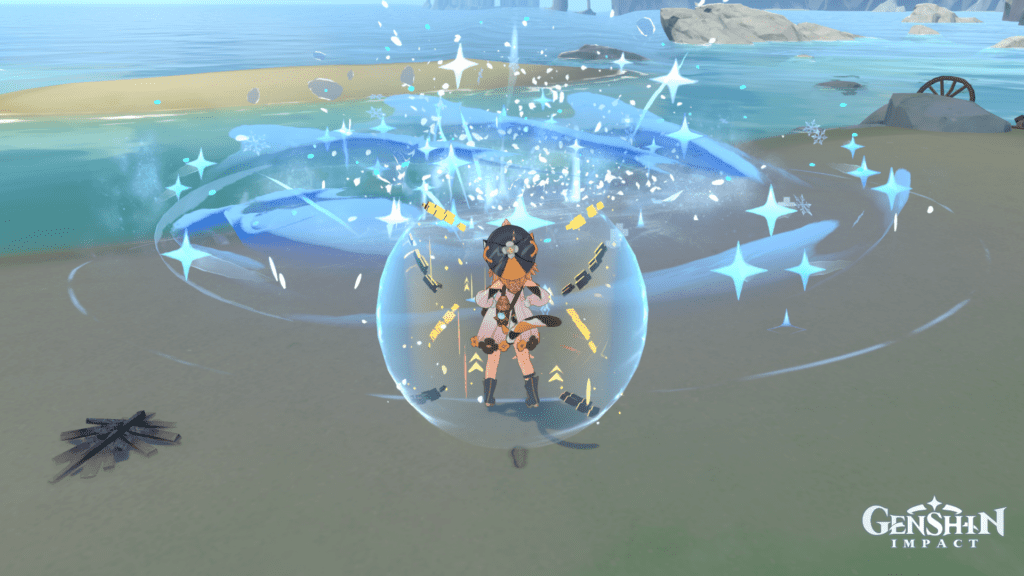
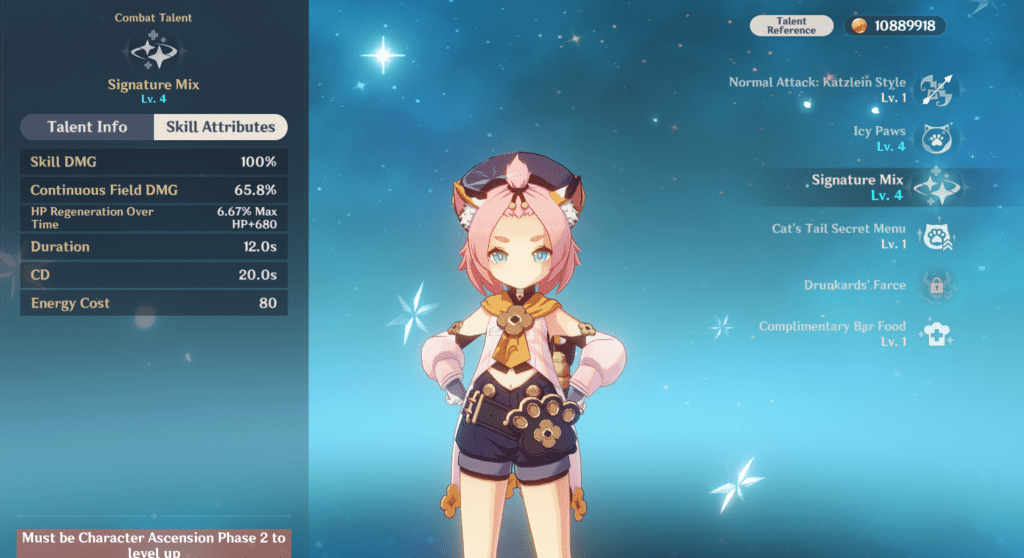
Diona tosses a special cold brew that creates an area of Drunken mist, which deals area-of-effect Cryo damage to enemies.
Drunken mist has the following properties:
- Enemies within the area are continuously affected by Cryo damage.
- The health of characters inside the area will regenerate over time.
Before you make assumptions about healing, let me break down the meta for you. When we consider the healing potential of a character, we usually use the tick metric. A tick means how much healing a character can do in a short period ( usually around 0.5 s to 1 s). For example, Bennett can heal faster because his healing ticks are faster.
In Diona’s case, that’s a bit different. Diona’s healing isn’t as fast as Bennett’s, so you have to spend a little extra time in the healing circle. You won’t notice much of a difference if your Diona is almost maxed out but if you are under-leveled, make sure to play a bit defensive to avoid taking critical hits.
The enemies in Diona’s burst will be affected by the Cryo element and receive Cryo damage over time (DoT). Additionally, you can also receive healing if you are inside its area of effect. The caveat with Diona’s burst is the positioning of the burst. Diona throws her brew in a direction, which usually is toward an enemy.
So, if an enemy repositions itself and you are low on health, you have no option but to stand in the circle. Meanwhile, an enemy can change its attack pattern or move away, which completely wastes your burst. The worst case scenario is you ending up in low health with an enemy in the circle, where you’ll be fighting for your life.
Passive: Cat’s Tail Secret Menu
Characters shielded by Diona’s elemental skill get a 10 % movement speed bonus and a 10 % reduction in stamina consumption.
Any passive that enhances quality-of-life features like movement speed is very much welcomed. I love passives that can increase movement speed because it allows me to easily position myself on the battlefield or move out of the enemy’s attack zone.
As for stamina consumption, if you are using characters that use charged attacks to deal damage, then you can capitalize on it to save some stamina. Characters like Hu Tao, Ningguang, or Keqing are prime examples.
Passive: Drunkards’ Farce
Enemies that stand in the area of the Signature mix have their attack decreased by 10 % for 15 s.
Unless you face boss enemies like Primo Geovishap, this passive won’t make much difference. Though, I’ll still consider this passive situational because the burst limits the healing area, and you might be in close range with enemies. You will receive less damage, but at the same time, you are in the enemy’s attack range.
Passive: Complimentary Bar Food
Diona has a 12 % chance to obtain double the product if she achieves Perfect Cooking on a dish that affects a character’s health.
A decent utility passive that you can use on Diona to cook food and have a chance to receive extra dishes.
Constellations
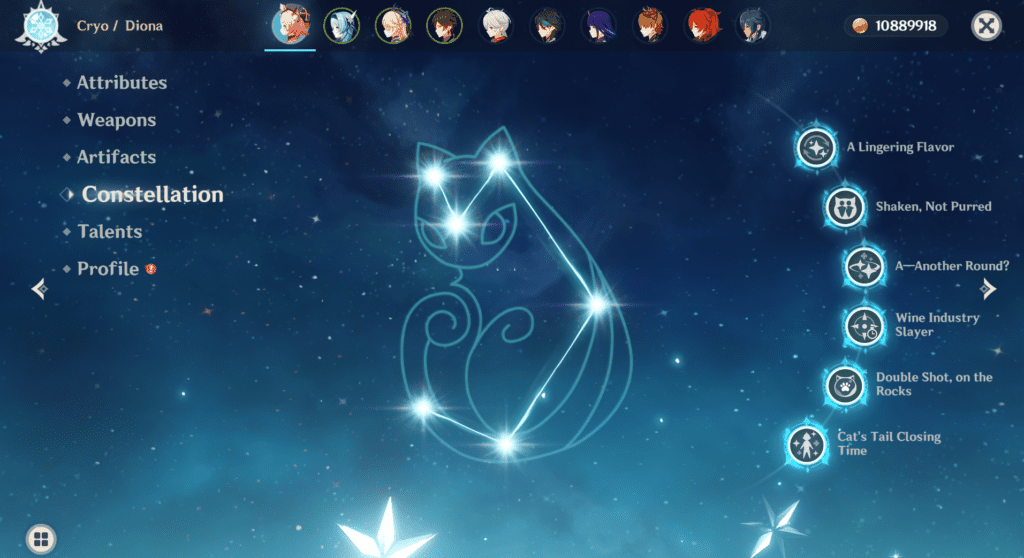
A Lingering Flavor
If you have some extra primogems, then go for this constellation because it helps to reduce the burst cost and regenerates 15 energy after the effect of Signature Mix expires. Basically, your burst cost reduces from 80 units to 65 units after this constellation is unlocked.
Shaken, Not Purred
Another awesome constellation that can help you in co-op. This constellation helps to increase the damage and shield absorption of Icy Paws by 15 %. Additionally, it provides a shield for other characters near you with a 50 % damage absorption shield for 5 seconds that scales off Icey Paws’s shield once they hit enemies.
There have been many events where many other players didn’t have constellations on Zhongli, as his second constellation grants shields to other nearby characters.
Hence, a de-facto choice was to use Diona to shield characters. Honestly, the shield absorption may feel underwhelming. However, once you have invested enough resources in her, you will realize that it’s still a decent shield that provides movement and stamina consumption bonuses to other members.
A-Another Round?
This constellation will increase the level of your burst by 3 with a maximum limit of 15. A direct effect of this constellation will be on healing capability, which will increase once you unlock this constellation.
Wine Industry Slayer
You will never need to use this constellation unless you opt for a niche playstyle that requires Diona’s aimed shots. This constellation reduced the charging time of Diona’s precise shots by 60 % within the area of the Signature mix.
Whether you see it from the meta-perspective or general use, I suggest you avoid using Diona’s normal shots, as they bring minimal value to the team.
Double Shot, on the Rocks
A decent constellation that boosts your Icy Paws talent by 3 levels with a limit of 15. It’s a good constellation that can strengthen your shield’s damage absorption.
Cat’s Tail Closing Time
This constellation focuses on the effects of Signature Mix in its area and grants bonuses based on characters’ health.
If the health is below or equal to 50 %, the incoming healing bonus increases by 30 %; otherwise, elemental mastery increases by 200 units. In my opinion, this is a decent constellation because you get an additional healing bonus once your health is below 50 %.
Still, it’s impossible to make the most of Elemental mastery unless you want a dedicated reaction team. Don’t get me wrong; it’s still good; however, you should be aware of using Elemental mastery in teams to benefit from this constellation.
If you want to know more about Elemental mastery, then check out our awesome guide on it so that you can trigger powerful reactions.
Weapons
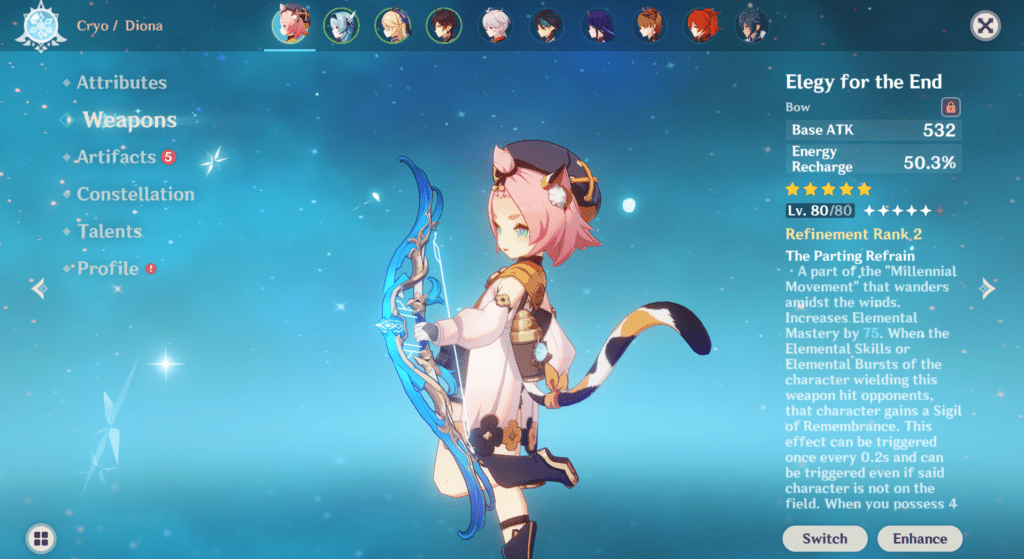
Elegy for the End ( 5-star )
In simples of terms, you only use the Elegy for the End for its energy recharge substat. The elemental mastery buff from the passive is minimal and won’t make a notable difference in your damage output.
This weapon may seem more suited towards a character like Venti because it features Elemental mastery in the passive, but the energy recharge substat still makes it a viable option on Diona.
A decent energy recharge on this weapon can help to fill Diona’s burst easily and can take some benefit from an increase in elemental mastery from the passive.
End of the Line ( 4-star )
If you are a fan of fishing in the game, this weapon is free at the Sumeru fishing association with its refinement material. Just like in The Catch, to obtain this weapon, you have to farm for fish and exchange them at the shop to get the weapon and its refinements.
You can use this weapon on Diona because it features an energy recharge substat; however, the passive isn’t that good because it does minimal damage based on the overall attack.
Sure the attack can be increased, but since you will be playing Diona in a support role most of the time, it’s better to invest in her health than in offensive stats like attack percent or CRIT rate.
Fading Twilight ( 4-star )
Fading Twilight is a bow that was launched in the Perilous Trial event, where it was available for free with its refinements. If you want to know more about events, then jump over to our events guide, where we discuss all the major events in the game.
It’s quite common to get event-exclusive weapons in events that you can add to your inventory; however, most of them aren’t permanent in the game. While some weapons like The Catch may stay in the game after their events expire, others aren’t available anymore.
Fading Twilight’s energy recharge substat is, again, good for Diona, and the passive also helps to buff her support role. Though you may not see a massive damage boost, it’s still better than nothing.
Favonius Warbow ( 4-star )
The Favonius weapon series is an amazing option for any character who doesn’t have enough energy recharge in their kit because this weapon’s substat and passive both feature energy recharge. This weapon is a powerhouse if you want to generate energy particles for your team and get their burst back in a couple of seconds.
If you use this weapon on Diona, you can refill her energy or use her to serve as a battery for other characters. In a team where you have Eula and Diona, you can use Diona to funnel particles to Eula so her burst can have better uptime. Remember to swap your characters fast enough to funnel the particles to Eula.
Sacrificial bow ( 4-star )
The Sacrificial bow is equally good if you use the Favonius bow on another character. The bow’s passive helps reset the cooldown of elemental skill that can prove useful in situations facing tough enemies. Sometimes, it may happen that in the spiral abyss, you are against lectors, geovishaps, or riftwolves and receive severe damage.
In that case, you need better uptime on your shield and healing. That’s where the Sacrificial bow comes into play. You can instantly pop another shield if the existing one is destroyed and regenerate your burst with a few more energy particles.
Artifacts
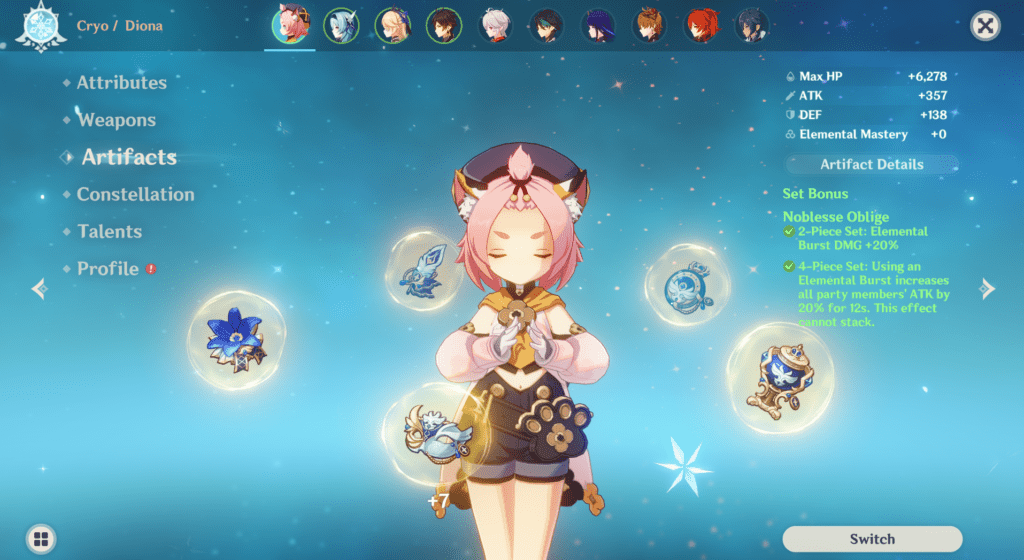
Noblesse Oblige
Noblesse Oblige is a good set on Diona because it can boost a party-wide attack once you use her elemental burst. Though there’s little use for its 2-piece bonus that increases burst damage, a complete Noblesse will go a long way.
You can use this set with the Sacrificial bow and keep the 4-piece buff up almost all the time. Ultimately, it depends on your team rotation, but in general, this is a really good set for support characters.
Maiden’s Beloved
If you feel that your healing is severely inefficient, then equipping Maiden’s beloved will work in your favor. This set is dedicated to healing abilities and buffs your character’s healing effectiveness by 15 %. Other team members will receive 20 % extra healing for 15 seconds once you use a skill or burst on Diona.
This artifact set is also easy to farm and resin efficient as it’s available alongside the Viridescent Venerer artifact set. So, if you are farming for Maiden’s beloved artifact set, you can also get your hands on the Venerer set. Both sets will pay you off in the long run; however, once you get better Noblesse pieces, I recommend you switch to them.
Tenacity of the Millelith
The Tenacity of the Millelith is a unique support artifact set that requires using a character’s elemental skill to benefit from its 4-piece effect. With 2-piece Tenacity of the Millelith artifact set, you receive a 20 % bonus on your health, and the complete set grants you increased attack and shield strength for 3s.
I would suggest you equip this set if you have a Sacrificial bow on Diona, as you can use her elemental skill twice a row. However, the only caveat is the time window for the buffs to be active. That’s why you should opt for this set only if you don’t have other options and use fast combinations to clear chambers.
2-Piece Options
Surprisingly, the 2-piece, 2-piece combination on Diona is a really good option. You can use a combination of the above-listed artifacts on Diona to capitalize on their 2-piece bonuses and yield some amazing results.
Take an example of 2-piece Tenacity and Maiden’s beloved. You get a combination of health bonuses and healing effectiveness simultaneously on top of your abilities. That results in a stronger shield and better efficiency in healing for your team.
So, even if you find another artifact set whose 2-piece bonuses are worth equipping, feel free to go that route. It’s no hard and fast rule that you should stick to one strategy because the game’s requirements in the end game are constantly evolving.
Artifact Attributes
Most of the time, you will be using Diona in support, so an ER or HP sands would suffice your needs for energy recharge or extra health. For the Goblet and Circlet, I recommend you go with HP on both of them to benefit from a stronger shield.
Only go for a healing bonus circlet if you feel that healing isn’t sufficient enough. Still, before making that decision, ensure your talents leveled up because they might fix that issue for you.
Team Compositions
Mono Cryo: Diona Cryo Cryo Anemo
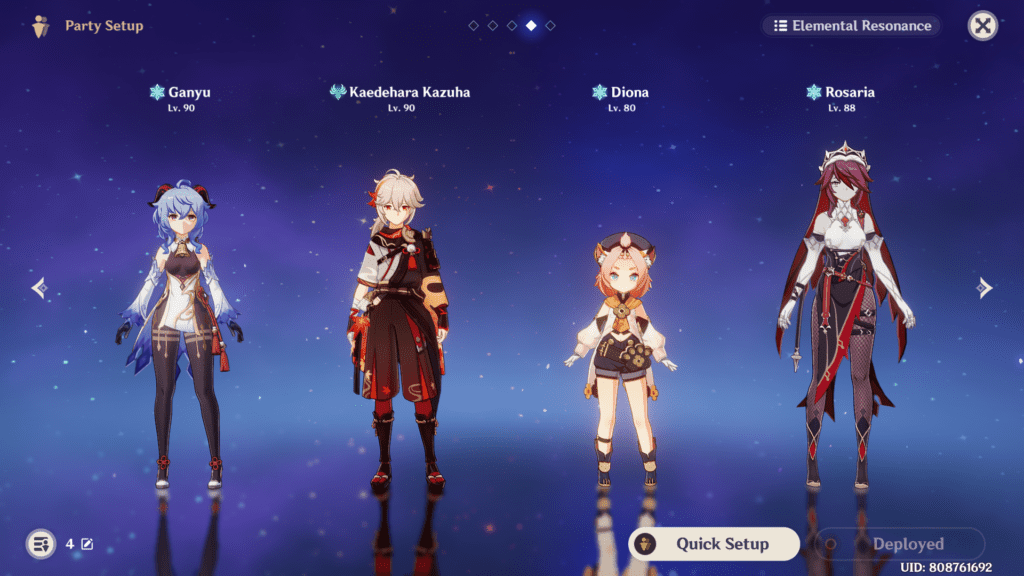
In the Mono cryo team, your main focus is to deal as maximum Cryo damage as possible. Characters like Ayaka or Ganyu can help you massively in those teams where you can put an Anemo character with the Viridescent Venerer set to shred Cryo resistance from enemies.
Anemo characters like Venti, Kazuha, or Sucrose will be optimal choices if you want crowd control on your team and group up enemies in one place. It’s no hard and fast rule to go with Mono Cryo teams, but if you have Abyss heralds or Hydro mages in front of you, then you may have to go to such lengths.
Freeze: Diona Anemo Hydro Flex
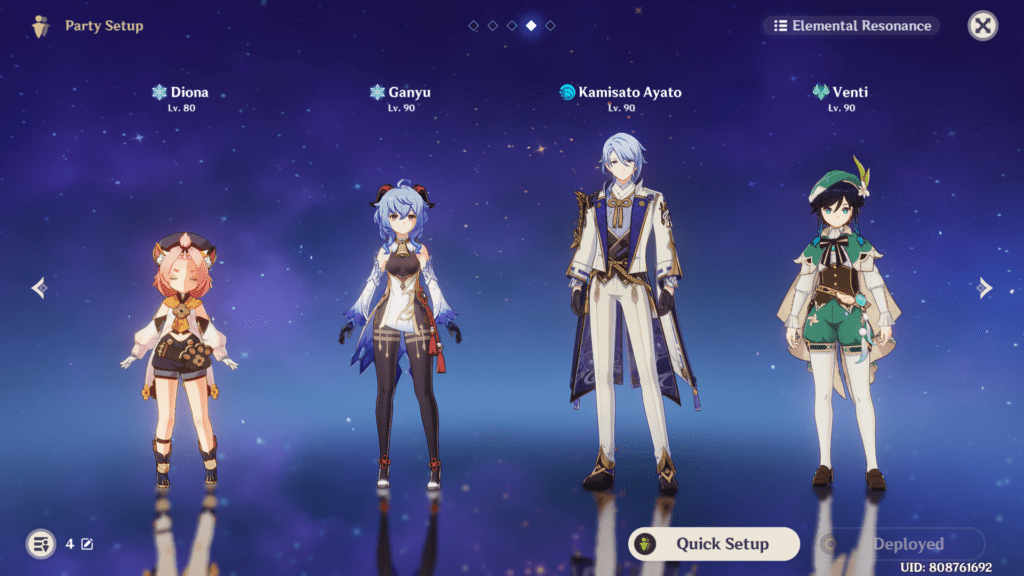
Freeze teams are really amazing because of their potential to immobilize enemies where you can churn out serious damage to them. Suppose you have another Cryo character in place. In that case, you can benefit from the Blizzard strayer artifact and Cryo resonance, which will boost your character’s CRIT rate.
At that point, nothing can save your enemies from chunky damage numbers. This team will require good Hydro and Anemo supports like Kokomi, Venti, Kazuha, Sucrose, Mona, or anyone with a good off-field Hydro application. Ayato can be a hit or miss, but if it works for you, it’s perfectly fine to pair him up with a character like Venti.
Physical Damage Support: Diona Electro Flex Flex
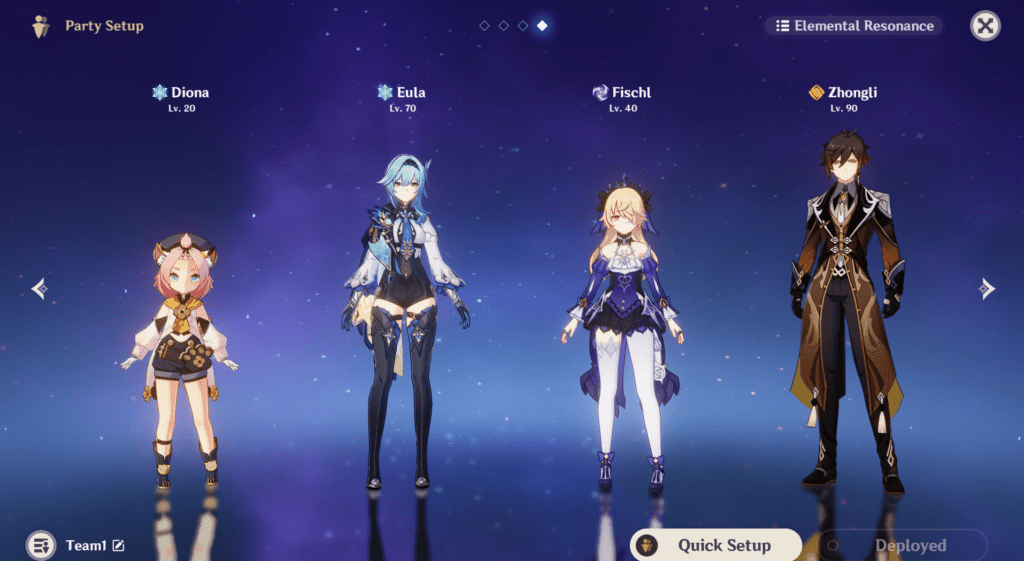
Characters like Rosaria, Eula, or Razor are really good when dealing physical damage to enemies. Honestly, the Physical damage meta has been out of scope for a while because of how potent elemental teams are. Still, Eula is a really good character who can wipe out hordes of enemies in a blink of a second with her devastating burst.
Diona’s main role in this team composition is funneling particles to a character like Eula so she can use burst again. To supplement physical damage, you can have an Electro character who can trigger superconduct on enemies to reduce enemies’ physical resistance.
If you have good off-field Electro support like Fischl, Kuki Shinobu, Dori, or Yae Miko, then you can easily trigger reactions. To boost that further, an Anemo character with the Viridescent Venerer will be quite helpful.
Frequently Asked Questions
Question: Can I Use Diona in Melt Teams?
Answer: Yes, you can use Diona in melt teams or reverse melt if you want to. However, the caveat is that her Cryo application isn’t that good regarding those team compositions. You have better Cryo characters like Rosaria, Kaeya, or Chongyun who can fulfill that role.
Another con about Diona is that her burst might miss a target and not be able to apply Cryo at all. That puts you at risk of repositioning yourself on the battlefield and chasing that burst.
Question: Is Diona better than Kaeya?
Answer: It depends on which context you are referring to. In the case of shielding and healing, Diona is definitely better than Kaeya because she has those abilities in-built into her kit.
For sure, Kaeya does get a shield but only with extra constellations. If we talk about the Cryo application, then I must say I find Kaeya better than Diona because of his burst and low cooldown elemental skill.
Question: Is Diona the Best healer in the Game? How Good is she when it Comes to Healing other Characters?
Answer: I don’t think Diona is the best healer in the game when the likes of Kokomi, Jean, and Bennett exist in the top spots. Diona is definitely a decent healer because of her good shielding and healing talents, but her burst makes it a bit complicated to get healed.
Unlike Jean or Bennett, who use their burst in one place, Diona throws her burst toward the enemy, and you have to stand in that field to get healed. That can worsen the situation if you face enemies like Abyss heralds, lectors, or Geovishaps if you don’t have a Hydro character to freeze them.
Closing Remarks
Diona definitely is one of the best characters in the game, but it ultimately depends on her team composition. She’s not a very flexible character because her elemental burst isn’t the most consistent.
You must keep an eye on the enemies to position yourself better and utilize your abilities. Some enemies may get aggressive if you are close enough to them, and you may risk getting wiped out.
Nonetheless, you should try her and build some teams around her to see which suits your needs. If you want to know about other characters in the game, head over to the character guides on our site to use the best builds for your teams! That was it from my end, and I hope you get a Diona if you don’t have her. I wish you luck, my friend.
Besides writing about his favourite games, Himanshu prefers to keep himself up-to-date with the latest happenings in the financial world, watching anime, cooking and listening to music from all around the world.
- Genshin Impact Fontaine Region Guide - January 5, 2024
- Genshin Impact Wild Fairies of Erinnyes Guide - December 17, 2023
- Genshin Impact All Dendroculus Locations - December 12, 2023