

Looking at the night sky, have you ever wondered what lies beyond the stars? Maybe more stars, planets, and galaxies than we could estimate. All of us have learned about stars in our science classes. As a kid, I used to walk under the night sky and tried to draw stars’ constellations in my notebook.
I’m not talking about Genshin Impact’s character constellations, but the ones we read in school times. Orion, Taurus, Ursa major, I used to spend hours locating these constellations, and I often ended up with gibberish patterns in my notebook.
I wondered whether we could study those shiny stars, and after googling for a while, I came across a unique term, Astrology, the study of celestial objects, like stars, that focused on finding patterns made by stars. When it comes to astrology, people have a myriad of beliefs. Some of us believe in them, and some don’t.
Do you believe in a horoscope? Do you think people make their fate themselves? Is everything that’s happening already written in fate? Is it all pseudoscience, or there’s a meaning to your star charts? That’s a hard question to answer in the real world.
However, there is a person in Teyvat whose astrological predictions always come true. A young astrologist who wants to seize her destiny and aspires to become a master of her art, Mona.
In this Mona Genshin Impact guide, I will be your guide among the stars and introduce this passionate astrologist whose fate brought her to the Traveler.
Not only is she a loyal friend, but also a supporting character that everyone wants on their account. Harnessing the power of hydromancy, let’s learn about Mona’s best weapons, artifacts, and team compositions and seal away the fate of our enemies. Oh, and don’t forget to bring some Mora because Mona doesn’t have any.
Witness the Power of Hydromancy, Mona Megistus
So far, I would say Mona’s story quest has been among the best ones. We met her while leaving Liyue, and after Paimon questioned her credibility, she proclaimed to the Traveler that they weren’t from Teyvat.
Mona was able to convince the Traveler and offered to see their fate in exchange for acting as her disciple and helping her in retrieving a box that was a part of an agreement between her master and her friend 50 years ago.
Mona’s master, old and fragile, wasn’t in the best shape to retrieve the box, and she delegated the task to her. After helping some people, the party made a pit stop at the Wangshu Inn, and we got to know that Mona was actually broke.
She had no Mora on her whatsoever, and it was evident that she needed help. Luckily, our Traveler treated her to a scrumptious meal, and we set out on a journey to Mondstadt once again. It was pretty impressive when she saw through some thieves posing as legitimate businessmen and sent them running back home.
For the first time, it felt safe to travel beside someone as reliable as Mona. Mona’s astrology is based on hydromancy, and she’s easily able to see the true starry sky by using the reflections in bodies of water.
It was funny when she was expecting someone of quite a high status to be her rival but eventually found out that it was Klee who had the box.
Klee is Klee. There was no way she could’ve known what the box was for. All she knew was how to make Jumpty dumpties, which was taught by her mother, Alice, Mona’s master’s long-time rival and friend.
The whole interaction was wholesome, and after the whole incident, Mona eventually decided to temporarily extend her stay in Mondstadt, as she wasn’t supposed to read her master’s diary. If there’s one character I love the most, that’s Klee. Innocent, jolly, and full of life.

A throwback for Veteran players to remember the event, Unreconciled stars, where we witnessed Mona’s powers in action. While Scaramouche made a move to take down the Traveler, Mona immediately recognized his true intentions and teleported Fischl and the Traveler away from the spot.
Things might have taken a worse turn if Scaramouche had been able to hit the Traveler. Mona’s companionship throughout the event safeguarded the Traveler from unexpected pitfalls and helped uncover the story of Leonard, an adventurer who aspired to climb the Pilos peak but wasn’t able to.
Maybe one day, we’ll have these flagship events return to the game. New players do miss out on a lot of event-exclusive content that sometimes leads to plotholes in the story.
Ascension and Talent Level-Up
Mona’s ascension stat, Energy recharge, is immensely valuable in her gameplay. You can get her burst back faster and use it to grant you a consistent damage bonus.
There are characters like Bennett, Sara, Gorou, or Yun Jin, who can buff a character, but they do have their niche cases. Mona’s kit revolves around providing an overall damage bonus, and you will find most of the damage speed runs will have Mona as their core character.
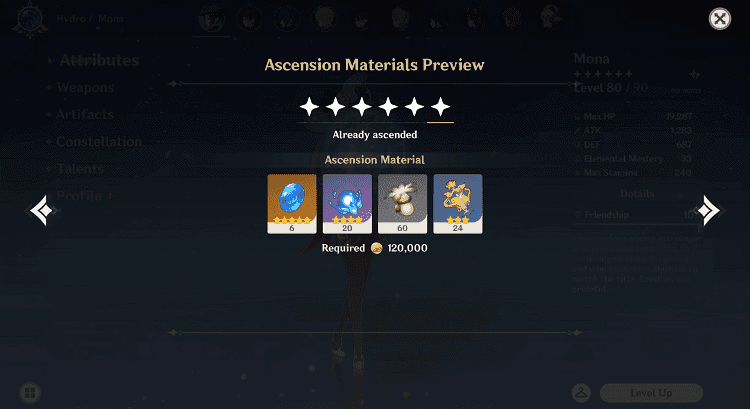
You need the following materials to ascend Mona:
- Mona x 420,000
- Philanemo mushroom x 168
- Whopperflower nectar x 18
- Shimmering nectar x 30
- Energy nectar x 36
- Cleansing heart x 46
- Varunada lazurite sliver x 1
- Varunada lazurite fragment x 9
- Varunada lazurite chunk x 9
- Varunada lazurite gemstone x 6
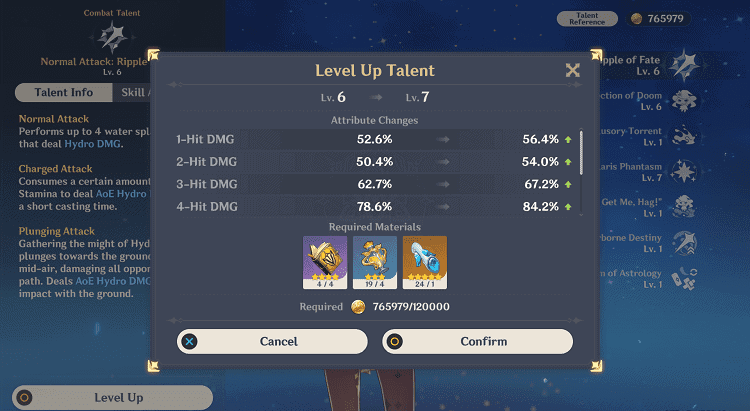
Here’s a list of materials to max out a single talent on Mona:
- Mora x 1,652,500
- Ring of boreas x 6
- Crown of insight x 1
- Whopperflower nectar x 6
- Shimmering nectar x 22
- Energy nectar x 31
- Teachings of resistance x 3
- Guide to resistance x 21
- Philosophies of resistance x 38
I’d suggest having a Cryo or Electro character to fight Oceanid’s mimics, as they can be annoying if you don’t have a shield character. The best way to farm Mona’s boss ascension materials is to co-op with other people, as Andrius can be challenged in co-op mode as well.
You can have a high AR player accompany you and easily grind materials. Do make sure that you have plenty of fragile resins to utilize. You should prioritize her elemental burst and skill if you want to play her as a support. If you want to play her as a DPS, then level up all the talent equally.
Combat Talents
Normal Attack: Ripple of Fate
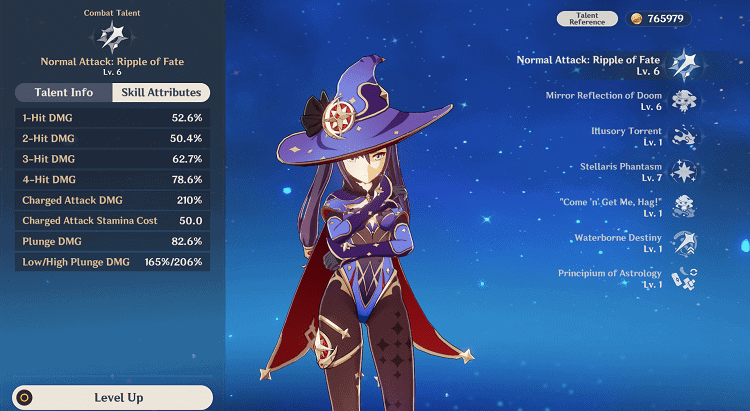
- Normal attack: Mona can perform up to 4 instances of Hydro damage
- Charged attack: After consuming a certain amount of stamina, Mona deals area-of-effect damage.
- Plunging attack: After plunging from mid-air, Mona deals AoE damage upon impact on the ground
Mona’s normal and charged attacks have one of the most beautiful attack animations in the game. Like Kaeya, she can teleport a small distance in her normal attacks, and her charged attack summons an artistic astronomic-esque animation.
Elemental Skill: Mirror Reflection of Doom

Mona deploys a phantom that has the following properties:
- The phantom continuously taunts enemies
- It deals Hydro damage to nearby enemies
- After expiry, the phantom explodes to deal AoE Hydro damage
Hold: Mona moves back after deploying a phantom. Only one phantom can exist at a time.
You can deploy the skill to apply Hydro on enemies or taunt them. Enemies’ aggro will be concentrated toward the phantom, giving you a time window to switch out characters. A good thing about the phantom is that it deals area-of-effect Hydro damage to nearby enemies, which can still be used to trigger a reaction.
Elemental Burst: Stellaris Phantasm
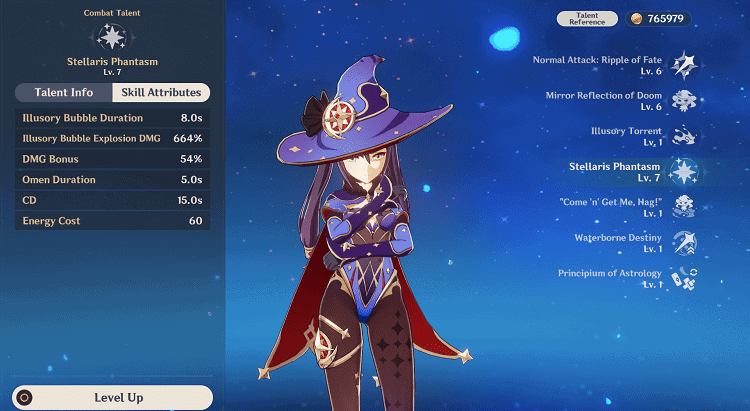
Mona applies an Illusory bubble status to enemies in a large area. The illusory bubble has the following effects:
- The enemies are trapped inside a pocket, and wet status is applied to them. At the same time, weaker enemies are rendered immobile.
The following effects are applied when an enemy affected by the elemental burst is damaged:
- The Illusory bubble is removed while dealing Hydro damage in the process.
- An omen is applied to an enemy that grants a damage bonus and increases the damage of an attack that triggers it.
One important thing that you have to keep in mind is that the Omen buff’s duration starts after the Illusory bubble explodes. You need to pay attention to the effects that the burst undergoes and follow them to set up a proper reaction or provide a damage bonus to other characters.
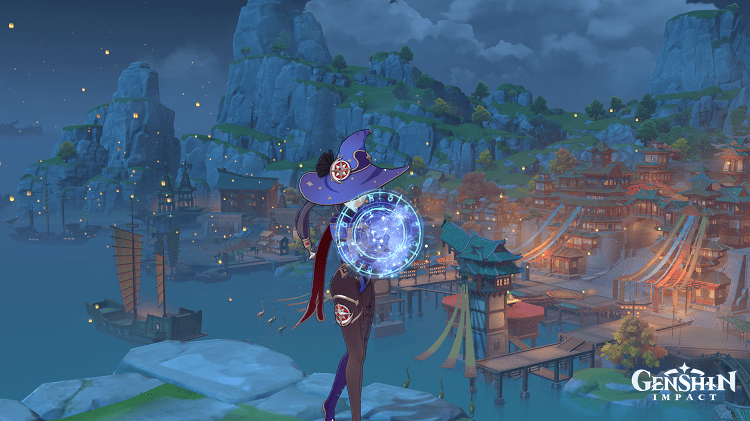
Passive: Illusory Torrent
Mona consumes stamina to gain an increase in movement speed and cloaks herself to move on normal and water surfaces. Mona applies a wet status to enemies after reappearing.
It would have been awesome if Mona was immune to incoming damage; however, you are vulnerable to enemies’ attacks even if you are in the alternate sprint mode.
I love to use her sprint to cover long distances, especially travel between islands in the water. For example, you can teleport to the Guyun stone forest and make a run for the Geo hypostasis with Mona’s alternate sprint.
Passive: “Come ‘n’ Get Me, Hag!”
Mona will deploy a phantom if there are enemies nearby once she uses her alternate sprint, Illusory Torrent, for 2 seconds. The phantom lasts for 2 seconds and deals 50 % damage of elemental burst damage.
The passive blends in her alternate sprint in the play style. I would say you don’t necessarily have to sprint for the sake of using this passive. While you are facing enemies, you won’t be stationary for a long time.
You would have to position yourself strategically on the battlefield, and it eventually will activate this passive if Mona is your on-field character.
Passive: Waterborne Destiny
Mona’s Hydro damage increases by 20 % of her energy recharge.
The passive does look lucrative enough to stack as much energy recharge on Mona, but I reckon it’ll give diminishing returns. Unless you are running team compositions where you need Mona only for the supporting role, you shouldn’t overkill energy recharge.
Still, you need to have a decent amount of energy recharge that will weave with her abilities’ damage.
Passive: Principium of Astrology
Mona has a 25 % chance to refund crafting materials used for Weapon ascension materials.
I love passives that refund a portion of used materials in crafting. As someone who spends less time on farming these days, I rely on farming routes and don’t want to miss any chance to save my materials.
Constellations
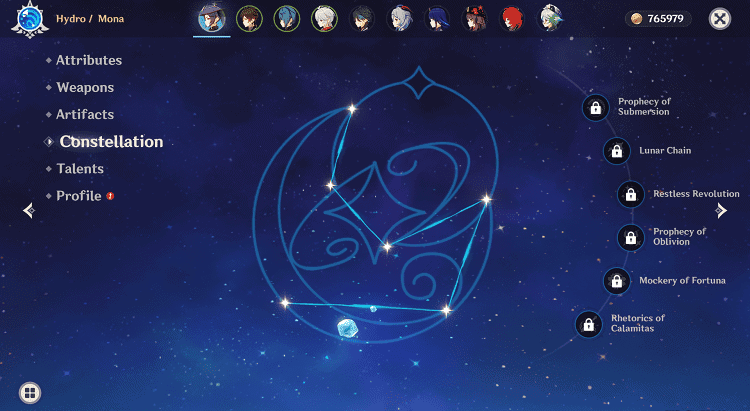
C1: Prophecy of Submersion
The effects of Hydro-related elemental reactions are enhanced for 8 seconds once your character hits an enemy affected by an Omen. Electro-charged, vaporize, and Hydro swirl damage increases by 15 %. Additionally, the freeze duration increases by 15 %.
The constellation makes Mona invaluable for Freeze team compositions. The duration increases by 15 %, and you can keep the enemies immobile to deal more damage.
Besides the duration increase, the reaction damage increases for Electro-charged, Vaporize, and Hydro swirl reactions. Overall, a decent constellation that can help you in teams that center around Mona.
C2: Lunar Chain
There’s a 20 % chance that a charged attack will trigger automatically once Mona’s normal attack hits. The effect has a cooldown of 5 seconds.
I have mixed feelings about this constellation. The constellation does fuse an automatically charged attack with her attack string. However, it may take some time to get used to it.
Another thing that bothers me is the % chance and 5-second cooldown. This means you have less likelihood to trigger the attack, and 5 seconds basically means you are swapping her in and out. In the end, It all boils down to RNG on charged attacks.
C3: Restless Revolution
The level of Mona’s elemental skill, Stellaris Phantasm, increases by 3 with a maximum limit of 15.
The constellation provides a massive damage boost to Mona’s elemental burst. Extra 3 levels on her burst will skyrocket her buff damage and Illusory bubble’s damage. For screenshot damage, where you systematically set up reactions and trigger a reaction to one-shot an enemy, Mona is an essential character.
C4:Prophecy of Oblivion
Character’s CRIT rate on attack increases by 15 % when an enemy is affected by an Omen.
Overall a nice constellation that increases your characters’ CRIT rate against enemies affected by an Omen. Specifically speaking about freeze team compositions where you equip characters with the Blizzard strayer artifact, this constellation will almost guarantee a critical hit on enemies.
C5: Mockery of Fortune
The level of Mona’s elemental burst, Mirror Reflection of Doom, increases by 3 with a maximum limit of 15.
A standard constellation that increases the level of her elemental skill.
C6: Rhetorics of Calamitas
With a maximum damage bonus limit of 180 %, Mona gains a 60 % damage bonus to her next charged attack per second of movement in her elemental skill, Illusory Torrent. The effect cannot last more than 8 seconds.
Unless you focus on a charged attack playstyle, there’s not much use for this constellation. The damage bonus might look glittery, but at the same time, the constellation heavily relies on the user of her elemental skill.
Artifacts
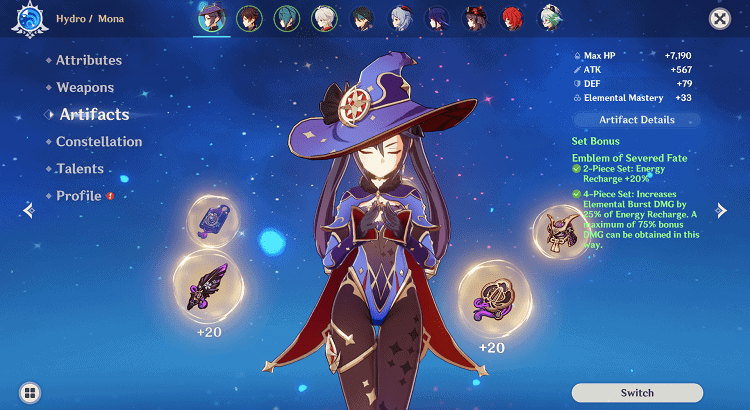
Emblem of Severed Fate
The artifact set provides a 20 % energy recharge from the 2-piece set bonus, and the complete set grants an elemental burst damage bonus. The damage bonus depends on 25 % of the total energy recharge a character has, and you can obtain a maximum of 75 % bonus damage from the set.
Mona’s ascension stat, energy recharge synergizes with this artifact set and allows you to benefit from a decent burst damage bonus; however, no matter how tempting it may feel about investing in energy recharge on her, the results won’t be good enough.
The main reason to use this artifact set is to have almost 100 % uptime on her elemental burst so that she can shine as a supporting character. Mona can be a burst DPS with this artifact set. You can use another character with the Thrilling tales of Dragon Slayers to switch to Mona and give her an attack buff.
Noblesse Oblige
A default option for most of the supporting characters in the game. The 2-piece bonus gives you a 20 % burst damage bonus, whereas the complete set gives your team members a 20 % attack bonus for 12 seconds.
You can use the artifact set on Mona to buff your teammates’ attack and allow them to pump extra attack to her elemental burst. However, the set may not be perfect on Mona, but it holds its value for supporting characters.
Heart of Depth / Wanderer’s Troupe
Both of these artifacts sets focus on increasing the charged attack damage. The Heart of Depth grants a Hydro damage bonus and a normal and charged attack damage bonus, whereas the Wanderer’s troupe increases the elemental mastery and provides a charged attack damage bonus.
These artifact sets are suitable if you want to play Mona in a damage role. You can use her normal or charged attacks to apply Hydro on enemies to set up reactions or trigger them yourself. Whether you want burst damage or consistent damage, these artifact sets will suffice your needs.
Tenacity of the Millelith
You gain a 20 % health bonus with the 2-piece set, and the complete set increases the attack and shield strength of party members. With a cooldown of 0.5 seconds, the set can also trigger its effects even if the equipping character is not on the field.
You can definitely use this artifact set on Mona if you have characters who can utilize their shields to protect teammates. However, you may not be able to maintain a decent uptime on the 4-piece set because Mona’s elemental skill has a short duration.
Your elemental skill has to hit an enemy to activate the 4-piece buff, and Mona’s elemental skill lasts for 5 seconds, which is quite a short duration. You can deploy her elemental skill, have a clock with you and notice that the skill doesn’t last long, and you may lose out potential bonus from the artifact set.
Nonetheless, the artifact still holds its value when coming to team rotations where combinations are fast, and players who love to clear abyss floors faster will find this set useful in their gameplay.
Artifact Attributes
For a supporting role, you can go with Energy recharge on the sands, Hydro damage bonus on the goblet, and CRIT rate or CRIT damage on the circlet.
However, when you play her as a DPS, an energy recharge sands won’t be of much use. You can either go with an ATK % or EM sands on Mona to benefit from consistent or burst damage, respectively.
The more elemental mastery a character has, the better the reaction damage. You can check our guide on Elemental mastery to refine reactions’ concepts.
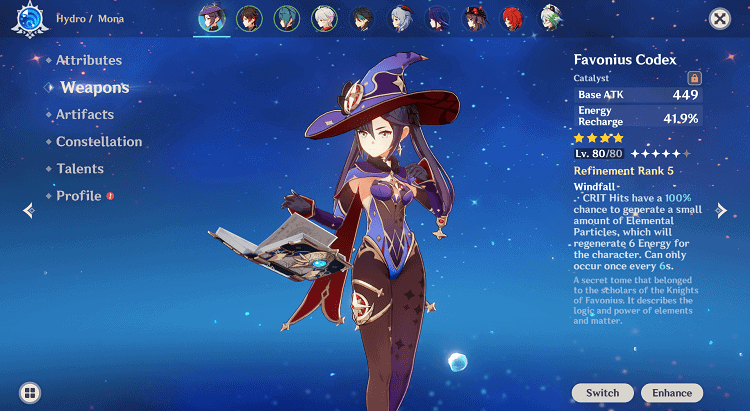
Weapons
Mona is a versatile character who can almost equip any Catalyst weapon. A few notable mentions would be the Thrilling tales of Dragon Slayers, the Hakushin ring, and the Prototype Amber for their powerful passives in supporting other team members.
For a DPS role, you can equip weapons that have ATK %, CRIT rate, CRIT damage, and EM as their substats. Catalysts with these substats will be optional for a consistent or burst damage setup.
As for a supporting role, Catalysts with an energy recharge substat will be incredible to equip on Mona or the ones whose passives benefit your overall team. I would recommend going with any of the following weapons on Mona:
- Tulaytullah’s Remembrance (5-star)
- Skyward Atlas (5-star)
- Lost Prayers to the Sacred Winds (5-star)
- Memory of Dust (5-star)
- Kagura’s Verity (5-star)
- A Thousand Floating Dreams (5-star)
- The Widsith (4-star)
- Solar Pearl (4-star)
- Mappa Mare (4-star)
- Prototype Amber (4-star)
- Hakushin (4-star)
- Favonius Codex (4-star)
- Thrilling Tales of Dragon Slayers (3-star)
Team Compositions
Almost every team where Mona is being used either as a support or DPS will need at least one Anemo character to shred elemental resistance from enemies by using the Viridescent Venerer artifact set.
Characters like Jean, Sucrose, Faruzan, Kazuha, Venti, or Anemo Traveler can help you shred the Hydro resistance from enemies.
Dendro Teams: Mona, Dendro, Flex, Flex
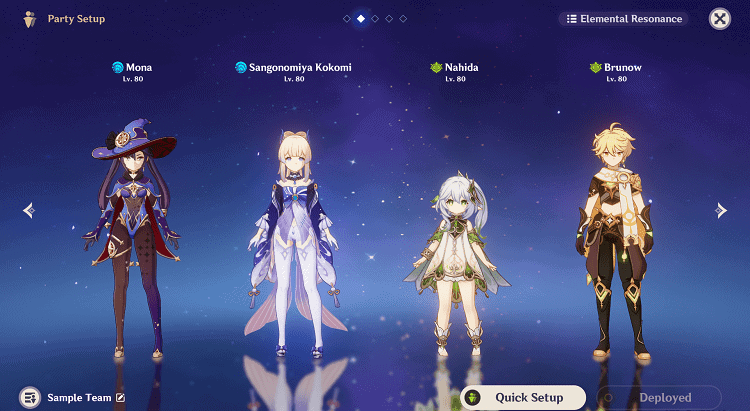
With the introduction of the Dendro element in the game, players have access to a plethora of reactions. Mona’s Hydro application might fit with Bloom reactions that occur when Hydro and Dendro come in contact with each other.
However, when we view it from a bird’s eye, Mona’s supporting abilities weigh far over her role in Dendro teams. Nonetheless, if you don’t have any options for Hydro applications in Bloom, Hyperbloom, or Burgeon teams, you can use Mona.
Mono Hydro: Mona, Anemo, Flex, Flex

Mono Hydro teams focus on dealing with as much Hydro damage as possible. You can have Mona as an on-field damage dealer with off-field characters like Xingqiu, Kokomi, Barbara ( with C2), or Yelan to supplement the damage. You can use Kazuha to grant elemental damage bonuses to party members and buff their Hydro damage bonus.
Even if you go with two Hydro characters, one Anemo character, and a Geo character, the main source of damage should be Hydro damage in a Mono Hydro team.
Electro-Charged: Mona, Electro, Anemo, Flex
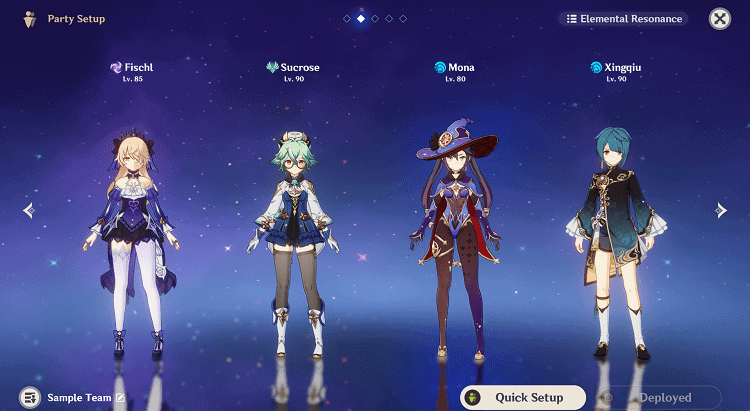
These teams focus on a reaction between Hydro and Electro that can also stun-lock enemies and trigger reactions in between them. Electro characters like Yae Miko, Raiden Shogun, Kuki Shinobu, Fischl, Beidou, and Lisa are amazing options. As for Hydro characters, you can go with Xingqiu.
Yelan, Kokomi or Kamisato Ayato. I would suggest having an Anemo character to swirl the elements and reduce enemies’ Electro and Hydro resistance. Mona can be used on the field to maintain a consistent Hydro application, while off-field Electro characters can supplement her damage output.
Vaporize: Mona, Pyro, Anemo, Flex
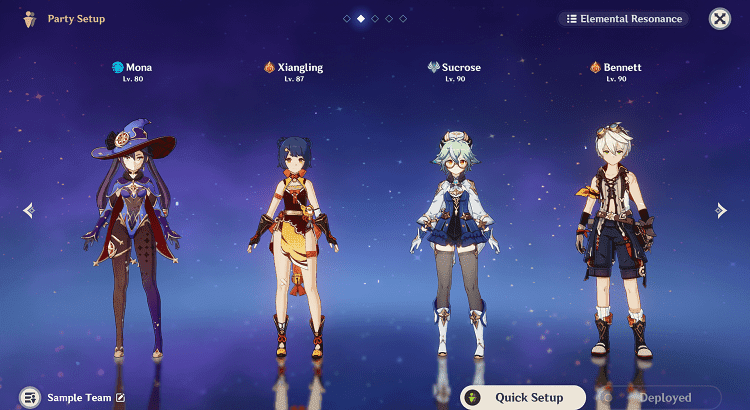
These teams focus on utilizing Pyro characters’ elemental application to trigger amplifying reactions. Xiangling, Bennett, Klee, Yanfei, and Hu Tao are a few characters that can utilize these slots well.
You can use another Catalyst character to hold the Thrilling tales of Dragon slayers to buff the switched character with an attack buff. However, for one-shot damage, your team rotation should be pristine.
There is no room for error, and you need to keep the optimal combination in mind. There are advanced theory-crafting concepts, but for the sake of simplicity, just wait for 2 seconds after Mona’s burst to apply Pyro, and you will be good to go.
Sticking to the explicit description of abilities’ will yield flawless results for most of the characters in the game.
Freeze: Mona, Cryo, Cryo, Anemo
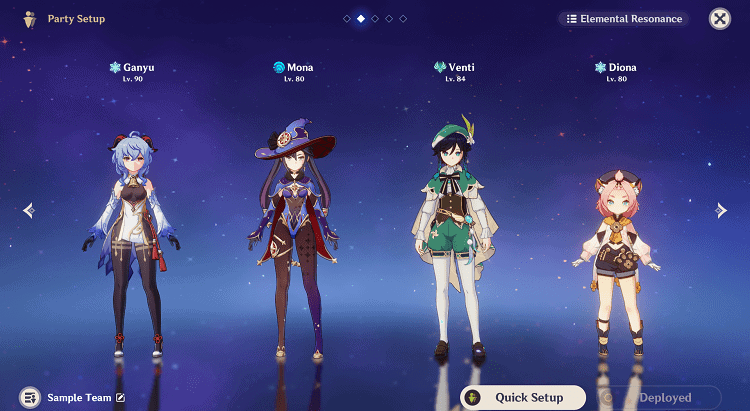
I’d highly recommend using two Cryo characters in freeze teams, with one slot for Mona and the other for an Anemo character. The Cryo resonance will provide an extra CRIT rate buff that can add up on top of the CRIT rate buff you will obtain from the Blizzard strayer artifact set.
You can use Mona’s elemental skill and burst to have enough Hydro application on enemies and freeze them using the Cryo element. However, it’s better to apply the Cryo element and then use her elemental burst to extend the damage buff’s duration. There are plenty of good Cryo characters that you can use in this team composition.
Ganyu, Ayaka, Diona, Layla, Kaeya, Shenhe, Rosaria, and Chongyun, are all suitable in a freeze team composition in some roles. Diona can provide you with off-field healing and shield your characters at the same time.
Shenhe can buff your Cryo damage, whereas Ganyu can severely damage enemies. An awesome team would be Ganyu and Diona. Mona and Venti, where you can crowd-control enemies and use Ganyu’s charged attacks to deplete their health bars.
Frequently Asked Questions
Question: Should I Use Mona as a DPS or Support?
Answer: I would suggest going for a supporting role, as you can equip her with the Thrilling tales of Dragon slayers, which is an insanely valuable 3-star weapon.
Question: Is Mona a Good Character without Extra Constellations?
Answer: Yes, Mona is a fantastic character, even at C0. You can build her as a support for other team members.
Question: Is it Easy to Make Reactions with Mona?
Answer: I reckon it’s that easy. You need solid technical skills to execute her elemental burst flawlessly. If you want screenshot damage, then you need to have solid reaction knowledge and should know elemental mastery concepts.
An Anemo character with the Viridescent Venerer artifact set will shred elemental resistance from enemies and amplify the elemental damage.
Knowledge is Priceless
Mona is bad at managing her finances. Her only stable source of income comes from a column on astrology in Fontaine’s newspaper, the Steambird. The moment she gets her paycheck, the very first thing she does is purchase astrology equipment for her studies.
Though, as a student, I do believe that investing in your education takes priority, it shouldn’t be at the cost of basic amenities. With a minimum stable income, Mona barely manages through months. In a way, living penny to penny has made her accustomed to a frugal lifestyle.
I do respect Mona’s desire to uncover mysteries surrounding the world. Her passion for astrology is miraculous, but it does take a toll on her mental health. Sometimes, people get offended by her predictions and her nature to lay them out cold in front of them.
Mona doesn’t lack human emotions, but she doesn’t like to sugarcoat the truth. She’s a talented individual who yearns for genuine friendship. I’m glad that the Traveler considers her a genuine friend and trusts in her abilities.
Besides writing about his favourite games, Himanshu prefers to keep himself up-to-date with the latest happenings in the financial world, watching anime, cooking and listening to music from all around the world.
- Genshin Impact Fontaine Region Guide - January 5, 2024
- Genshin Impact Wild Fairies of Erinnyes Guide - December 17, 2023
- Genshin Impact All Dendroculus Locations - December 12, 2023